Introduction
It all started one rainy afternoon when I found myself staring at a jar of cookie butter on the kitchen counter, wondering what on earth to do with it. You know that feeling when you buy something on a whim — mostly because the label looks irresistible — and then it just sits there, quietly judging you from the pantry? That was me. I was craving something sweet, but honestly, the thought of firing up the oven felt like too much work. So, I decided to experiment, mixing that luscious cookie butter with cream cheese, thinking it might just work as a no-bake cheesecake. To my surprise, it turned into this irresistibly creamy, dreamy dessert that I couldn’t stop tweaking (and eating) for days.
What really sold me on these Creamy No-Bake Cookie Butter Cheesecake Bars was how smooth and rich the texture became without any baking at all. The cookie butter lent a warm, spiced flavor that paired perfectly with the tang of cream cheese, all resting on a crunchy, buttery crust. Honestly, the first bite had me closing my eyes for a second, savoring that cozy, caramel-like taste. Since then, these bars have become my go-to for last-minute guests or when I need a quick, comforting treat that feels fancy but requires zero oven time.
There’s something quietly satisfying about pulling these bars out of the fridge — the way the layers hold together, the gentle scent of cinnamon and nutmeg, and the soft creaminess that melts on your tongue. They’re proof that sometimes the simplest ideas come from a little kitchen curiosity and a lot of cookie butter love. This recipe stuck with me because it’s just as perfect for a solo indulgence as it is for sharing with friends, making the whole experience feel both personal and a little special.
Why You’ll Love This Recipe
After making these cheesecake bars more times than I can count, I can say this recipe is a keeper for a bunch of reasons. It’s one of those rare desserts that’s both ridiculously easy and incredibly satisfying. Here’s why you’ll find yourself coming back to these bars again and again:
- Quick & Easy: Ready in under 30 minutes with just a bit of chilling. Perfect when you want something sweet without the fuss.
- Simple Ingredients: No need to hunt for anything exotic — just pantry staples and that magical jar of cookie butter you’ve been eyeing.
- Perfect for Any Occasion: Whether it’s a casual get-together, a potluck, or a cozy weekend treat, these bars fit right in.
- Crowd-Pleaser: I’ve brought these to family dinners and office parties, and they disappear fast. Kids and adults both love them.
- Unbelievably Delicious: The combo of creamy cheesecake and spiced cookie butter is like a warm hug in dessert form.
What makes this recipe stand out is the no-bake method paired with a cookie butter twist that’s anything but ordinary. Unlike traditional cheesecakes, this one skips the oven anxiety yet delivers a smooth, luscious texture that feels indulgent but approachable. Plus, the crust made from crushed cookies adds a perfectly crunchy base that balances the creamy filling.
This isn’t just another cheesecake bar; it’s a little experiment turned into a beloved recipe that brings comfort and a bit of magic to the table. The balance of sweetness and spice makes it feel like a treat you’d want to savor slowly, even as you secretly plan your next slice.
What Ingredients You Will Need
This recipe uses simple, wholesome ingredients to deliver bold flavor and satisfying texture without the fuss. Most of these are likely pantry staples or easy to find, and you can swap a few items if needed without losing that signature creamy, spiced taste.
- For the Crust:
- 1 ½ cups graham cracker crumbs (or digestive biscuits, finely crushed)
- 6 tablespoons unsalted butter, melted (adds richness and helps the crust hold)
- 2 tablespoons granulated sugar (balances the buttery flavor)
- For the Cheesecake Filling:
- 16 oz (450 g) cream cheese, softened (I prefer Philadelphia for the smooth texture)
- ½ cup creamy cookie butter (the star ingredient—Skippy’s or Biscoff work great)
- ¾ cup powdered sugar (for gentle sweetness)
- 1 teaspoon vanilla extract (boosts flavor depth)
- 1 cup heavy cream, cold (whipped to stiff peaks for that fluffy creaminess)
- ¼ teaspoon ground cinnamon (optional but adds a cozy spice note)
- Pinch of salt (enhances all flavors)
- Optional Toppings:
- Additional cookie butter drizzle
- Crushed cookies or graham cracker crumbs
- Whipped cream or a sprinkle of cinnamon
If you want to make this gluten-free, swap the graham crackers for gluten-free cookie crumbs or almond flour crust. For a dairy-free option, use dairy-free cream cheese and coconut cream instead of heavy cream—though the texture will be a bit different but still delicious.
Equipment Needed
- 8×8-inch (20×20 cm) square baking pan or dish – I find glass or metal pans both work well, but glass helps you see the layers better.
- Mixing bowls – at least two: one for the crust and one for the filling.
- Electric mixer or stand mixer – for whipping the cream and blending the filling until smooth.
- Spatula – for folding in whipped cream gently and scraping the bowl clean.
- Measuring cups and spoons – accuracy matters here to get that perfect cheesecake texture.
- Plastic wrap or aluminum foil – to cover the bars while chilling.
If you don’t have an electric mixer, you can whip the cream by hand, but it takes some elbow grease. I use a hand mixer most days because it’s quicker and easier to get those stiff peaks without overwhipping.
Preparation Method
- Prepare the crust: Combine the graham cracker crumbs, melted butter, and sugar in a medium bowl. Stir until the mixture resembles wet sand and holds together when pressed. (About 3 minutes.)
- Press the crust: Pour the crumb mixture into your 8×8-inch pan and press firmly into an even layer using the bottom of a glass or your fingers. This sets the foundation, so make sure it’s compact. Chill in the fridge for at least 15 minutes to firm up while you prepare the filling.
- Make the cheesecake filling: In a large bowl, beat the softened cream cheese with cookie butter and powdered sugar using an electric mixer on medium speed until smooth and creamy. Add vanilla extract, cinnamon, and a pinch of salt, mixing just to combine. This should take about 3-4 minutes for a silky texture.
- Whip the cream: In a separate bowl, whip the cold heavy cream on high speed until stiff peaks form (about 3-5 minutes). Watch closely to avoid overwhipping, which can turn the cream grainy.
- Fold the cream into the filling: Gently fold the whipped cream into the cream cheese mixture in two additions, using a spatula. Take care to keep the mixture light and airy — this step is what makes the bars so creamy and fluffy.
- Assemble the bars: Pour the filling over the chilled crust and spread evenly with a spatula. Smooth the top for a clean finish.
- Chill completely: Cover the pan with plastic wrap and refrigerate for at least 4 hours, preferably overnight. This chilling time lets the cheesecake set perfectly without baking.
- Serve: Once set, cut into 12 bars using a sharp knife (dip the knife in hot water and wipe dry between cuts for clean edges). Add your favorite toppings if desired.
Quick tip: If your cream cheese isn’t soft enough, pop it in the microwave for 10 seconds to make mixing easier. Also, don’t rush the folding step — keeping the air in the whipped cream is key for that dreamy texture.
Cooking Tips & Techniques
Making no-bake cheesecake bars might seem straightforward, but a few little tricks can make a world of difference. Here’s what I’ve learned from trial and error over countless batches:
- Softening cream cheese: This is crucial. If it’s too cold, you’ll get lumps in the filling. I usually take mine out about 30 minutes before starting, or zap it in 10-second bursts in the microwave.
- Whipping cream perfectly: Cold cream whips best. Chill your bowl and beaters if you can. Stop whipping as soon as stiff peaks form — overwhip and you risk turning it into butter.
- Folding technique: Be gentle. Use a spatula and fold by scooping from the bottom and turning over the top. Don’t stir vigorously or you’ll lose the airiness.
- Chill time: Don’t skip this. The bars need time to firm up so they hold their shape. Overnight is ideal if you can wait.
- Cutting clean slices: Warm your knife under hot water and wipe it dry between cuts. This prevents crumbly edges and keeps your bars looking sharp.
One lesson I learned the hard way was rushing the chill time and ending up with a filling that was too soft to slice. Patience really pays off here! Also, using quality cookie butter makes a huge flavor difference — some brands are sweeter or less spiced, so pick one that suits your taste.
Variations & Adaptations
If you want to mix things up or accommodate different diets, these cheesecake bars are surprisingly adaptable:
- Nut-free version: Use nut-free cookie butter (like sunflower seed butter) instead of the traditional Biscoff-style to avoid allergens.
- Chocolate twist: Swirl melted dark chocolate into the filling before chilling for a marbled effect and richer flavor.
- Seasonal flavors: Add a teaspoon of pumpkin pie spice in fall or a splash of orange zest in winter for a festive flair.
- Gluten-free crust: Swap graham crackers for gluten-free cookies or almond flour mixed with a touch of sugar and butter.
- Dairy-free: Try dairy-free cream cheese and coconut cream whipped as a replacement for the heavy cream.
Personally, I once added a layer of sliced bananas between the crust and filling for a quick banana cream cheesecake vibe, and it was a hit. Feel free to get creative — this recipe is a great base to experiment with flavors and textures.
Serving & Storage Suggestions
These cheesecake bars are best served chilled, straight from the fridge. Letting them sit at room temperature for 5-10 minutes before serving softens the texture just enough to bring out that creamy lushness.
For presentation, a simple drizzle of warmed cookie butter or a dusting of cinnamon on top adds a nice touch. Pair them with a cup of strong coffee or a glass of cold milk for a classic combo.
Store leftovers tightly wrapped or in an airtight container in the fridge for up to 4 days. They also freeze well — wrap bars individually in plastic wrap and place them in a freezer bag for up to 2 months. Thaw overnight in the fridge before serving.
Flavors actually deepen after a day or two in the fridge, so if you can wait, the bars taste even better the next day. Just keep them covered to avoid absorbing other fridge odors.
Nutritional Information & Benefits
These creamy no-bake bars are rich and indulgent, but the ingredient list is straightforward and free from artificial additives. Here’s a rough estimate per serving (1 bar out of 12):
- Calories: ~280
- Fat: 20g (mostly from cream cheese and butter)
- Carbohydrates: 20g (includes sugars)
- Protein: 4g
Cookie butter contributes some trace minerals like iron and calcium, while cream cheese offers a dose of calcium and protein. Using real butter and cream means this isn’t a low-fat dessert, but it’s made with real, simple ingredients rather than processed fillers.
If you’re watching carbs, swapping sugar for a keto-friendly sweetener and using almond flour crust can help keep it low-carb. Keep in mind the recipe contains dairy and gluten unless you adapt it, so it’s not suited for everyone but can be tweaked to fit many dietary needs.
Conclusion
These Creamy No-Bake Cookie Butter Cheesecake Bars have become one of my favorite go-to desserts for good reason. They combine that luxurious cheesecake texture with the warm, spicy goodness of cookie butter — all without turning on the oven. Whether you’re short on time, new to cheesecake making, or just craving something cozy and sweet, this recipe fits the bill.
Feel free to customize the filling, crust, or toppings to suit your style and taste. I love how forgiving this dessert is, which makes it perfect for both beginners and seasoned bakers looking for a quick fix. Honestly, it’s the kind of treat you’ll find yourself making over and over again, just like I did, because it’s that satisfying.
Give it a try, and if you end up tweaking the recipe, I’d love to hear how it turns out. There’s something special about sharing these little kitchen discoveries, and I hope these bars bring a bit of comfort and joy to your table.
FAQs
Can I make these cheesecake bars ahead of time?
Yes! They’re perfect for making a day or two in advance. Just keep them covered in the fridge, and they’ll taste even better after the flavors meld.
What if I don’t have cookie butter? Can I substitute something else?
You can try peanut butter or almond butter, but the flavor will be different. The unique spiced sweetness of cookie butter really makes this recipe special.
How do I know when the whipped cream is ready?
Look for stiff peaks — when you lift the beaters, the cream should hold its shape without collapsing.
Can I freeze these bars?
Absolutely. Freeze individual bars wrapped tightly in plastic wrap, then thaw in the fridge overnight before serving.
Is there a vegan version of this recipe?
Yes, you can use vegan cream cheese, coconut cream (whipped), and a dairy-free cookie butter to make a vegan-friendly version, though texture and flavor might vary slightly.
Pin This Recipe!
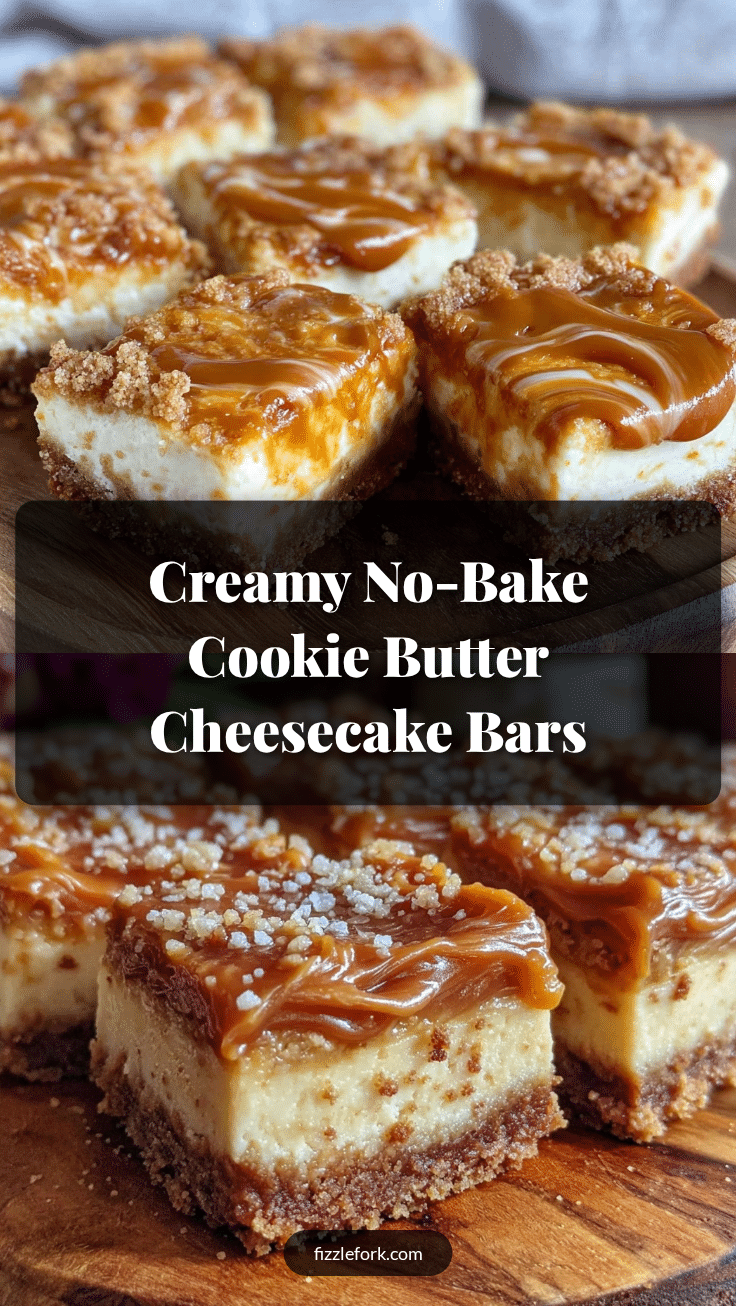
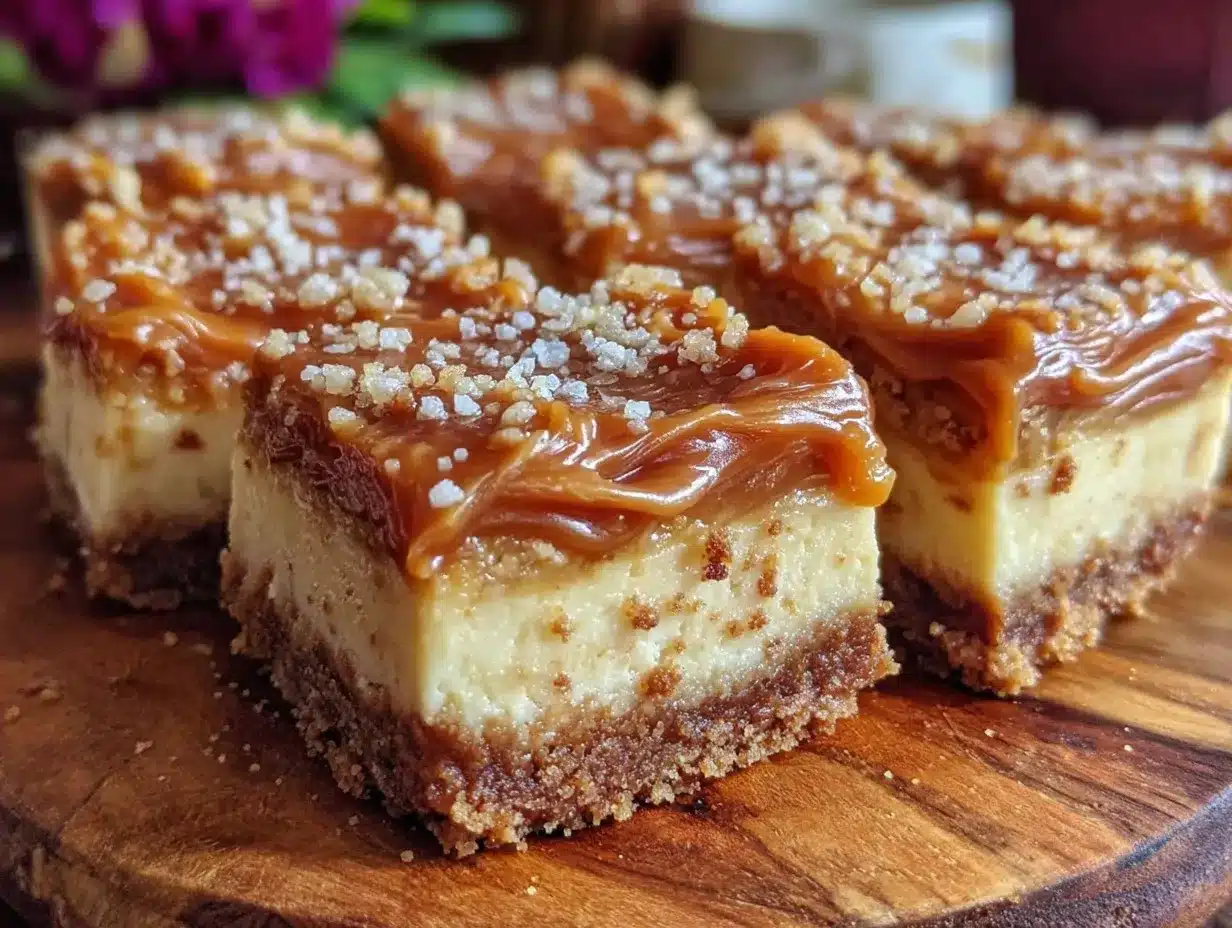
Creamy No-Bake Cookie Butter Cheesecake Bars
These no-bake cheesecake bars combine creamy cheesecake with spiced cookie butter on a crunchy buttery crust, delivering a rich and indulgent dessert without any oven time.
- Prep Time: 15 minutes
- Cook Time: 0 minutes
- Total Time: 4 hours 15 minutes
- Yield: 12 servings 1x
- Category: Dessert
- Cuisine: American
Ingredients
- 1 ½ cups graham cracker crumbs (or digestive biscuits, finely crushed)
- 6 tablespoons unsalted butter, melted
- 2 tablespoons granulated sugar
- 16 oz (450 g) cream cheese, softened
- ½ cup creamy cookie butter
- ¾ cup powdered sugar
- 1 teaspoon vanilla extract
- 1 cup heavy cream, cold
- ¼ teaspoon ground cinnamon (optional)
- Pinch of salt
- Optional toppings: additional cookie butter drizzle, crushed cookies or graham cracker crumbs, whipped cream or a sprinkle of cinnamon
Instructions
- Combine the graham cracker crumbs, melted butter, and sugar in a medium bowl. Stir until the mixture resembles wet sand and holds together when pressed (about 3 minutes).
- Pour the crumb mixture into an 8×8-inch pan and press firmly into an even layer using the bottom of a glass or your fingers. Chill in the fridge for at least 15 minutes to firm up.
- In a large bowl, beat the softened cream cheese with cookie butter and powdered sugar using an electric mixer on medium speed until smooth and creamy. Add vanilla extract, cinnamon, and a pinch of salt, mixing just to combine (about 3-4 minutes).
- In a separate bowl, whip the cold heavy cream on high speed until stiff peaks form (about 3-5 minutes).
- Gently fold the whipped cream into the cream cheese mixture in two additions using a spatula, keeping the mixture light and airy.
- Pour the filling over the chilled crust and spread evenly with a spatula. Smooth the top.
- Cover the pan with plastic wrap and refrigerate for at least 4 hours, preferably overnight.
- Once set, cut into 12 bars using a sharp knife (dip the knife in hot water and wipe dry between cuts for clean edges). Add optional toppings if desired.
Notes
Soften cream cheese before mixing to avoid lumps. Whip cream to stiff peaks but avoid overwhipping. Fold whipped cream gently to keep airiness. Chill bars overnight for best texture. Warm knife between cuts for clean slices. Use quality cookie butter for best flavor.
Nutrition
- Serving Size: 1 bar (1/12 of recip
- Calories: 280
- Fat: 20
- Carbohydrates: 20
- Protein: 4
Keywords: no-bake cheesecake, cookie butter, cheesecake bars, easy dessert, no oven dessert, creamy cheesecake, spiced dessert


