“Hey, are you bringing those Oreo cheesecake bars to the party?” That text popped up while I was juggling a million last-minute graduation party plans. Honestly, I wasn’t sure if I could pull off anything fancy, but these creamy no-bake Oreo cheesecake bars have quietly become my go-to for moments like this—when you want something impressive but also ridiculously easy. I first stumbled onto this recipe during a chaotic weekend when my oven decided to take a break, and my craving for cheesecake was non-negotiable. I wasn’t sure about skipping the bake, but those Oreo layers and the smooth cream cheese filling ended up being a total crowd-pleaser.
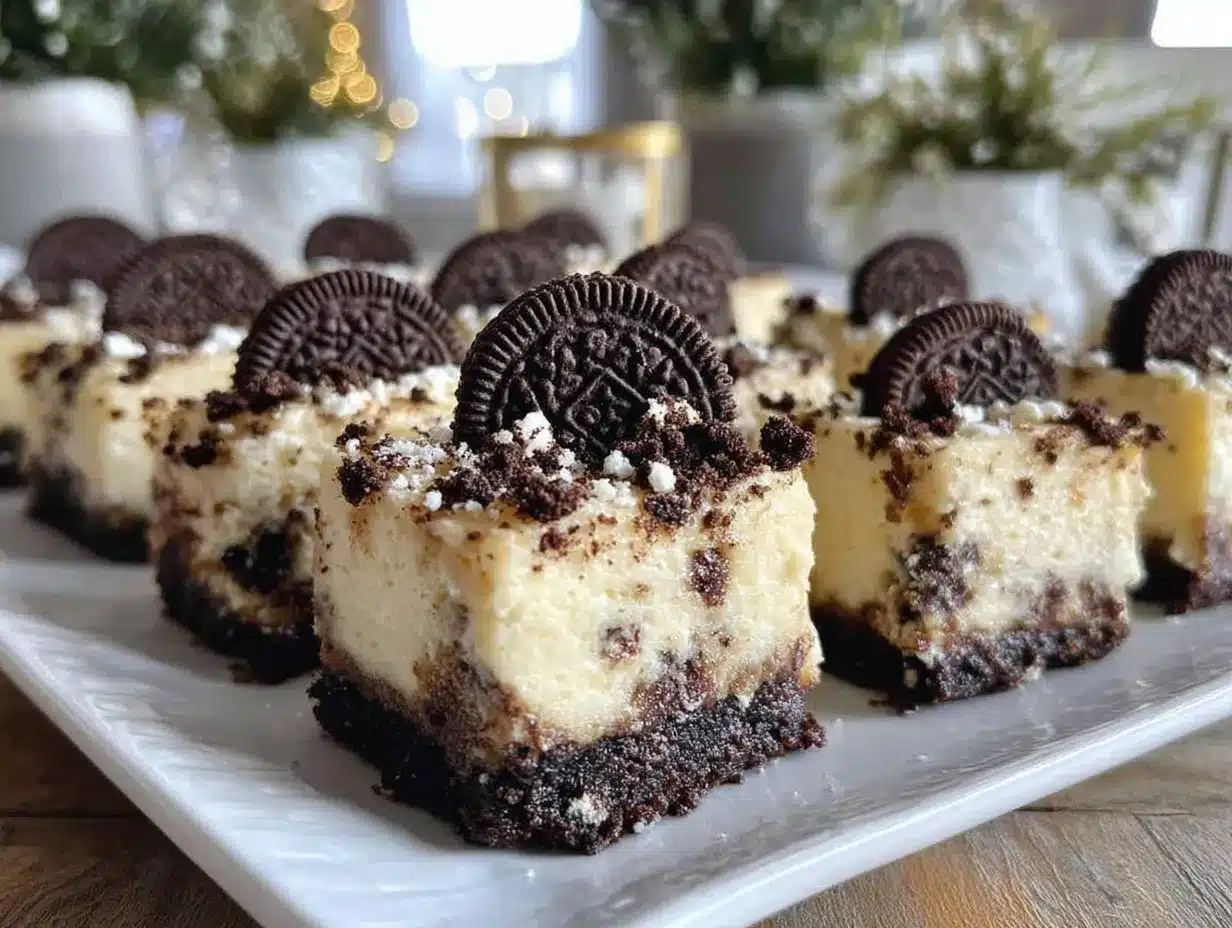
There’s something about the crunchy Oreo crust paired with that luscious filling that makes you close your eyes after the first bite. It’s the kind of dessert that feels like a hug from an old friend, perfect for celebrating milestones like graduation. This recipe stuck with me because it’s low-fuss yet hits that sweet spot where texture and flavor meet just right. Plus, it’s a relief when you can whip it up without breaking a sweat or heating up the kitchen on a hot day.
Honestly, this recipe feels like a little secret weapon for anyone who wants to impress guests with minimal effort. The bars slice up cleanly, travel well, and somehow manage to feel indulgent without requiring hours of prep. If you’re looking for a dessert that’s creamy, crunchy, and downright addictive for your graduation party, these bars are the quiet star of the show.
Why You’ll Love This Recipe
Having tested this creamy no-bake Oreo cheesecake bars recipe more times than I can count, I can say it’s truly a winner for so many reasons. Here’s why it deserves a spot in your graduation party lineup:
- Quick & Easy: Comes together in under 30 minutes, no oven needed—which means less stress and more time celebrating.
- Simple Ingredients: Pantry staples like cream cheese and Oreos make this recipe super accessible; no fancy trips to specialty stores.
- Perfect for Graduation Parties: It’s the kind of dessert that looks fancy but is totally fuss-free, perfect for impressing a crowd without scrambling.
- Crowd-Pleaser: Kids and adults alike can’t get enough—there’s something universally satisfying about Oreos and cheesecake teaming up.
- Unbelievably Delicious: That creamy filling with crunchy Oreo bits throughout creates a texture that’s just next-level comfort food.
What sets this recipe apart? It’s all about the balance. The crust isn’t just crushed Oreos—there’s a bit of melted butter that holds everything together perfectly. The filling gets a light whip to keep it airy yet decadently creamy, and tossing in a few crushed Oreos into the filling adds that delightful surprise crunch. Plus, I like to chill mine for at least 4 hours (overnight if possible) to get that clean slice and a texture that’s just right—not too firm, not too soft. This isn’t your run-of-the-mill cheesecake bar; it’s the best version for a no-bake dessert that feels like a celebration in every bite.
What Ingredients You Will Need
This recipe uses simple, wholesome ingredients to deliver bold flavor and satisfying texture without the fuss. Most of these are pantry staples or easy to find in any grocery store, which makes it a no-brainer for last-minute party prep.
- Oreos: About 24 whole Oreos, crushed (reserve a few for garnish). I prefer regular classic Oreos for the perfect balance of sweetness and crunch.
- Unsalted Butter: 6 tablespoons (85g), melted. This binds the crust and adds richness.
- Cream Cheese: 16 ounces (450g), softened to room temperature. Use full-fat for the creamiest texture.
- Powdered Sugar: ¾ cup (90g), sifted for smoothness and balanced sweetness.
- Heavy Whipping Cream: 1 cup (240ml), cold. Whipped to soft peaks to lighten the filling.
- Vanilla Extract: 1 teaspoon, for that warm, comforting note.
- Optional Add-Ins: A pinch of salt to bring out the flavors or a splash of coffee extract for a subtle mocha twist.
Looking for variations? Swap the heavy cream with coconut cream to keep it dairy-free, or use reduced-fat cream cheese for a lighter version (though it changes the texture a bit). In summer, you can add fresh strawberries on top to brighten the flavor and add a pop of color.
Equipment Needed
- 8×8-inch (20×20 cm) baking pan: For setting the bars. Glass or metal works fine; glass helps monitor the crust.
- Mixing bowls: One large for the filling and one medium for the crust ingredients.
- Electric mixer or stand mixer: Essential for whipping the cream cheese and heavy cream smoothly. A hand mixer is a budget-friendly option that works well too.
- Food processor or resealable bag and rolling pin: For crushing Oreos finely.
- Spatula and measuring cups/spoons: For mixing and measuring accurately.
Pro tip: If you don’t have a food processor, place Oreos in a zip-top bag and crush them with a rolling pin or heavy pan. It’s a bit more rustic but totally effective. I’ve made these bars dozens of times using both methods, and the texture turns out just right either way.
Preparation Method
- Prepare the crust: Crush 24 Oreos finely using a food processor or by hand. In a medium bowl, combine the crushed Oreos with 6 tablespoons (85g) melted unsalted butter. Mix until the crumbs are evenly coated and clump together when pressed.
- Form the crust base: Press the Oreo mixture firmly into the bottom of an 8×8-inch (20×20 cm) baking pan, making an even layer. Use the back of a spoon or a flat-bottomed glass to compact it tightly. Chill the crust in the refrigerator for 15 minutes to set while you make the filling.
- Make the filling: In a large bowl, beat 16 ounces (450g) softened cream cheese and ¾ cup (90g) powdered sugar with an electric mixer until smooth and free of lumps, about 2-3 minutes. Add 1 teaspoon vanilla extract and continue mixing.
- Whip the cream: In a separate chilled bowl, whip 1 cup (240ml) heavy whipping cream to soft peaks. Be careful not to overbeat; the cream should hold its shape but still be smooth.
- Combine and fold: Gently fold the whipped cream into the cream cheese mixture in thirds, using a spatula. Fold just until incorporated to keep the filling light and airy.
- Add Oreo bits: Chop 4-6 Oreos roughly and fold them into the filling for extra crunch and flavor bursts.
- Assemble: Spread the filling evenly over the chilled crust, smoothing the top with a spatula.
- Chill: Cover the pan with plastic wrap and refrigerate for at least 4 hours, ideally overnight. This allows the filling to firm up for clean slicing.
- Serve: Before serving, garnish with reserved Oreo crumbs or whole mini Oreos for a festive touch. Cut into bars using a sharp knife warmed under hot water for neat edges.
Note: If the filling feels too soft after chilling, a quick 15-minute stint in the freezer can help firm it up without freezing it solid. Also, avoid rushing the chilling step—patience pays off with texture and flavor.
Cooking Tips & Techniques
One trick I’ve learned is to always soften your cream cheese fully before mixing. Cold cream cheese leads to lumps, and no one wants to bite into a chunk in a smooth cheesecake bar. Leave it out at room temperature for about an hour or microwave in short bursts if you’re in a hurry.
When whipping the cream, keep an eye on the texture. Under-whipping means a runny filling; over-whipping can turn your cream into butter—both are unwelcome surprises. Soft peaks are your sweet spot.
Pressing the crust firmly into the pan is key. I sometimes use the bottom of a measuring cup to compact it tightly so the base doesn’t crumble when slicing. This little step makes serving way easier and cleaner.
Chilling is non-negotiable. The longer the bars rest, the better the flavor melds and the firmer the texture becomes. I’ve found overnight chilling is worth planning for, especially if you want neat, photogenic bars for your graduation party spread.
If you want to speed things up, you can pre-crush Oreos and store them airtight in the fridge, so you just mix and assemble when needed—super handy for busy hosts.
Variations & Adaptations
While the classic creamy no-bake Oreo cheesecake bars are hard to beat, here are a few tweaks I’ve tried and loved:
- Chocolate Lover’s Version: Mix in ¼ cup (25g) cocoa powder into the filling for a mocha twist. Add chocolate chips on top before chilling for extra indulgence.
- Fruit-Infused: Add a layer of fresh raspberries or sliced strawberries between the crust and filling. The tartness balances the rich creaminess perfectly.
- Gluten-Free Option: Use gluten-free chocolate sandwich cookies for the crust and garnish. The texture remains just as satisfying.
- Dairy-Free Adaptation: Swap cream cheese with a plant-based alternative and use coconut cream whipped to soft peaks instead of heavy cream.
- Mini Cheesecake Cups: Instead of bars, assemble the crust and filling into mini mason jars or cupcake liners for portable party snacks.
One variation I made last minute was adding a swirl of peanut butter into the filling, which surprisingly paired beautifully with the Oreos and added a nutty richness that guests couldn’t stop talking about.
Serving & Storage Suggestions
These bars are best served chilled, fresh from the fridge, with clean, sharp cuts for neat presentation. I like to garnish with a sprinkle of crushed Oreos or a few whole mini Oreos on top to make them look festive and inviting for any graduation festivity.
Pairing suggestions? A cold glass of milk or a lightly brewed coffee balances the richness perfectly. They also go great alongside light finger foods or a fresh fruit platter.
Store leftover bars in an airtight container in the refrigerator for up to 4 days. For longer storage, wrap individual bars tightly in plastic wrap and freeze for up to 2 months. Thaw overnight in the fridge before serving.
Reheating isn’t really recommended, but letting them sit at room temperature for 10 minutes before serving helps soften the filling slightly, making the texture more luscious.
Nutritional Information & Benefits
Each serving of these creamy no-bake Oreo cheesecake bars is a delightful treat, offering approximately 300-350 calories, with a comforting balance of fats and sugars. The cream cheese provides a bit of protein and calcium, while the Oreos, though indulgent, add that essential nostalgic crunch.
For those mindful of dietary needs, this recipe can be adapted to be gluten-free or dairy-free as mentioned above, making it flexible for many preferences. While it’s definitely a dessert to enjoy in moderation, it’s perfect for celebratory occasions where the joy of sharing matters most.
From a wellness perspective, I like to think of this recipe as a little fun moment in the day—a sweet reminder that celebrations deserve a special kind of comfort food.
Conclusion
These creamy no-bake Oreo cheesecake bars have become a staple for me when celebrating big moments like graduations. They’re simple enough to whip up in a flash but deliver a depth of flavor and texture that feels truly special. You can tweak the recipe based on what you have on hand or your personal tastes, making it a versatile dessert that fits any party vibe.
What I love most is how these bars bring people together—whether it’s kids sneaking a bite early or adults savoring the creamy richness with a smile. If you try this recipe, I’d love to hear how you made it your own and what moments it made sweeter for you.
Go ahead and make these bars the sweet highlight of your graduation party—they’re guaranteed to be a hit that leaves everyone asking for the recipe.
Frequently Asked Questions
Can I make these bars ahead of time?
Yes! In fact, chilling them overnight helps the flavors meld and makes slicing easier. Just keep them covered in the fridge until ready to serve.
What if I don’t have heavy cream?
You can try whipping canned coconut cream as a dairy-free alternative or substitute with whipped topping, but fresh heavy cream gives the best texture.
Can I use a different cookie for the crust?
Absolutely! Chocolate wafer cookies or gluten-free sandwich cookies work well as substitutes. Just crush them finely and mix with melted butter.
How do I get clean slices when cutting the bars?
Use a sharp knife warmed under hot water and wiped dry before slicing. Chill the bars well beforehand for the cleanest cuts.
Is it possible to make these bars vegan?
Yes, replace cream cheese with vegan cream cheese and use coconut cream instead of heavy cream. Choose vegan sandwich cookies to complete the adaptation.
For more easy-to-make crowd-pleasers that don’t require turning on the oven, you might enjoy the creamy cookie dough fudge no-bake recipe or the creamy Oreo trifle no-bake dessert, both perfect for any festive occasion.
Pin This Recipe!
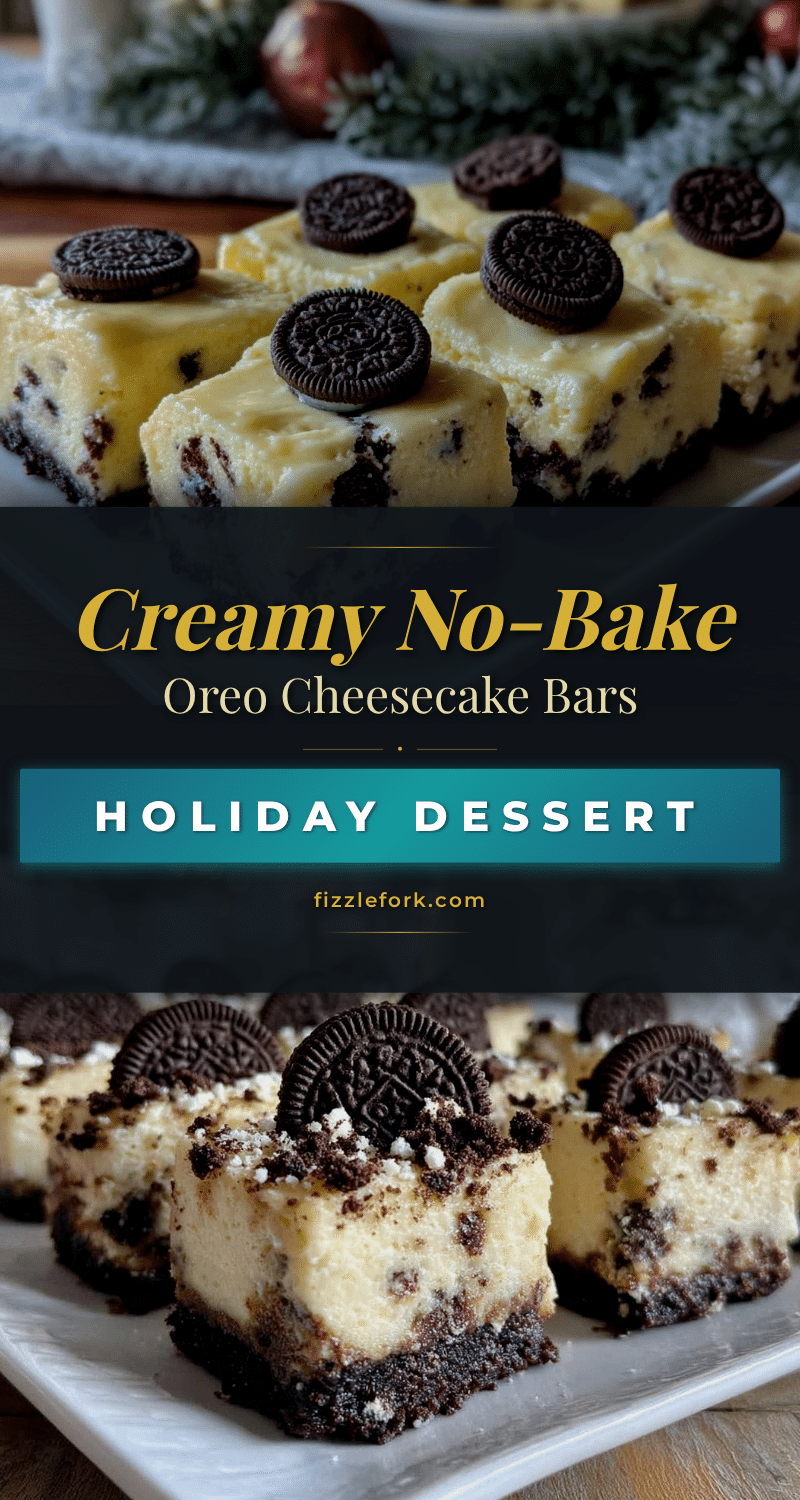
Creamy No-Bake Oreo Cheesecake Bars
These creamy no-bake Oreo cheesecake bars are an easy, crowd-pleasing dessert perfect for graduation parties, featuring a crunchy Oreo crust and luscious cream cheese filling.
- Prep Time: 20 minutes
- Cook Time: 0 minutes
- Total Time: 4 hours 20 minutes
- Yield: 16 servings 1x
- Category: Dessert
- Cuisine: American
Ingredients
- 24 whole Oreos, crushed (reserve a few for garnish)
- 6 tablespoons (85g) unsalted butter, melted
- 16 ounces (450g) cream cheese, softened to room temperature
- 3/4 cup (90g) powdered sugar, sifted
- 1 cup (240ml) heavy whipping cream, cold
- 1 teaspoon vanilla extract
- Optional: pinch of salt
- Optional: splash of coffee extract
- Optional: 1/4 cup (25g) cocoa powder for mocha twist
- Optional: chocolate chips for topping
- Optional: fresh raspberries or sliced strawberries
- Optional: plant-based cream cheese and coconut cream for dairy-free version
Instructions
- Crush 24 Oreos finely using a food processor or by hand.
- In a medium bowl, combine crushed Oreos with 6 tablespoons melted unsalted butter. Mix until crumbs are evenly coated and clump together when pressed.
- Press the Oreo mixture firmly into the bottom of an 8×8-inch baking pan, making an even layer. Chill in the refrigerator for 15 minutes to set.
- In a large bowl, beat 16 ounces softened cream cheese and 3/4 cup powdered sugar with an electric mixer until smooth and free of lumps, about 2-3 minutes.
- Add 1 teaspoon vanilla extract and continue mixing.
- In a separate chilled bowl, whip 1 cup heavy whipping cream to soft peaks.
- Gently fold the whipped cream into the cream cheese mixture in thirds using a spatula until just incorporated.
- Chop 4-6 Oreos roughly and fold them into the filling.
- Spread the filling evenly over the chilled crust, smoothing the top with a spatula.
- Cover the pan with plastic wrap and refrigerate for at least 4 hours, ideally overnight.
- Before serving, garnish with reserved Oreo crumbs or whole mini Oreos.
- Cut into bars using a sharp knife warmed under hot water for neat edges.
Notes
Soften cream cheese fully before mixing to avoid lumps. Whip cream to soft peaks to avoid turning it into butter. Press crust firmly for clean slices. Chill bars overnight for best texture and flavor. If filling is too soft after chilling, freeze for 15 minutes to firm up without freezing solid. Use a sharp knife warmed under hot water for clean cuts.
Nutrition
- Serving Size: 1 bar (assuming 16 b
- Calories: 325
- Sugar: 22
- Sodium: 210
- Fat: 22
- Saturated Fat: 13
- Carbohydrates: 30
- Fiber: 1
- Protein: 5
Keywords: no-bake, Oreo, cheesecake bars, easy dessert, graduation party, creamy, crowd-pleaser, no oven, quick dessert


