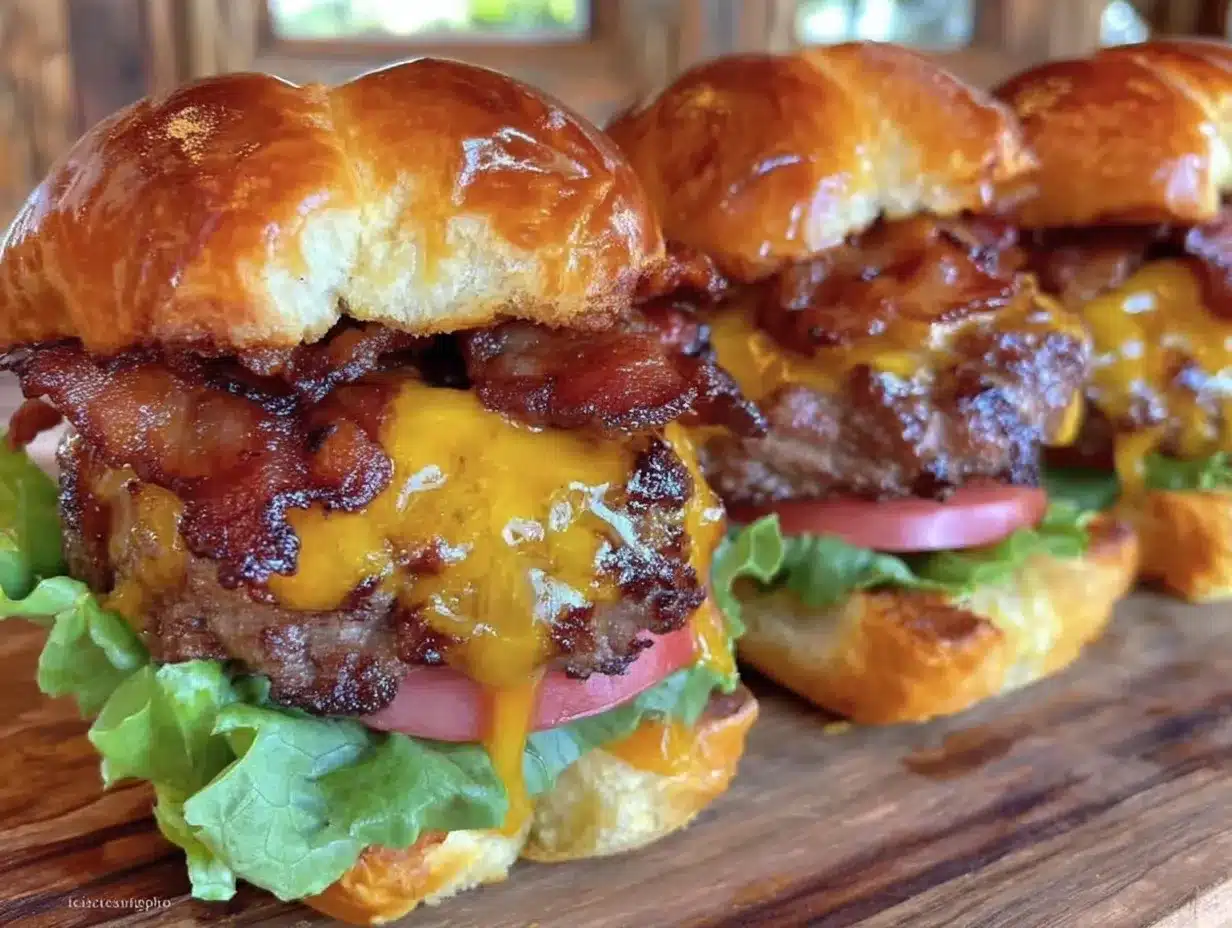
“You gotta try these sliders,” my buddy texted me late one Friday. I was skeptical—homemade bacon cheeseburger sliders? I mean, sliders are usually a party snack, right? But after a seriously chaotic day where dinner felt like an impossible dream, I figured, why not? The kitchen smelled like smoky bacon and melted cheese within minutes, and honestly, those little bites of joy turned a rough evening into something a bit more bearable. There’s something about the perfect combo of juicy beef, crispy bacon, and that special sauce that just feels like a warm hug on a plate.
I’m not usually the slider type, but after making these a few times—okay, more than a few—I realized how easy they are and how perfectly they fit into any night where you want comfort food fast and fuss-free. The special sauce? That’s the real game-changer. It’s creamy, tangy, and a little zesty, bringing all the flavors together without overshadowing the star players: the bacon and melted cheese.
What really sold me was how the recipe feels like a secret weapon for unexpected guests or those lazy weekend afternoons when you want a little indulgence without the hassle. No fancy ingredients, no complicated steps, just pure, savory goodness. I’ve even brought these sliders over to friends’ houses, and they’ve asked for the recipe every single time. Honestly, it stuck with me because it’s reliable, satisfying, and just downright delicious.
So yeah, this isn’t just another burger recipe—it’s the kind of snack that sneaks up on you and leaves you craving more. If you’ve been hunting for that savory homemade bacon cheeseburger slider recipe with an easy special sauce that’s actually worth your time, this might just be your new go-to.
Why You’ll Love This Recipe
After testing and tweaking this savory homemade bacon cheeseburger sliders recipe over several weeks, I’m confident it’s one of those rare finds that ticks all the boxes. Here’s why this recipe has earned a permanent spot in my rotation:
- Quick & Easy: You can have these sliders ready in about 30 minutes—perfect for busy weeknights or last-minute cravings when you don’t want to slave over the stove.
- Simple Ingredients: No hunting for obscure condiments or artisanal buns here. Most ingredients are pantry staples or easy-to-find supermarket basics.
- Perfect for Gatherings: Whether it’s game day, a casual party, or cozy family dinner, these sliders bring people together without the stress.
- Crowd-Pleaser: Kids, adults, picky eaters—you name it, these sliders get rave reviews every time.
- Unbelievably Delicious: The smoky bacon pairs beautifully with gooey cheddar, and the special sauce adds a tangy, creamy kick that sets this recipe apart.
What makes these sliders different? It’s the balance. I don’t mess around with overly complicated toppings or weird flavor combos. Instead, I focus on getting the seasoning right, crisping the bacon perfectly, and making sure the special sauce is just tangy enough without stealing the spotlight. Plus, the slider buns are lightly toasted to add that subtle crunch, which is an easy step that packs a big punch.
Honestly, it’s comfort food reimagined for people who want something satisfying but not time-consuming. And the way the flavors meld together? It’s the kind of recipe that makes you close your eyes after the first bite and savor every mouthful.
What Ingredients You Will Need
This recipe uses simple, wholesome ingredients to deliver bold flavor and satisfying texture without the fuss. Most of these are pantry staples, and none require a special trip to a fancy store.
- For the Sliders:
- 1 pound (450g) ground beef (80/20 blend for juicy patties)
- 8 slider buns (Hawaiian rolls work wonderfully for their slight sweetness)
- 8 slices crispy bacon (I like thick-cut for best texture)
- 8 slices sharp cheddar cheese (or your favorite melting cheese)
- Salt and freshly ground black pepper to taste
- 1 tablespoon Worcestershire sauce (adds a savory umami boost)
- 1 teaspoon garlic powder (optional but recommended)
- For the Special Sauce:
- ½ cup mayonnaise (I prefer Hellmann’s for creaminess)
- 2 tablespoons ketchup
- 1 tablespoon yellow mustard
- 1 teaspoon pickle relish (sweet or dill, based on your preference)
- 1 teaspoon apple cider vinegar (brings a nice tang)
- ½ teaspoon smoked paprika (adds mild smokiness)
- Pinch of salt and pepper
- Optional Garnishes:
- Thinly sliced red onions
- Leafy lettuce or baby spinach
- Tomato slices
For substitutions, if you want to keep it lighter, swap regular mayo for a light or avocado-based mayo. Gluten-free buns can replace slider buns for gluten-sensitive eaters. If you’re dairy-free, use vegan cheese slices and a dairy-free mayo alternative in the special sauce. For a little heat, a dash of hot sauce or cayenne pepper in the sauce works wonders.
Equipment Needed
- Large skillet or grill pan – For cooking the patties evenly and crisping the bacon.
- Spatula – A sturdy one for flipping the sliders without breaking the patties.
- Mixing bowl – To whisk together the special sauce ingredients.
- Baking sheet or large oven-safe dish – To assemble and warm sliders in the oven before serving.
- Knife and cutting board – For slicing onions, tomatoes, and bacon.
- Optional: Meat thermometer – To check doneness if you’re particular about burger temperature.
If you don’t have a grill pan, a cast-iron skillet works just as well and gives a great sear. For budget-friendly options, a non-stick frying pan is fine, but keep an eye on heat to avoid burning the bacon or patties. I’ve found that a medium-high heat works best to get crispy bacon without overcooking the beef.
Preparation Method
- Prepare the Special Sauce: In a small bowl, whisk together mayonnaise, ketchup, yellow mustard, pickle relish, apple cider vinegar, smoked paprika, salt, and pepper until smooth. Cover and chill in the fridge while you prep the sliders. (This takes about 5 minutes.)
- Cook the Bacon: Heat your skillet over medium heat. Lay the bacon slices flat and cook until crispy, about 4–6 minutes per side. Remove and drain on paper towels. Keep the bacon fat in the pan for extra flavor later. (Tip: Don’t discard the bacon grease—it adds depth when cooking the patties!)
- Form the Patties: In a mixing bowl, combine ground beef, Worcestershire sauce, garlic powder, salt, and pepper. Gently mix without overworking the meat. Divide into 8 equal portions (~2 ounces or 56g each) and shape into small patties slightly wider than your buns, as they’ll shrink while cooking.
- Cook the Patties: Using the same skillet with bacon fat, increase heat to medium-high. Add patties and cook about 3 minutes per side for medium doneness. Place a slice of cheddar cheese on each patty during the last minute of cooking, covering the pan with a lid to melt cheese perfectly.
- Toast the Buns: While patties cook, slice slider buns in half and lightly toast them in a dry skillet or toaster oven until golden (about 1–2 minutes). This prevents sogginess and adds nice crunch.
- Assemble the Sliders: Spread a generous spoonful of special sauce on the bottom bun. Add the cheesy patty, top with crispy bacon, then optional onion, lettuce, and tomato slices. Cap with the top bun.
- Warm the Sliders (Optional): If making ahead or for a crowd, place assembled sliders in a baking dish, cover loosely with foil, and warm in a 350°F (175°C) oven for 5–7 minutes before serving.
When you bite in, you want to hear a slight crunch from the toasted bun and bacon, feel that melty cheese stretch, and taste the tangy punch of the special sauce. If your patties start to shrink too much, try chilling them briefly before cooking next time. And don’t forget, using a meat thermometer to hit 160°F (71°C) ensures safe, juicy burgers every time.
Cooking Tips & Techniques
Getting these sliders just right is about simple tricks learned through a few trial runs (and a couple of burnt patties—don’t ask). Here’s what I swear by:
- Don’t overmix the beef: Handling the meat too much can make the patties tough. Mix just until combined.
- Use bacon fat to cook the patties: That leftover grease adds smoky flavor and helps sear the beef.
- Press patties gently: Make a slight indentation in the center of each patty before cooking. This stops them from puffing up and helps them cook evenly.
- Cheese timing: Add cheese the last minute of cooking and cover with a lid to melt it perfectly without overcooking the patty.
- Toast buns right before assembly: It keeps the buns from getting soggy under the sauce and juicy patties.
- Multi-task: Cook bacon first, then patties in the same pan, and prep sauce while both cook to save time.
- Rest patties briefly: Let cooked patties rest 2–3 minutes before assembling to keep juices locked in.
One thing I learned the hard way: skipping the special sauce is a mistake. It ties everything together and keeps these sliders from being just ordinary burgers in mini form. Also, if you’re into layering flavors, a tiny sprinkle of smoked paprika on the patties or a dash of hot sauce in the sauce can make a noticeable difference.
Variations & Adaptations
Switching things up with these sliders is super easy. Here are a few variations I’ve tried and loved:
- Spicy Kick: Add diced jalapeños to the special sauce or swap cheddar for pepper jack cheese. It gives a nice heat without overwhelming the overall flavor.
- Healthier Twist: Use ground turkey or chicken instead of beef and swap regular bacon for turkey bacon. Use whole wheat slider buns or lettuce wraps for a low-carb option.
- BBQ Flare: Mix a tablespoon of your favorite BBQ sauce into the special sauce and add caramelized onions on top for a smoky-sweet combo.
- Cheese Swap: Try Swiss, mozzarella, or even blue cheese crumbles for a different melty experience.
- Seasonal Toppings: In summer, fresh tomato slices and crisp lettuce shine. In winter, switch to sautéed mushrooms or caramelized onions.
One personal favorite is swapping the slider buns for homemade crispy everything bagels sliced small. It adds a nice texture and flavor twist that’s unexpected but delicious.
Serving & Storage Suggestions
These sliders are best served warm, fresh off the skillet or oven. Arrange them on a platter with extra special sauce on the side for dipping and maybe some crispy fries or a fresh green salad to balance the richness.
For storage, wrap any leftovers tightly in foil or plastic wrap and refrigerate for up to 3 days. To reheat, place sliders on a baking sheet and warm in a 350°F (175°C) oven for about 10 minutes, or until heated through. Avoid microwaving if you want to keep that toasted bun crisp.
They also freeze well—just assemble without lettuce or tomato, wrap individually, and freeze. Thaw overnight in the fridge and reheat as above.
Flavors actually deepen after a day, so if you can wait, the next-day sliders are surprisingly tasty. Just add fresh greens or tomato when serving to brighten things back up.
Nutritional Information & Benefits
Each savory homemade bacon cheeseburger slider clocks in around 250-300 calories depending on toppings and bun choice. The beef packs a good dose of protein (about 15-18g per slider), and the bacon adds flavor and a bit of fat for satiety.
The special sauce contains healthy fats from mayo and a touch of vinegar for digestion. Using Hawaiian rolls adds a slight sweetness but can be swapped for whole grain or gluten-free options to suit dietary needs.
This recipe is naturally gluten-free if you use gluten-free buns and make sure your Worcestershire sauce is gluten-free (some brands vary). For a low-carb approach, try wrapping patties in lettuce leaves and skip the buns altogether.
From my wellness perspective, this recipe strikes a nice balance between indulgence and practicality. It’s not everyday food, but it fits perfectly when you want a satisfying, comforting meal that’s made from scratch with real ingredients.
Conclusion
These savory homemade bacon cheeseburger sliders with special sauce have become one of those recipes I return to again and again when I want simple, delicious comfort food without the fuss. They’re flexible, easy to make, and always impress without being complicated.
Feel free to tweak the sauce, swap cheeses, or add your favorite toppings—this recipe is a perfect base for your own slider creations. I love how it brings people together and turns any casual meal into something special.
Give it a try, and don’t be surprised if your friends start asking for the recipe too. And hey, if you’re interested in other quick family favorites, you might enjoy the easy homemade cheesy hamburger helper or the creamy keto crack chicken with bacon—both great for busy nights.
Happy cooking and enjoy every bite!
FAQs about Savory Homemade Bacon Cheeseburger Sliders
Can I make these sliders ahead of time?
Yes! You can assemble the sliders and refrigerate them for a few hours before baking. Just cover tightly and warm them in the oven before serving.
What’s the best way to keep the slider buns from getting soggy?
Lightly toasting the buns before assembling helps create a barrier that keeps moisture from soaking in. Also, add the special sauce just before serving.
Can I freeze these sliders?
Absolutely. Assemble without fresh veggies, wrap individually, and freeze. Thaw overnight and reheat in the oven for best results.
What’s a good substitute for the special sauce?
If you’re short on time, a mix of mayo and ketchup with a dash of mustard works as a quick alternative, but the full sauce really brings the flavor together.
How do I make the patties juicy and flavorful?
Use an 80/20 ground beef blend, don’t overmix, and cook on medium-high heat with a little bacon fat. Adding Worcestershire sauce to the meat mix also boosts flavor and moisture.
Pin This Recipe!
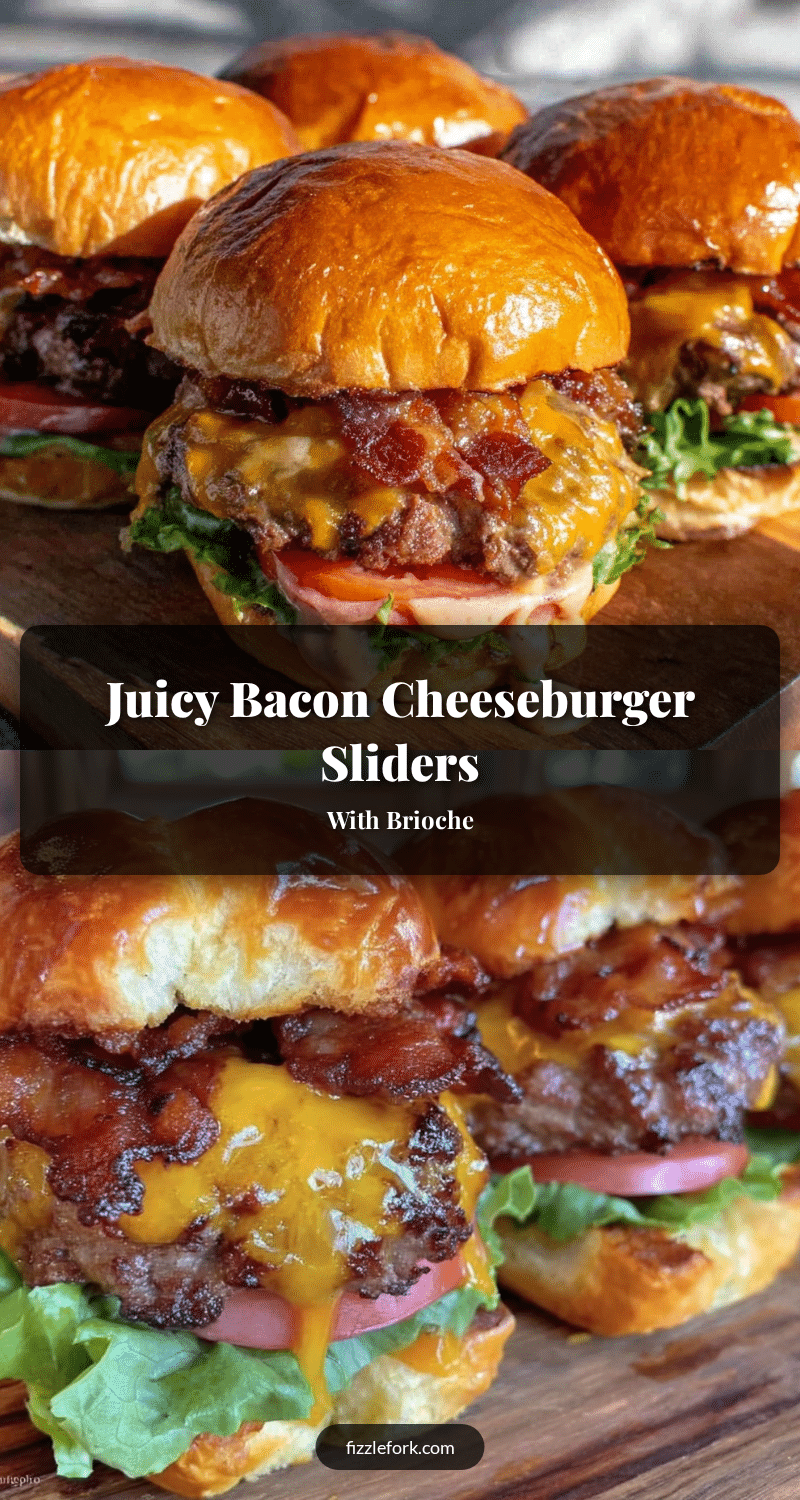
Savory Homemade Bacon Cheeseburger Sliders Recipe with Easy Special Sauce

These savory homemade bacon cheeseburger sliders combine juicy beef patties, crispy bacon, melted cheddar, and a tangy special sauce for a quick and crowd-pleasing comfort food perfect for any occasion.
- Prep Time: 10 minutes
- Cook Time: 20 minutes
- Total Time: 30 minutes
- Yield: 8 sliders 1x
- Category: Main Course
- Cuisine: American
Ingredients
- 1 pound ground beef (80/20 blend for juicy patties)
- 8 slider buns (Hawaiian rolls recommended)
- 8 slices crispy bacon (thick-cut preferred)
- 8 slices sharp cheddar cheese
- Salt and freshly ground black pepper to taste
- 1 tablespoon Worcestershire sauce
- 1 teaspoon garlic powder (optional)
- Special Sauce:
- ½ cup mayonnaise
- 2 tablespoons ketchup
- 1 tablespoon yellow mustard
- 1 teaspoon pickle relish
- 1 teaspoon apple cider vinegar
- ½ teaspoon smoked paprika
- Pinch of salt and pepper
- Optional Garnishes:
- Thinly sliced red onions
- Leafy lettuce or baby spinach
- Tomato slices
Instructions
- Prepare the Special Sauce: In a small bowl, whisk together mayonnaise, ketchup, yellow mustard, pickle relish, apple cider vinegar, smoked paprika, salt, and pepper until smooth. Cover and chill in the fridge while you prep the sliders (about 5 minutes).
- Cook the Bacon: Heat a skillet over medium heat. Lay bacon slices flat and cook until crispy, about 4–6 minutes per side. Remove and drain on paper towels. Keep the bacon fat in the pan for cooking the patties.
- Form the Patties: In a mixing bowl, combine ground beef, Worcestershire sauce, garlic powder, salt, and pepper. Mix gently without overworking. Divide into 8 equal portions (~2 ounces each) and shape into small patties slightly wider than the buns.
- Cook the Patties: Using the same skillet with bacon fat, heat to medium-high. Cook patties about 3 minutes per side for medium doneness. Add a slice of cheddar cheese on each patty during the last minute, cover with a lid to melt cheese.
- Toast the Buns: While patties cook, slice slider buns in half and lightly toast them in a dry skillet or toaster oven until golden, about 1–2 minutes.
- Assemble the Sliders: Spread special sauce on the bottom bun. Add cheesy patty, top with crispy bacon, then optional onion, lettuce, and tomato slices. Cap with the top bun.
- Warm the Sliders (Optional): Place assembled sliders in a baking dish, cover loosely with foil, and warm in a 350°F oven for 5–7 minutes before serving.
Notes
Do not overmix the beef to keep patties tender. Use bacon fat to cook patties for extra flavor. Press a slight indentation in patties before cooking to prevent puffing. Toast buns just before assembly to avoid sogginess. Rest patties 2–3 minutes before assembling. Special sauce is key to flavor balance. Use a meat thermometer to ensure patties reach 160°F for safety.
Nutrition
- Serving Size: 1 slider
- Calories: 275
- Sugar: 4
- Sodium: 550
- Fat: 18
- Saturated Fat: 7
- Carbohydrates: 15
- Fiber: 1
- Protein: 16
Keywords: bacon cheeseburger sliders, homemade sliders, special sauce, quick dinner, party food, comfort food, easy recipe


