“You’re telling me this chicken can get crispy in the oven, not fried?” my roommate asked as I pulled the golden chicken breasts from the oven, the kitchen smelling like a fresh lemon grove after a rainstorm. Honestly, I’d been skeptical myself at first. Chicken piccata has always been a pan-fried affair in my mind — that sizzle, that crunch, that immediate caramelization. But after a particularly hectic evening when standing over a stove felt impossible, I tossed the chicken in the oven and hoped for the best.
That night, the crispy baked chicken piccata with tangy lemon caper sauce not only saved dinner, but it also became one of those dishes I couldn’t stop making all week. Each bite gave me this perfect balance of crispy crust and bright, zingy sauce that just felt like sunshine on a plate. The capers added that salty pop, while the lemon cut through the richness in a way that made the whole dish feel special, yet utterly approachable.
What’s weirdly satisfying is that this recipe came from a place of sheer exhaustion and a pinch of curiosity. I wasn’t aiming for perfection — just a quick meal that tasted like I spent hours fussing. Turns out, it’s a keeper. Now, whenever I’m juggling too many things or craving something that feels fancy but isn’t, this chicken piccata slides into the rotation without fail. There’s something quietly comforting about that, you know?
It’s the kind of recipe that makes you want to slow down just enough to savor the tangy sauce and that crispy crust, and maybe even share it with a friend who doesn’t believe baked chicken can ever be as good as fried. Trust me, it is. And that’s why this recipe has stuck around my kitchen — it’s simple, satisfying, and sneaky enough to impress without the stress.
Why You’ll Love This Recipe
This crispy baked chicken piccata with tangy lemon caper sauce has won me over through countless tests (and happy dinners). It’s not just easy; it’s genuinely delicious in a way that makes you forget it’s baked, not fried. Here’s why it’s become such a favorite:
- Quick & Easy: Ready in under 35 minutes, it’s perfect for nights when you want something impressive without the fuss.
- Simple Ingredients: No need for fancy or hard-to-find items — just everyday staples like chicken breasts, lemons, capers, and pantry breadcrumbs.
- Perfect for Weeknight Dinners: Whether you’re cooking solo or for the family, this recipe hits the spot without requiring hours in the kitchen.
- Crowd-Pleaser: My picky eaters and friends alike always ask for seconds — the crispy texture and tangy sauce are a winning combo.
- Unbelievably Delicious: That balance of crunchy coating and bright, lemony caper sauce is just next-level comfort food.
What sets this chicken piccata apart is the baking method that locks in crispiness without the mess or oil of frying. Plus, the lemon caper sauce is made right in the same pan after baking, soaking up all the chicken goodness. I also love using panko breadcrumbs for that extra crunch — a little secret for making it restaurant-quality at home.
It’s the kind of dish that turns simple ingredients into something memorable — a quick weeknight meal that feels like a little celebration. You might even find yourself pairing it with a cozy side like my creamy one-pot chicken alfredo pasta recipe for an indulgent combo that doesn’t complicate dinner prep.
What Ingredients You Will Need
This crispy baked chicken piccata recipe relies on straightforward, wholesome ingredients that come together to create big flavor and irresistible texture. Most of these are pantry staples, which means no last-minute grocery runs — always a win!
- Chicken breasts: Boneless, skinless, and pounded to an even thickness for quick, even cooking.
- Panko breadcrumbs: For that light, airy crunch. I recommend Japanese-style panko if you can find it—it holds crispness better than regular breadcrumbs.
- Parmesan cheese: Freshly grated, mixed into the breadcrumb coating for savory richness.
- Garlic powder: Adds a subtle depth without overpowering.
- Salt and black pepper: To season both the chicken and the coating.
- Olive oil spray or light brushing: Helps the panko brown nicely in the oven.
- For the sauce:
- Fresh lemons: Both juice and thin slices for garnish. Fresh lemon juice is key to the bright tang.
- Capers: Drained and rinsed to keep the salty punch just right.
- Chicken broth or white wine: For deglazing the pan and building flavor.
- Unsalted butter: Adds silkiness and richness to the sauce.
- Fresh parsley: Chopped, for a fresh herbal note at the end.
- Optional: A pinch of red pepper flakes if you like a little heat with your tangy sauce.
If you want to switch things up, almond flour works great as a gluten-free alternative to panko, and swapping Greek yogurt for butter in the sauce can lighten it up a bit. Also, in summer, fresh herbs like thyme or basil can add a lovely twist.
Equipment Needed
- Baking sheet: A rimmed sheet works best to catch any drips from the sauce.
- Wire rack: This is a game-changer for baking chicken crisp evenly on all sides. Placing chicken on a wire rack allows hot air to circulate underneath, preventing sogginess.
- Meat mallet or rolling pin: For pounding chicken breasts to an even thickness — if you don’t have one, a heavy skillet works in a pinch.
- Mixing bowls: For coating the chicken and mixing breadcrumbs.
- Small saucepan or skillet: To make the lemon caper sauce right after baking the chicken.
- Measuring spoons and cups: For precise seasoning and sauce ingredients.
If you don’t have a wire rack, you can use a cooling rack on top of the baking sheet, just make sure it’s oven-safe. For budget-friendly options, simple metal racks from kitchen supply stores work great and clean up easily. My favorite is a non-stick wire rack that’s dishwasher safe — worth the small investment for crispy baked dishes like this one.
Preparation Method

- Preheat your oven to 425°F (220°C). This high heat is what helps achieve that golden, crispy crust without frying.
- Pound the chicken breasts. Place each breast between two sheets of plastic wrap or parchment paper. Use a meat mallet or rolling pin to gently pound to about ½ inch (1.3 cm) thickness. This ensures even cooking and tenderness.
- Prepare the breadcrumb coating. In a shallow bowl, combine 1 cup (90g) panko breadcrumbs, ¼ cup (25g) freshly grated Parmesan, 1 teaspoon garlic powder, ½ teaspoon salt, and ½ teaspoon black pepper. Mix well.
- Coat the chicken. Lightly spray or brush both sides of the chicken breasts with olive oil. Press each breast firmly into the breadcrumb mixture, coating both sides evenly. Set them aside on a plate.
- Arrange chicken on a wire rack over a baking sheet. This setup lets hot air circulate and keeps the crust crispy. If you don’t have a rack, place directly on a lightly greased baking sheet but flip halfway through baking.
- Bake for 18-20 minutes. Flip the chicken halfway through if not using a wire rack. The chicken should be golden brown and reach an internal temperature of 165°F (74°C). You’ll notice the crust is crisp but not oily.
- While chicken bakes, prepare the sauce. In a skillet over medium heat, melt 3 tablespoons (42g) unsalted butter. Add 2 minced garlic cloves and sauté for 30 seconds until fragrant.
- Deglaze the pan. Pour in ½ cup (120ml) chicken broth or white wine, scraping up any browned bits from the pan. Let it simmer for 2-3 minutes until slightly reduced.
- Add lemon juice and capers. Stir in juice from 1 lemon and 2 tablespoons of drained capers. Simmer another 2 minutes to meld flavors.
- Finish the sauce with a tablespoon of butter. Stir until melted and the sauce is silky. Season with a pinch of salt and pepper as needed.
- Serve immediately. Place chicken on plates, spoon over the lemon caper sauce, garnish with thin lemon slices and chopped fresh parsley.
Pro tip: Keep an eye on the chicken towards the end of baking—because ovens vary, you don’t want to dry it out. The internal temp is your best guide. Also, letting the chicken rest for 3-5 minutes after baking helps juices redistribute, keeping it tender under that crispy crust.
Cooking Tips & Techniques
Getting that perfect crispy baked chicken piccata is all about attention to a few key details:
- Even Thickness: Pounding the chicken to an even ½ inch thickness ensures it cooks uniformly. Uneven breasts can lead to dry edges or undercooked centers.
- Panko Crunch: Don’t skip the panko breadcrumbs! They’re lighter and airier than regular breadcrumbs, which means a crispier coating. Toasting them lightly in a dry pan before coating can boost crunchiness even more.
- Use a Wire Rack: This little step makes a huge difference. It allows hot air to circulate all around the chicken, preventing soggy bottoms. If you bake directly on a sheet, flip halfway for even crisp.
- Watch Your Oven Temp: Baking at 425°F (220°C) is key to crispiness without drying out the chicken. Lower temps won’t crisp the crust, and higher might burn it before the inside cooks.
- Sauce Timing: Make the lemon caper sauce while the chicken bakes to save time. The pan sauce benefits from those browned bits left behind, so don’t skip deglazing!
One mistake I made early on was under-seasoning the breadcrumb mix, which made the chicken taste bland despite the sauce. Adding a bit of garlic powder and Parmesan to the panko really lifts the flavor. Also, I once skipped rinsing capers and ended up with an overly salty sauce — lesson learned!
Finally, multitasking helps — while the chicken’s in the oven, toss a quick side like a fresh arugula salad or steam some green beans. This recipe pairs beautifully with easy sides like creamy one-pot chicken alfredo pasta for a full comfort meal.
Variations & Adaptations
This crispy baked chicken piccata recipe is quite flexible, so you can tweak it based on your mood or dietary needs:
- Gluten-Free Option: Swap panko breadcrumbs for almond flour or crushed gluten-free crackers. The chicken will still get a lovely crust, though a bit denser.
- Low-Carb Version: Skip breadcrumbs entirely and coat the chicken in a mix of grated Parmesan and almond flour for a keto-friendly twist.
- Herb-Infused Twist: Add fresh thyme or rosemary to the breadcrumb mix for an earthy note that complements the lemon and capers.
- Spicy Kick: Toss a pinch of red pepper flakes into the sauce or the breadcrumb coating for a subtle heat that balances the tang.
- Dairy-Free: Use vegan butter or olive oil in the sauce, and substitute nutritional yeast for Parmesan in the coating.
One variation I love is adding sliced artichoke hearts to the sauce for a Mediterranean vibe. It gives the dish an unexpected twist without much extra effort. You might also enjoy pairing this with easy cheesy dump and bake chicken parmesan casserole if you want a more indulgent, comforting spread on a busy night.
Serving & Storage Suggestions
Serve this crispy baked chicken piccata straight from the pan, spooning over plenty of that bright lemon caper sauce. It’s best warm, with fresh parsley and lemon slices adding a pop of color and freshness. A side of roasted vegetables or a simple pasta tossed in olive oil works beautifully.
For storage, keep leftover chicken and sauce separate if possible. Store in airtight containers in the refrigerator for up to 3 days. The crispy crust will soften over time, so reheating on a wire rack in a 375°F (190°C) oven for 10-12 minutes helps bring back some crunch.
The flavors in the sauce actually deepen after a day or two, making leftovers taste even better chilled or served cold over a salad. If freezing, wrap tightly and consume within 1 month for best quality.
For a well-rounded meal, consider serving with a crisp white wine or a sparkling water with lemon slices to complement the tangy sauce. My go-to quick side is steamed green beans or a light garlic sautéed spinach to keep things fresh and balanced.
Nutritional Information & Benefits
This crispy baked chicken piccata is a satisfying meal that balances protein, healthy fats, and bright flavors without excess calories. Here’s an approximate breakdown per serving (1 chicken breast with sauce):
| Calories | 350-400 kcal |
|---|---|
| Protein | 40g |
| Fat | 15g |
| Carbohydrates | 10-15g |
| Fiber | 1-2g |
Chicken breasts provide lean protein essential for muscle repair and satiety. The olive oil and butter add healthy fats that support nutrient absorption and flavor depth. Lemons are rich in vitamin C, which supports immunity and skin health, while capers add antioxidants and a unique flavor punch without many calories.
For those watching carbs, the light breadcrumb coating keeps carbs moderate, and swapping to almond flour reduces them further. This recipe is naturally gluten-free if you choose the right coating and is free from added sugars.
Conclusion
This crispy baked chicken piccata with tangy lemon caper sauce is one of those recipes that feels like a little celebration every time you make it. It’s easy enough for weeknights but special enough to share with guests, bringing together simple ingredients for a dish that’s unexpectedly crispy and bright.
I love how it transforms a classic pan-fried favorite into a less messy, healthier baked version without losing any of the charm or flavor. Plus, it’s versatile and forgiving, so you can tweak it to suit your taste or dietary needs.
Give it a try and see how quickly it becomes a regular in your kitchen. And if you experiment, I’d love to hear how you made it yours—comments and stories always make my day. Happy cooking!
FAQs about Crispy Baked Chicken Piccata
Can I use chicken thighs instead of breasts?
Yes! Boneless, skinless chicken thighs work well and stay juicy. Just adjust baking time to about 20-25 minutes, checking that internal temperature reaches 165°F (74°C).
How do I keep the chicken coating crispy after baking?
Using a wire rack for baking is crucial. Also, reheat leftovers in the oven on a rack instead of the microwave to help the crust stay crisp.
Can I prepare this recipe ahead of time?
You can bread the chicken and keep it refrigerated for a few hours before baking. The sauce is best made fresh but can be reheated gently.
What can I serve with chicken piccata?
Simple sides like steamed vegetables, roasted potatoes, or pasta tossed in olive oil complement the dish perfectly. Try pairing with easy one-pot lasagna for a comforting meal.
Is there a dairy-free way to make the sauce?
Yes, swap butter for olive oil or a dairy-free butter alternative. The sauce will still be flavorful and delicious.
Pin This Recipe!
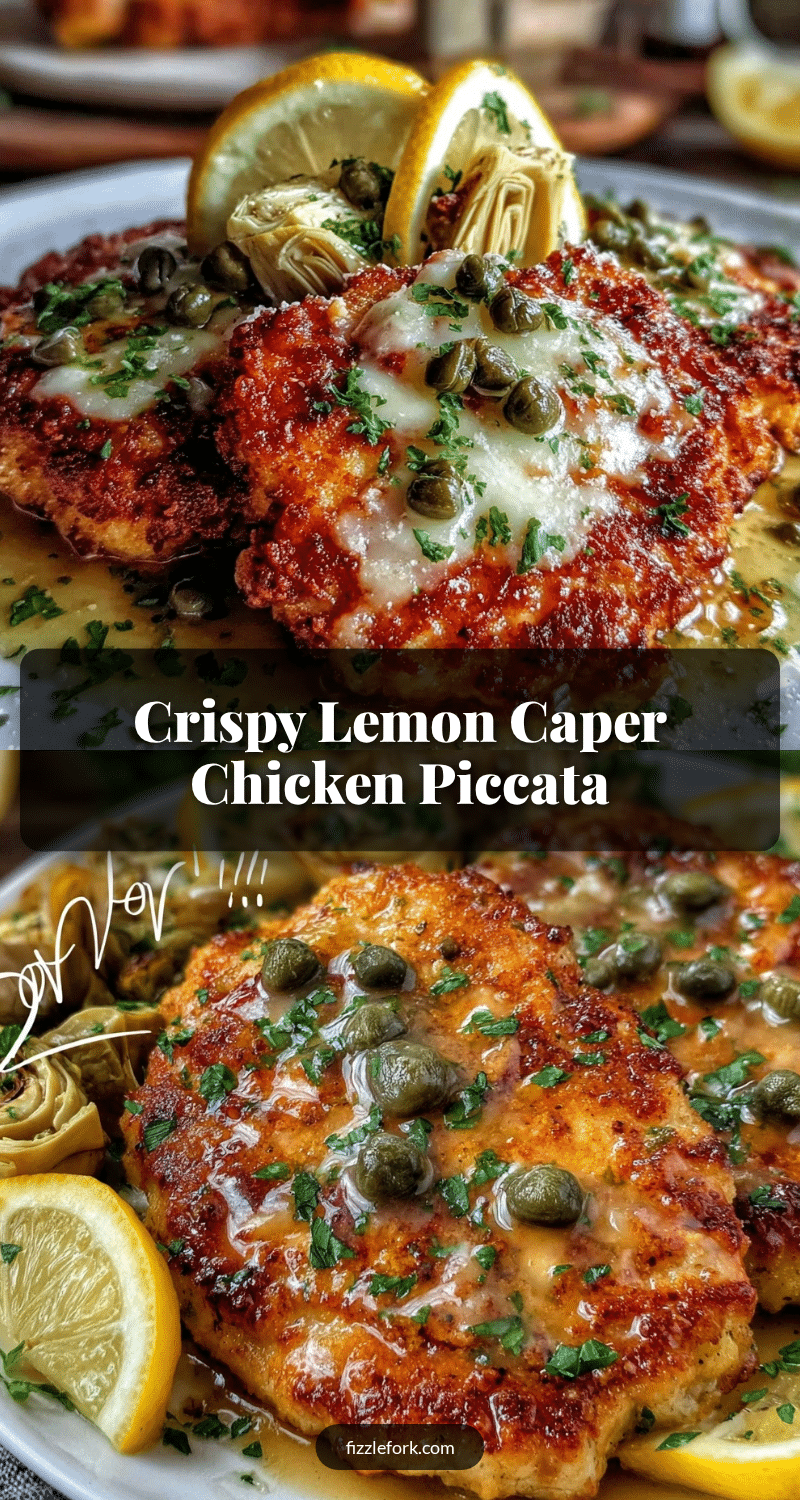
Crispy Baked Chicken Piccata Recipe Easy Tangy Lemon Caper Sauce

A quick and easy baked chicken piccata with a crispy panko crust and a bright, tangy lemon caper sauce that tastes like it was fried but without the mess.
- Prep Time: 10 minutes
- Cook Time: 20 minutes
- Total Time: 30 minutes
- Yield: 2 servings 1x
- Category: Main Course
- Cuisine: Italian-American
Ingredients
- 2 boneless, skinless chicken breasts, pounded to 1/2 inch thickness
- 1 cup panko breadcrumbs (Japanese-style recommended)
- 1/4 cup freshly grated Parmesan cheese
- 1 teaspoon garlic powder
- 1/2 teaspoon salt
- 1/2 teaspoon black pepper
- Olive oil spray or light brushing
- 3 tablespoons unsalted butter
- 2 garlic cloves, minced
- 1/2 cup chicken broth or white wine
- Juice of 1 fresh lemon
- 2 tablespoons drained capers
- Thin lemon slices for garnish
- Chopped fresh parsley for garnish
- Optional: pinch of red pepper flakes
Instructions
- Preheat your oven to 425°F (220°C).
- Place each chicken breast between two sheets of plastic wrap or parchment paper and pound to about 1/2 inch thickness using a meat mallet or rolling pin.
- In a shallow bowl, combine panko breadcrumbs, Parmesan cheese, garlic powder, salt, and black pepper. Mix well.
- Lightly spray or brush both sides of the chicken breasts with olive oil. Press each breast firmly into the breadcrumb mixture, coating both sides evenly. Set aside on a plate.
- Arrange chicken on a wire rack over a rimmed baking sheet to allow air circulation. If no wire rack is available, place directly on a lightly greased baking sheet and plan to flip halfway through baking.
- Bake for 18-20 minutes, flipping halfway if not using a wire rack, until chicken is golden brown and reaches an internal temperature of 165°F (74°C).
- While chicken bakes, prepare the sauce: In a skillet over medium heat, melt butter. Add minced garlic and sauté for 30 seconds until fragrant.
- Deglaze the pan with chicken broth or white wine, scraping up browned bits. Simmer for 2-3 minutes until slightly reduced.
- Stir in lemon juice and capers. Simmer another 2 minutes to meld flavors.
- Finish the sauce by stirring in 1 tablespoon of butter until melted and silky. Season with salt and pepper to taste.
- Serve chicken immediately, spooning over lemon caper sauce and garnishing with lemon slices and chopped parsley.
Notes
Use a wire rack for crispier chicken crust. Pounding chicken to even thickness ensures uniform cooking. Toast panko lightly for extra crunch. Watch oven temperature carefully to avoid drying out chicken. Let chicken rest 3-5 minutes after baking. For gluten-free, substitute panko with almond flour. For dairy-free, use vegan butter or olive oil and nutritional yeast instead of Parmesan.
Nutrition
- Serving Size: 1 chicken breast wit
- Calories: 375
- Sugar: 1
- Sodium: 600
- Fat: 15
- Saturated Fat: 7
- Carbohydrates: 12
- Fiber: 1.5
- Protein: 40
Keywords: chicken piccata, baked chicken, crispy chicken, lemon caper sauce, easy dinner, weeknight meal, panko crust


