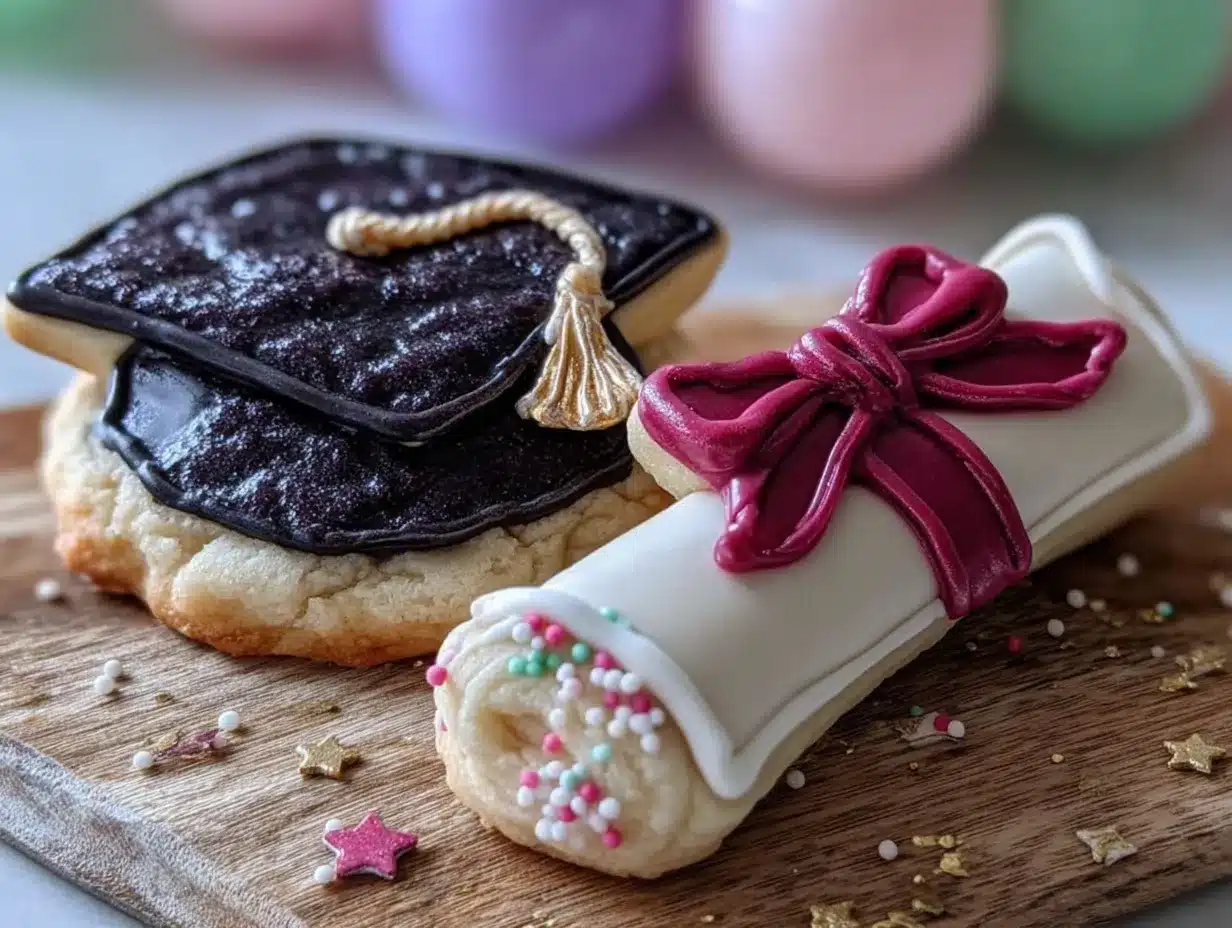
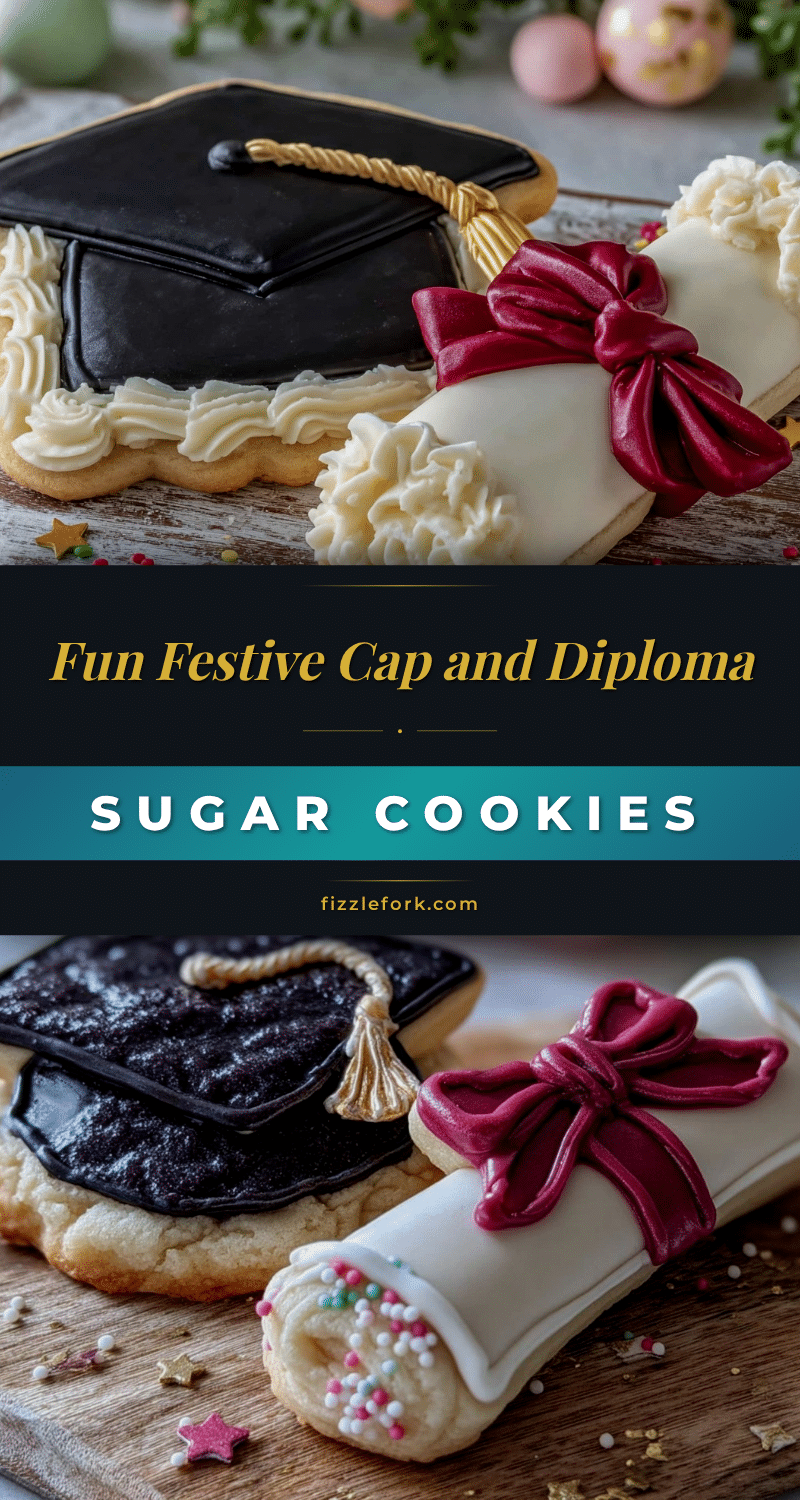
“Can you believe we’re actually doing this?” My sister’s voice crackled with a mix of nerves and excitement as we stared down at the pile of sugar cookies shaped like graduation caps and diplomas. It was late evening, the kitchen light casting soft shadows across the counter cluttered with piping bags, gel colors, and sprinkles. Honestly, I wasn’t sure if these cookies were going to look anywhere near “perfect,” but there we were, determined to make the celebration a little sweeter with a Perfect Cap and Diploma Sugar Cookie Decorating Set for Graduation.
It all started when last-minute plans to throw a small graduation party collided with my usual last-minute baking hustle. I’m not really a baker, but these cookies felt like a fun way to mark the moment, especially since my niece was graduating high school. What began as a cautious experiment quickly turned into a bit of an obsession—batches after batches, tweaking shades of icing and piping techniques, until those caps and diplomas looked like they belonged in a bakery window.
The smell of vanilla and sugar, the sight of those tiny details—the tassels, the scroll ribbons—somehow made all the chaos worthwhile. If you’re thinking this is just another cookie decorating post, well, it’s not. It’s the story of how a simple decorating set helped us turn a modest kitchen into a celebration hub, and how these cookies became the sweetest part of graduation day. And if you’re curious why these sugar cookies might just become your go-to graduation treat, stick around.
Why You’ll Love This Recipe
From my experience, this Perfect Cap and Diploma Sugar Cookie Decorating Set is the real deal when it comes to combining fun, flavor, and festive flair for graduation celebrations. I’ve tested these cookies through the chaos of party prep and the calm of quiet kitchen nights. Here’s why they stand out:
- Quick & Easy: They come together in under 90 minutes, which is a lifesaver when you’re juggling last-minute party details.
- Simple Ingredients: No need for fancy or hard-to-find items—you probably already have most of these in your pantry.
- Perfect for Graduation Parties: Whether it’s a backyard bash or a casual family hangout, these cookies fit right in.
- Crowd-Pleaser: Kids and adults both love them, and honestly, they’re a conversation starter thanks to their cute designs.
- Unbelievably Delicious: The soft, buttery texture paired with smooth royal icing makes them a comfort food with a festive twist.
What makes this recipe different? The decorating set includes cookie cutters shaped like caps and diplomas, plus step-by-step decorating guides that even a “not really a baker” type like me can follow without stress. The icing recipe strikes a perfect balance—not too runny, not too stiff—allowing for those tiny tassel details and smooth finishes. Plus, you can swap in almond or coconut flour for a gluten-free option, which I tried for a friend’s dietary needs with great results.
This isn’t just about cookies; it’s about creating little edible keepsakes that say, “You did it!” with every bite. And honestly, after the first batch, I understood why people keep coming back to decorating sets like this—they make celebration sweet and personal.
What Ingredients You Will Need
This recipe uses simple, wholesome ingredients to deliver bold flavor and a satisfying texture without the fuss. Most are pantry staples, and substitutions are easy if you need them.
- For the Sugar Cookie Dough:
- 2 ¾ cups (345 grams) all-purpose flour, sifted (or almond flour for gluten-free)
- 1 teaspoon baking powder
- ½ teaspoon salt
- 1 cup (227 grams) unsalted butter, softened (I prefer Kerrygold for richness)
- 1 ½ cups (300 grams) granulated sugar
- 1 large egg, room temperature
- 1 ½ teaspoons vanilla extract
- 1 teaspoon almond extract (optional, adds a subtle depth)
- For the Royal Icing:
- 4 cups (480 grams) powdered sugar, sifted
- 3 tablespoons meringue powder
- 9-10 tablespoons warm water
- Gel food coloring (black, white, gold, and any accent colors you want)
- Decorating Tools & Accents:
- Graduation cap and diploma cookie cutters (included in the decorating set)
- Piping bags and tips (#1 or #2 tips for fine lines)
- Edible gold dust or shimmer (optional for diploma ribbons)
- Sprinkles or edible pearls for extra flair
For the best cookie texture, make sure your butter is soft but not melted. When coloring the royal icing, a little gel goes a long way—start small to avoid overly vibrant shades. And if you want to swap Greek yogurt for some moisture in the dough, check out my cozy crockpot potato soup recipe for tips on balancing wet ingredients in baking.
Equipment Needed
You don’t need a fancy setup to get these cookies looking great. Here’s what I used and recommend:
- Mixing bowls (one large for dough, one for icing)
- Electric hand mixer or stand mixer (makes dough and icing easier, but you can mix by hand)
- Rolling pin (a silicone one helps prevent sticking)
- Graduation cap and diploma cookie cutters (the star of the set)
- Baking sheets lined with parchment paper or silicone mats
- Piping bags and fine round tips (#1 or #2 tips)
- Small spatula or butter knife for smoothing icing
If you don’t have piping tips, you can snip the corner of a plastic baggie for DIY piping. I once used a zip-top bag in a pinch—it works, but not as neatly! For budget-friendly options, silicone mats can often be found at local dollar stores, and they’re a game-changer for cleanup and even baking.
Preparation Method
- Make the Dough: In a medium bowl, whisk together 2 ¾ cups (345g) flour, 1 tsp baking powder, and ½ tsp salt. Set aside. In your mixing bowl, cream 1 cup (227g) softened butter with 1 ½ cups (300g) sugar until light and fluffy (about 3-4 minutes). Add 1 egg, 1 ½ tsp vanilla, and 1 tsp almond extract; mix until combined. Slowly add the dry ingredients and mix on low until dough forms. If too sticky, add a tablespoon of flour at a time.
- Chill the Dough: Divide dough into two discs, wrap in plastic wrap, and chill in the fridge for at least 1 hour (or up to overnight). This step is key for clean cookie shapes and less spreading during baking.
- Preheat Oven & Prepare Baking Sheets: Preheat to 350°F (175°C). Line baking sheets with parchment paper or silicone mats.
- Roll and Cut: On a lightly floured surface, roll dough to about ¼ inch (6mm) thickness. Use the graduation cap and diploma cookie cutters to cut shapes. Transfer carefully to baking sheets, spacing about 1 inch apart.
- Bake: Bake for 8-10 minutes until edges just start to turn golden. Watch closely—overbaking leads to hard cookies. Let cookies cool completely on wire racks before decorating.
- Prepare Royal Icing: In a clean bowl, combine 4 cups (480g) powdered sugar, 3 tbsp meringue powder. Add 9-10 tbsp warm water gradually, mixing on medium speed until stiff peaks form (about 5 minutes). Divide icing into bowls, tint with gel colors as desired.
- Decorate: Fill piping bags with colored icing. Outline caps in black or dark color and flood with a thinner consistency. Use white or gold to pipe diploma details and tassels. Let each layer dry for about 20 minutes before adding details to prevent colors bleeding.
- Finishing Touches: Add edible gold dust to diploma ribbons or sprinkle tiny pearls on caps for that extra touch. Let the cookies dry completely for at least 4 hours or overnight before stacking or packaging.
Pro tip: If your icing gets too thick while decorating, add a drop of water and mix well. And if you want to speed up drying, a fan set on low can help, but don’t rush or the icing might crack. I always make a test cookie first to adjust icing consistency before going full batch. It saved me from a runny disaster once!
Cooking Tips & Techniques
Decorating sugar cookies can feel a little intimidating, but a few tricks go a long way:
- Don’t Skip Chilling: Chilling the dough is non-negotiable for sharp cookie edges and less spreading. Without it, your caps might look more like blobs.
- Consistent Rolling Thickness: Use rolling pin guides or bands to keep your dough even. Uneven cookies bake unevenly, which messes with decorating.
- Royal Icing Consistency: You want two consistencies: thicker for outlines, thinner for flooding. Test by dragging a spoon through the icing—if it flows back smoothly in 10 seconds, it’s flood consistency.
- Layering Icing: Let each layer dry completely before adding the next. I learned this the hard way when my colors bled into each other.
- Patience Is Key: I know, it’s tempting to rush. But letting your cookies dry fully before handling prevents smudges and cracks. Sometimes it means overnight waits, which is worth it.
When I first tried decorating, I struggled with shaky hands and uneven lines. What helped was resting my elbows on the counter, and using a toothpick for fixing small mistakes. Also, don’t underestimate the power of a good piping bag grip—holding it like a pencil gives better control.
Variations & Adaptations
These cookies are a blank canvas for your creativity. Here are a few ways I’ve mixed things up:
- Dietary Options: Swap all-purpose flour with almond or oat flour for gluten-free versions. Use dairy-free butter and coconut yogurt to make vegan-friendly cookies.
- Flavor Twists: Add lemon zest or almond extract to the dough for a subtle flavor lift. I once added a touch of cinnamon for a cozy fall graduation party.
- Color Variations: Customize the icing colors to match school colors or party themes. Navy and gold look classy, while bright pastels add a fun vibe.
- Alternative Decorations: Use edible markers to add names or graduation years on the diplomas. Or sprinkle colored sanding sugar instead of royal icing for a crunchy texture.
- Different Shapes: Try incorporating other graduation-themed shapes like stars or books using cookie cutters from your collection. If you want more inspiration, check out my loaded potato skins recipe for fun party snack ideas that pair well with these cookies.
One time I used a no-bake chocolate ganache as a filling between two cookies for a sandwich cookie treat—rich but totally worth it.
Serving & Storage Suggestions
These decorated sugar cookies are best served at room temperature so the icing isn’t too hard or sticky. Arrange them on a platter with some fresh fruit or alongside a pitcher of lemonade for a light, festive spread.
They also make excellent party favors—wrap individually in cellophane tied with ribbon matching your graduation colors. If you’re looking for more savory party dishes to balance the sweets, the slow cooker buffalo chicken dip is always a hit with guests.
To store, keep cookies in an airtight container at room temperature for up to 5 days. For longer storage, freeze undecorated cookies wrapped well in plastic wrap and foil. Decorated cookies freeze okay but can be delicate—freeze them flat and separate layers with parchment paper.
Reheat frozen cookies by letting them thaw at room temperature. Flavors mellow and actually develop a little after a day or so, so if you can, make them a day ahead. Just don’t stash them with anything strong-smelling, or your cookies might pick up odd flavors.
Nutritional Information & Benefits
Each cookie (about 3 inches wide) has roughly 160 calories, 6 grams fat, 25 grams carbs, and 2 grams protein. The butter and sugar give it that classic rich, sweet flavor, while the egg adds protein and moisture.
Using real butter and fresh vanilla extract adds wholesome flavor without artificial ingredients. The royal icing is mostly powdered sugar and meringue powder, which is egg-white based, adding a bit of protein and structure.
For those watching gluten, swapping to almond flour makes this recipe gluten-free, and using natural food colorings keeps it free from artificial dyes. While these aren’t exactly health food, they’re a special occasion treat that feels homemade and thoughtful.
Conclusion
These Perfect Cap and Diploma Sugar Cookies are more than just dessert—they’re a way to mark a milestone with a personal touch. Whether you’re a seasoned baker or a first-timer, this decorating set makes it doable and fun, turning simple cookies into keepsakes. I love how these cookies bring a little joy to the chaos of graduation prep and put smiles on everyone’s faces.
Feel free to play with colors, flavors, and details to make them truly yours. And if you try these cookies, I’d love to hear how your decorating adventure went! Sharing your twists or tips keeps the kitchen fun and inspiring. Here’s to sweet celebrations and moments worth savoring.
FAQs About Perfect Cap and Diploma Sugar Cookie Decorating Set
Can I make the dough ahead of time?
Yes! The dough can be made and refrigerated up to 3 days ahead or frozen for up to 3 months. Just thaw in the fridge overnight before rolling.
How do I prevent royal icing from cracking?
Keep the icing covered when not in use, and let each layer dry at room temperature without rushing. Adding a few drops of corn syrup can make the icing more flexible.
What if I don’t have cookie cutters shaped like caps or diplomas?
You can use cookie cutters of similar shapes like squares or rectangles for diplomas and triangles or hats for caps. Alternatively, cut shapes freehand with a knife on rolled dough.
Can I freeze decorated cookies?
It’s best to freeze undecorated cookies. If freezing decorated ones, place them flat, separated by parchment paper, and thaw fully before serving.
What’s the best way to color royal icing?
Gel food coloring works best because it doesn’t thin the icing. Start with a tiny amount and add more to reach your desired shade.
Pin This Recipe!
Perfect Cap and Diploma Sugar Cookie Decorating Set 5 Easy Graduation Ideas

Celebrate graduation with these soft, buttery sugar cookies shaped like caps and diplomas, decorated with smooth royal icing for a festive and personal touch.
- Prep Time: 20 minutes
- Cook Time: 10 minutes
- Total Time: 1 hour 30 minutes
- Yield: 24 cookies 1x
- Category: Dessert
- Cuisine: American
Ingredients
- 2 ¾ cups (345 grams) all-purpose flour, sifted (or almond flour for gluten-free)
- 1 teaspoon baking powder
- ½ teaspoon salt
- 1 cup (227 grams) unsalted butter, softened
- 1 ½ cups (300 grams) granulated sugar
- 1 large egg, room temperature
- 1 ½ teaspoons vanilla extract
- 1 teaspoon almond extract (optional)
- 4 cups (480 grams) powdered sugar, sifted
- 3 tablespoons meringue powder
- 9–10 tablespoons warm water
- Gel food coloring (black, white, gold, and any accent colors)
- Graduation cap and diploma cookie cutters
- Piping bags and tips (#1 or #2 tips)
- Edible gold dust or shimmer (optional)
- Sprinkles or edible pearls (optional)
Instructions
- Make the Dough: In a medium bowl, whisk together flour, baking powder, and salt. In a mixing bowl, cream softened butter with sugar until light and fluffy. Add egg, vanilla, and almond extract; mix until combined. Slowly add dry ingredients and mix until dough forms. Add flour if too sticky.
- Chill the Dough: Divide dough into two discs, wrap in plastic wrap, and chill in the fridge for at least 1 hour or overnight.
- Preheat Oven & Prepare Baking Sheets: Preheat oven to 350°F (175°C). Line baking sheets with parchment paper or silicone mats.
- Roll and Cut: Roll dough to about ¼ inch thickness on a lightly floured surface. Use cookie cutters to cut shapes. Transfer to baking sheets, spacing 1 inch apart.
- Bake: Bake for 8-10 minutes until edges start to turn golden. Cool completely on wire racks before decorating.
- Prepare Royal Icing: Combine powdered sugar and meringue powder in a bowl. Gradually add warm water while mixing until stiff peaks form (about 5 minutes). Divide and tint with gel colors.
- Decorate: Fill piping bags with colored icing. Outline caps in black or dark color and flood with thinner consistency. Use white or gold for diploma details and tassels. Let each layer dry about 20 minutes before adding more details.
- Finishing Touches: Add edible gold dust or sprinkle pearls on cookies. Let dry completely for at least 4 hours or overnight before storing or packaging.
Notes
Chill dough for at least 1 hour for clean shapes and less spreading. Use two consistencies of royal icing: thicker for outlines and thinner for flooding. Let each icing layer dry fully before adding the next to prevent bleeding. Add a drop of water if icing thickens while decorating. Use a fan on low to speed drying but avoid cracking. Dough can be made ahead and refrigerated or frozen. Freeze undecorated cookies flat with parchment between layers.
Nutrition
- Serving Size: 1 cookie (about 3 in
- Calories: 160
- Fat: 6
- Carbohydrates: 25
- Protein: 2
Keywords: graduation cookies, sugar cookies, cookie decorating, royal icing, graduation party treats, gluten-free sugar cookies, festive cookies


