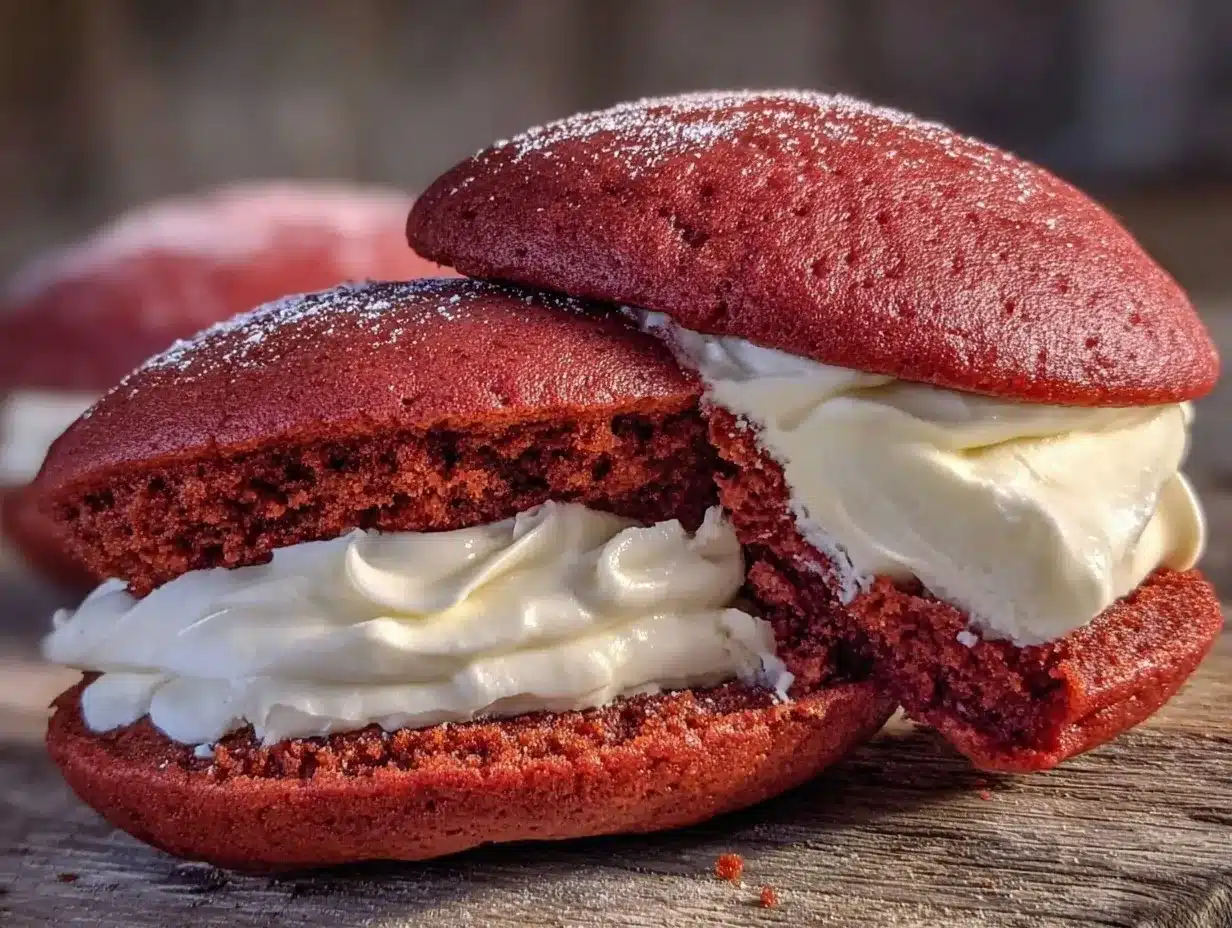
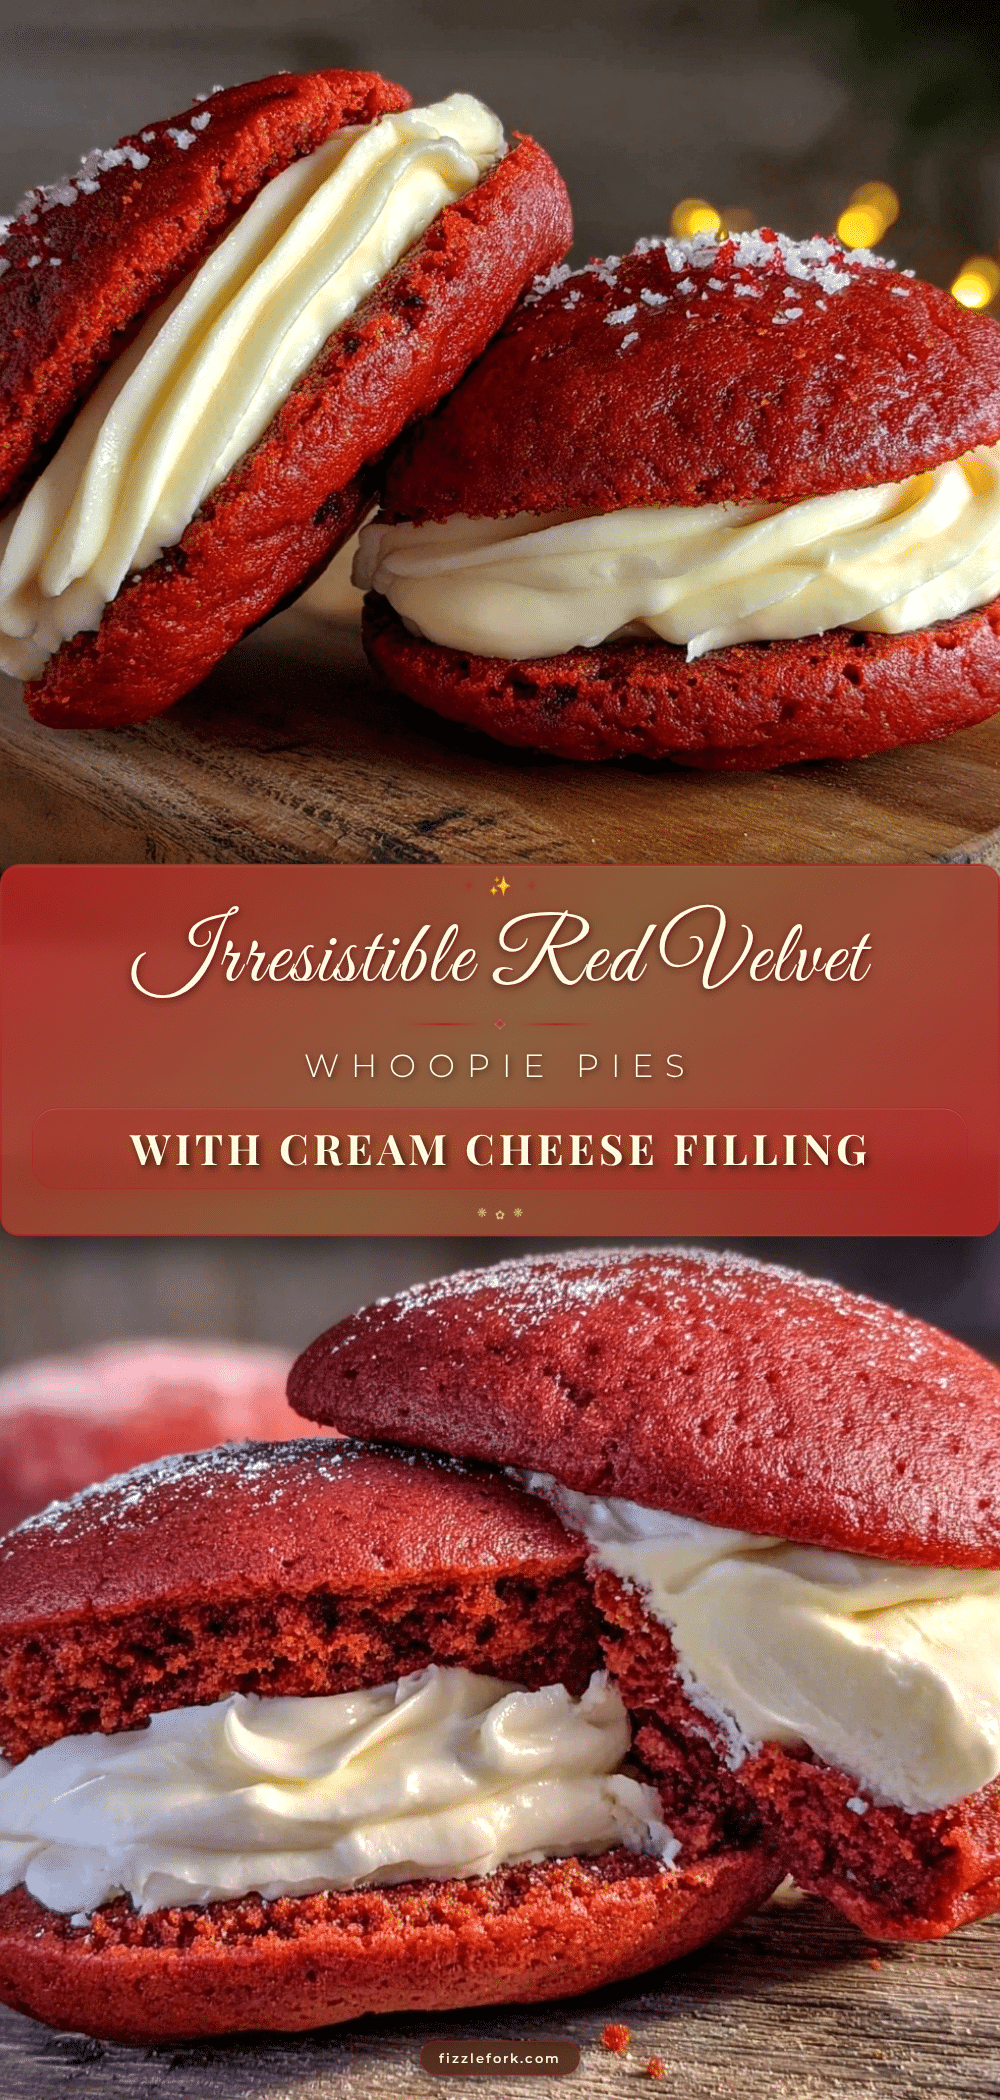
That chilly evening when I first pulled these cozy red velvet whoopie pies from the oven, the whole kitchen smelled like a warm hug. Honestly, I was halfway between giving up on baking for the night and looking for a quick treat to brighten my mood. The red velvet whoopie pies with cream cheese filling weren’t originally planned — I was just trying to use up some leftover cocoa powder and cream cheese in the fridge. But as I bit into one, the soft, tender cakes sandwiching that tangy, silky filling made me pause. You know that moment when a simple dessert unexpectedly feels like a celebration? That’s exactly what happened.
What’s funny is I was skeptical at first. I mean, who hasn’t had a dry red velvet cake disaster before? But these whoopie pies came out so moist, fluffy, and balanced with just the right hint of chocolate and spice. The cream cheese filling? Not your usual heavy frosting — it’s smooth and light, the perfect cozy contrast. Months later, this recipe still gets a spot on my weekend baking list, especially when I want something sweet but not fussy. It’s the kind of treat that makes you linger over coffee, savoring every bite without rushing.
There’s a quiet comfort in these whoopie pies, the kind that feels like wrapping yourself in a soft blanket on a cold day. And that’s why this recipe stuck — it’s simple, dependable, and honestly, a little addictive. If you’re into homemade desserts that feel both special and homey, these red velvet whoopie pies might just become your new go-to.
Why You’ll Love This Recipe
- Quick & Easy: These red velvet whoopie pies come together in about 35 minutes, perfect for busy afternoons or last-minute dessert cravings.
- Simple Ingredients: No trips to specialty stores here — most items are pantry staples like cocoa, flour, and cream cheese.
- Perfect for Cozy Gatherings: Whether it’s an intimate coffee break or a casual family get-together, these treats fit right in.
- Crowd-Pleaser: Kids and adults alike love the tender red velvet cake paired with the creamy filling. I’ve tested this on a few picky eaters, and it got unanimous thumbs up.
- Unbelievably Delicious: The combination of the moist cakes with the tangy, slightly sweet cream cheese filling is what sets these apart from other red velvet desserts.
- What Makes It Different: Instead of a heavy frosting, the filling is whipped to a light, creamy texture that melts in your mouth. Plus, the cakes bake quickly and remain soft without drying out.
- An Emotional Connection: This recipe isn’t just dessert — it’s a cozy moment, a pause in the day, a little joy wrapped in red velvet. It’s my personal reminder that homemade sweets don’t have to be complicated to be memorable.
What Ingredients You Will Need
This recipe uses straightforward, wholesome ingredients to create a bold flavor and soft texture without any fuss. Most of these are kitchen basics you probably already have, and a few tips on selecting them will guarantee the best results.
- All-purpose flour (2 cups / 240 g) – the base for tender cakes; sifted for fluffiness
- Cocoa powder (2 tablespoons / 15 g) – unsweetened, for that classic red velvet hint of chocolate
- Baking soda (1 teaspoon / 5 g) – helps with rise and lightness
- Salt (½ teaspoon / 3 g) – balances sweetness and enhances flavor
- Unsalted butter (½ cup / 113 g), softened – I use Land O’Lakes for a rich, creamy texture
- Granulated sugar (1 cup / 200 g) – for just the right sweetness
- Large egg (1), room temperature – binds and adds moisture
- Buttermilk (¾ cup / 180 ml) – adds tang and tenderness (can substitute with ¾ cup milk + 1 tablespoon vinegar, left to sit 5 minutes)
- Vanilla extract (1 teaspoon / 5 ml) – enhances flavor
- Red food coloring (1 to 2 teaspoons) – I prefer gel food coloring for vibrant color without thinning batter
- Cream cheese (8 ounces / 226 g), softened – the star of the filling, use full-fat for best flavor
- Powdered sugar (1 ½ cups / 180 g) – sweetens and thickens the filling
- Unsalted butter for filling (¼ cup / 57 g), softened – adds smooth richness
- Vanilla extract for filling (½ teaspoon / 2.5 ml) – brings depth to the cream cheese filling
For a seasonal twist, try adding a pinch of cinnamon to the batter or swapping the classic cream cheese filling with a whipped mascarpone for a richer taste. If you need a dairy-free option, almond or coconut yogurt can replace buttermilk, and vegan cream cheese works well for the filling. I’ve found that small-curd cream cheese creates the smoothest texture in the filling, so watch out for grainy alternatives.
Equipment Needed
- Mixing bowls – one large for the batter, one medium for the filling
- Electric mixer or stand mixer – highly recommended for smooth, lump-free batter and fluffy filling (hand mixer works okay too but takes longer)
- Measuring cups and spoons – precise measurements make a difference, especially with baking soda and cocoa
- Rubber spatula – for folding ingredients gently without deflating batter
- Baking sheet – lined with parchment paper or silicone baking mat for easy release
- Cooling rack – to cool whoopie pie cakes evenly
- Spoon or cookie scoop – to portion batter consistently, a small ice cream scoop works perfectly
If you don’t have a stand mixer, no worries—just be patient with the hand mixer to get a smooth filling. Silicone mats are a game-changer for cleanup and preventing sticking; I keep mine for all my baking projects, including when making blueberry cheesecake bars. For budget-friendly options, standard parchment paper does the trick.
Preparation Method
- Preheat your oven to 350°F (175°C). Line two baking sheets with parchment paper or silicone mats. This ensures the whoopie pies bake evenly and don’t stick.
- Mix dry ingredients: In a medium bowl, sift together 2 cups (240 g) all-purpose flour, 2 tablespoons (15 g) cocoa powder, 1 teaspoon (5 g) baking soda, and ½ teaspoon (3 g) salt. Set aside. Sifting helps avoid lumps and ensures a light texture.
- Cream butter and sugar: In a large bowl, beat ½ cup (113 g) softened unsalted butter and 1 cup (200 g) granulated sugar with an electric mixer on medium speed until light and fluffy, about 3-4 minutes. This step is key for tender cakes.
- Add egg and vanilla: Beat in 1 large egg (room temperature) and 1 teaspoon (5 ml) vanilla extract until fully combined.
- Incorporate red food coloring: Add 1 to 2 teaspoons of gel red food coloring and mix well until the batter turns a vibrant red. Adjust amount for desired shade.
- Alternate adding dry ingredients and buttermilk: Starting and ending with the dry ingredients, add the flour mixture in three parts, alternating with ¾ cup (180 ml) buttermilk. Mix on low speed just until incorporated after each addition. Overmixing can make the cakes tough.
- Portion batter: Using a spoon or cookie scoop, drop rounded tablespoons of batter onto the prepared baking sheets, spacing them about 2 inches apart. Each should be roughly 1 ½ inches in diameter — you want little cake rounds that will pair perfectly with the filling.
- Bake: Bake in the preheated oven for 10-12 minutes, or until the tops spring back lightly when touched and a toothpick inserted in the center comes out clean. Don’t overbake; you want them soft, not dry.
- Cool: Remove from oven and let the cakes cool on the baking sheets for 5 minutes, then transfer to a wire rack to cool completely. Cooling is crucial before filling to avoid melting the cream cheese.
- Prepare the filling: In a medium bowl, beat 8 ounces (226 g) softened cream cheese and ¼ cup (57 g) softened unsalted butter together until smooth and creamy. Gradually add 1 ½ cups (180 g) powdered sugar, then beat in ½ teaspoon (2.5 ml) vanilla extract. If the filling is too soft, chill for 10-15 minutes to firm up.
- Assemble: Pair the cooled cakes by size. Spread or pipe about 2 tablespoons of the cream cheese filling onto the flat side of one cake, then sandwich with the other. Press gently to spread filling evenly to the edges.
- Serve or chill: These whoopie pies can be enjoyed immediately or refrigerated for a firmer texture. Cover and chill if storing to keep filling fresh.
Pro tip: If your oven runs hot, rotate the baking sheets halfway through baking for even color. Also, when portioning batter, keeping the size consistent helps with uniform baking and pairing.
Cooking Tips & Techniques
One thing I’ve learned over the years is that the texture of these red velvet whoopie pies hinges on gentle mixing. Overmixing the batter leads to denser cakes, so fold in dry ingredients carefully. Also, letting your butter and cream cheese soften properly before mixing the filling makes all the difference — no gritty lumps allowed here!
Another tip is to use gel food coloring instead of liquid. It gives you a rich red without watering down the batter. I’ve tried natural colorings like beet juice, but they don’t quite get that classic red velvet pop.
When baking, watch the pies closely after the 10-minute mark. They bake fast and can dry out if left too long. It’s better to slightly underbake than overbake because the cakes continue to set as they cool.
Multitasking tip: While the pies cool, whip up the cream cheese filling so everything comes together smoothly. If your filling feels too soft to spread easily, a quick chill in the fridge helps it firm up without losing creaminess.
Lastly, don’t skip the cooling step before filling; warm cakes will melt the cream cheese, making a mess. Patience here leads to neat, picture-perfect whoopie pies every time.
Variations & Adaptations
- Chocolate Whoopie Pies: Swap the cocoa powder with an equal amount of Dutch-process cocoa for a deeper chocolate flavor. This works beautifully if you want a richer twist on the classic red velvet version.
- Gluten-Free Option: Use a gluten-free all-purpose flour blend in place of regular flour. Make sure it contains xanthan gum for structure. The texture will be slightly different but still delicious.
- Seasonal Spice Twist: Add ½ teaspoon of cinnamon and a pinch of nutmeg to the dry ingredients. This gives the whoopie pies a cozy, autumnal vibe that’s wonderful around the holidays.
- Vegan Adaptation: Replace butter with vegan margarine, use flax egg (1 tablespoon ground flaxseed + 3 tablespoons water) for the egg substitute, and swap cream cheese with a plant-based cream cheese alternative. It’s surprisingly good!
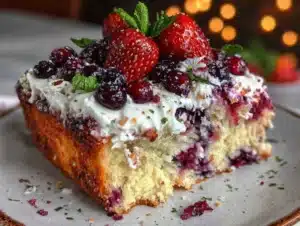
- Fruity Filling: Mix 2 tablespoons of pureed raspberries or strawberries into the cream cheese filling for a fresh, fruity burst. This pairs well if you’re serving them alongside summer berry desserts.
One of my favorite personal tweaks is adding a teaspoon of espresso powder to the batter. It’s subtle but brings out the chocolate notes in the cocoa, making the whoopie pies feel a bit more grown-up.
Serving & Storage Suggestions
These red velvet whoopie pies are best served at room temperature. Let them sit out for about 20 minutes after removing from the fridge to soften the filling slightly for the perfect bite. They look adorable stacked on a pretty platter — great for sharing over tea or coffee.
They pair wonderfully with a creamy latte or a simple glass of cold milk. For a festive occasion, consider serving them alongside a slice of red velvet flag cake to keep the theme going.
Store leftover whoopie pies in an airtight container in the refrigerator for up to 4 days. If you want to freeze them, wrap each pie individually in plastic wrap and place in a freezer-safe container or bag. Thaw overnight in the fridge and bring to room temperature before serving.
Flavors mellow and meld nicely when chilled, so sometimes I make them a day ahead. Just be sure to keep them covered to prevent the cakes from drying out.
Nutritional Information & Benefits
Each cozy red velvet whoopie pie contains roughly 250-300 calories, depending on the size, with about 10 grams of fat, 35 grams of carbohydrates, and 3 grams of protein. The cream cheese filling adds calcium and some protein, making it a bit more satisfying than a plain cookie.
Key ingredients like cocoa powder are rich in antioxidants, and buttermilk contributes beneficial probiotics and calcium. While this dessert is indulgent, it’s made with real ingredients and no artificial preservatives, which makes it a better choice than many store-bought treats.
For those watching gluten or dairy, the recipe can be adapted to fit gluten-free or vegan diets with simple swaps, broadening its appeal without losing flavor or texture.
Conclusion
Cozy red velvet whoopie pies with cream cheese filling are a little slice of homemade happiness that doesn’t require hours in the kitchen. They’re soft, flavorful, and pleasantly light thanks to the whipped filling. Whether you’re baking for a quiet night in or a casual get-together, these treats offer a comforting sweetness that feels effortless yet special.
I love how this recipe is both familiar and a bit playful — like a dessert that invites you to slow down and enjoy the little moments. Feel free to tweak the filling thickness or try one of the variations to make it your own. I’m always curious about what creative spins others come up with, so if you try these, don’t hesitate to share your thoughts or adaptations.
Here’s to many cozy baking sessions and sweet smiles with these delightful whoopie pies!
FAQs
What makes a whoopie pie different from a regular cupcake?
Whoopie pies are essentially two soft, cake-like cookies sandwiched with a creamy filling, whereas cupcakes are single cakes topped with frosting. The texture of whoopie pies is often denser and softer, making them perfect for handheld treats.
Can I prepare the red velvet whoopie pies ahead of time?
Yes! You can bake the cakes a day ahead and store them in an airtight container at room temperature or in the fridge. Assemble the pies right before serving for the freshest texture, or make them fully assembled and keep refrigerated for up to 4 days.
How do I prevent the cream cheese filling from being too runny?
Make sure your cream cheese and butter are softened but not melted. Gradually add powdered sugar and whip until thick and fluffy. If it’s still too soft, chilling the filling for 10-15 minutes helps it firm up nicely.
Can I freeze the whoopie pies?
Absolutely. Wrap each assembled whoopie pie tightly in plastic wrap and store in a freezer-safe bag or container. Thaw in the refrigerator overnight and bring to room temperature before enjoying.
Are there any good substitutes for buttermilk in this recipe?
If you don’t have buttermilk, mix ¾ cup (180 ml) milk with 1 tablespoon of white vinegar or lemon juice. Let it sit for 5 minutes before using. This mimics the tang and acidity that buttermilk provides, helping tenderize the cakes.
Pin This Recipe!
Red Velvet Whoopie Pies Recipe Easy Homemade Cream Cheese Filling

Soft, moist red velvet whoopie pies with a light, tangy cream cheese filling that’s perfect for cozy gatherings and quick baking sessions.
- Prep Time: 15 minutes
- Cook Time: 12 minutes
- Total Time: 35 minutes
- Yield: 12 servings 1x
- Category: Dessert
- Cuisine: American
Ingredients
- 2 cups (240 g) all-purpose flour
- 2 tablespoons (15 g) unsweetened cocoa powder
- 1 teaspoon (5 g) baking soda
- ½ teaspoon (3 g) salt
- ½ cup (113 g) unsalted butter, softened
- 1 cup (200 g) granulated sugar
- 1 large egg, room temperature
- ¾ cup (180 ml) buttermilk (or ¾ cup milk + 1 tablespoon vinegar, left to sit 5 minutes)
- 1 teaspoon (5 ml) vanilla extract
- 1 to 2 teaspoons red gel food coloring
- 8 ounces (226 g) cream cheese, softened
- 1 ½ cups (180 g) powdered sugar
- ¼ cup (57 g) unsalted butter for filling, softened
- ½ teaspoon (2.5 ml) vanilla extract for filling
Instructions
- Preheat your oven to 350°F (175°C). Line two baking sheets with parchment paper or silicone mats.
- In a medium bowl, sift together flour, cocoa powder, baking soda, and salt. Set aside.
- In a large bowl, beat softened butter and granulated sugar with an electric mixer on medium speed until light and fluffy, about 3-4 minutes.
- Beat in the egg and vanilla extract until fully combined.
- Add red food coloring and mix until the batter turns vibrant red.
- Alternately add the dry ingredients and buttermilk in three parts, starting and ending with the dry ingredients. Mix on low speed just until incorporated after each addition.
- Using a spoon or cookie scoop, drop rounded tablespoons of batter onto the prepared baking sheets, spacing about 2 inches apart.
- Bake for 10-12 minutes, or until tops spring back lightly and a toothpick inserted comes out clean.
- Cool cakes on baking sheets for 5 minutes, then transfer to a wire rack to cool completely.
- Prepare the filling by beating cream cheese and softened butter until smooth and creamy. Gradually add powdered sugar, then beat in vanilla extract. Chill if too soft.
- Pair cooled cakes by size. Spread or pipe about 2 tablespoons of filling onto one cake and sandwich with the other. Press gently to spread filling evenly.
- Serve immediately or refrigerate for a firmer texture. Cover and chill if storing.
Notes
Use gel food coloring for vibrant red without thinning the batter. Avoid overmixing to keep cakes tender. Chill filling if too soft before assembling. Rotate baking sheets halfway if oven runs hot. Let cakes cool completely before filling to prevent melting.
Nutrition
- Serving Size: 1 whoopie pie
- Calories: 275
- Sugar: 25
- Sodium: 210
- Fat: 11
- Saturated Fat: 6
- Carbohydrates: 35
- Fiber: 1
- Protein: 3
Keywords: red velvet, whoopie pies, cream cheese filling, easy dessert, homemade, quick baking, cozy treats