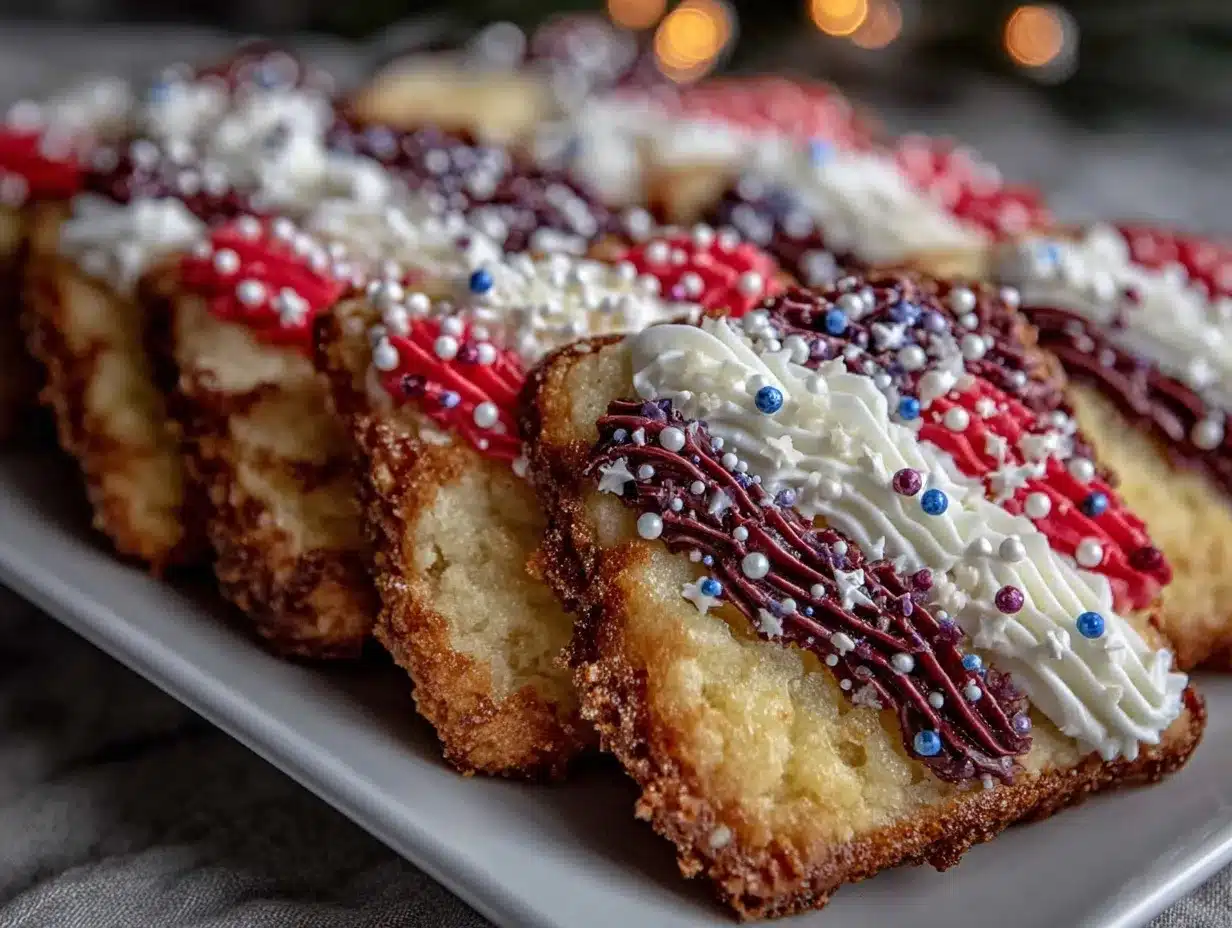
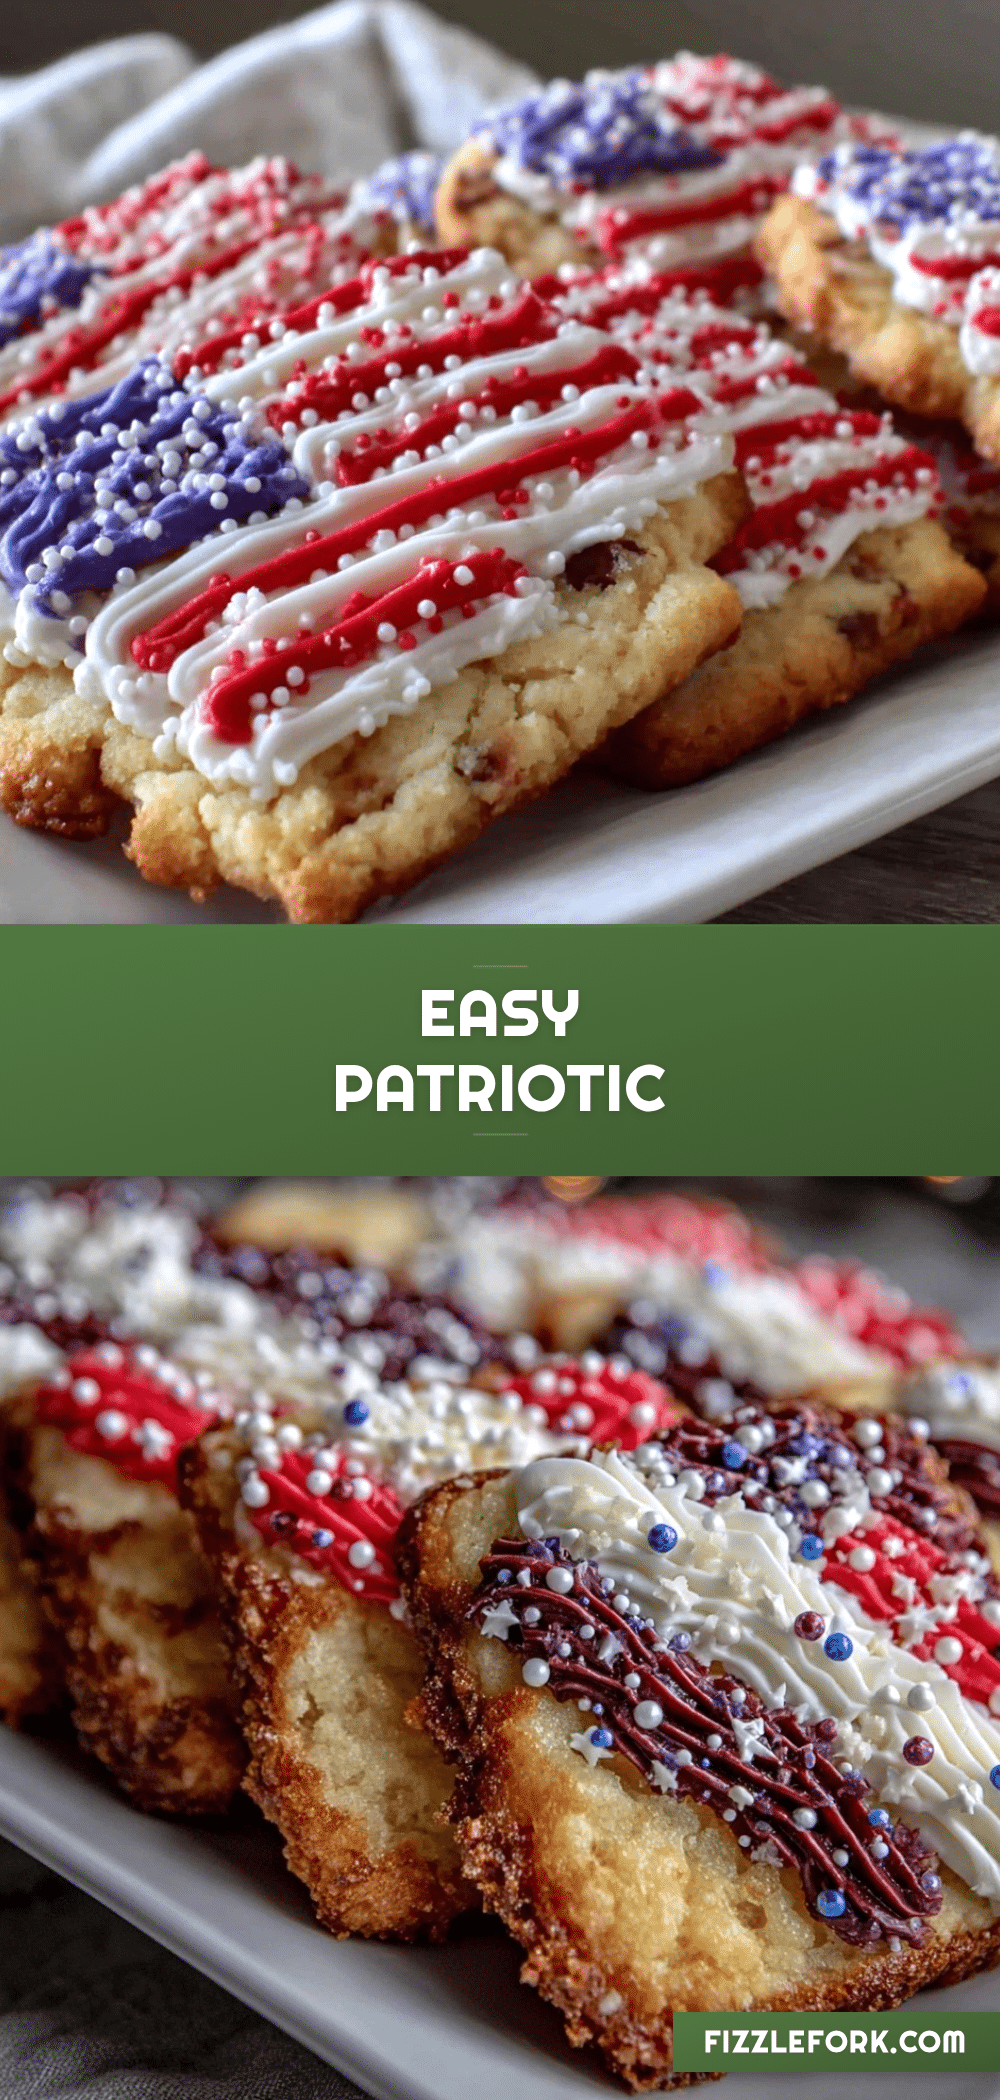
The kitchen smelled like a sugar-sweet parade as I rolled out dough on a sunlit afternoon, with the radio humming quietly in the background. I wasn’t planning anything fancy—just a quick dessert for a last-minute neighborhood barbecue. Honestly, I was skeptical about tackling royal icing, you know, the kind that looks intimidating with all those fancy piping bags and precise lines. But with a simple cookie cutter and a handful of staple ingredients, these easy patriotic flag sugar cookies came together faster than I expected. What started as a casual, “Let’s just try this” ended up being the star of the party, with neighbors asking for the recipe on the spot. The crisp edges, the vibrant red, white, and blue icing—it all just clicked, making me realize that sometimes the best recipes come from that relaxed, no-pressure cooking vibe. These cookies didn’t just decorate the table; they brought a little sparkle and smiles that stuck with me long after the last crumb was gone.
Why You’ll Love This Recipe
This easy patriotic flag sugar cookies recipe with royal icing has been a staple in my summer celebrations, and here’s why I keep coming back to it:
- Quick & Easy: The dough mixes up in 10 minutes, and the royal icing is surprisingly simple to make, perfect for busy weekends or spontaneous get-togethers.
- Simple Ingredients: No need for fancy specialty items—everything you need is probably tucked away in your pantry or fridge already.
- Perfect for Summer Holidays: Whether it’s July 4th, Memorial Day, or any patriotic event, these cookies bring that festive vibe with zero fuss.
- Crowd-Pleaser: Kids love decorating them, and adults appreciate the balance of crisp cookie and smooth icing.
- Unbelievably Delicious: The buttery sugar cookie base combined with the sweet but not-too-sweet royal icing creates a texture and flavor combo that’s pure comfort food.
What sets this recipe apart is the approach to royal icing—it’s not about perfection but about fun and ease, making those iconic flag stripes and stars more approachable. Instead of stressing over complicated piping, I’ve found a way to get that classic look with minimal effort and maximum charm. Honestly, it’s the kind of recipe that feels like a little celebration in every bite, and it’s stuck with me because it’s as much about the memories made while baking as it is about the cookies themselves.
What Ingredients You Will Need
This recipe uses simple, wholesome ingredients to deliver bold flavor and satisfying texture without the fuss. Most of these are pantry staples, and you can easily swap a few depending on your preferences or what’s on hand.
- For the Sugar Cookies:
- 2 ¾ cups (345g) all-purpose flour (I prefer King Arthur for consistent results)
- 1 teaspoon baking powder
- ½ teaspoon salt
- 1 cup (226g) unsalted butter, softened (room temperature for easy creaming)
- 1 ½ cups (300g) granulated sugar
- 1 large egg, room temperature
- 1 teaspoon pure vanilla extract (fresh is best, but imitation works in a pinch)
- For the Royal Icing:
- 3 cups (360g) powdered sugar, sifted
- 2 large egg whites or 4 tablespoons meringue powder + 5 tablespoons water (for food safety and stability)
- ½ teaspoon cream of tartar (helps with consistency and stability)
- Food coloring: gel-based red and blue (AmeriColor gels are my go-to for vibrant colors)
- Optional: a drop of vanilla or almond extract for flavor in the icing
Feel free to use almond flour for a gluten-free twist on the cookies, but note that texture will be a bit different. For dairy-free, swap the butter with coconut oil (solid, not melted). And if you want to keep it simple, store-bought royal icing mix can work too, though you might miss the homemade freshness.
Equipment Needed
For this recipe, you won’t need anything too fancy, but having the right tools can make your life easier and the cookies look extra special.
- Mixing bowls: A medium and a large one for dough and icing prep.
- Hand mixer or stand mixer: It makes creaming the butter and sugar a breeze, though a sturdy whisk works if you’re patient.
- Rolling pin: For even dough thickness.
- Patriotic flag-shaped cookie cutters or a simple rectangle cutter and a star-shaped cutter for decorations.
- Piping bags or small zip-top bags: For applying royal icing. Snip the tip for control.
- Spoons or toothpicks: For spreading and detailing icing.
- Baking sheets lined with parchment paper or silicone mats to prevent sticking.
If you don’t have piping bags, no stress—zip bags with a tiny corner cut out work just as well. I’ve found that silicone mats are easier to clean and help cookies bake evenly, but parchment is a great budget-friendly choice. Keeping your tools clean and dry is key for royal icing success; moisture can mess with the consistency.
Preparation Method
- Mix Dry Ingredients: In a medium bowl, whisk together 2 ¾ cups (345g) all-purpose flour, 1 teaspoon baking powder, and ½ teaspoon salt. This keeps the leavening and salt evenly distributed. Set aside. (5 minutes)
- Cream Butter and Sugar: Using a mixer, beat 1 cup (226g) softened unsalted butter with 1 ½ cups (300g) granulated sugar until light and fluffy—about 3-4 minutes on medium speed. This step is crucial for tender cookies. (5 minutes)
- Add Egg and Vanilla: Beat in 1 large egg and 1 teaspoon vanilla extract until fully incorporated. The dough will look creamy and smooth. (2 minutes)
- Combine Wet and Dry: Gradually add the flour mixture to the butter mixture, mixing on low speed until just combined. Don’t overmix or the cookies can get tough. The dough should be soft but not sticky. (3-4 minutes)
- Chill the Dough: Form the dough into a disk, wrap in plastic, and refrigerate for at least 1 hour. This step firms it up for easier rolling and helps maintain cookie shape during baking. (60 minutes)
- Roll and Cut: Preheat oven to 350°F (175°C). On a lightly floured surface, roll out dough to roughly ¼ inch (6mm) thickness. Cut into flag shapes or rectangles and stars for decorating. Transfer to baking sheets lined with parchment paper or silicone mats, spacing about 1 inch (2.5 cm) apart. (15-20 minutes)
- Bake: Bake for 8-10 minutes, until edges are lightly golden but centers still soft. The smell here is delightful—like buttery sugar clouds. Cool completely on wire racks before decorating. (8-10 minutes baking + 15 minutes cooling)
- Prepare Royal Icing: In a large bowl, whisk together 3 cups (360g) powdered sugar, 2 large egg whites (or meringue powder and water), and ½ teaspoon cream of tartar. Beat until the icing holds stiff peaks (about 5-7 minutes). Divide into three bowls for red, blue, and white icing; tint red and blue with gel colors. (15 minutes)
- Decorate: Using piping bags or zip bags, outline and fill cookie sections with red and blue stripes and white stars. Use a toothpick to smooth icing and fix any bubbles. Let icing dry completely, ideally several hours or overnight for best texture. (Time varies based on decoration detail)
Pro tip: If your icing seems too thick, add a few drops of water; too thin, add more powdered sugar. The goal is a spreadable but not runny consistency. Also, chilling the decorated cookies after icing helps the royal icing set perfectly.
Cooking Tips & Techniques
Royal icing can seem daunting, but a few tips can make all the difference:
- Beat the egg whites well: This builds structure for stiff peaks, which means your decorations won’t collapse or spread.
- Work in small batches: Divide icing before coloring to avoid waste and keep colors vibrant.
- Use gel food coloring: It won’t thin the icing like liquid colors do, so your designs stay sharp.
- Don’t overroll dough: Keeping it about ¼ inch thick ensures the cookies bake evenly without getting too crunchy or soft.
- Chill dough properly: This helps keep the shape and makes cutting cleaner.
- Practice piping on parchment: Before decorating cookies, practice stripes and stars on parchment to get comfortable with pressure and flow.
- Keep your workspace dry: Even a little moisture can ruin royal icing consistency.
I learned the hard way that rushing the drying time causes smudging, so patience here is key. Also, if you want more advanced shapes, star-shaped berry shortcake parfaits share a similar decorating vibe but with fresh fruit for another festive twist.
Variations & Adaptations
These cookies are a blank canvas for creativity, and you can easily tweak them to suit your needs or mood.
- Dietary Options: Swap all-purpose flour with gluten-free flour blends to make these gluten-free. For dairy-free, use coconut oil or vegan butter.
- Seasonal Colors: While red, white, and blue are perfect for patriotic themes, try swapping the colors for a winter holiday version with green and red or even pastel hues for spring celebrations.
- Flavor Twists: Add lemon zest to the cookie dough for a citrusy pop or a pinch of cinnamon for warmth. For a boozy adult spin, a splash of bourbon in the dough adds complexity.
- Decorating Techniques: Instead of stripes and stars, try polka dots, swirls, or even stenciled designs with edible markers for variety.
- Personal Favorite: I once made these cookies with a cream cheese swirl filling sandwiched between two cookies for a rich surprise—highly recommend if you want to impress.
Serving & Storage Suggestions
Serve these patriotic flag sugar cookies at room temperature for the best texture—the icing will be crisp but tender underneath. They make a great addition to summer potlucks or picnics alongside savory bites like juicy pulled pork sliders or spicy grilled shrimp skewers.
For storage, keep cookies in an airtight container at room temperature for up to 5 days. If you want to save them longer, freeze undecorated cookies in a single layer wrapped tightly for up to 3 months. Decorated cookies freeze best after the icing has fully dried, separated by parchment paper to prevent sticking.
Reheat frozen cookies by letting them thaw at room temperature—avoid microwaving as it can soften the icing and make it sticky. Over time, the flavors meld beautifully, so making cookies a day ahead can actually improve taste.
Nutritional Information & Benefits
These sugar cookies with royal icing are a treat, so moderation is key. Each cookie (about 3-inch size) contains approximately:
| Calories | 150-180 |
|---|---|
| Fat | 7g |
| Carbohydrates | 22g |
| Sugar | 14g |
| Protein | 2g |
Key ingredients like butter provide richness and texture, while egg whites in the icing add protein and help keep it light. Using real vanilla extract boosts flavor without added sugar. For those watching sugar intake, reducing the powdered sugar slightly in the icing can help, but it may affect texture.
This recipe is naturally gluten-containing, but easy to adapt for gluten-free diets. Dairy-free options are also possible with simple swaps. The bright colors make these cookies a festive way to enjoy a classic treat without feeling overly heavy or complicated.
Conclusion
Easy patriotic flag sugar cookies with royal icing are more than just a sweet snack—they’re a way to bring a little joy and color to your gatherings without the stress. Whether you’re baking solo or with kids, the approachable dough and forgiving icing make this a recipe that invites creativity and fun. I love how these cookies have become a tradition for me, reminding me that sometimes simple ingredients and a little patience can turn a casual afternoon into something special. Feel free to play with colors, shapes, and flavors until you find your perfect version. If you give this recipe a try, I’d love to hear how your cookies turn out or any twists you add!
FAQs About Easy Patriotic Flag Sugar Cookies
How long does royal icing take to dry completely?
Typically, royal icing takes several hours to dry fully—overnight is best to get that firm, crisp finish perfect for stacking or packaging.
Can I make the sugar cookie dough ahead of time?
Yes! You can prepare the dough up to 3 days in advance and keep it wrapped in the refrigerator or freeze it for up to a month.
What if I don’t have egg whites for royal icing?
You can use meringue powder mixed with water as a safe and stable alternative that works just as well.
How do I prevent cookies from spreading too much while baking?
Chilling the dough before rolling and baking is key. Also, avoid using melted butter and don’t overmix once you add the flour.
Can I use store-bought food coloring for the icing?
Gel food coloring is best because it won’t thin your icing. Liquid colors can make the icing runny, so if you only have those, use sparingly.
Pin This Recipe!
Easy Patriotic Flag Sugar Cookies Recipe
These easy patriotic flag sugar cookies with royal icing are perfect for summer holidays and celebrations, combining a buttery sugar cookie base with vibrant red, white, and blue icing for a festive treat.
- Prep Time: 20 minutes
- Cook Time: 10 minutes
- Total Time: 1 hour 50 minutes
- Yield: 24 cookies 1x
- Category: Dessert
- Cuisine: American
Ingredients
- 2 ¾ cups (345g) all-purpose flour
- 1 teaspoon baking powder
- ½ teaspoon salt
- 1 cup (226g) unsalted butter, softened
- 1 ½ cups (300g) granulated sugar
- 1 large egg, room temperature
- 1 teaspoon pure vanilla extract
- 3 cups (360g) powdered sugar, sifted
- 2 large egg whites or 4 tablespoons meringue powder + 5 tablespoons water
- ½ teaspoon cream of tartar
- Gel-based red and blue food coloring
- Optional: a drop of vanilla or almond extract for icing flavor
Instructions
- Mix dry ingredients: whisk together flour, baking powder, and salt in a medium bowl. Set aside.
- Cream butter and sugar: beat softened butter with granulated sugar until light and fluffy, about 3-4 minutes.
- Add egg and vanilla: beat in egg and vanilla extract until fully incorporated.
- Combine wet and dry: gradually add flour mixture to butter mixture, mixing on low speed until just combined. Do not overmix.
- Chill dough: form dough into a disk, wrap in plastic, and refrigerate for at least 1 hour.
- Roll and cut: preheat oven to 350°F (175°C). Roll dough to ¼ inch thickness, cut into flag shapes or rectangles and stars. Place on lined baking sheets about 1 inch apart.
- Bake: bake for 8-10 minutes until edges are lightly golden but centers are soft. Cool completely on wire racks.
- Prepare royal icing: whisk powdered sugar, egg whites (or meringue powder and water), and cream of tartar until stiff peaks form (5-7 minutes). Divide into three bowls and tint red and blue with gel colors.
- Decorate: use piping bags or zip bags to outline and fill cookie sections with red and blue stripes and white stars. Smooth icing with a toothpick. Let icing dry completely, ideally overnight.
Notes
If icing is too thick, add a few drops of water; if too thin, add more powdered sugar. Chill decorated cookies after icing to help set. Use gel food coloring for vibrant colors without thinning icing. Dough can be prepared up to 3 days ahead or frozen for up to a month. Store decorated cookies in an airtight container at room temperature for up to 5 days or freeze after icing dries.
Nutrition
- Serving Size: 1 cookie (about 3-in
- Calories: 165
- Sugar: 14
- Fat: 7
- Carbohydrates: 22
- Protein: 2
Keywords: patriotic cookies, sugar cookies, royal icing, 4th of July, Memorial Day, easy cookies, flag cookies, summer dessert