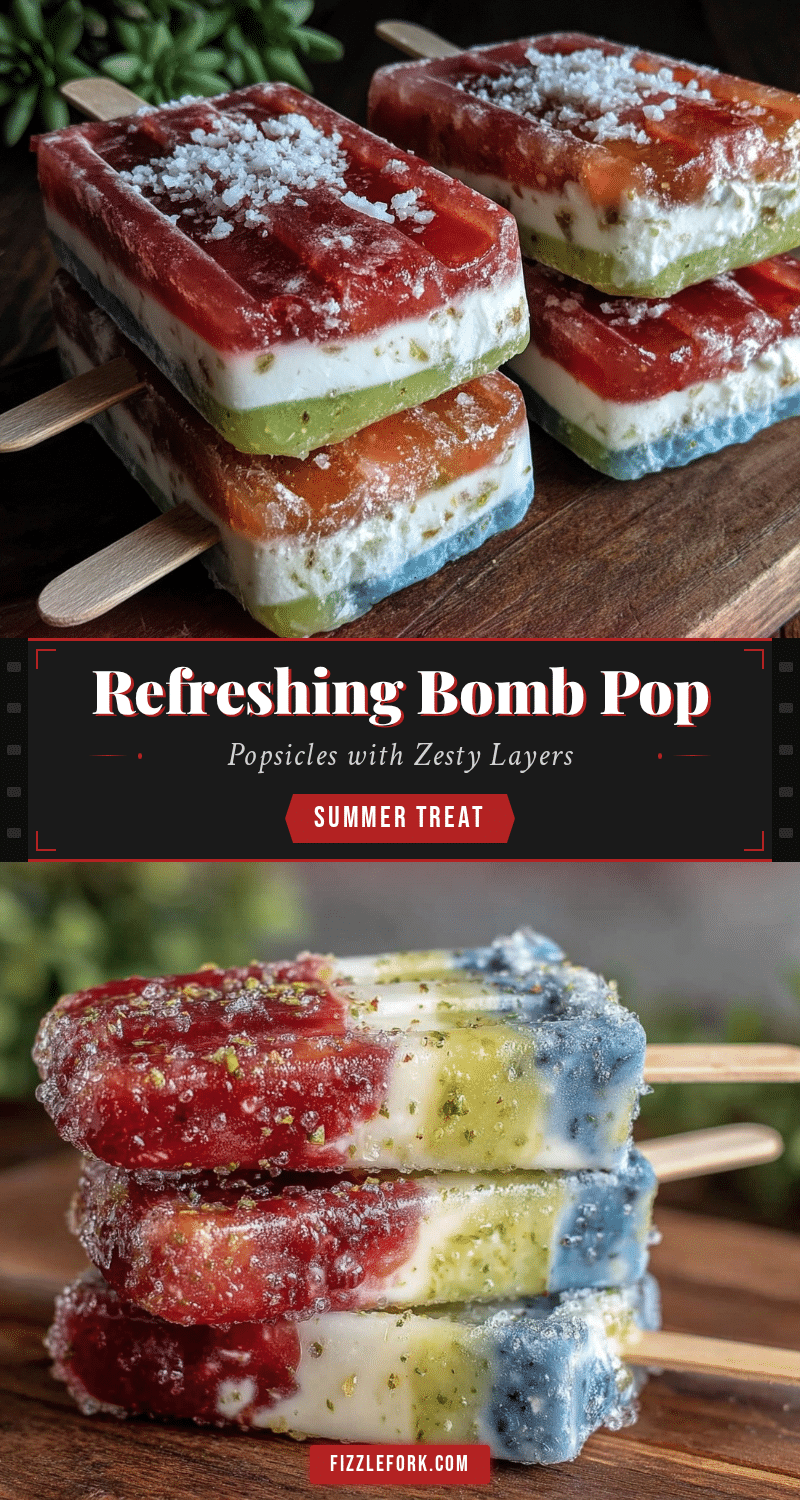
“Are you sure these are going to turn out like the ones from the freezer aisle?” my skeptical niece asked, eyes narrowed as she peered over the counter. Honestly, I wasn’t 100% confident either the first time I made these Refreshing Bomb Pop Popsicles with Zesty Cherry Lime & Blue Raspberry. I mean, how could homemade popsicles possibly live up to those bright, perfectly layered ones from childhood? But, you know, sometimes the best recipes come from a little curiosity and a pinch of stubbornness.
That afternoon, the sun was relentless, and the usual store-bought popsicles felt a bit like a cop-out. I wanted something fresh, tangy, and vibrant—something that would bring a little zing back into summer afternoons without the artificial aftertaste. So, with a few simple ingredients and a borrowed popsicle mold, I gave it a try. The kids and I gathered around the kitchen table, patiently waiting for the layers to freeze one by one, sneaking tastes of the zesty cherry lime and the electric blue raspberry mixtures.
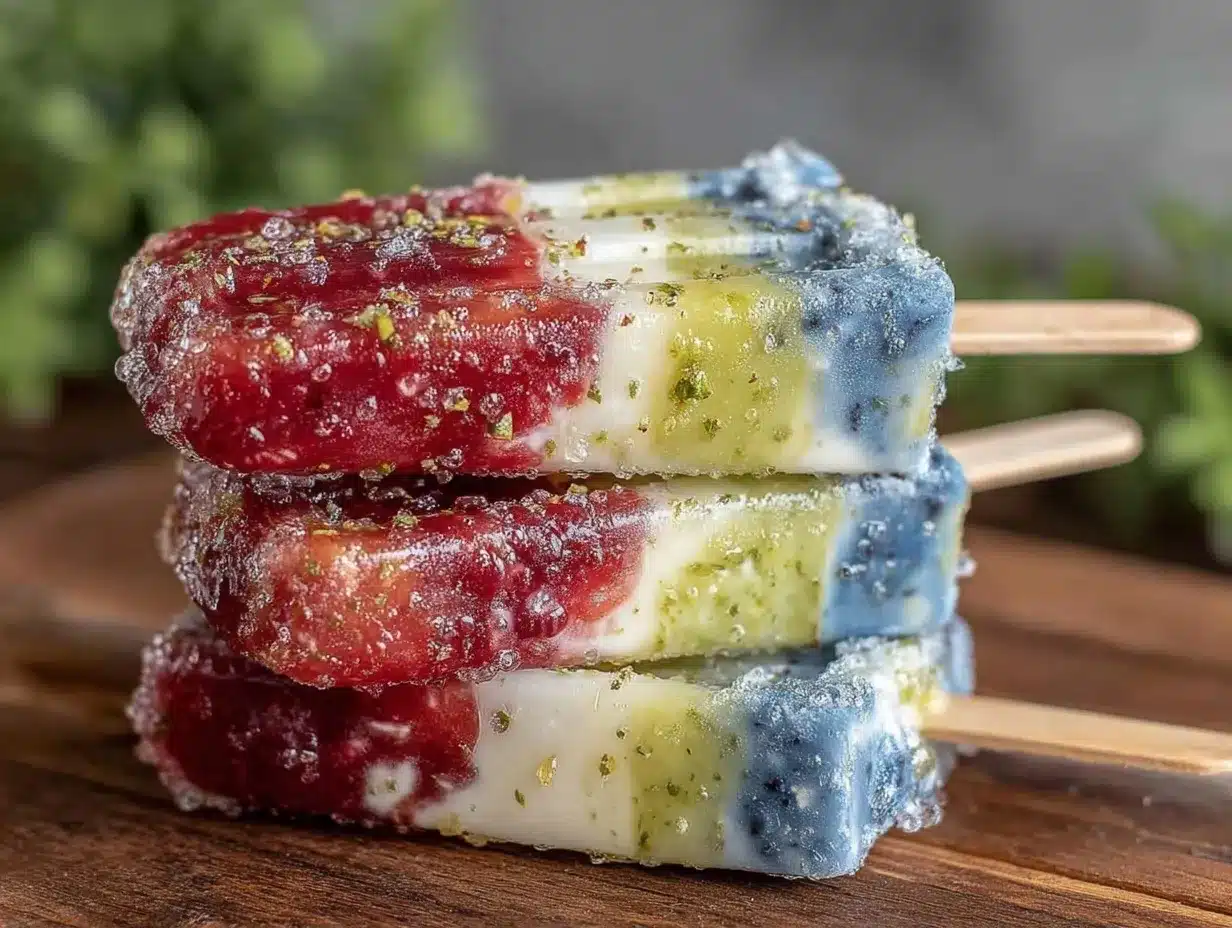
When the first popsicle was finally ready, that familiar burst of tart cherry and lime hit my tongue, followed by the sweet, bright blue raspberry notes. It wasn’t just good—it was better than I expected. The best part? No weird chemicals, just pure, bold flavor that made me close my eyes and smile. Since then, these popsicles have become our go-to cool-down treat, showing up at backyard barbecues and lazy weekend afternoons. They remind me that sometimes the best summer memories are made with a little patience and a lot of flavor layered just right.
There’s something quietly satisfying about biting into a homemade pop that you crafted yourself, knowing exactly what’s inside. These Bomb Pop Popsicles stuck with me because they’re simple, fun, and perfectly zesty—the kind of recipe that feels like sunshine in your hand.
Why You’ll Love This Bomb Pop Popsicles Recipe
Making these Bomb Pop Popsicles with Zesty Cherry Lime & Blue Raspberry isn’t just about beating the heat; it’s about enjoying a little homemade magic that kids and adults alike rave about. Having tested this recipe multiple times—trust me, I have a few frozen popsicles hiding in my freezer as I write this—I’ve nailed down what makes it stand out from your typical icy treat.
- Quick & Easy: You can whip up all three colorful layers and have them frozen in just a few hours, perfect for last-minute summer cravings or an unexpected guest.
- Simple Ingredients: No need for specialty stores—fresh lime juice, frozen cherries, raspberry syrup, and a few pantry staples are all you need.
- Perfect for Summer Parties: Whether it’s a casual backyard get-together or a festive 4th of July, these popsicles bring a splash of color and excitement to the table.
- Crowd-Pleaser: The sweet-tart balance keeps everyone coming back for more, including picky eaters and flavor adventurers.
- Unbelievably Delicious: The layering technique ensures every lick delivers a refreshing, zesty punch that feels like a mini celebration.
What really sets this recipe apart is the natural zing of fresh lime paired with the brightness of real frozen cherries and the nostalgic blue raspberry flavor—a classic combination, but crafted from scratch. And unlike store versions, you control the sweetness and avoid any artificial coloring or preservatives. It’s a recipe that invites you to pause, savor, and share, making it a standout on any summer menu.
Honestly, once you try these, you’ll understand why they’ve become a little obsession around my kitchen, brightening even the most hectic days with a simple, delicious treat.
What Ingredients You Will Need
This recipe uses simple, wholesome ingredients to deliver bold flavor and satisfying texture without the fuss. Most of these are pantry staples or easy to find in the produce aisle. If you want to swap or tweak, I’ve included substitution tips below.
- Frozen Cherries: 1 cup (about 150g), pitted (adds natural sweetness and vibrant cherry flavor)
- Fresh Lime Juice: 1/4 cup (60ml), freshly squeezed (for that signature zesty tang)
- Granulated Sugar: 1/3 cup (65g) (balances tartness—adjust to taste)
- Water: 1 cup (240ml), divided (for blending and dissolving sugar)
- Blue Raspberry Syrup: 1/3 cup (80ml) (store-bought or homemade—adds that nostalgic blue raspberry punch)
- Lemon Juice: 1 tablespoon (15ml), freshly squeezed (brightens flavors)
- Optional: A pinch of sea salt (enhances overall taste)
Ingredient tips: Look for firm, pitted frozen cherries to avoid bitter pits. I prefer Starkist brand blue raspberry syrup because of its well-balanced sweetness and natural flavor. If you want a lower-sugar option, swap granulated sugar for honey or agave syrup, keeping in mind the texture might differ slightly.
Substitution ideas: Use fresh raspberries blended with a little sugar instead of blue raspberry syrup for a more natural twist or try lime zest in place of lemon juice for a sharper citrus note. For a dairy-free variation, this recipe is naturally free of dairy.
Equipment Needed
- Blender or Food Processor: Essential for pureeing the frozen cherries and blending the mixtures smoothly. A high-speed blender works best but a standard one will do.
- Popsicle Molds: You’ll want a set that allows layering—silicone molds make popping out the finished product easier.
- Mixing Bowls: A couple of medium-sized bowls for mixing syrups and juices.
- Measuring Cups & Spoons: For accuracy, especially when balancing sweet and tart flavors.
- Freezer: Obviously, a reliable freezer is a must. If you don’t have popsicle molds, small paper cups and wooden sticks can work as a budget-friendly alternative.
From personal experience, avoid metal molds unless you’re comfortable flexing them just right to pop out the popsicles. Silicone molds are forgiving and easy to clean, which is a big win when you’re making multiple layers like this recipe requires.
Preparation Method
- Prepare the Cherry Lime Layer (about 10 minutes): In your blender, combine 1 cup frozen cherries, 1/4 cup fresh lime juice, 1/6 cup (about 33g) sugar, and 1/3 cup (80ml) water. Blend until smooth but still slightly textured—think thick smoothie consistency. Taste and adjust sugar if needed. Pour this mixture into your popsicle molds, filling them about one-third full. Freeze for 45–60 minutes until firm enough to layer.
- Make the Blue Raspberry Layer (about 5 minutes): In a bowl, whisk together blue raspberry syrup, lemon juice, 1/6 cup (33g) sugar, and 1/3 cup (80ml) water until sugar dissolves. Pour this gently over the frozen cherry layer, filling another third of the mold. Freeze again for 45–60 minutes until firm.
- Create the Final Lime Layer (about 5 minutes): Mix fresh lime juice, remaining 1/6 cup sugar, and 1/3 cup water until sugar dissolves. Pour this last layer carefully over the blue raspberry one, filling the molds to the top. Insert popsicle sticks and freeze for at least 4 hours or overnight for best results.
- Unmold and Serve: To release, run warm water over the outside of the mold for a few seconds (not too long or popsicles will melt). Gently pull the sticks out and enjoy immediately.
- Clean up: Rinse molds with warm water and mild soap to keep them ready for your next batch.
Pro tip: Freezing each layer separately is crucial to keep the clean, bright stripes that make these popsicles so visually fun. If you try to layer without waiting, colors will bleed and the iconic look gets lost.
Also, using fresh lime juice instead of bottled makes a noticeable difference in flavor brightness—trust me on this one!
Cooking Tips & Techniques
One thing I’ve learned after a few batches is that patience is key. Rushing the freezing times can turn your layers into a muddled mess, which, honestly, nobody wants when you’re chasing that classic bomb pop look. So set a timer and don’t skip the chill steps.
Also, when blending the frozen cherries, avoid over-blending into a juice. A bit of texture gives the popsicle a pleasant bite, making it feel more homemade and less like a syrupy slush. Speaking of syrup, stirring the sugar into the water and juice until fully dissolved prevents grainy popsicles.
Another trick: If your freezer is too cold, the popsicles might crack or develop ice crystals. Try placing them in the coldest spot for the first hour, then move them to a slightly warmer shelf for the rest of the freezing time.
And don’t forget to test your popsicle molds. My first molds were flimsy plastic, and I swear it took a wrestling match to get those popsicles out. Investing in flexible silicone molds is worth every penny for ease of use and cleanup.
Finally, a little sea salt added to the layers can subtly bring out the fruit flavors—you wouldn’t expect it, but it really works.
Variations & Adaptations
While the classic cherry lime and blue raspberry combo is a winner, there’s room to play around with this recipe depending on what you have on hand or your taste preferences.
- Dietary Twist: Swap sugar for maple syrup or honey for a natural sweetener. Just keep in mind the texture may be a tiny bit softer.
- Seasonal Flair: Use fresh berries like strawberries or blueberries instead of frozen cherries in summer for a fresher flavor and a pop of color variation.
- Flavor Swap: Replace blue raspberry syrup with homemade blueberry puree mixed with a dash of lemon juice for a more natural version.
- Adult Version: Add a splash of tequila or rum to the lime layer for a boozy twist—just reduce the water slightly to keep freezing consistency.
- Personal Favorite: Once, I swapped the lime layer for a watermelon-lime blend, which was unexpectedly refreshing and paired perfectly with the other layers.
If you’re avoiding artificial colors, homemade syrups or purees work beautifully. This recipe also adapts well to popsicle molds of different shapes or sizes, just adjust freezing time accordingly.
Serving & Storage Suggestions
Serve these popsicles chilled right from the freezer for that crisp, refreshing bite that cools you down instantly. They look fantastic presented on a simple white plate or in a colorful bowl with a few fresh mint leaves for a summery touch.
Pairing these popsicles with a light, savory snack like spicy grilled shrimp skewers or juicy pulled pork sliders makes for a balanced outdoor meal that hits all the right notes.
For storage, keep popsicles in an airtight container or tightly wrapped in plastic wrap to prevent freezer burn. They will hold for up to 2 weeks, but honestly, they rarely last that long in my house!
When reheating popsicles—well, you don’t—but if they soften too much, a quick stint back in the freezer (a couple of hours) will firm them up again. The flavors actually meld a bit more if they sit overnight, making them taste even better the next day.
Nutritional Information & Benefits
These popsicles are a guilt-free way to enjoy a sweet treat. Each popsicle contains approximately 70-90 calories, depending on the size and sweetness adjustments. They’re naturally gluten-free and dairy-free, making them suitable for many dietary needs.
Frozen cherries pack antioxidants and vitamin C, while fresh lime juice adds a dose of vitamin C and aids digestion. The blue raspberry syrup contributes mostly sweetness, so feel free to reduce sugar for a lighter version.
From a wellness perspective, these popsicles offer a hydrating boost on hot days without the additives found in many commercial frozen treats. I appreciate how they satisfy my sweet tooth while keeping things fresh and real.
Conclusion
These Refreshing Bomb Pop Popsicles with Zesty Cherry Lime & Blue Raspberry are more than just a nostalgic nod to childhood; they’re a simple, joyful way to bring fresh flavor and a splash of color to your summer days. Whether you’re cooling off after a backyard barbecue or just craving a sweet, tangy snack, this recipe fits the bill perfectly.
Feel free to tweak the layers or sweetness to suit your taste—after all, the best recipes are the ones you make your own. I love these popsicles because they’re fun to make, look fantastic, and taste even better than I expected.
If you give this recipe a try, I’d love to hear how you customized it or what moments it made cooler in your kitchen. Sharing those stories makes all the difference!
Here’s to many sunny afternoons with a popsicle in hand and a smile on your face.
Frequently Asked Questions About Bomb Pop Popsicles
Can I make these popsicles without blue raspberry syrup?
Absolutely! You can substitute blue raspberry syrup with a homemade blueberry puree mixed with a little lemon juice or use store-bought blueberry syrup for a more natural flavor.
How long do these popsicles take to freeze completely?
Each layer needs about 45–60 minutes to freeze before adding the next. After the final layer, freeze the popsicles for at least 4 hours or overnight for the best results.
Can I use fresh cherries instead of frozen?
Yes, fresh cherries work great. Just pit and lightly freeze them for about an hour before blending to get the right texture.
What if I don’t have popsicle molds?
Small paper cups and wooden sticks make a great alternative. Just fill the cups in layers and freeze as directed.
How do I prevent ice crystals from forming in my popsicles?
Make sure the sugar is fully dissolved in the liquids before freezing, and avoid opening the freezer frequently during the freezing process to minimize temperature fluctuations.
Pin This Recipe!
Bomb Pop Popsicles Recipe Easy 5-Step Refreshing Cherry Lime Blue Raspberry
Refreshing homemade Bomb Pop Popsicles with zesty cherry lime and blue raspberry layers, perfect for summer parties and a healthy, flavorful treat.
- Prep Time: 20 minutes
- Cook Time: 6 hours
- Total Time: 6 hours 20 minutes
- Yield: 6 popsicles 1x
- Category: Dessert
- Cuisine: American
Ingredients
- 1 cup frozen cherries, pitted (about 150g)
- 1/4 cup fresh lime juice (60ml)
- 1/3 cup granulated sugar (65g), divided
- 1 cup water (240ml), divided
- 1/3 cup blue raspberry syrup (80ml)
- 1 tablespoon fresh lemon juice (15ml)
- Pinch of sea salt (optional)
Instructions
- Prepare the Cherry Lime Layer: In a blender, combine 1 cup frozen cherries, 1/4 cup fresh lime juice, 1/6 cup (about 33g) sugar, and 1/3 cup (80ml) water. Blend until smooth but slightly textured. Adjust sugar to taste. Pour into popsicle molds filling about one-third full. Freeze for 45–60 minutes until firm.
- Make the Blue Raspberry Layer: In a bowl, whisk together blue raspberry syrup, lemon juice, 1/6 cup (33g) sugar, and 1/3 cup (80ml) water until sugar dissolves. Pour gently over the frozen cherry layer, filling another third of the mold. Freeze for 45–60 minutes until firm.
- Create the Final Lime Layer: Mix fresh lime juice, remaining 1/6 cup sugar, and 1/3 cup water until sugar dissolves. Pour carefully over the blue raspberry layer, filling molds to the top. Insert popsicle sticks and freeze for at least 4 hours or overnight.
- Unmold and Serve: Run warm water over the outside of the mold for a few seconds to release popsicles. Gently pull out sticks and enjoy immediately.
- Clean up: Rinse molds with warm water and mild soap.
Notes
Freeze each layer separately to maintain clean, bright stripes. Use fresh lime juice for better flavor brightness. Avoid over-blending cherries to keep texture. Adding a pinch of sea salt enhances fruit flavors. Silicone molds are recommended for easy unmolding.
Nutrition
- Serving Size: 1 popsicle
- Calories: 7090
- Sugar: 15
- Sodium: 10
- Carbohydrates: 18
- Fiber: 1
Keywords: Bomb Pop Popsicles, cherry lime popsicles, blue raspberry popsicles, homemade popsicles, summer treats, layered popsicles, refreshing dessert


