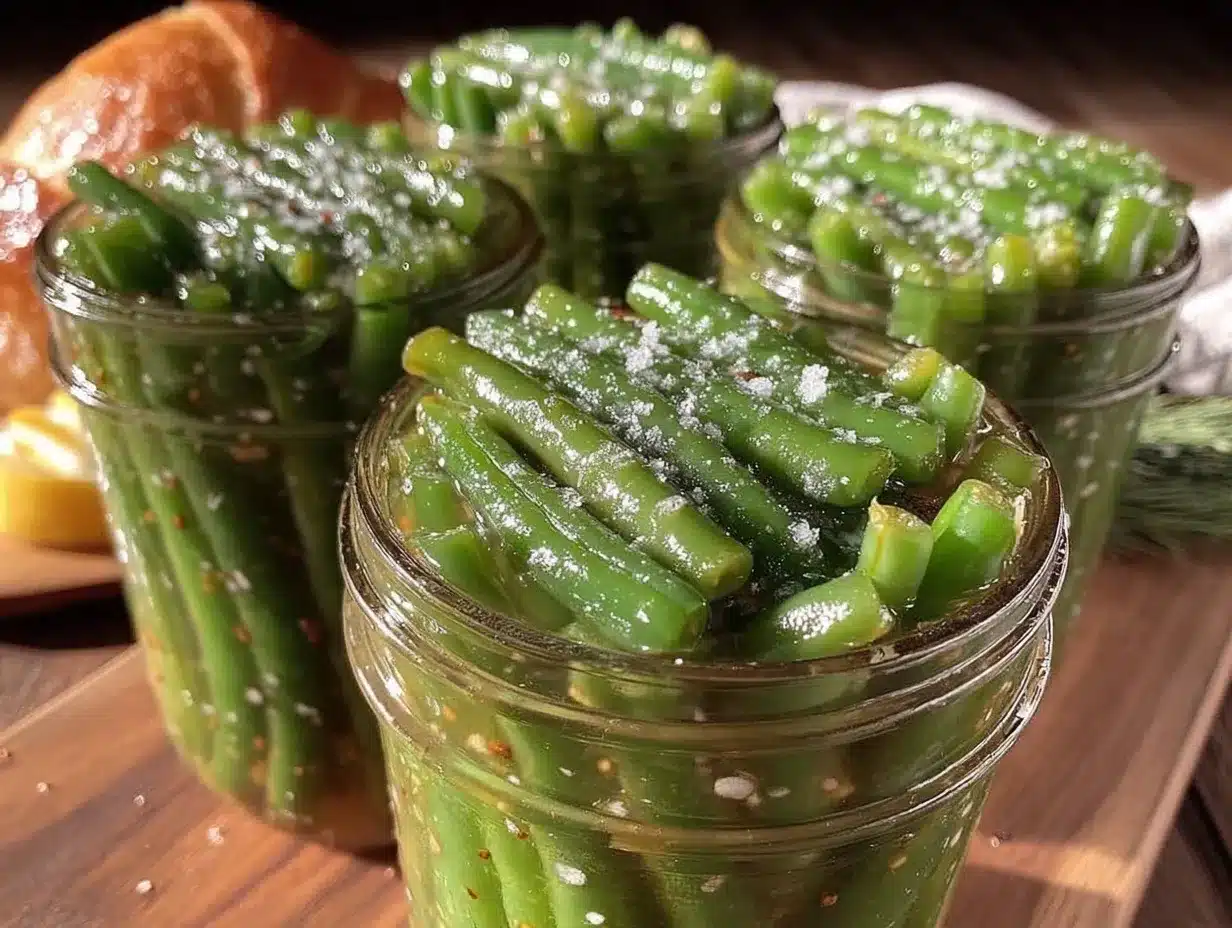
The jars were emptied before I even finished labeling them. Third batch in two weeks, and still, the requests kept coming. “Could you share that green beans canning guide again?” my neighbor asked, holding a near-empty jar like a trophy. It wasn’t planned to become such a whirlwind, honestly. It all started when I grabbed a bushel of fresh green beans from the farmer’s market, intending to try canning them for the first time. I figured, why not preserve that crisp-tender snap and vibrant color for winter meals?
That first batch surprised me — not just with how well they held their texture but how everyone seemed to genuinely enjoy them. From potlucks to weekday dinners, those green beans vanished faster than I expected. I still remember the moment a friend texted midweek, “Is it too late to get in on that green bean stash?” It hit me then that this wasn’t just good preservation; it was a simple recipe that brought a bit of garden joy to the table, no matter the season.
What stuck with me wasn’t just the ease of the process but the way those crisp-tender beans carried the essence of summer into chilly nights. If you’re like me—someone who gauges success by how many empty jars are left—you’ll find this guide perfect for making your own green bean magic. There’s a quiet satisfaction in pulling out a sealed jar and knowing exactly what’s inside, ready to brighten your meals anytime.
So here’s a straightforward, no-fuss canning guide that’s become a quiet favorite around here. It’s about preserving freshness, texture, and that unmistakable snap you want from perfectly canned green beans. Let’s get to it.
Why You’ll Love This Easy Crisp-Tender Green Beans Canning Guide
Having tried several methods over the years, this green beans canning guide stands out for good reasons. The recipe has been tested through multiple seasons, and honestly, it keeps impressing everyone who tastes the results. Here’s why it’s worth your time:
- Quick & Easy: The entire canning process takes under an hour once your beans are prepped, perfect for those busy days when you want to preserve your harvest without fuss.
- Simple Ingredients: No complicated additives or preservatives—just fresh green beans, water, salt, and a bit of vinegar if you prefer a tangy touch.
- Perfect for Any Occasion: Whether you’re stocking up for cozy winter dinners or bringing a jar to a summer potluck, these canned green beans fit the bill.
- Crowd-Pleaser: Kids and adults alike have given rave reviews, especially when served alongside dishes like savory smoked pulled pork sliders or a fresh summer salad.
- Unbelievably Delicious: The beans retain a crisp-tender bite that’s hard to get from frozen or store-bought canned options. It’s like a little jar of summer.
What makes this recipe different? The key lies in the gentle blanching and precise water bath canning times that keep beans firm, not mushy—something I learned the hard way after a few failed batches. Plus, I prefer using Ball jars and their two-piece lids for a reliable seal every time. This guide isn’t just about preservation; it’s about savoring that fresh-picked crunch year-round. It’s the kind of recipe that makes you look forward to opening a jar on a cold evening and taste the garden’s best.
What Ingredients You Will Need for Crisp-Tender Canned Green Beans
This recipe uses straightforward, wholesome ingredients to deliver that bright, fresh flavor and satisfying texture without any fuss or fancy additives. Most are pantry staples or easy to find at your local market.
- Fresh green beans: about 4 pounds (1.8 kg), washed, trimmed, and snapped or cut into 2-inch pieces. Choose firm, vibrant beans for the best texture.
- Water: for blanching and canning, enough to cover beans in your pot and jars.
- Salt: 2 teaspoons (10 ml) canning or pickling salt, optional but recommended for flavor enhancement.
- Vinegar (optional): 2 tablespoons (30 ml) of white distilled vinegar per quart jar for a slight tang and preservation boost.
When selecting green beans, look for a crisp snap when you bend them—this signals freshness. If you can’t get fresh beans, frozen won’t work here because canning relies on the beans’ raw state. For salt, I like to stick to canning salt as it doesn’t cloud the water or jar. If you’re watching sodium intake, you can omit salt or reduce it, but taste will be milder.
Feel free to experiment with heirloom varieties or purple beans for a colorful twist. In summer, pairing these with other preserved favorites like grilled corn on the cob can make your pantry feel like a farmers market.
Equipment Needed for Green Beans Canning
For this easy green beans canning guide, you’ll want to gather a few kitchen essentials that make the process smooth and safe. I’ve found that having the right tools not only speeds things up but also helps avoid frustrating mishaps.
- Large pot or canner: A water bath canner or a large stockpot with a lid—big enough to fully submerge your jars.
- Jar lifter: This tool is a must for safely removing hot jars from boiling water without burning yourself.
- Wide-mouth Mason jars: Quart-sized (32 oz / 946 ml) jars work best for green beans, but pint jars are fine for smaller portions.
- Two-piece canning lids: New lids are necessary for a proper seal; reuse your metal screw bands if they’re in good shape.
- Large bowl: For ice water to cool blanched beans quickly (this keeps them crisp).
- Funnel and ladle: To fill jars neatly and minimize mess.
- Kitchen timer: Very helpful to track blanching and processing times precisely.
If you don’t have a canner, a tall, wide stockpot with a rack on the bottom works just fine. I once used a large pasta pot in a pinch, and it got the job done, though a dedicated canner is easier. Keeping your equipment clean and dry before starting is something I learned the hard way after a few cloudy jars. Also, a magnetic lid lifter makes handling lids hygienic and simple.
Preparation Method for Easy Crisp-Tender Green Beans Canning
- Prepare your beans: Wash and trim about 4 pounds (1.8 kg) of fresh green beans. Snap or cut them into 2-inch (5 cm) pieces. This size fits nicely in quart jars and cooks evenly.
- Blanch the beans: Bring a large pot of water to a boil. Add the beans and blanch for exactly 3 minutes. This brief cooking helps preserve the color and crunch. Immediately transfer beans to a large bowl of ice water to stop cooking and keep them crisp. Drain well after cooling.
- Prepare jars and lids: Wash Mason jars, lids, and bands in hot soapy water. Rinse thoroughly. Keep jars warm in simmering water to avoid breakage when filling with hot beans.
- Fill the jars: Using a funnel, pack the blanched green beans vertically into warm jars, leaving about 1 inch (2.5 cm) headspace. If you like, add 2 teaspoons (10 ml) of canning salt per quart jar for flavor. Pour boiling water over beans, covering them completely while maintaining the 1-inch headspace. Remove air bubbles by running a non-metallic spatula around the jar interior.
- Seal and process: Wipe jar rims with a clean damp cloth. Place lids on jars and screw bands finger-tight. Place jars in your water bath canner with at least 1 inch (2.5 cm) of boiling water covering them. Process quart jars for 25 minutes at a gentle boil. Adjust for altitude if needed. After processing, remove jars and let them cool undisturbed for 12-24 hours. You’ll hear satisfying “pings” as jars seal.
Important notes: Don’t skip the ice water bath—it’s key to that crisp-tender texture. Also, avoid over-packing jars; tight packing can cause beans to mush. I once learned this the hard way when a jar burst during processing. Keep your processing times consistent to avoid under- or over-cooking. If a jar doesn’t seal, refrigerate and use those beans within a week.
Cooking Tips & Techniques for Perfect Canned Green Beans
Getting crisp-tender green beans right isn’t magic—it’s about timing and technique. Here’s what I’ve learned from several canning seasons:
- Don’t over-blanch: Three minutes is just right. Longer blanching softens the beans and ruins that snap.
- Use fresh beans: Beans picked the same day or within 24 hours give the best results. Older beans lose firmness and flavor.
- Maintain jar headspace: That 1-inch space is crucial for proper sealing and expansion during processing.
- Watch water temperature: Start with boiling water in both blanching and canning; cold water can cause jars to crack or seals to fail.
- Test your seal: After cooling, lids should be concave and not pop when pressed. If they do, refrigerate the jar and use soon.
- Label your jars: Date and contents are helpful for pantry organization—you’ll thank yourself later.
I once tried rushing the cooling step to save time, and ended up with mushier beans. Patience pays off here. If you want to speed things up, prepare your jars and lids ahead of time, and keep everything ready before you start blanching. Multitasking kitchen tasks like prepping beans while water heats makes the process smoother.
Variations & Adaptations for Your Green Beans Canning
While this guide covers the classic crisp-tender green beans, feel free to tweak it based on your pantry, taste, or dietary needs:
- Spicy Pickled Beans: Add 1/2 teaspoon of red pepper flakes and 1 clove crushed garlic per jar before filling with water for a kick.
- Herb-Infused Beans: Toss in a sprig of fresh dill or thyme to add subtle herbal notes.
- Low-Sodium Option: Skip the salt and vinegar; flavor will be milder but still fresh and crunchy.
- Pressure Canning Method: For those wary of water bath canning, pressure canning is an option. Process at 10 PSI for 25 minutes, which is safer for low-acid vegetables.
- Freezing Alternative: If you want to try freezing instead, blanch beans for 3 minutes, cool, drain, and freeze in airtight bags. Texture won’t be as crisp as canned but still tasty.
One personal favorite is adding a splash of apple cider vinegar for a slight tang that brightens the beans without overpowering. I also experimented with purple beans once, which made for stunning jars that are as pretty as they are tasty.
Serving & Storage Suggestions for Canned Green Beans
Once sealed, store your jars in a cool, dark pantry or basement for up to 12 months. The flavor and texture are best enjoyed within the first year, but I’ve had jars stay good well beyond that.
Serve your canned green beans warm or cold. They make a fantastic side dish steamed briefly or tossed in a skillet with garlic and butter. They also pair beautifully with hearty mains like savory beer can chicken or a simple grilled steak.
To reheat, gently warm the beans in a saucepan over low heat or microwave with a splash of water to retain moisture. Avoid overcooking to keep that crisp-tender bite. If you open a jar and don’t use all the beans, store leftovers in the fridge and consume within 3-5 days.
Over time, the flavors mellow and deepen, making them even more comforting in soups or casseroles. I’ve found that a jar opened after 6 months tastes like a little sunshine in winter.
Nutritional Information & Benefits of Canned Green Beans
Canned green beans are a low-calorie, nutrient-rich vegetable with plenty of fiber, vitamins A and C, and antioxidants. They support digestion and immune health without adding extra fat or sugar. One cup (about 125 grams) of canned green beans typically contains around 40 calories, 2 grams of protein, and 4 grams of fiber.
Using fresh green beans and minimal salt keeps this recipe heart-healthy and suitable for most diets. It’s naturally gluten-free and low-carb, making it a versatile pantry staple. From a wellness perspective, having these canned green beans on hand encourages more vegetable intake year-round, which is always a win.
Just watch for added salt if you’re on a sodium-restricted diet, and rinse beans briefly before eating if needed.
Conclusion: Why This Green Beans Canning Guide Works for You
This easy crisp-tender green beans canning guide has quietly become a pantry staple for good reason. It’s straightforward, reliable, and delivers a taste and texture that truly honor fresh-picked beans. I love how it brings a little bit of the garden into the kitchen no matter the season, and how many times it’s sparked simple, satisfying meals.
Feel free to adjust salt, add flavor twists, or swap canning methods to suit your style. The best part is making it your own while keeping the process stress-free. If you’ve ever tried preserving your harvest or want a no-fail way to enjoy green beans all year, this guide is a solid place to start.
And hey, if you’re looking for something to pair your green beans with, check out the crispy sheet pan honey mustard chicken recipe — it’s a perfect companion for those crisp, canned beans.
Happy canning, and here’s to plenty of full jars and empty plates.
FAQs About Easy Crisp-Tender Green Beans Canning
How long do canned green beans last?
Properly sealed and stored, canned green beans last up to 12 months in a cool, dark place. After opening, refrigerate and consume within 3-5 days.
Can I use frozen green beans for canning?
No, frozen beans have already been cooked and don’t hold up well to the canning process. Use fresh, raw green beans for the best results.
Do I need to add vinegar to canned green beans?
Vinegar is optional. It adds a slight tang and helps with preservation but isn’t required if you prefer plain canned beans.
What if my jar doesn’t seal after processing?
If a jar fails to seal, refrigerate it and use the contents within a week. You can also reprocess with a new lid if you want to store it longer.
Can I can green beans using a pressure canner?
Yes, pressure canning is safe for green beans. Process at 10 PSI for 25 minutes, adjusting for altitude. It’s an alternative to water bath canning, especially in areas with low atmospheric pressure.
Pin This Recipe!

Easy Crisp-Tender Green Beans Canning Guide
A straightforward, no-fuss guide to canning fresh green beans that preserves their crisp-tender texture and vibrant color for year-round enjoyment.
- Prep Time: 15 minutes
- Cook Time: 40 minutes
- Total Time: 55 minutes
- Yield: 4 quart jars (approximately 8 servings) 1x
- Category: Preserved Vegetables
- Cuisine: American
Ingredients
- 4 pounds fresh green beans, washed, trimmed, and snapped or cut into 2-inch pieces
- Water, enough to cover beans in pot and jars
- 2 teaspoons canning or pickling salt per quart jar (optional)
- 2 tablespoons white distilled vinegar per quart jar (optional)
Instructions
- Prepare your beans: Wash and trim about 4 pounds of fresh green beans. Snap or cut them into 2-inch pieces.
- Blanch the beans: Bring a large pot of water to a boil. Add the beans and blanch for exactly 3 minutes. Immediately transfer beans to a large bowl of ice water to stop cooking and keep them crisp. Drain well after cooling.
- Prepare jars and lids: Wash Mason jars, lids, and bands in hot soapy water. Rinse thoroughly. Keep jars warm in simmering water to avoid breakage when filling with hot beans.
- Fill the jars: Using a funnel, pack the blanched green beans vertically into warm jars, leaving about 1 inch headspace. Add 2 teaspoons of canning salt per quart jar if desired. Pour boiling water over beans, covering them completely while maintaining the 1-inch headspace. Remove air bubbles by running a non-metallic spatula around the jar interior.
- Seal and process: Wipe jar rims with a clean damp cloth. Place lids on jars and screw bands finger-tight. Place jars in your water bath canner with at least 1 inch of boiling water covering them. Process quart jars for 25 minutes at a gentle boil. Adjust for altitude if needed. After processing, remove jars and let them cool undisturbed for 12-24 hours.
Notes
Do not skip the ice water bath after blanching to maintain crisp-tender texture. Avoid over-packing jars to prevent mushy beans or jar breakage. If a jar does not seal, refrigerate and use within a week or reprocess with a new lid. Adjust processing time for altitude if necessary. Vinegar is optional and adds a slight tang and preservation boost.
Nutrition
- Serving Size: 1 cup (about 125 gra
- Calories: 40
- Sugar: 2
- Sodium: 300
- Carbohydrates: 8
- Fiber: 4
- Protein: 2
Keywords: green beans, canning, preserving, crisp-tender, water bath canning, homemade canned vegetables, easy canning guide


