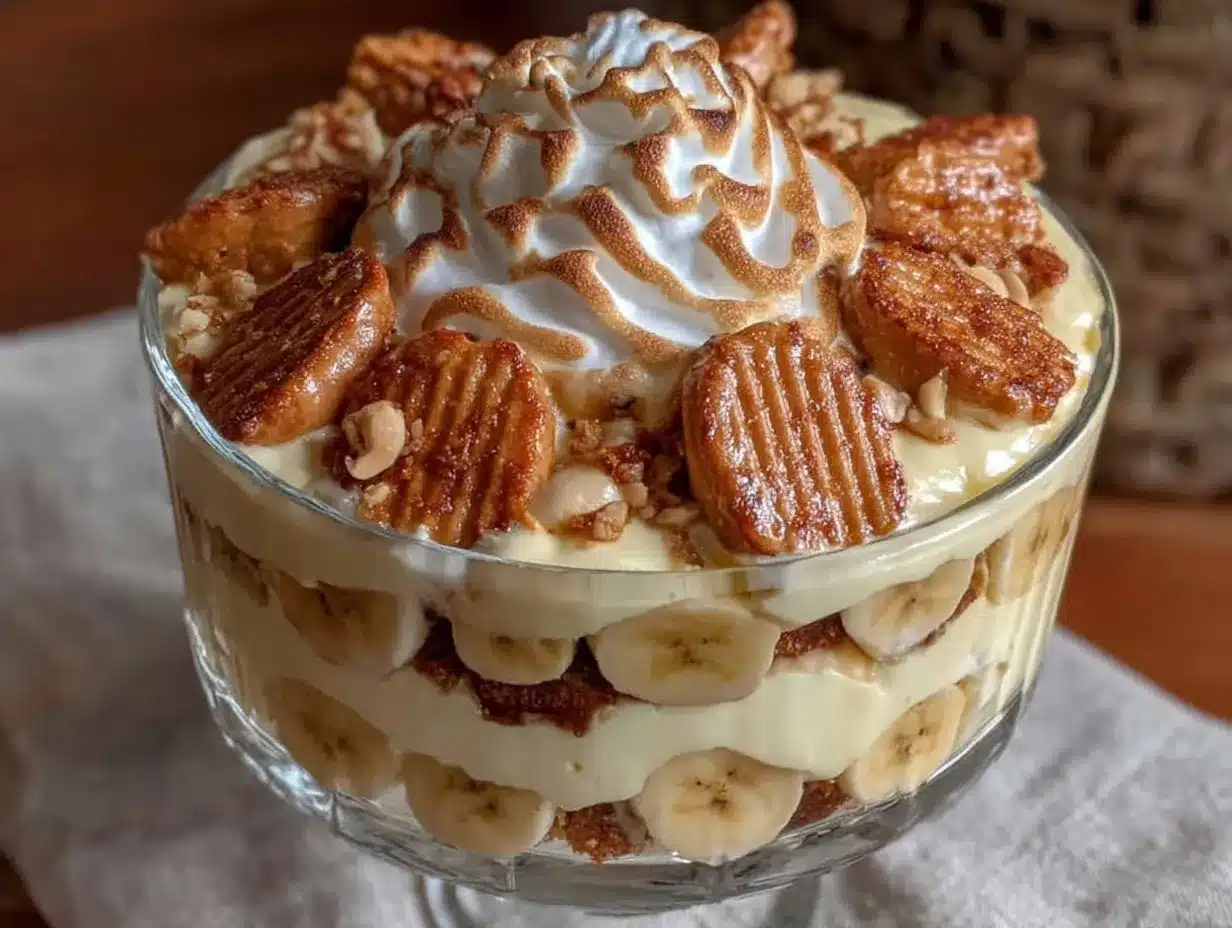
My partner took a second spoonful of this creamy classic banana pudding with vanilla wafers and just nodded quietly. No big reaction, no fanfare—just that small, satisfied gesture that said more than words could. I caught myself watching him savor it, the way the pudding clung to the wafers, the bananas softening into the custard, and it hit me how this recipe had quietly become our go-to comfort dessert. It wasn’t the usual loud “wow” moment, but something more subtle, like a soft little secret between us.
The texture was everything—silky pudding, tender slices of banana, and the nostalgic crunch of vanilla wafers softening at just the right pace. Honestly, I wasn’t sure if I was making something remarkable or just a simple treat until that quiet nod sealed it. The kitchen smelled faintly of vanilla and sweet bananas, and even though it’s a classic recipe, it somehow felt fresh and reassuring all at once.
This creamy classic banana pudding with vanilla wafers isn’t about flashy desserts or complicated steps. It’s about those small moments of simple pleasure, the kind you want to revisit on a cozy evening or when friends stop by unexpectedly. It’s a recipe that sticks not just because it tastes good but because it’s easy enough to make anytime and always delivers that familiar comfort, the kind that feels like a warm hug after a long day.
There’s something quietly dependable about this dessert, the kind that’s ready whenever you need it. And I get why my partner keeps coming back for more—without me even asking. It’s not just pudding; it’s a little moment of calm, and it’s exactly why this recipe stayed with me.
Why You’ll Love This Creamy Classic Banana Pudding with Vanilla Wafers Recipe
After testing multiple banana pudding recipes, this version stood out for a few very good reasons. It’s a dessert that feels both nostalgic and fresh, and honestly, it’s one I trust to turn out perfectly every time. Here’s what makes it special:
- Quick & Easy: Ready in under 30 minutes plus chilling time—ideal for busy weeknights or last-minute dessert cravings.
- Simple Ingredients: No need for fancy stores; you probably have everything for this classic dessert in your pantry or fridge right now.
- Perfect for Any Occasion: Whether it’s a family dinner, potluck, or just a treat to yourself after a long day, this pudding fits right in.
- Crowd-Pleaser: This recipe always gets nods of approval from both kids and adults—there’s just something about that creamy texture with vanilla wafers that wins everyone over.
- Unbelievably Delicious: The balance of smooth pudding, ripe bananas, and crunchy-soft wafers creates a texture and flavor combo that feels like pure comfort food.
What sets this apart from other banana pudding recipes? Well, it’s the way the pudding is made from scratch with a simple vanilla custard base instead of instant pudding mix. The vanilla flavor is rich but never overpowering, and the custard’s creamy consistency comes from carefully cooking the ingredients together. Plus, layering the bananas and wafers in a way that lets the wafers soften without turning mushy takes a little finesse but makes all the difference.
This isn’t just another banana pudding; it’s the kind that makes you pause and close your eyes after the first bite. It’s like comfort food rethought—classic, simple, but satisfying in a way that feels homemade and heartfelt. And if you’re looking for a sweet finish to pair with something savory like smoked pulled pork sliders, this pudding fits the bill perfectly.
Ingredients You Will Need for Creamy Classic Banana Pudding with Vanilla Wafers
This recipe uses simple, wholesome ingredients to deliver bold flavor and satisfying texture without any fuss. Most of these are pantry or fridge staples, and you can easily find them in any grocery store. Here’s what you’ll need:
- For the Custard:
- 2 cups whole milk (for the creamiest texture, I recommend a trusted brand like Horizon Organic)
- 3/4 cup granulated sugar
- 1/3 cup all-purpose flour (for thickening; use gluten-free flour if needed)
- 4 large egg yolks, room temperature (adds richness and smoothness)
- 1/4 teaspoon salt (balances the sweetness)
- 2 teaspoons pure vanilla extract (real vanilla makes all the difference)
- 2 tablespoons unsalted butter, softened (adds a silky finish)
- For the Layers:
- 4-5 ripe bananas, sliced (choose bananas that are firm but sweet; avoid overly mushy ones)
- 1 package vanilla wafers (Nilla Wafers are a classic choice and hold up well as they soften)
- For the Topping (Optional):
- 1 cup heavy whipping cream (chilled)
- 2 tablespoons powdered sugar (for a lightly sweetened whipped cream)
- 1 teaspoon vanilla extract
In the summertime, swapping fresh bananas with a few slices of fresh seasonal berries can add a nice twist. And if you need a dairy-free version, you can replace the milk with coconut milk and the butter with a dairy-free alternative. For a fun texture contrast, some folks like to sprinkle crushed vanilla wafers on top just before serving.
Equipment Needed
To make this creamy classic banana pudding with vanilla wafers, you don’t need anything fancy—just some basic kitchen tools that most home cooks have.
- Medium saucepan (preferably non-stick for easy stirring)
- Whisk (for smooth custard mixing)
- Mixing bowls (one for the custard prep, one for whipping cream)
- Measuring cups and spoons (for accuracy)
- Rubber spatula (great for scraping the sides of the pan)
- 9×9-inch or similar baking dish (glass or ceramic works best for layering)
- Electric mixer or hand whisk (if making whipped cream topping)
- Knife and cutting board (for slicing bananas)
If you don’t have a whisk, a fork can work in a pinch, but whisking helps prevent lumps in the custard. For budget-friendly options, any medium saucepan with a thick bottom works well to prevent scorching. I’ve found that a glass dish heats evenly for chilling and looks nice for serving, but a ceramic or plastic container works just fine if you prefer.
Preparation Method
- Prepare the Custard Base (15-20 minutes): In a medium saucepan, combine 2 cups of whole milk, 3/4 cup sugar, and 1/3 cup all-purpose flour. Whisk together until smooth. Place over medium heat and cook, stirring constantly, until the mixture thickens and starts to bubble—this usually takes about 7-10 minutes. Be patient; stirring continuously prevents lumps and keeps the custard silky.
- Temper the Egg Yolks (3 minutes): In a separate bowl, whisk 4 egg yolks lightly. Slowly pour about 1/2 cup of the hot milk mixture into the yolks while whisking vigorously to avoid cooking the eggs too quickly. Then, pour the yolk mixture back into the saucepan with the remaining milk mixture.
- Cook the Custard Until Thick (5 minutes): Return the pan to medium heat and cook, stirring constantly, until the custard is thick enough to coat the back of a spoon. This step is crucial for that creamy texture—don’t rush it! Once thickened, remove from heat and stir in 2 tablespoons softened unsalted butter, 2 teaspoons vanilla extract, and 1/4 teaspoon salt. Set aside to cool slightly (about 10 minutes).
- Slice the Bananas (5 minutes): While the custard cools, slice 4-5 ripe bananas into 1/4-inch thick rounds. Avoid using overly ripe bananas that might turn mushy too fast.
- Layer the Pudding (10 minutes): In a 9×9-inch dish, spread a thin layer of custard on the bottom. Add a layer of vanilla wafers, then a layer of banana slices. Repeat layering—custard, wafers, bananas—until all ingredients are used. Finish with a generous layer of custard on top to seal everything in.
- Chill for Best Results (at least 4 hours or overnight): Cover the pudding with plastic wrap, pressing it directly onto the surface of the custard to prevent a skin from forming. Refrigerate for at least 4 hours or overnight to let flavors meld and wafers soften just right.
- Optional Whipped Cream Topping (5-10 minutes): Just before serving, whip 1 cup of chilled heavy cream with 2 tablespoons powdered sugar and 1 teaspoon vanilla extract until soft peaks form. Spread or pipe over the top of the pudding for an extra creamy finish.
Common tip: If your custard gets a little lumpy, a quick whisk or passing it through a fine sieve before layering can save the texture. Also, don’t rush chilling—the pudding tastes best when the wafers have softened but still hold a slight bite.
Cooking Tips & Techniques for Perfect Banana Pudding
Making creamy classic banana pudding with vanilla wafers is simple, but a few tricks help get that perfect texture and flavor every time:
- Constant Stirring: When cooking the custard, stir constantly over medium heat to prevent lumps and avoid scorching. I learned this the hard way when my first batch had clumps!
- Temper Eggs Slowly: Pour hot milk slowly into yolks while whisking to avoid scrambled eggs. This step makes or breaks your custard.
- Use Ripe but Firm Bananas: The bananas should be sweet but not mushy. Overripe bananas can make the pudding watery and overly sweet.
- Layering Matters: Make sure wafers are evenly spread and bananas are sliced uniformly. This ensures even softening and a balanced bite.
- Chill Long Enough: Refrigerate for at least 4 hours. The pudding tastes better the next day, as flavors meld and wafers soften properly without turning to mush.
- Whipped Cream Topping: Whip cream just before serving to keep it light and fluffy. Add a touch of powdered sugar and vanilla for flavor—skip if you want a more traditional pudding.
One thing I’ve found is that rushing the cooling or skipping the tempering results in less-than-smooth pudding. Patience pays off with velvety texture and balanced sweetness. Also, if you prefer a lighter dessert, you can cut the sugar slightly, but be careful not to lose the classic banana pudding sweetness.
Variations & Adaptations for Creamy Classic Banana Pudding
This recipe is great as is, but there are several ways to switch things up depending on your taste, dietary needs, or what you have on hand:
- Gluten-Free Version: Use gluten-free vanilla wafers or substitute with gluten-free cookies like almond flour wafers to keep it safe and tasty.
- Vegan/Dairy-Free: Replace milk with almond or coconut milk, use a vegan butter substitute, and skip the egg yolks by using a cornstarch-thickened custard. Swap whipped cream with coconut whipped cream for topping.
- Extra Texture: Add a layer of toasted chopped pecans or walnuts between the wafers and bananas for a nutty crunch that contrasts the creamy pudding.
- Fruit Variations: Mix in fresh strawberries or blueberries along with the bananas for a pop of tartness and color.
- Cooked Meringue Topping: For a fancier finish, try a browned meringue on top instead of whipped cream. It adds a lovely toasted flavor and a bit of drama.
Personally, I once made a version with crushed red velvet cookies instead of vanilla wafers for a fun twist at a party. It was a hit and showed how flexible this classic recipe can be.
Serving & Storage Suggestions
This creamy classic banana pudding with vanilla wafers is best served chilled, straight from the fridge. The pudding is smooth and cool, making it a perfect finish to a warm summer meal or a cozy family dinner.
For serving, spoon generous portions into dessert bowls or glass cups to showcase the layers of bananas and wafers. A dollop of freshly whipped cream on top adds elegance and extra creaminess. Pair it with a light beverage like the sparkling strawberry lemonade punch to keep the meal balanced and refreshing.
Leftovers store well in the refrigerator for up to 3 days. Keep the pudding covered with plastic wrap pressed onto the surface to prevent it from drying out or developing a skin. When reheating, it’s best served cold, but if necessary, you can warm it gently in the microwave for about 15 seconds—just don’t overdo it or the wafers may get soggy.
Over time, the flavors deepen and the wafers soften further, so some prefer to make this pudding a day ahead. Just keep an eye on the texture if you want to serve it with a bit of crunch still intact.
Nutritional Information & Benefits
This creamy classic banana pudding with vanilla wafers is a moderately indulgent dessert, but it does provide some nutritional benefits thanks to its real ingredients:
- Each serving contains approximately 250-300 calories, depending on portion size and topping choices.
- Bananas contribute potassium, vitamin C, and dietary fiber, supporting heart health and digestion.
- The milk and eggs provide protein and calcium, which are essential for bone strength.
- This recipe can be adapted to be gluten-free or dairy-free to suit different dietary needs.
- Because it’s made from scratch, it has no preservatives or artificial additives common in store-bought puddings.
From a personal wellness perspective, I appreciate that this dessert feels like a treat but includes wholesome ingredients I can feel good about sharing with family and friends. Compared to instant pudding mixes, the homemade custard tastes fresher and less overly sweet.
Conclusion
This creamy classic banana pudding with vanilla wafers is one of those recipes that quietly earns a spot in your dessert rotation. It’s simple, reliable, and brings together textures and flavors that hit that perfect sweet spot—creamy, fruity, and just a little crunchy.
Feel free to tweak the layers, swap toppings, or adjust sweetness to fit your taste. That’s part of what makes this recipe a keeper—it’s easy to customize but always comforting. I love how it brings a little calm and sweetness to our table, especially on those evenings when you just want something familiar and satisfying.
If you try this recipe, I’d love to hear how you make it your own or if it brought a quiet smile like it did here. Sharing those little moments is what makes food blogging so rewarding. Enjoy every spoonful!
Frequently Asked Questions About Creamy Classic Banana Pudding
Can I make banana pudding ahead of time?
Yes, it actually tastes better if you make it at least 4 hours ahead or overnight. Chilling allows the wafers to soften and the flavors to meld beautifully.
What can I use instead of vanilla wafers?
You can substitute with gluten-free cookies, shortbread, or even ladyfingers for a slightly different texture but similar layering effect.
How do I prevent the pudding from being too runny?
Cook the custard until it thickens enough to coat the back of a spoon. Using the right flour amount and stirring constantly helps achieve perfect thickness.
Can I skip the eggs in the custard?
Eggs provide richness and help thicken the custard, but you can use cornstarch as a thickener for an eggless version. Just expect a slightly different texture.
How long does homemade banana pudding last in the fridge?
Store it covered for up to 3 days. After that, the texture may degrade, and the bananas may brown, so it’s best enjoyed fresh.
Pin This Recipe!
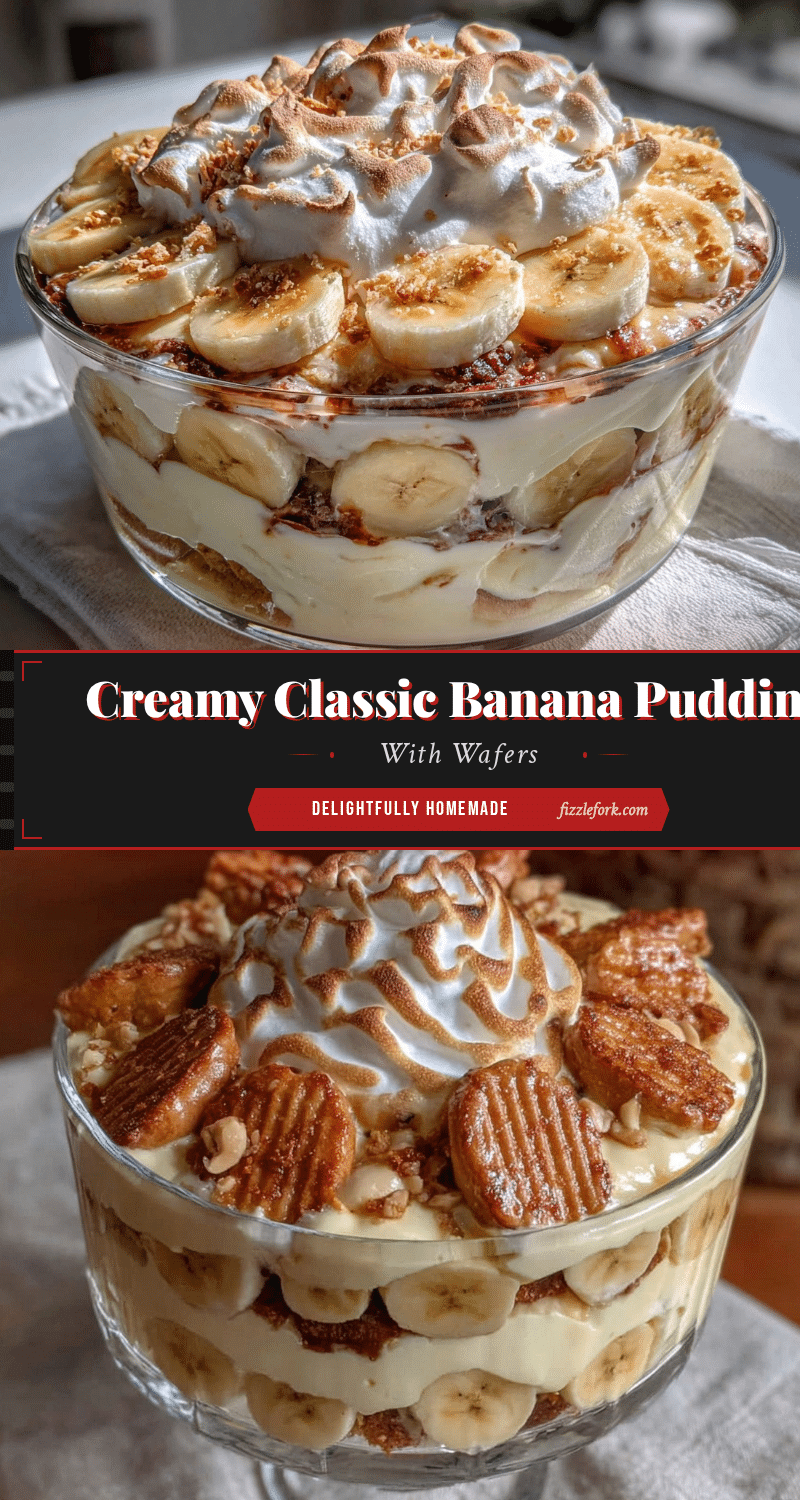
Creamy Classic Banana Pudding Recipe with Vanilla Wafers Easy and Perfect
A nostalgic and fresh homemade banana pudding made from scratch with a silky vanilla custard, ripe bananas, and classic vanilla wafers. This easy dessert is perfect for any occasion and delivers comforting, creamy texture with a nostalgic crunch.
- Prep Time: 20 minutes
- Cook Time: 15 minutes
- Total Time: 4 hours 35 minutes
- Yield: 8 servings 1x
- Category: Dessert
- Cuisine: American
Ingredients
- 2 cups whole milk
- 3/4 cup granulated sugar
- 1/3 cup all-purpose flour (use gluten-free flour if needed)
- 4 large egg yolks, room temperature
- 1/4 teaspoon salt
- 2 teaspoons pure vanilla extract
- 2 tablespoons unsalted butter, softened
- 4–5 ripe bananas, sliced
- 1 package vanilla wafers
- Optional Topping:
- 1 cup heavy whipping cream, chilled
- 2 tablespoons powdered sugar
- 1 teaspoon vanilla extract
Instructions
- In a medium saucepan, combine 2 cups whole milk, 3/4 cup sugar, and 1/3 cup all-purpose flour. Whisk until smooth.
- Place over medium heat and cook, stirring constantly, until mixture thickens and starts to bubble, about 7-10 minutes.
- In a separate bowl, whisk 4 egg yolks lightly. Slowly pour about 1/2 cup of the hot milk mixture into the yolks while whisking vigorously.
- Pour the yolk mixture back into the saucepan with the remaining milk mixture.
- Return to medium heat and cook, stirring constantly, until custard thickens enough to coat the back of a spoon, about 5 minutes.
- Remove from heat and stir in 2 tablespoons softened unsalted butter, 2 teaspoons vanilla extract, and 1/4 teaspoon salt. Let cool about 10 minutes.
- Slice 4-5 ripe bananas into 1/4-inch thick rounds.
- In a 9×9-inch dish, spread a thin layer of custard on the bottom. Add a layer of vanilla wafers, then a layer of banana slices.
- Repeat layering custard, wafers, and bananas until all ingredients are used. Finish with a generous layer of custard on top.
- Cover pudding with plastic wrap pressed onto the surface to prevent skin formation. Refrigerate at least 4 hours or overnight.
- Optional: Just before serving, whip 1 cup chilled heavy cream with 2 tablespoons powdered sugar and 1 teaspoon vanilla extract until soft peaks form. Spread or pipe over pudding.
Notes
Stir custard constantly to prevent lumps and scorching. Temper egg yolks slowly to avoid scrambling. Use ripe but firm bananas to prevent mushiness. Chill pudding at least 4 hours for best texture. Whip cream topping just before serving for lightness. For dairy-free or vegan versions, substitute milk and butter accordingly and use cornstarch instead of eggs.
Nutrition
- Serving Size: 1/8 of recipe (about
- Calories: 275
- Sugar: 28
- Sodium: 150
- Fat: 10
- Saturated Fat: 6
- Carbohydrates: 40
- Fiber: 2
- Protein: 5
Keywords: banana pudding, vanilla wafers, classic dessert, homemade pudding, creamy banana dessert, easy banana pudding, comfort food


