It was one of those chilly Saturday afternoons when the kind of comfort food you crave is something warm, buttery, and just a little bit nostalgic. I was hosting an impromptu gathering—neighbors dropping by, kids running around, someone’s guitar humming softly in the background—and I needed a dessert that felt like a hug but could feed a small army. Honestly, I was a bit skeptical about cookie bars at first. I mean, could they really live up to the chewy, crispy allure of classic chocolate chip cookies? Turns out, with browned butter, they absolutely can. The first time I made these cozy browned butter chocolate chip cookie bars, the rich, nutty aroma filled the kitchen in minutes, and the bars vanished quicker than I could say “second helping.”
What stuck with me wasn’t just how easy it was to throw together a batch big enough for a crowd, but how they brought everyone around the table in that effortless way homemade treats do. You know that moment when someone closes their eyes after a bite? Yeah, that one. There was something about the browned butter’s deep caramel undertone paired with melty chocolate chunks that felt like winter wrapped in a blanket. Plus, the bars hold their shape so well, making them perfect for passing around without the crumbly mess of regular cookies.
Making these bars became part of that cozy weekend ritual, especially when the days get shorter and the nights demand a little indulgence. They’re not just a recipe—they’re a warm invitation to slow down, share stories, and savor the small moments. And honestly, that’s why I keep coming back to these browned butter chocolate chip cookie bars for any crowd, every time.
Why You’ll Love This Recipe
- Quick & Easy: Ready in under 40 minutes from start to finish, perfect for last-minute get-togethers or when you just need a sweet fix without fuss.
- Simple Ingredients: Uses pantry staples you probably already have, no need for specialty shopping trips.
- Perfect for Crowds: Made in a large baking pan, these bars cut into generous squares that are easy to serve and share.
- Crowd-Pleaser: Kids, adults, cookie skeptics—all rave about the rich, buttery flavor and gooey chocolate pockets.
- Unbelievably Delicious: Browned butter adds a toasty, nutty depth that transforms classic chocolate chip bars into something next-level cozy.
This recipe isn’t your run-of-the-mill cookie bar. The secret lies in gently browning the butter until it smells like toasted caramel—a simple twist that makes a huge difference in flavor. Plus, I’ve tested this recipe multiple times (okay, maybe more than a few) to get the texture just right: soft and chewy in the middle with slightly crisp edges. Whether you’re feeding a crowd at a holiday party or just want a batch to share with friends over coffee, these bars hit the spot every time.
What really makes these bars stand out is the balance between rich, nutty butter and melty chocolate that stays gooey even after cooling. It’s a comforting, familiar flavor but with a grown-up twist that makes you smile with every bite.
What Ingredients You Will Need
This recipe relies on simple, wholesome ingredients that come together for maximum flavor without complication. Most of these are pantry staples, and you can easily swap a few to accommodate what you have on hand or dietary needs.
- Unsalted butter, 1 cup (2 sticks) – browned until golden and nutty (this is the flavor backbone)
- Brown sugar, 1 cup (packed) – adds moisture and deep caramel notes
- Granulated sugar, ½ cup – balances sweetness and texture
- Large eggs, 2 (room temperature) – for structure and richness
- Pure vanilla extract, 2 teaspoons – enhances flavor complexity
- All-purpose flour, 2 ½ cups – I prefer King Arthur for consistent results
- Baking soda, 1 teaspoon – helps with rise and tenderness
- Salt, ½ teaspoon – balances sweetness and brings flavors together
- Semi-sweet chocolate chips, 2 cups – for that melty, gooey chocolate goodness; Ghirardelli is my go-to
- Optional: Chopped toasted nuts, ½ cup – walnuts or pecans add crunch and extra warmth
If you need a gluten-free version, swapping the all-purpose flour for a 1-to-1 gluten-free blend works well here without sacrificing texture. For a dairy-free option, use vegan butter and dairy-free chocolate chips—just brown the butter alternative gently as you would regular butter. The ingredients are flexible but sticking to browned butter really is key for that cozy, nutty flavor.
Equipment Needed
- Medium saucepan or skillet: For browning the butter—something with a light-colored bottom helps you see the color change better.
- Mixing bowls: One large bowl for combining dry ingredients, and another for wet.
- Measuring cups and spoons: Accuracy helps keep the texture consistent.
- 9×13-inch baking pan: Standard size for even baking and easy slicing.
- Spatula or wooden spoon: For mixing batter without overworking it.
- Whisk: To blend wet ingredients smoothly.
- Cooling rack: To let bars cool evenly and avoid sogginess.
If you don’t have a 9×13 pan, a similar-sized oven-safe dish works just fine, but adjust baking time slightly. I’ve used glass and metal pans—the metal ones tend to brown the edges faster, so keep an eye on timing. For browning butter, a stainless steel pan is great because it distributes heat evenly and makes spotting the color change easier. Also, a silicone spatula is my personal favorite for scraping browned butter out of the pan without leaving much behind.
Preparation Method
- Browning the butter: Place 1 cup (2 sticks) of unsalted butter in a medium saucepan over medium heat. Stir constantly with a wooden spoon or heat-resistant spatula. After about 5-7 minutes, the butter will melt, foam, then start to brown and smell nutty. Watch closely—once it turns golden brown with tiny brown flecks, remove from heat immediately to prevent burning.
- Mixing sugars and eggs: In a large bowl, combine 1 cup packed brown sugar and ½ cup granulated sugar. Pour in the browned butter (it will be warm but not hot), then whisk in 2 large room-temperature eggs and 2 teaspoons vanilla extract until smooth and glossy, about 1-2 minutes.
- Combining dry ingredients: In a separate bowl, whisk together 2 ½ cups all-purpose flour, 1 teaspoon baking soda, and ½ teaspoon salt. This ensures even distribution of leavening for perfect texture.
- Forming the dough: Gradually add the dry mix to the wet ingredients, stirring gently with a spatula until just combined. Avoid overmixing to keep the bars tender.
- Adding chocolate chips and nuts: Fold in 2 cups semi-sweet chocolate chips and, if using, ½ cup chopped toasted nuts. The batter will be thick and slightly sticky.
- Preparing the pan: Lightly grease a 9×13-inch baking pan or line it with parchment paper for easy removal. Spread the dough evenly with a spatula or your hands, pressing gently to fill the corners and smooth the top.
- Baking: Bake at 350°F (175°C) for 25-30 minutes. Check at 25 minutes—edges should be golden brown, and center set but still soft when touched lightly. A toothpick inserted should come out with a few moist crumbs, not wet batter.
- Cooling: Let the bars cool completely in the pan on a cooling rack before slicing into squares. This step helps the bars firm up and makes cutting cleaner.
Pro tip: If you forget to brown the butter or rush this step, your bars will still taste good but won’t have that deep, cozy flavor that makes this recipe special. Also, when mixing the dough, it’s tempting to overwork it, but patience here pays off with softer bars.
Cooking Tips & Techniques
Browning butter is a small but mighty step that transforms these cookie bars. The key is to stir constantly and watch carefully—once those milk solids turn golden and the aroma shifts to toasted caramel, you’re there. I’ve learned the hard way that walking away for even 30 seconds can mean burnt butter, so stay close!
When it comes to mixing, folding in the flour gently is crucial. Overmixing activates gluten, making bars tough instead of tender. Honestly, I tend to under-mix rather than overdo it, especially since the dough is thick and forgiving.
For consistent baking, I recommend starting with room-temperature eggs and butter for even mixing and rise. If you’re baking in a glass pan, reduce the oven temperature by 25°F (about 15°C) to prevent overbrowning edges. Metal pans bake faster but give a crispier crust.
Timing is everything: the bars look slightly underdone when you take them out, but they’ll continue setting as they cool. Resist the urge to cut while hot or you’ll get gooey messes instead of neat squares. I learned this after a few impatient attempts!
Lastly, if you like a bit of contrast, sprinkle some flaky sea salt on top right after baking—it’s a small touch that plays well with all the sweetness and butter richness.
Variations & Adaptations
- Dietary tweaks: Swap all-purpose flour for a gluten-free blend to accommodate gluten sensitivities. Use dairy-free butter and vegan chocolate chips for a dairy-free version that still tastes indulgent.
- Flavor twists: Add ½ cup shredded coconut or a handful of dried cherries for a fruity, chewy surprise. Or stir in a teaspoon of cinnamon or espresso powder to deepen the flavor profile.
- Texture changes: For extra gooey bars, reduce baking time by 2-3 minutes. If you want a cakier texture, add an extra egg or 2 tablespoons of milk.
- Cooking methods: These bars can also be baked as individual cookies on a sheet for a chewier bite, or pressed into a muffin tin for portable treats.
- Personal favorite: I once tried mixing in chopped toffee bits alongside the chocolate chips—totally addictive and a fun surprise in every bite.
Serving & Storage Suggestions
These bars are best enjoyed at room temperature, letting those browned butter flavors and melty chocolate shine through. If you want a cozy treat, serve them slightly warmed (about 10 seconds in the microwave)—that gooey chocolate moment is unbeatable.
They pair wonderfully with a simple glass of cold milk, a cup of strong coffee, or even a cozy spiced tea, making them great for brunch or afternoon gatherings.
For storage, keep the bars in an airtight container at room temperature for up to 3 days. They’ll stay soft and moist, but if you want to keep them longer, wrap tightly and freeze for up to 2 months. Thaw overnight in the fridge or at room temperature before serving.
Reheating in a warm oven (about 300°F/150°C for 5 minutes) helps refresh their just-baked charm, especially after refrigeration. Over time, the flavors meld and deepen, so if you make a big batch, they just get better the next day.
Nutritional Information & Benefits
Each serving of these cookie bars (assuming 12 squares per pan) is roughly 300-350 calories, with about 15 grams of fat, 40 grams of carbs, and 4 grams of protein. The browned butter provides a richer source of healthy fats compared to regular butter, and the dark chocolate chips offer antioxidants.
Key ingredients like eggs supply essential nutrients, while the use of real butter (instead of margarine) gives you that wholesome, natural taste with minimal processing. If you opt for nuts, you add a boost of heart-healthy fats and fiber.
This recipe fits well in an occasional treat mindset and can be adapted for gluten-free or dairy-free diets. Just keep in mind the sugar content is moderate to high, so enjoy in balance with your overall nutrition goals.
Conclusion
These cozy browned butter chocolate chip cookie bars have become my go-to when feeding a crowd without sacrificing that homemade warmth everyone loves. They’re simple, comforting, and a little bit special, with a nutty depth that keeps people coming back for more.
Feel free to tweak the add-ins or baking time to suit your taste, but don’t skip the browned butter step—that’s the heart of their charm. Honestly, baking this recipe feels like wrapping yourself in a cozy sweater with a cup of tea, and sharing that feeling with others is the best part.
If you give these bars a try, I’d love to hear how you make them your own or any fun twists you add. Happy baking and sharing!
FAQs
Can I make these cookie bars ahead of time?
Absolutely! They keep well at room temperature for a few days or can be frozen for longer storage. Just cool completely before storing.
What’s the best way to brown butter without burning it?
Use a light-colored pan to monitor color changes and stir constantly over medium heat. Remove from heat as soon as the butter turns golden brown and smells nutty.
Can I use dark chocolate or milk chocolate instead of semi-sweet?
Yes, both work well. Dark chocolate adds richness with less sweetness, while milk chocolate gives a creamier, sweeter bite.
How do I make these bars gluten-free?
Swap the all-purpose flour for a gluten-free 1-to-1 baking flour blend. The texture may vary slightly but will still be delicious.
Why are my cookie bars cakey instead of chewy?
Overmixing the batter or adding too much flour can cause cakey texture. Try mixing just until combined and measure flour carefully.
Pin This Recipe!
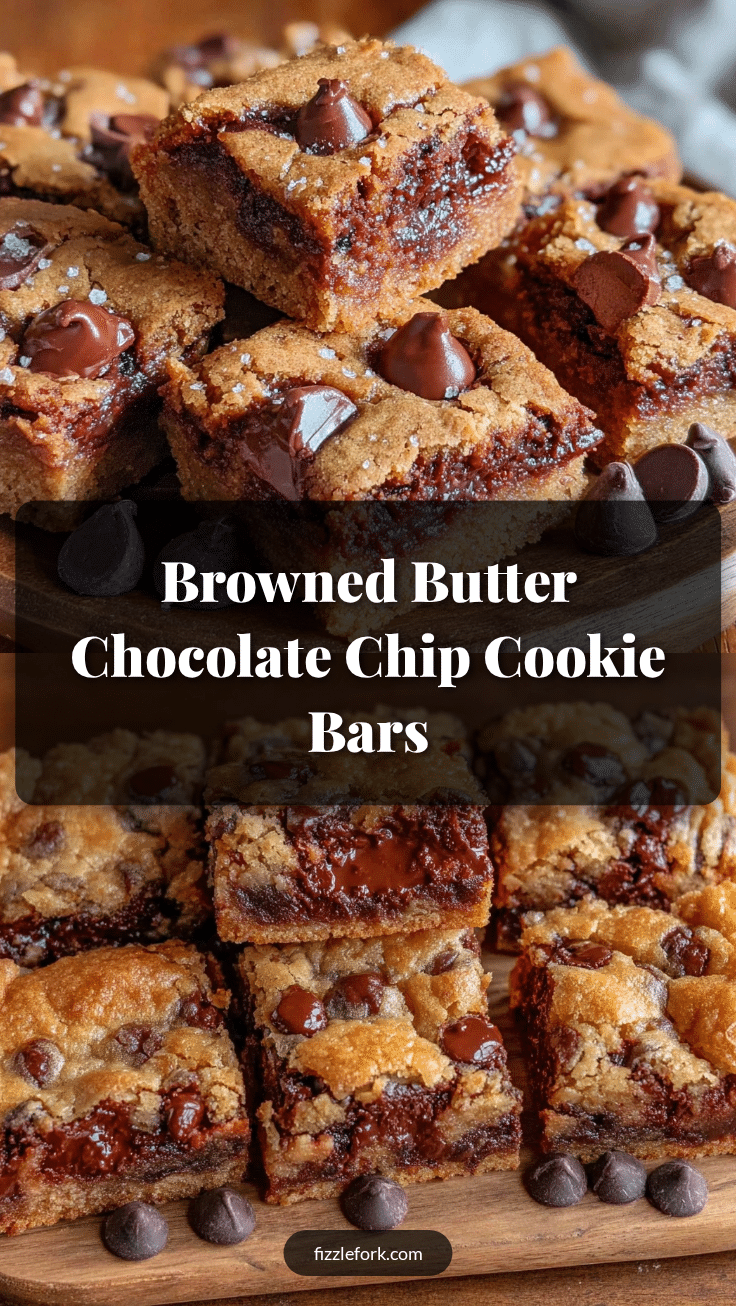
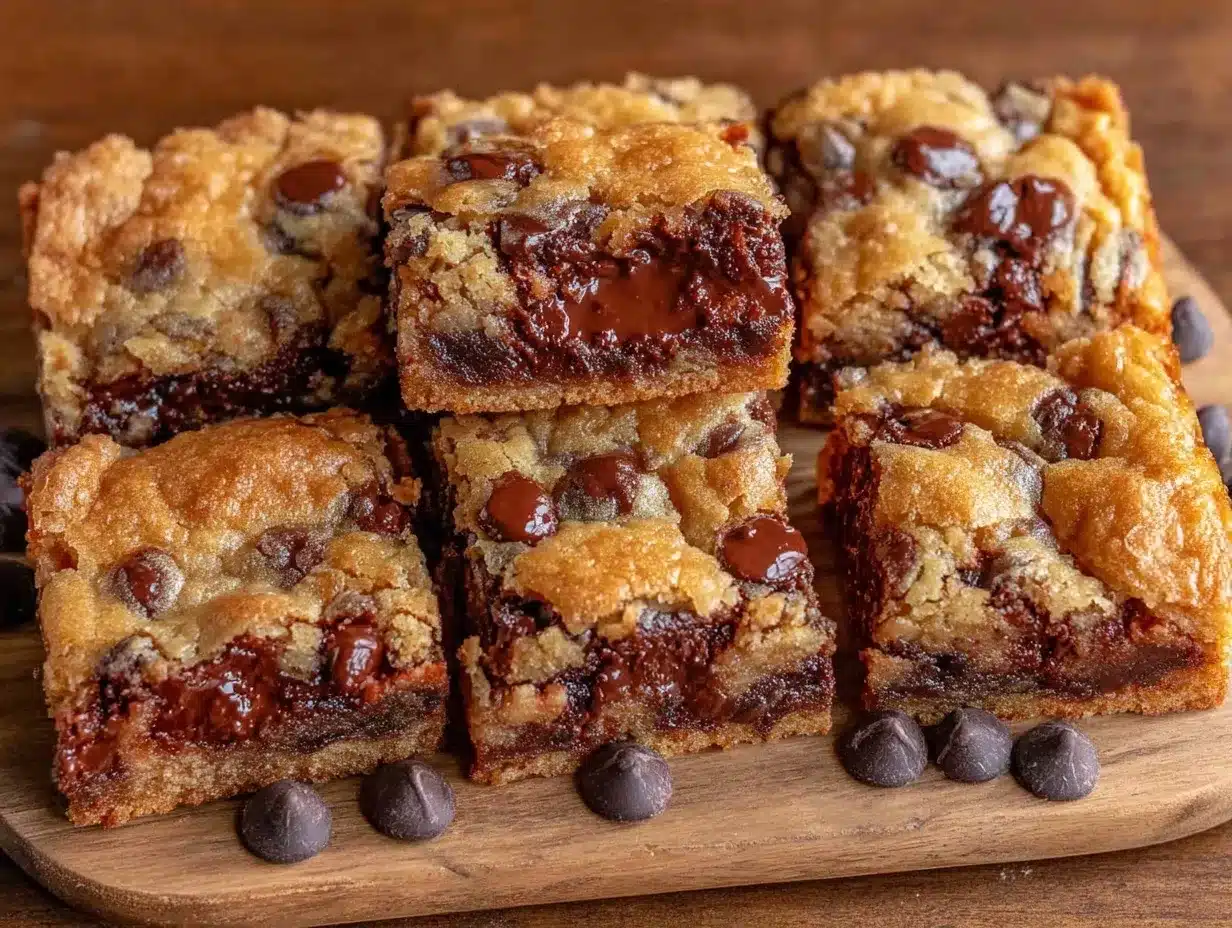
Browned Butter Chocolate Chip Cookie Bars
These cookie bars feature a rich, nutty browned butter flavor paired with melty chocolate chips, offering a soft and chewy texture with slightly crisp edges. Perfect for feeding a crowd and easy to make with pantry staples.
- Prep Time: 15 minutes
- Cook Time: 30 minutes
- Total Time: 45 minutes
- Yield: 12 servings 1x
- Category: Dessert
- Cuisine: American
Ingredients
- 1 cup (2 sticks) unsalted butter, browned
- 1 cup packed brown sugar
- 1/2 cup granulated sugar
- 2 large eggs, room temperature
- 2 teaspoons pure vanilla extract
- 2 1/2 cups all-purpose flour
- 1 teaspoon baking soda
- 1/2 teaspoon salt
- 2 cups semi-sweet chocolate chips
- Optional: 1/2 cup chopped toasted nuts (walnuts or pecans)
Instructions
- Place 1 cup (2 sticks) of unsalted butter in a medium saucepan over medium heat. Stir constantly with a wooden spoon or heat-resistant spatula. After about 5-7 minutes, the butter will melt, foam, then start to brown and smell nutty. Once it turns golden brown with tiny brown flecks, remove from heat immediately to prevent burning.
- In a large bowl, combine 1 cup packed brown sugar and 1/2 cup granulated sugar. Pour in the browned butter (warm but not hot), then whisk in 2 large room-temperature eggs and 2 teaspoons vanilla extract until smooth and glossy, about 1-2 minutes.
- In a separate bowl, whisk together 2 1/2 cups all-purpose flour, 1 teaspoon baking soda, and 1/2 teaspoon salt.
- Gradually add the dry mix to the wet ingredients, stirring gently with a spatula until just combined. Avoid overmixing.
- Fold in 2 cups semi-sweet chocolate chips and, if using, 1/2 cup chopped toasted nuts.
- Lightly grease a 9×13-inch baking pan or line it with parchment paper. Spread the dough evenly with a spatula or hands, pressing gently to fill corners and smooth the top.
- Bake at 350°F (175°C) for 25-30 minutes. Check at 25 minutes; edges should be golden brown and center set but still soft when touched lightly. A toothpick inserted should come out with a few moist crumbs, not wet batter.
- Let the bars cool completely in the pan on a cooling rack before slicing into squares.
Notes
Use a light-colored pan to monitor butter browning and stir constantly to avoid burning. Avoid overmixing the dough to keep bars tender. If baking in a glass pan, reduce oven temperature by 25°F to prevent overbrowning. Let bars cool completely before slicing for cleaner cuts. Optional flaky sea salt sprinkled on top after baking enhances flavor.
Nutrition
- Serving Size: 1 bar (1/12th of the
- Calories: 325
- Sugar: 25
- Sodium: 150
- Fat: 15
- Saturated Fat: 9
- Carbohydrates: 40
- Fiber: 2
- Protein: 4
Keywords: browned butter, chocolate chip, cookie bars, easy dessert, crowd-pleaser, chewy bars, buttery, chocolate, baking