Let me tell you, the scent of tangy pineapple mingling with crispy fried pork sizzling in the pan is enough to make anyone’s mouth water. The first time I whipped up this crispy authentic sweet and sour pork recipe, I was instantly hooked. It was the kind of moment where you pause, take a deep breath, and just smile because you know you’re onto something truly special. Years ago, when I was knee-high to a grasshopper, my grandma used to make a version of this dish that was the highlight of every family dinner. I thought nothing could top hers—until I tried making this recipe myself on a rainy weekend, trying to recreate that magic.
Honestly, my family couldn’t stop sneaking bites off the cooling rack (and I can’t really blame them)—the perfect combo of crunch, tang, and sweetness feels like a warm hug on a plate. You know what? This crispy authentic sweet and sour pork recipe is dangerously easy and provides pure, nostalgic comfort. Perfect for potlucks, a sweet treat for your kids after school, or just to brighten up your Pinterest cookie board with something savory and colorful. After testing this recipe multiple times (in the name of research, of course!), it’s become a staple for family gatherings and gifting. You’re definitely going to want to bookmark this one.
Why You’ll Love This Recipe
This crispy authentic sweet and sour pork recipe is a winner for so many reasons—let me break it down for you:
- Quick & Easy: Comes together in under 30 minutes, perfect for busy weeknights or last-minute cravings.
- Simple Ingredients: No fancy grocery trips needed; you likely already have everything in your kitchen.
- Perfect for Dinner or Parties: Great for cozy family dinners or impressing guests at your next potluck.
- Crowd-Pleaser: Always gets rave reviews from kids and adults alike, thanks to its irresistible crunch and balanced flavors.
- Unbelievably Delicious: The texture and flavor combo is next-level comfort food—crispy pork meets tangy, sweet sauce in perfect harmony.
What sets this recipe apart? Well, it’s all about the batter—a light, airy coating that crisps up like magic without being greasy. I use a pinch of cornstarch and a touch of baking powder for that perfect crunch. The sauce strikes the right balance—bright and tangy with just enough sweetness, thanks to fresh pineapple juice and a splash of rice vinegar. This isn’t just another sweet and sour pork recipe; it’s the best homemade version you’ll find, tested and fine-tuned to bring out the flavor without fuss.
Plus, this recipe feels like comfort food reimagined—fast, healthier than takeout, but with the same soul-soothing satisfaction. It’s the kind of dish that makes you close your eyes after the first bite and just savor the moment. Perfect for impressing without stress or turning a simple meal into something memorable.
What Ingredients You Will Need
This recipe uses simple, wholesome ingredients to deliver bold flavor and that satisfying crispy texture without the fuss. Most are pantry staples, and substitutions are easy if needed.
- For the Pork:
- 1 lb (450g) pork tenderloin or loin, cut into 1-inch cubes (lean cuts work best)
- 1 large egg, beaten (helps bind the batter)
- ¼ cup (30g) cornstarch (for that signature crisp)
- 2 tbsp all-purpose flour (adds a light coating)
- 1 tsp baking powder (makes the crust extra airy)
- Salt and pepper, to taste
- Vegetable oil, for frying (I use peanut oil for a neutral flavor and high smoke point)
- For the Sweet and Sour Sauce:
- ½ cup (120ml) pineapple juice (fresh if possible for the best tang)
- ¼ cup (60ml) rice vinegar (adds a gentle acidity)
- ⅓ cup (65g) granulated sugar (balances the tartness)
- 2 tbsp ketchup (for color and a hint of tomato sweetness)
- 1 tbsp soy sauce (for umami depth)
- 1 tbsp cornstarch mixed with 2 tbsp water (to thicken the sauce)
- 1 cup pineapple chunks (fresh or canned, drain if canned)
- 1 small red bell pepper, diced (adds color and crunch)
- 1 small green bell pepper, diced
- 1 small onion, chopped
Ingredient tips: I recommend using a trusted brand of cornstarch like Argo for the best texture. If you prefer gluten-free, swap all-purpose flour with rice flour or almond flour. For a dairy-free option, this recipe is naturally free from dairy, so no worries there. In summer, fresh pineapple chunks make the dish pop even more.
Equipment Needed
- Heavy-bottomed skillet or wok (for even heating and crisp frying)
- Mixing bowls (for batter and sauce prep)
- Measuring cups and spoons (accuracy matters here)
- Tongs or slotted spoon (to safely handle hot pork pieces)
- Paper towels (to drain excess oil after frying)
- Whisk (for mixing sauce smoothly)
- Knife and cutting board (for prepping vegetables and pork)
If you don’t have a wok, a heavy skillet works just fine. I’ve also fried smaller batches in a deep saucepan—you just have to be careful with oil temperature. For frying, I recommend a thermometer if you have one; it takes the guesswork out of the process and prevents greasy or undercooked pork. Budget-friendly tip: a simple candy or deep-fry thermometer can be found online or at kitchen stores for under $10 and is totally worth it.
Preparation Method
- Prep the Pork: Pat the pork cubes dry with paper towels to remove excess moisture. Season with salt and pepper. In a medium bowl, beat the egg gently.
- Make the Batter: In another bowl, combine cornstarch, flour, baking powder, and a pinch of salt. Add the beaten egg and stir until it creates a thick batter that coats the pork well. If too thick, add a splash of water; if too thin, add a little more cornstarch.
- Coat the Pork: Toss the pork cubes into the batter, making sure each piece is fully coated. This step is key for that crispy texture, so don’t skimp on the coating!
- Heat the Oil: Pour about 2 inches (5 cm) of vegetable oil into your wok or skillet. Heat to 350°F (175°C). Use a thermometer if you have one; if not, drop a small bit of batter into the oil—it should sizzle and float immediately.
- Fry the Pork: Fry the pork cubes in batches, avoiding overcrowding (overcrowding drops the oil temperature). Fry for about 3-4 minutes per batch or until golden brown and crispy. Remove with tongs and drain on paper towels. Keep warm in a low oven if needed.
- Prepare the Sauce: In a saucepan, whisk together pineapple juice, rice vinegar, sugar, ketchup, and soy sauce over medium heat. Bring to a gentle boil.
- Add Veggies & Pineapple: Stir in pineapple chunks, diced bell peppers, and onion. Cook for 3-4 minutes until veggies are slightly tender but still crisp.
- Thicken the Sauce: Mix cornstarch and water to make a slurry. Slowly pour into the simmering sauce while stirring constantly until it thickens, about 1-2 minutes.
- Combine & Serve: Toss the crispy pork into the sauce, making sure each piece is coated evenly. Serve immediately over steamed jasmine rice or noodles.
Pro tip: Keep the oil hot between batches to maintain crispiness. If the pork starts to look soggy, a quick re-fry for 30 seconds can bring back crunch.
Cooking Tips & Techniques
Getting that perfect crisp on sweet and sour pork can be tricky, but here are some tips I wish I’d known earlier:
- Dry Pork is Key: Moisture is the enemy of crispiness. Pat your pork as dry as possible before battering.
- Don’t Overcrowd the Pan: Fry in small batches to keep oil temperature steady and pork crunchy.
- Use a Thermometer: Oil temperature around 350°F (175°C) is ideal. Too low and pork gets greasy; too high and batter burns.
- Double Fry for Extra Crunch: If you have time, fry pork twice. First at a lower temp to cook through, then again at higher temp for maximum crunch.
- Make Sauce Last Minute: Prepare and thicken sauce while frying pork so it’s hot and fresh when served.
- Use Fresh Pineapple Juice: It really makes a difference in bright, authentic flavor.
Speaking from experience, I once skipped drying the pork properly and ended up with a soggy mess—lesson learned! Also, multitasking by prepping veggies while the pork fries saves loads of time.
Variations & Adaptations
This crispy authentic sweet and sour pork recipe is flexible to suit many tastes and dietary needs:
- Gluten-Free: Use rice flour or a gluten-free flour blend instead of all-purpose flour. Make sure your soy sauce is gluten-free too.
- Low-Carb Version: Swap cornstarch with almond flour or coconut flour for the batter. The sauce can be sweetened with a sugar substitute like erythritol.
- Vegetarian Twist: Replace pork with firm tofu or cauliflower florets, coated and fried using the same method. The sauce remains unchanged and delicious.
- Spicy Kick: Add a teaspoon of chili paste or fresh chopped chilies to the sauce for heat.
- Personal Favorite: I sometimes toss in sliced water chestnuts for crunch and swap bell peppers for colorful carrots and snap peas for seasonal freshness.
This dish adapts well to air frying too—just spray the battered pork lightly with oil and air fry at 400°F (200°C) for 12-15 minutes, shaking halfway through.
Serving & Storage Suggestions
Serve your crispy authentic sweet and sour pork piping hot over fluffy steamed jasmine rice or with chow mein noodles. A sprinkle of chopped green onions or toasted sesame seeds on top adds a nice finishing touch. Pair it with simple sides like steamed bok choy or a crunchy cucumber salad to balance the richness.
Leftovers can be stored in an airtight container in the refrigerator for up to 2 days. The pork will soften a bit, but reheating in a hot skillet or oven at 350°F (175°C) for 5-7 minutes restores some crunch. Avoid microwaving if you want to keep it crispy.
Flavors actually mellow and deepen after a day, so if you don’t mind less crunch, the next-day version tastes fantastic cold or reheated.
Nutritional Information & Benefits
This recipe provides a balanced meal with protein from pork, fiber and vitamins from fresh veggies, and a moderate amount of carbs from the sauce and rice. Per serving (about 1 cup pork with sauce), you can expect roughly:
| Calories | 420 kcal |
|---|---|
| Protein | 30g |
| Carbohydrates | 35g |
| Fat | 15g |
| Fiber | 3g |
Key health benefits include lean pork as a great source of B vitamins and protein, vitamin C from bell peppers and pineapple, and antioxidants from fresh ingredients. The recipe is naturally gluten-free if you swap soy sauce and flour accordingly, and can be adapted for low-carb or vegetarian diets.
Conclusion
To sum it up, this crispy authentic sweet and sour pork recipe is a must-try for anyone craving that classic, comforting Chinese takeout flavor made fresh at home. It’s easy enough for a weeknight dinner but impressive enough for guests. Customize the veggies or spice level to suit your taste, and you’ve got a go-to dish that’s both nostalgic and fresh.
Honestly, this recipe holds a special place in my heart—it’s the perfect blend of crunchy, tangy, and sweet that reminds me of family dinners and lazy weekends. Give it a go, and I’d love to hear your twists or how it turned out for you—drop a comment or share this with your foodie friends. Remember, good food is all about sharing and enjoying together!
FAQs About Crispy Authentic Sweet and Sour Pork
Can I use a different cut of pork for this recipe?
Yes! Pork tenderloin or loin are best for tenderness and quick cooking, but you can use pork shoulder if you don’t mind slightly chewier bites. Just cut into small, uniform pieces.
How do I keep the pork crispy after adding the sauce?
To keep maximum crispiness, toss the pork in sauce just before serving. If you need to make ahead, keep pork and sauce separate and combine right before eating.
Is it possible to bake instead of fry the pork?
Absolutely! Coat the pork as usual, place on a greased baking sheet, and bake at 425°F (220°C) for 20-25 minutes, flipping halfway, until crispy.
Can I make the sauce ahead of time?
Yes, the sauce can be made a day ahead and refrigerated. Reheat gently and thicken again if needed before adding pork.
What should I serve with sweet and sour pork?
Steamed jasmine rice, fried rice, or noodles are classic choices. Light vegetable sides like steamed bok choy, cucumber salad, or stir-fried greens balance the flavors nicely.
Pin This Recipe!

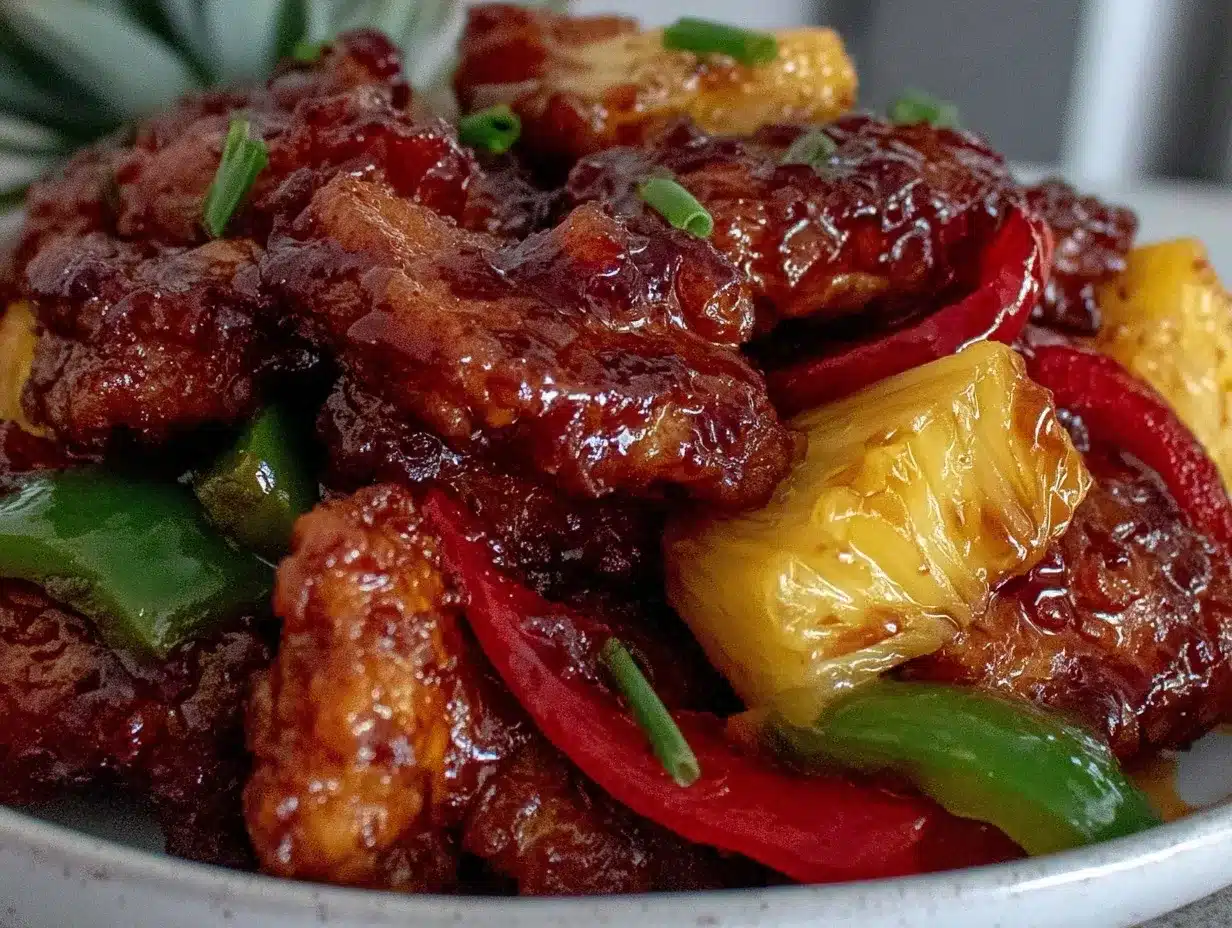
Crispy Authentic Sweet and Sour Pork Recipe Easy Homemade 30-Minute Dinner

A quick and easy recipe for crispy sweet and sour pork with a light, airy batter and a tangy, sweet sauce featuring fresh pineapple juice and colorful vegetables. Perfect for family dinners or potlucks.
- Prep Time: 10 minutes
- Cook Time: 20 minutes
- Total Time: 30 minutes
- Yield: 4 servings 1x
- Category: Main Course
- Cuisine: Chinese
Ingredients
- 1 lb (450g) pork tenderloin or loin, cut into 1-inch cubes
- 1 large egg, beaten
- 1/4 cup (30g) cornstarch
- 2 tbsp all-purpose flour
- 1 tsp baking powder
- Salt and pepper, to taste
- Vegetable oil, for frying (peanut oil recommended)
- 1/2 cup (120ml) pineapple juice
- 1/4 cup (60ml) rice vinegar
- 1/3 cup (65g) granulated sugar
- 2 tbsp ketchup
- 1 tbsp soy sauce
- 1 tbsp cornstarch mixed with 2 tbsp water (slurry)
- 1 cup pineapple chunks (fresh or canned, drained if canned)
- 1 small red bell pepper, diced
- 1 small green bell pepper, diced
- 1 small onion, chopped
Instructions
- Pat the pork cubes dry with paper towels to remove excess moisture. Season with salt and pepper. In a medium bowl, beat the egg gently.
- In another bowl, combine cornstarch, flour, baking powder, and a pinch of salt. Add the beaten egg and stir until it creates a thick batter that coats the pork well. Adjust consistency with water or cornstarch if needed.
- Toss the pork cubes into the batter, making sure each piece is fully coated.
- Pour about 2 inches of vegetable oil into a wok or heavy-bottomed skillet. Heat to 350°F (175°C).
- Fry the pork cubes in batches for 3-4 minutes or until golden brown and crispy. Remove with tongs and drain on paper towels. Keep warm if needed.
- In a saucepan, whisk together pineapple juice, rice vinegar, sugar, ketchup, and soy sauce over medium heat. Bring to a gentle boil.
- Stir in pineapple chunks, diced bell peppers, and onion. Cook for 3-4 minutes until veggies are slightly tender but still crisp.
- Slowly pour the cornstarch slurry into the simmering sauce while stirring constantly until it thickens, about 1-2 minutes.
- Toss the crispy pork into the sauce, coating each piece evenly. Serve immediately over steamed jasmine rice or noodles.
Notes
Pat pork dry to ensure crispiness. Fry in small batches to maintain oil temperature. Use a thermometer to keep oil at 350°F. Double frying can increase crunch. Toss pork in sauce just before serving to keep it crispy. Sauce can be made ahead and reheated. Baking option: bake at 425°F for 20-25 minutes, flipping halfway.
Nutrition
- Serving Size: About 1 cup pork wit
- Calories: 420
- Fat: 15
- Carbohydrates: 35
- Fiber: 3
- Protein: 30
Keywords: sweet and sour pork, crispy pork, homemade Chinese recipe, quick dinner, easy pork recipe, family dinner, potluck recipe