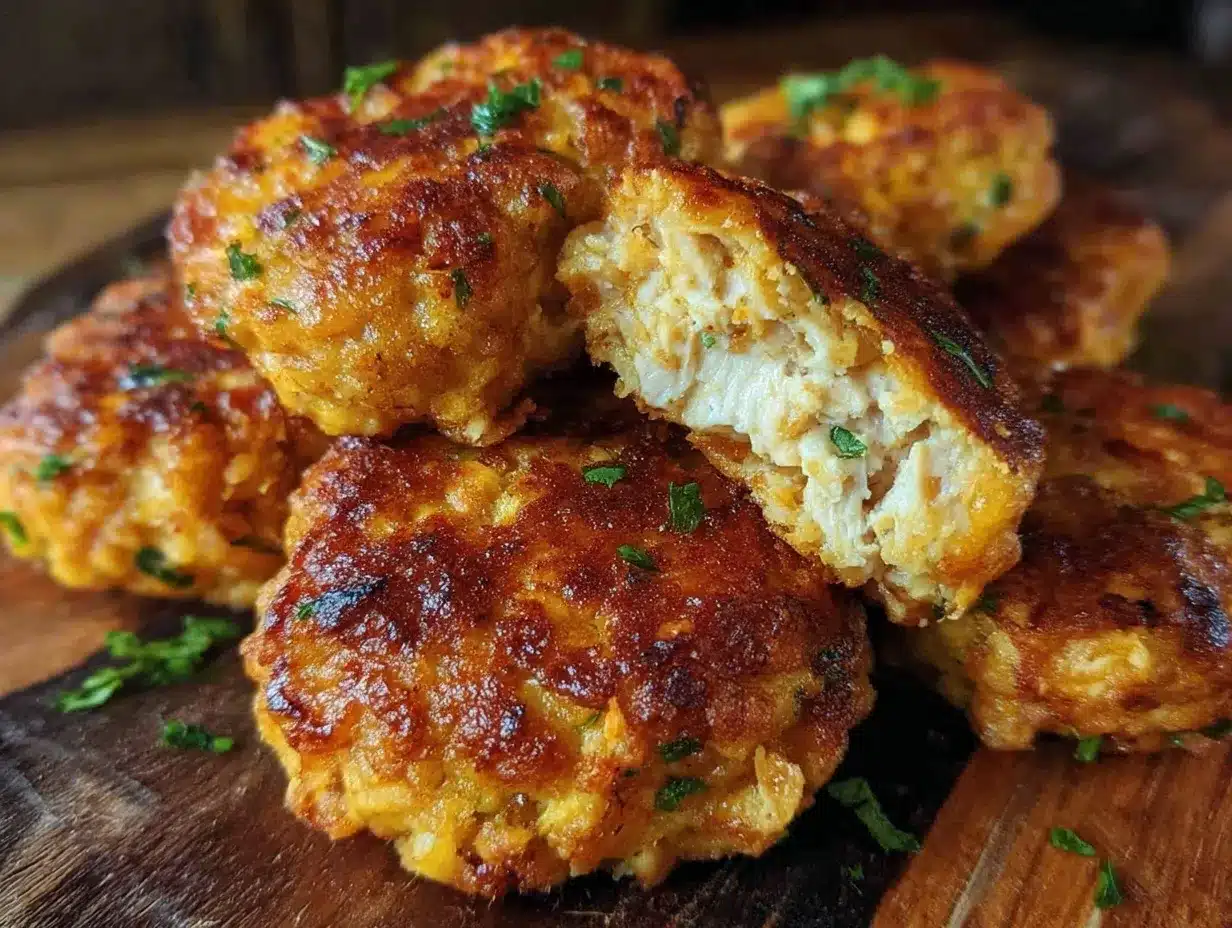
Let me tell you, the smell of golden, crispy chicken nugget dippers fresh out of the oven is enough to make anyone’s mouth water. There’s this unmistakable crunch that hits your ears before your taste buds even get a chance to say hello. The first time I baked these crispy baked chicken nugget dippers, I was instantly hooked—the kind of moment where you pause, take a deep breath, and just smile because you know you’re onto something truly special. It’s funny how such a simple snack can bring back memories of childhood afternoons and family dinners, especially since I’ve always been a sucker for homemade comfort food that’s a little healthier.
Years ago, when I was knee-high to a grasshopper, my grandma used to make these fried nuggets that were crispy on the outside and juicy on the inside. But let’s face it, frying is messy and not exactly the best for a quick snack fix. So, after several tries (and a few kitchen mishaps), I landed on this baked version that’s just as crunchy, full of flavor, and—honestly—a bit dangerous because it’s so easy to munch on. My family couldn’t stop sneaking them off the cooling rack (and I can’t really blame them). These chicken nugget dippers have become a staple for our weekend movie nights and a perfect little homemade snack to brighten up any lunchbox or potluck spread.
You know what’s great? These crispy baked chicken nugget dippers are perfect for those moments when you want something satisfying but don’t want to spend ages in the kitchen. Whether you’re feeding hungry kids, looking to impress friends without breaking a sweat, or just craving a healthier twist on a classic, this recipe has got you covered. Tested multiple times—in the name of research, of course—they always come out perfect: crispy, juicy, and downright delicious. You’re going to want to bookmark this one.
Why You’ll Love This Recipe
Honestly, this crispy baked chicken nugget dippers recipe ticks all the boxes for a go-to snack or light meal. Backed by plenty of kitchen trials and a lot of taste-testing, here’s why it stands out:
- Quick & Easy: Comes together in under 30 minutes, perfect for busy weeknights or last-minute cravings.
- Simple Ingredients: No fancy grocery trips needed; you likely already have everything in your kitchen.
- Perfect for Any Occasion: Great for after-school snacks, casual parties, or cozy dinners.
- Crowd-Pleaser: Always gets rave reviews from kids and adults alike (trust me, I’ve tested this on picky eaters!).
- Unbelievably Delicious: The crispy coating combined with juicy chicken delivers next-level comfort food vibes.
What sets this recipe apart is the baking method that locks in juiciness while giving you that golden crunch without the extra oil mess. Plus, the seasoning is spot-on—enough to add flavor without overpowering, making these nugget dippers adaptable for all tastes. I use a blend of panko breadcrumbs and a sprinkle of parmesan, which adds a subtle richness that you won’t find in the frozen stuff. And honestly, biting into these feels like comfort food reimagined—healthier, faster, but with the same soul-soothing satisfaction.
What Ingredients You Will Need
This recipe uses simple, wholesome ingredients to deliver bold flavor and satisfying texture without the fuss. Most are pantry staples, with a few easy swaps if needed.
- Chicken breasts: 1 pound (450 g), boneless and skinless, cut into bite-sized strips (the star of the show!)
- Panko breadcrumbs: 1 cup (about 100 g) – I recommend Japanese-style panko for the best crunch
- Grated Parmesan cheese: ¼ cup (25 g) – adds a subtle nutty flavor and helps crispness
- Garlic powder: 1 teaspoon – for that savory kick
- Onion powder: 1 teaspoon – balances the garlic
- Smoked paprika: ½ teaspoon – optional, but adds a lovely smoky depth
- Salt and pepper: to taste
- Eggs: 2 large, beaten (helps the coating stick)
- Olive oil spray or avocado oil spray: for a light mist before baking (makes the nuggets golden and crispy)
Substitution tips: Use almond flour or crushed gluten-free crackers instead of panko for a gluten-free version. Swap Parmesan for nutritional yeast if you want a dairy-free option but want to keep that cheesy flavor. If you prefer spicier, add a pinch of cayenne pepper or chili powder to the breadcrumb mix.
Equipment Needed
- Baking sheet: A rimmed baking sheet works best to catch any drips and keep your oven clean.
- Wire rack: Placing the chicken nugget dippers on a wire rack over the baking sheet helps air circulate for extra crispiness.
- Mixing bowls: At least two—one for the egg wash, one for the breadcrumb mixture.
- Sharp knife and cutting board: For cutting the chicken into dippers.
- Measuring cups and spoons: Precision matters when getting the seasoning just right.
If you don’t have a wire rack, placing parchment paper on your baking sheet and flipping the nuggets halfway through baking will still do the job. I’ve tried both ways and honestly, the wire rack makes a noticeable difference in crispiness. For budget-friendly options, simple cookie sheets and wire racks from your local store work great without breaking the bank.
Preparation Method
- Preheat your oven to 425°F (220°C). This high heat is key to getting that perfect crispy exterior.
- Prepare your chicken: Pat the chicken strips dry with paper towels. This little step helps the coating stick better and keeps moisture in check.
- Mix the dry coating: In a shallow bowl, combine panko breadcrumbs, grated Parmesan, garlic powder, onion powder, smoked paprika, salt, and pepper. Give it a good stir to evenly distribute the spices.
- Beat the eggs: In a separate bowl, whisk the eggs until smooth. This will help the coating stick to the chicken.
- Coat the chicken: Dip each chicken strip into the egg wash, letting excess drip off, then press into the breadcrumb mixture, coating evenly on all sides. For extra crunch, you can repeat this step—dip back into egg and breadcrumbs once more.
- Place on wire rack: Arrange the coated chicken strips on the wire rack over your baking sheet. This setup lets hot air circulate around each piece, ensuring crunch on all sides.
- Spray lightly with oil: Use olive or avocado oil spray to mist the nuggets. This little touch helps them brown beautifully without deep-frying.
- Bake: Place in the oven and bake for 15-18 minutes. Flip halfway through baking to get an even golden crust. Keep an eye on them near the end—the aroma will tell you when they’re perfectly done.
- Check doneness: Internal temperature should reach 165°F (74°C). If you don’t have a meat thermometer, cut into a nugget—the juices should run clear, and the meat should be opaque.
- Serve immediately: Let the nuggets rest for 2-3 minutes on the rack before serving. This helps the coating set and keeps them crispy.
Pro tip: Don’t overcrowd your baking sheet! Give each nugget some breathing room to crisp up properly. If you’re making a big batch, bake in two rounds. Also, patting the chicken dry is a small step that makes a big difference—you’ll notice the coating sticks better and the texture is much crispier.
Cooking Tips & Techniques
Getting crispy baked chicken nugget dippers just right isn’t rocket science, but a few tricks make all the difference. For starters, using panko breadcrumbs instead of regular breadcrumbs is a game changer. Panko has a lighter, airier texture that crisps up better in the oven.
Another tip is to use a wire rack on your baking sheet. This allows hot air to circulate under and around the nuggets, preventing sogginess. If you don’t have one, flipping the nuggets halfway through baking helps, but the wire rack is worth the investment if you make these often.
One mistake I made early on was skipping the egg wash. I thought the breadcrumbs might stick on their own, but nope—without that sticky layer, the coating falls off, and you end up with bland patches. Also, don’t rush the baking time; turning the nuggets halfway ensures even browning and prevents burning on one side.
Timing is key if you’re multitasking. Prepare your coating and egg wash before cutting the chicken, so you can go straight into dipping and baking without losing heat in the oven. And honestly, letting the nuggets rest a couple of minutes after baking makes them crunchier instead of soggy—something I learned after trying to serve them instantly!
Variations & Adaptations
This crispy baked chicken nugget dippers recipe is pretty flexible, which means you can make it your own with a few tweaks. Here are some favorites I’ve tried or recommend:
- Spicy Kick: Add a teaspoon of cayenne pepper or hot smoked paprika to the breadcrumb mix for a bit of heat that wakes up your taste buds.
- Herbed Delight: Mix in dried Italian herbs like oregano, basil, and thyme into the breadcrumbs for a fresh, aromatic twist.
- Gluten-Free: Swap panko with crushed gluten-free crackers or almond flour. Just keep an eye on the baking time as almond flour browns faster.
- Dairy-Free: Leave out the Parmesan and add extra garlic powder or nutritional yeast if you want that cheesy flavor without dairy.
- Air Fryer Option: Cook the nugget dippers in an air fryer at 400°F (200°C) for 10-12 minutes, flipping halfway. You’ll get that same golden crunch with less oven heat.
One of my personal favorite variations is swapping chicken for turkey breast—leaner but just as juicy when baked right. I also sometimes add a touch of lemon zest to the breadcrumb mix for a subtle brightness that’s unexpected but lovely.
Serving & Storage Suggestions
These crispy baked chicken nugget dippers are best served hot and fresh out of the oven—crispy on the outside, juicy inside, and begging for your favorite dipping sauce. Personally, I love pairing them with classic honey mustard, spicy sriracha mayo, or a cool ranch dip. For a fun twist, try a tangy BBQ sauce or even a creamy avocado dip for a fresh touch.
If you’re serving these at a party, arrange them on a platter with small bowls of assorted dips. They also make a perfect addition to lunchboxes, picnic baskets, or alongside a crisp salad for a light dinner.
To store leftovers, place cooled nugget dippers in an airtight container and refrigerate for up to 3 days. Reheat in the oven at 375°F (190°C) for 8-10 minutes or until warmed through and crispy again. Avoid microwaving if you want to keep the crunch (trust me, it gets soggy fast).
If you want to freeze, flash freeze the nuggets on a baking sheet first, then transfer to a freezer-safe bag for up to 2 months. Reheat straight from frozen in the oven at 400°F (200°C) for 15-20 minutes. The flavors often deepen a bit after resting, so leftovers can be even tastier the next day.
Nutritional Information & Benefits
Each serving of these crispy baked chicken nugget dippers offers a balanced mix of protein, moderate carbs, and low fat, making them a healthier alternative to traditional fried nuggets. Chicken breast is a lean protein that supports muscle repair and keeps you feeling full longer. Using panko and baking instead of frying cuts down on added fats and calories without sacrificing crunch.
This recipe is naturally gluten-friendly if you use gluten-free panko or almond flour, and dairy-free options are easily swapped in. Plus, the light seasoning keeps sodium levels reasonable. I like this recipe because it fits well into a balanced diet and satisfies snack cravings without guilt.
Conclusion
To wrap it all up, these crispy baked chicken nugget dippers are a winner for anyone craving a tasty, homemade snack that doesn’t involve frying or a ton of prep. They’re simple, quick, and come together with ingredients you likely already have. Plus, they’re adaptable enough to fit a variety of diets and taste preferences.
I love this recipe because it brings back that nostalgic comfort food vibe but with a lighter, fresher twist that suits my busy lifestyle. You really can’t go wrong here—whether you’re feeding kids, impressing friends, or just indulging yourself. Give it a try, tweak it your way, and let me know how it turns out. Don’t forget to share your favorite dip pairing or any creative adaptations you come up with. Happy cooking!
FAQs About Crispy Baked Chicken Nugget Dippers
Can I use chicken thighs instead of chicken breasts?
Absolutely! Chicken thighs are juicier and will work well. Just adjust baking time slightly as thighs may take a bit longer to cook through.
How do I keep the nuggets crispy after baking?
Using a wire rack during baking helps. Also, avoid covering them right after cooking and reheat in the oven instead of microwave when serving leftovers.
Is it possible to make these vegan?
You can try using plant-based chicken substitutes and egg replacers, but the texture and taste will differ. Experiment with vegan breadcrumbs and flax egg for binding.
Can I prepare these in advance and freeze them?
Yes! Freeze the coated, uncooked nuggets on a baking sheet first, then transfer to a freezer bag. Bake from frozen, adding a few extra minutes to cook time.
What are some good dipping sauces for these chicken nugget dippers?
Honey mustard, ranch, BBQ sauce, spicy mayo, or even a cool avocado dip all pair wonderfully. Feel free to get creative!
Pin This Recipe!
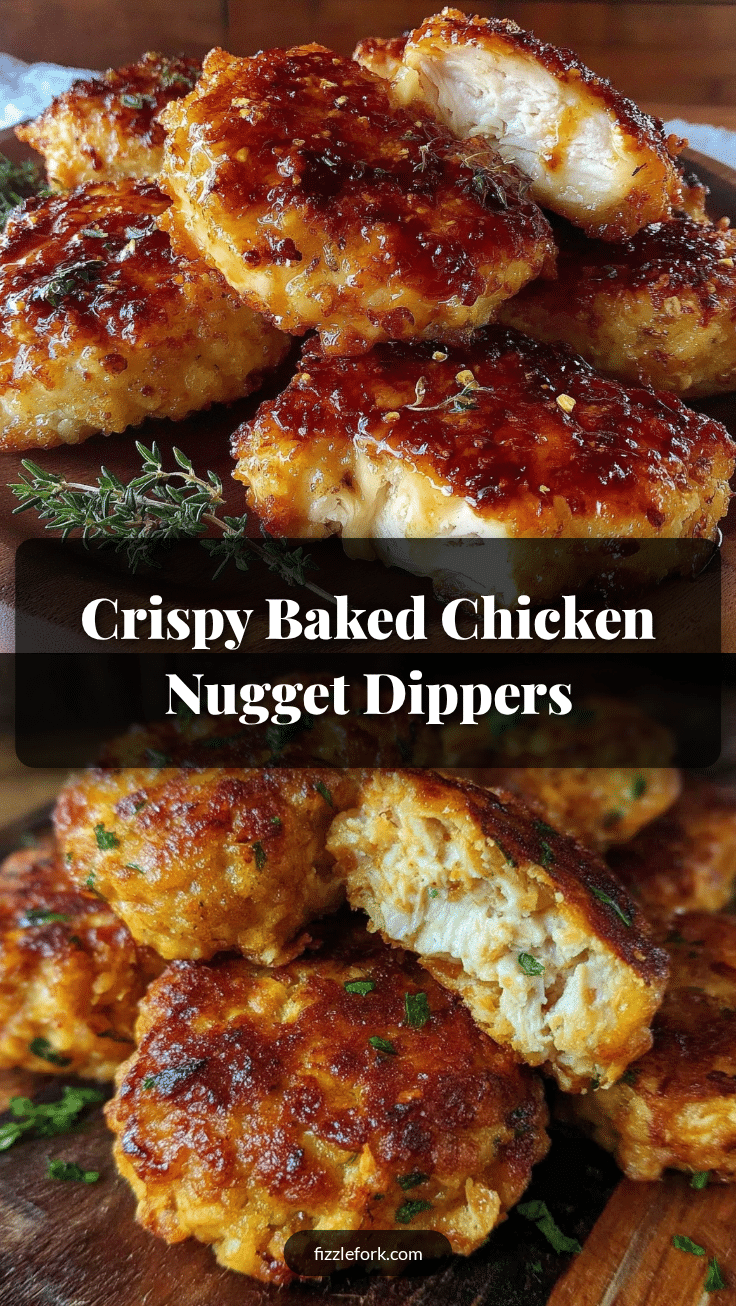
Crispy Baked Chicken Nugget Dippers
These crispy baked chicken nugget dippers are a healthier homemade snack that delivers a golden crunch and juicy interior, perfect for quick meals or snacks.
- Prep Time: 10 minutes
- Cook Time: 18 minutes
- Total Time: 28 minutes
- Yield: 4 servings 1x
- Category: Snack
- Cuisine: American
Ingredients
- 1 pound boneless, skinless chicken breasts, cut into bite-sized strips
- 1 cup panko breadcrumbs (about 100 g), preferably Japanese-style
- ¼ cup grated Parmesan cheese (25 g)
- 1 teaspoon garlic powder
- 1 teaspoon onion powder
- ½ teaspoon smoked paprika (optional)
- Salt and pepper to taste
- 2 large eggs, beaten
- Olive oil spray or avocado oil spray
Instructions
- Preheat your oven to 425°F (220°C).
- Pat the chicken strips dry with paper towels.
- In a shallow bowl, combine panko breadcrumbs, grated Parmesan, garlic powder, onion powder, smoked paprika, salt, and pepper.
- In a separate bowl, whisk the eggs until smooth.
- Dip each chicken strip into the egg wash, letting excess drip off, then press into the breadcrumb mixture, coating evenly on all sides. Repeat for extra crunch if desired.
- Arrange the coated chicken strips on a wire rack over a baking sheet.
- Spray lightly with olive or avocado oil spray.
- Bake for 15-18 minutes, flipping halfway through baking to ensure even golden crust.
- Check doneness: internal temperature should reach 165°F (74°C) or juices run clear and meat is opaque.
- Let the nuggets rest for 2-3 minutes on the rack before serving.
Notes
Use a wire rack for extra crispiness or flip nuggets halfway if no rack is available. Pat chicken dry before coating for better adhesion. For gluten-free, substitute panko with almond flour or gluten-free crackers. For dairy-free, replace Parmesan with nutritional yeast. Avoid microwaving leftovers to keep crispiness.
Nutrition
- Serving Size: About 4-5 nugget dip
- Calories: 280
- Sugar: 1
- Sodium: 350
- Fat: 9
- Saturated Fat: 2
- Carbohydrates: 18
- Fiber: 1
- Protein: 30
Keywords: chicken nuggets, baked chicken, healthy snack, crispy chicken, homemade nuggets, easy recipe, kid-friendly