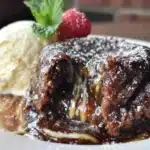
Let me tell you, the first time I pulled a warm, gooey molten lava cake out of the oven, the rich chocolate aroma instantly filled the kitchen—making my mouth water before I even took a bite. There’s something dangerously irresistible about that soft outer cake giving way to a river of molten chocolate that just begs to be savored slowly. The first time I baked Chili’s Molten Lava Cake with creamy vanilla ice cream was honestly one of those rare moments where you pause, take a deep breath, and just smile because you know you’re onto something truly special.
Years ago, when I was knee-high to a grasshopper, my family had a tradition of gathering around the dinner table with a sweet treat to close the night. I stumbled upon this recipe on a rainy weekend and thought, “Why not try something a little fancy but still comforting?” What I didn’t expect was how effortlessly this dessert would become a staple for family gatherings. My loved ones couldn’t stop sneaking the lava cakes off the cooling rack (and I can’t really blame them).
Honestly, this decadent Chili’s Molten Lava Cake with creamy vanilla ice cream feels like a warm hug on a plate. You know what? It’s perfect for impressing guests without the stress or just treating yourself after a long day. Whether you’re brightening up a potluck or making a sweet surprise for your kids, this recipe is dangerously easy and packed with pure, nostalgic comfort. After testing it multiple times (in the name of research, of course), I can say you’re going to want to bookmark this one.
Why You’ll Love This Recipe
This decadent Chili’s Molten Lava Cake recipe has been lovingly tested in my kitchen and is family-approved every single time. Whether you’re a seasoned baker or a newbie, this recipe hits all the right notes with its texture, flavor, and ease of preparation. Here’s why it stands out:
- Quick & Easy: You’ll have molten lava cakes ready in under 30 minutes, perfect for busy weeknights or last-minute dessert cravings.
- Simple Ingredients: No need for fancy or hard-to-find items; chances are, you already have everything in your pantry and fridge.
- Perfect for Any Occasion: Whether it’s a cozy dinner, a romantic date night, or a festive holiday treat, these cakes fit right in.
- Crowd-Pleaser: Kids and adults alike rave about these—there’s just something about that warm chocolate center paired with creamy vanilla ice cream that wins hearts every time.
- Unbelievably Delicious: The rich chocolate flavor combined with the smooth, velvety texture is pure comfort food magic.
What makes this recipe different? Well, it’s the perfect balance of a slightly crispy cake exterior with an ooey-gooey molten center that melts in your mouth. The creamy vanilla ice cream isn’t just a sidekick—it’s a match made in dessert heaven, complementing the warm richness with a cool, smooth contrast. This isn’t just another molten lava cake; it’s the best version I’ve found, refined through countless experiments and a few happy accidents. Trust me, it’s the kind of dessert that makes you close your eyes after the first bite and savor the moment.
What Ingredients You Will Need
This recipe uses simple, wholesome ingredients to deliver bold chocolate flavor and a satisfyingly soft texture without any fuss. Most of these are pantry staples, and you can easily find them at any grocery store.
- For the Cake Batter:
- Unsalted butter (6 tablespoons, softened) – adds richness and moistness
- Bittersweet or semi-sweet chocolate (6 ounces / 170g, chopped) – I recommend Ghirardelli for a deep chocolate flavor
- Granulated sugar (1 cup / 200g) – balances the chocolate’s bitterness
- Large eggs (3, room temperature) – helps create that tender structure
- All-purpose flour (1/2 cup / 65g) – provides the body for the cake
- Vanilla extract (1 teaspoon) – enhances the flavor
- Salt (a pinch) – to bring out the chocolate’s depth
- For the Creamy Vanilla Ice Cream:
- Heavy cream (1 cup / 240ml)
- Whole milk (1/2 cup / 120ml)
- Granulated sugar (1/3 cup / 65g)
- Vanilla bean paste or extract (1 tablespoon) – for that rich vanilla aroma
- Optional: pinch of salt to balance sweetness
If you want to make this dairy-free, swap butter with coconut oil and use your favorite dairy-free ice cream. For gluten-free lovers, almond or oat flour works well in place of all-purpose flour, though the texture will be a little different but still delicious. Also, if fresh vanilla beans aren’t available, a high-quality vanilla extract will do just fine.
Equipment Needed
To get this decadent Chili’s Molten Lava Cake just right, you’ll need a handful of kitchen tools that most home cooks already have. Here’s what I use and recommend:
- Ramekins or Muffin Tin: 6 individual ramekins around 6 ounces (180 ml) capacity work best for that perfect molten center.
- Mixing Bowls: A heatproof bowl for melting chocolate and butter, plus a larger bowl for mixing batter.
- Double Boiler or Microwave: For gently melting chocolate and butter—if you don’t have a double boiler, a microwave-safe bowl works fine, just go slow and stir often.
- Hand Mixer or Whisk: To beat eggs and sugar until light and fluffy.
- Spatula: For folding ingredients gently and scraping down the bowl.
- Cooling Rack: Crucial for letting the cakes cool slightly before serving.
If you’re on a budget, muffin tins work great in place of ramekins, just grease them well. Also, a digital timer will help keep an eye on baking time because a few seconds too long can mean no molten center. Personally, I keep a small silicone brush handy for greasing ramekins evenly.
Preparation Method

- Preheat your oven to 425°F (220°C). Lightly butter and dust the ramekins with cocoa powder to prevent sticking. This little trick also adds a subtle chocolate flavor to the edges.
- Melt the butter and chocolate together. Use a double boiler or microwave in short bursts, stirring every 20 seconds until smooth and glossy. Be careful not to overheat or scorch the chocolate—it should look silky with no lumps.
- In a separate bowl, beat the eggs and granulated sugar. Use a hand mixer or whisk vigorously for about 3-4 minutes until the mixture is pale and thick, almost like a mousse. This step traps air and creates that tender crumb.
- Slowly fold the melted chocolate mixture into the eggs and sugar. Use a spatula and fold gently to keep as much air in the batter as possible. The batter will look luscious and chocolatey.
- Sift the flour and salt over the batter. Fold carefully until just combined—avoid overmixing, or your cakes could turn dense.
- Divide the batter evenly among the ramekins. Fill each about 3/4 full for the perfect rise and molten center.
- Bake for 12-14 minutes. You want the edges firm and set but the center slightly jiggly—this is your cue that the lava is ready to ooze out when you cut in.
- Remove from the oven and let the cakes rest for 1 minute. Run a small knife around the edges to loosen, then invert each cake onto a serving plate.
- Serve immediately with a generous scoop of creamy vanilla ice cream. The contrast between hot lava cake and cold ice cream is pure magic.
Pro tip: If your cakes don’t have that molten center on the first try, don’t fret. Oven temperatures vary, so try reducing baking time by 30-second increments next time. Also, use fresh eggs at room temperature for the best rise. I learned that the hard way after a few sad, flat cakes!
Cooking Tips & Techniques
Getting molten lava cake just right is part science, part art, and a bit of patience. Here are some tips I’ve picked up over the years:
- Don’t Skip Room Temperature Eggs: They whip better and produce a lighter batter.
- Butter and Chocolate Must Melt Gently: Avoid overheating to keep the chocolate silky smooth, which affects texture.
- Folding is Key: Be gentle when folding flour and chocolate mixtures to keep air bubbles intact, which creates that fluffy exterior contrasted with a molten center.
- Watch the Oven Closely: Even a minute overbaking can turn that luscious lava into a fully cooked cake. I usually set my timer for 12 minutes and peek through the oven window instead of opening the door.
- Use Cocoa Powder, Not Flour, for Dusting: It prevents sticking and adds a subtle chocolate hint to the cake edges.
- Multitasking: While the cakes bake, whip up the vanilla ice cream or get your serving plates ready—timing is everything!
One lesson I learned the hard way: trying to make these in large batches can be tricky since oven heat distribution varies. Baking in smaller batches ensures perfect molten centers every time.
Variations & Adaptations
Want to switch things up? Here are some delicious ways to customize your molten lava cake:
- Dietary: Use almond or oat flour for gluten-free options, and swap butter for coconut oil for dairy-free versions. Coconut or cashew-based ice creams pair beautifully here.
- Flavor Twists: Add a teaspoon of espresso powder to the batter for a mocha kick or a pinch of cinnamon for warmth. A splash of orange zest brightens the chocolate flavor wonderfully.
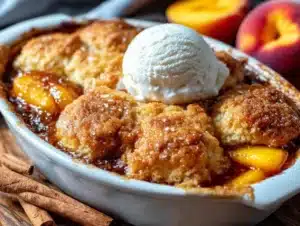
- Seasonal: In summer, top the cake with fresh raspberries or strawberries instead of vanilla ice cream. For fall, try a scoop of cinnamon or pumpkin ice cream.
- Cooking Method: If you don’t have an oven, these can be steamed in ramekins on the stovetop, although texture will be slightly different—still delicious!
One of my favorite personal twists is adding a spoonful of salted caramel sauce inside the batter before baking. It creates a molten caramel core alongside the chocolate—dangerously good and perfect for special occasions.
Serving & Storage Suggestions
These molten lava cakes are best served warm, right after baking, to enjoy that molten center at its peak. Pair with creamy vanilla ice cream or whipped cream for a classic combo. For a festive touch, dust with powdered sugar or add a few fresh berries on top.
If you have leftovers (which is rare!), cover tightly and refrigerate for up to 2 days. To reheat, pop them in a preheated 350°F (175°C) oven for 5-7 minutes or microwave briefly, but note the lava center may firm up.
Vanilla ice cream can be stored in the freezer for several weeks—just scoop out right before serving. The flavors of the cake actually deepen a bit if you let them sit for 10-15 minutes after baking, but be sure not to wait too long or the lava will set.
For entertaining, serve these on a pretty plate with a drizzle of chocolate or raspberry sauce to really wow your guests.
Nutritional Information & Benefits
Each serving of this decadent Chili’s Molten Lava Cake with vanilla ice cream roughly contains 450-500 calories, depending on portion size and ice cream amount. The cake is rich in antioxidants thanks to the dark chocolate, which can support heart health when enjoyed in moderation.
The eggs provide a good source of protein, and using high-quality unsalted butter adds healthy fats that help with nutrient absorption. For those watching carbs, using almond flour in the batter can reduce carbohydrate content.
This dessert is gluten-containing by default, but easy to adapt for gluten-free diets. Allergens include dairy, eggs, and gluten unless substitutions are made. As always, moderation is key, but this dessert offers pure joy and comfort that makes it worth every bite.
Conclusion
In a nutshell, this decadent Chili’s Molten Lava Cake paired with creamy vanilla ice cream is a dessert that’s both easy to make and impressive to serve. You really can’t go wrong with this recipe whether you’re treating yourself or hosting friends and family. The balance of warm, gooey chocolate and cool ice cream is simply unbeatable.
Feel free to customize it to your taste—maybe add a little chili powder for a subtle kick or swap in your favorite ice cream flavor. Honestly, I love this recipe because it brings people together, sparks smiles, and makes any day feel a little more special.
Give it a try, and let me know how it goes! Comments, shares, or your own tasty adaptations are always welcome. You’re going to want to keep this recipe handy for dessert emergencies and celebrations alike. Happy baking!
FAQs
How do I make sure my molten lava cake has a gooey center?
Bake for 12-14 minutes and look for firm edges with a slightly jiggly center. Avoid overbaking, and use room temperature eggs for better rise.
Can I prepare the batter ahead of time?
It’s best to bake the cakes immediately after preparing the batter to keep the molten center perfect, but you can refrigerate batter for up to 24 hours and bake just before serving.
What if I don’t have ramekins? Can I use a muffin tin?
Yes! Just grease the muffin tin wells well and fill about 3/4 full. Baking time may vary slightly, so watch closely.
Is there an easy way to melt chocolate without a double boiler?
Absolutely. Use a microwave-safe bowl and heat chocolate and butter in 20-second intervals, stirring in between until smooth.
Can I make the vanilla ice cream without an ice cream maker?
Yes! You can make a simple no-churn vanilla ice cream by whipping heavy cream with sweetened condensed milk and vanilla, then freezing until firm.
Pin This Recipe!

Decadent Chili’s Molten Lava Cake Recipe with Easy Vanilla Ice Cream Pairing
A rich and gooey molten lava cake with a warm chocolate center paired perfectly with creamy vanilla ice cream. This quick and easy dessert is perfect for impressing guests or treating yourself.
- Prep Time: 15 minutes
- Cook Time: 14 minutes
- Total Time: 29 minutes
- Yield: 6 servings 1x
- Category: Dessert
- Cuisine: American
Ingredients
- 6 tablespoons unsalted butter, softened
- 6 ounces bittersweet or semi-sweet chocolate, chopped
- 1 cup granulated sugar
- 3 large eggs, room temperature
- 1/2 cup all-purpose flour
- 1 teaspoon vanilla extract
- Pinch of salt
- For the vanilla ice cream:
- 1 cup heavy cream
- 1/2 cup whole milk
- 1/3 cup granulated sugar
- 1 tablespoon vanilla bean paste or extract
- Optional: pinch of salt
Instructions
- Preheat your oven to 425°F (220°C). Lightly butter and dust the ramekins with cocoa powder to prevent sticking.
- Melt the butter and chocolate together using a double boiler or microwave in short bursts, stirring every 20 seconds until smooth and glossy.
- In a separate bowl, beat the eggs and granulated sugar with a hand mixer or whisk vigorously for 3-4 minutes until pale and thick.
- Slowly fold the melted chocolate mixture into the eggs and sugar using a spatula, folding gently to keep air in the batter.
- Sift the flour and salt over the batter and fold carefully until just combined.
- Divide the batter evenly among the ramekins, filling each about 3/4 full.
- Bake for 12-14 minutes until edges are firm but the center is slightly jiggly.
- Remove from oven and let cakes rest for 1 minute. Run a knife around edges and invert onto serving plates.
- Serve immediately with a generous scoop of creamy vanilla ice cream.
Notes
Use room temperature eggs for better rise. Avoid overbaking to maintain molten center. Dust ramekins with cocoa powder instead of flour for subtle chocolate flavor and to prevent sticking. If using muffin tins, grease well and adjust baking time as needed. For dairy-free, substitute butter with coconut oil and use dairy-free ice cream. For gluten-free, substitute all-purpose flour with almond or oat flour.
Nutrition
- Serving Size: 1 molten lava cake w
- Calories: 475
- Sugar: 38
- Sodium: 120
- Fat: 28
- Saturated Fat: 16
- Carbohydrates: 50
- Fiber: 4
- Protein: 6
Keywords: molten lava cake, chocolate dessert, easy dessert, vanilla ice cream, quick dessert, family dessert, chocolate cake