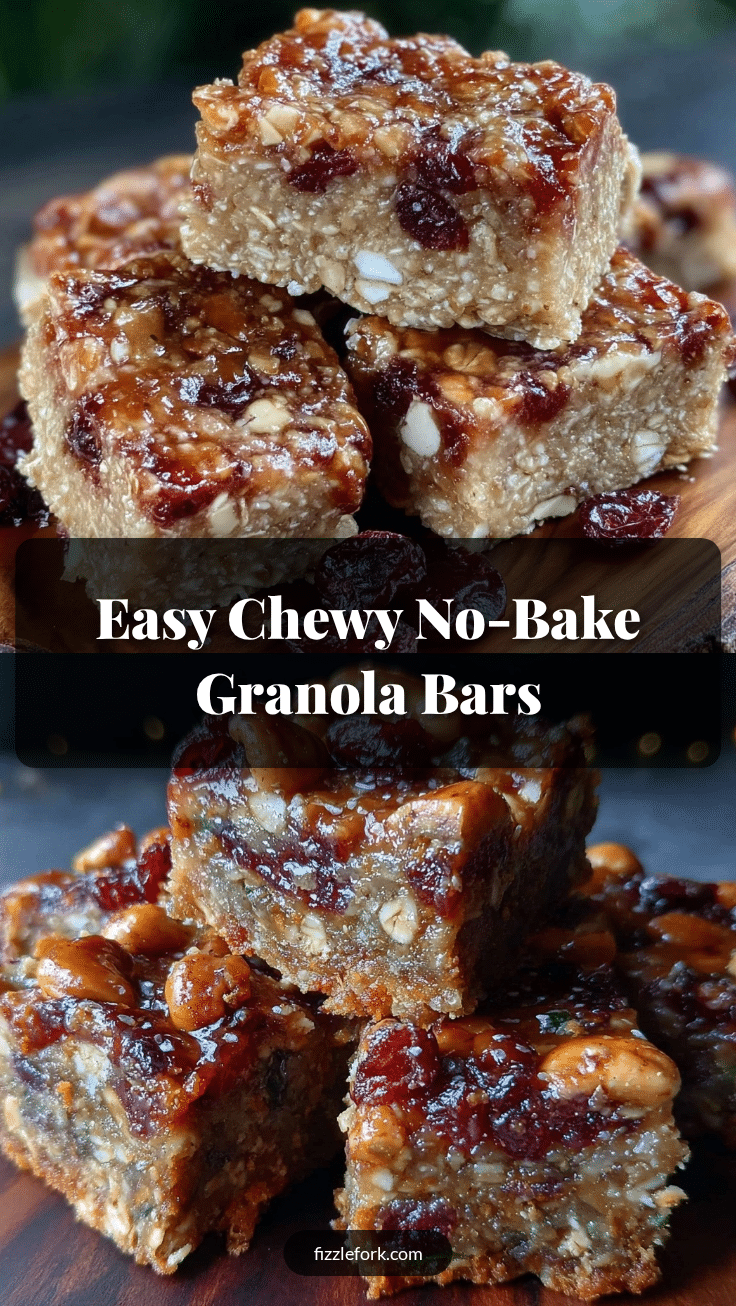
Let me tell you, the warm, nutty aroma of honey and toasted oats blending together in the kitchen is enough to make your mouth water — especially when it’s the promise of easy chewy no-bake granola bars for travel snacks. The first time I whipped up these bars, I was scrambling to pack for a weekend getaway and realized I’d forgotten any proper snacks. Honestly, these bars saved the day. I still remember that pause—the kind where you bite in, close your eyes, and grin because you know you’re holding something truly special.
When I was knee-high to a grasshopper, my grandma used to make the best homemade snacks, but they always involved a lot of baking. Years ago, I stumbled upon this no-bake version while trying to recreate that nostalgic comfort but without heating up the whole kitchen. What I wish I’d known then is how dangerously easy these granola bars are—no oven fuss, just pure, chewy goodness that’s perfect for travel.
My family couldn’t stop sneaking them off the counter (and I can’t really blame them). These bars quickly became a staple for road trips, hiking days, and even gifting at bake sales. Let’s face it, when you’re on the go, you want snacks that are both satisfying and hassle-free, and these easy chewy no-bake granola bars fit that bill perfectly.
Whether you’re packing lunchboxes, prepping for a flight, or just need a quick bite between meetings, these bars brighten up your snack game with minimal effort. I’ve tested this recipe more times than I can count—in the name of research, of course—and it always delivers that comforting, chewy texture that feels like a warm hug from the inside out. You’re going to want to bookmark this one for all your travel snack needs.
Why You’ll Love This Recipe
After countless trials (and a few sweet mishaps), I can say these easy chewy no-bake granola bars are a winner in so many ways. Here’s why they’ve earned a permanent spot in my snack arsenal:
- Quick & Easy: Comes together in under 20 minutes, perfect for those last-minute snack emergencies or busy mornings.
- Simple Ingredients: No fancy grocery runs needed; you probably have everything in your pantry right now.
- Perfect for Travel: Designed to hold up well in your bag without crumbling—ideal for flights, road trips, or hiking.
- Crowd-Pleaser: Kids, adults, and picky eaters all give these bars rave reviews (my own kids fight over the last piece!).
- Unbelievably Delicious: The chewy texture combined with just the right balance of sweet and nutty flavor is pure comfort food.
What sets this recipe apart? It’s the no-bake magic—no oven, no mess, just a quick mix-and-press method that yields bars with a satisfyingly chewy bite. I like to blend my nut butter and honey gently to create that perfect sticky base, which holds everything together without being too hard or crumbly. Plus, tweaking the oats-to-nut ratio has made these bars my go-to for customizing texture and flavor depending on the season or mood.
This recipe isn’t just good—it’s the kind that makes you close your eyes after the first bite and say, “Yep, this is snack perfection.” It’s comfort food reimagined for busy lives and travel adventures. Honestly, if you want to impress guests or just treat yourself without fuss, these bars have you covered.
What Ingredients You Will Need
This recipe uses simple, wholesome ingredients to deliver bold flavor and satisfying texture without the fuss. Most of these are pantry staples, and you’ll find them easy to swap if needed.
- Old-Fashioned Rolled Oats (2 cups / 180g) – The chewy backbone of these granola bars. Quick oats can be used but might change the texture slightly.
- Nut Butter (1 cup / 240ml) – Creamy peanut butter works great, but almond or cashew butter gives a nice twist. I personally prefer a natural, unsweetened brand like Smucker’s Natural for that pure nutty flavor.
- Honey (⅓ cup / 113g) – Acts as the sweetener and sticky binder. Raw honey adds a nice depth of flavor.
- Vanilla Extract (1 teaspoon) – Just a splash to round out the sweetness.
- Chia Seeds (2 tablespoons) – Optional, but adds a nice crunch and fiber boost.
- Mini Chocolate Chips (½ cup / 90g) – If you want a touch of indulgence. Use dairy-free chips if preferred.
- Flaxseed Meal (2 tablespoons) – Optional, helps with binding and adds omega-3 goodness.
- Salt (¼ teaspoon) – Just a pinch to balance sweetness.
For seasonal tweaks, I like swapping mini chocolate chips for dried cranberries or chopped nuts in the fall. If you want a gluten-free option, make sure your oats are certified gluten-free. And if you’re dairy-free, almond or sunflower seed butter works beautifully.
Equipment Needed
- Mixing Bowl: A large bowl to combine everything. Glass or stainless steel works best to avoid sticking.
- Measuring Cups and Spoons: Precise measurements matter here for texture.
- Wooden Spoon or Silicone Spatula: For mixing the sticky ingredients without losing patience.
- 8×8-Inch Baking Pan or Square Dish: To press and set the bars. I like glass pans because they make it easy to lift the whole batch out.
- Parchment Paper: For lining the pan and making removal a breeze.
- Plastic Wrap or Food Storage Container: To store your bars once set.
If you don’t have parchment paper, lightly greasing the pan works too, but trust me, parchment is a game-changer for cleanup. No fancy gadgets are needed here, making this recipe budget-friendly and accessible.
Preparation Method
- Prepare your pan: Line an 8×8-inch (20x20cm) baking dish with parchment paper, letting the edges hang over for easy removal. This takes about 2 minutes.
- Mix the wet ingredients: In your large mixing bowl, combine 1 cup (240ml) nut butter, ⅓ cup (113g) honey, and 1 teaspoon vanilla extract. Stir gently but thoroughly until smooth and well blended. This should take about 3-4 minutes. If your nut butter is thick, warming it slightly makes mixing easier.
- Add dry ingredients: To the wet mixture, add 2 cups (180g) rolled oats, 2 tablespoons chia seeds, 2 tablespoons flaxseed meal, ½ cup (90g) mini chocolate chips, and ¼ teaspoon salt. Stir everything together until the oats and seeds are evenly coated and the mixture looks sticky but not runny. This step might take 4-5 minutes.
- Press into pan: Transfer the mixture into your prepared pan. Using a spatula or the back of a spoon, press firmly and evenly to compact the mixture. This helps the bars hold together and gives that satisfying chewy texture. Spend about 3 minutes here, applying firm pressure.
- Chill: Cover the pan with plastic wrap and refrigerate for at least 2 hours, or until the mixture is firm to the touch. This chilling step is key for bars that won’t crumble on the go.
- Cut and serve: Once chilled, lift the mixture out using the parchment paper edges. Place on a cutting board and slice into 10-12 bars, depending on your preferred size. These bars are ready to enjoy immediately, but I find they taste better after resting for a few hours.
Pro tip: If the mixture feels too sticky to handle, chill it for 15 minutes before pressing. If too dry, add a tablespoon of honey or nut butter to help bind.
Cooking Tips & Techniques
Getting the perfect chewy texture takes a bit of practice, but here’s what I’ve learned from making these bars over and over:
- Use room temperature nut butter: Cold nut butter is tough to mix and can lead to uneven texture. Warming it slightly in the microwave for 20 seconds helps.
- Don’t skip the chilling: I once tried skipping the fridge step, and let me tell you, the bars fell apart in my bag. Chilling firms everything up so your bars hold their shape.
- Press firmly: The harder you press the mixture into the pan, the less crumbly the bars will be. I like using a flat-bottomed measuring cup to really compact the mix.
- Measure oats carefully: Too many oats can dry out the bars, so stick to the recipe ratios for best results.
- Mix-ins are flexible: Adding seeds or chocolate chips is great, but don’t overload the bars or they’ll be too crumbly.
One lesson I learned the hard way: using crunchy nut butter threw off the texture big time. Smooth and creamy versions are your best bet here. Also, multitasking is your friend—mix your wet ingredients while the oats are measuring to save time.
Variations & Adaptations
Ready to shake things up? Here are some fun ways to customize your easy chewy no-bake granola bars:
- Seasonal Fruit Twist: Swap chocolate chips for dried cranberries, chopped apricots, or freeze-dried berries for a fruity punch.
- Nut-Free Version: Use sunflower seed butter or tahini instead of peanut or almond butter to make these safe for nut allergies.
- Protein Boost: Add a scoop of your favorite protein powder or toss in hemp seeds to up the nutrition factor.
- Spiced Up: Stir in a teaspoon of cinnamon or pumpkin pie spice for a cozy flavor profile perfect for fall.
- Chocolate Lovers’: Drizzle melted dark chocolate over the chilled bars or fold in cocoa nibs for extra indulgence.
I tried adding shredded coconut once, which gave a lovely tropical vibe but required a touch more honey to keep the bars sticky. Feel free to experiment with what you have on hand! Just remember to keep the ratio of wet to dry ingredients balanced to maintain that perfect chew.
Serving & Storage Suggestions
These bars are best served chilled or at room temperature. If you’re packing them for travel, wrapping individually in parchment or wax paper keeps them neat and easy to grab on the go.
Pair them with a hot cup of coffee or tea for a morning boost, or enjoy alongside fresh fruit for a balanced snack. They also make a great addition to picnic baskets or lunchboxes.
To store, place the bars in an airtight container and keep refrigerated for up to 1 week. For longer storage, freeze them wrapped individually in plastic wrap and placed in a freezer bag. When you want a snack, thaw at room temperature for 20 minutes or pop in the microwave for 15 seconds.
Flavors actually deepen when stored overnight, so making them a day ahead is ideal for travel snacks. Just remember to keep them cool in warm weather, or they might get a bit soft.
Nutritional Information & Benefits
Each bar (assuming 12 bars per batch) roughly contains:
| Calories | Fat | Carbohydrates | Fiber | Protein |
|---|---|---|---|---|
| ~180 kcal | 9g | 20g | 3g | 5g |
Thanks to the oats and seeds, these bars provide a good source of fiber and healthy fats, helping keep you full and energized. The nut butter adds protein, making them a smart snack for sustained travel or active days. Using natural sweeteners like honey means you’re avoiding refined sugars, keeping the snack wholesome.
They’re gluten-free when made with certified oats and nut-free versions are easy to make, too. Be mindful of nut allergies if serving a crowd. Overall, these bars offer a well-rounded, satisfying option for anyone looking to snack smart on the move.
Conclusion
If you’re looking for a snack that’s quick, easy, and reliably delicious, these easy chewy no-bake granola bars for travel snacks are your new best friend. They’re flexible, friendly to most diets, and come together with minimal fuss—perfect for busy lives and busy adventures.
I love this recipe because it brings together simple ingredients in a way that feels homemade and comforting, but without heating up the kitchen or fiddling with complicated steps. Honestly, it’s a recipe I turn to time and again when I want a nutritious, chew-worthy snack that travels well.
Give it a try, tweak it your way, and let me know how your bars turn out! Share your favorite mix-ins or storage hacks in the comments below—I’m always eager to hear from fellow snack lovers. Here’s to many happy, chewy bites on your next journey!
FAQs About Easy Chewy No-Bake Granola Bars
Can I use quick oats instead of rolled oats?
You can, but quick oats tend to make the bars softer and less chewy. Rolled oats hold up better for that chewy texture we love.
How long do these granola bars last?
Stored in an airtight container in the fridge, they last about one week. You can freeze them for up to 3 months for longer storage.
Can I make these bars vegan?
Yes! Substitute honey with maple syrup or agave nectar and use dairy-free chocolate chips to keep it vegan-friendly.
What’s the best way to prevent bars from crumbling?
Pressing the mixture firmly into the pan and chilling for at least two hours is key. Using enough nut butter and honey as binders also helps.
Can I add protein powder to these bars?
Absolutely! Adding a scoop of your favorite protein powder can boost nutrition, but you might need to adjust the wet ingredients slightly to keep the right texture.
Pin This Recipe!
Easy Chewy No-Bake Granola Bars Recipe Perfect for Travel Snacks
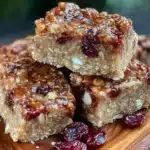
These easy chewy no-bake granola bars are perfect for travel snacks, combining a nutty, sweet flavor with a satisfying chewy texture. They come together quickly without any baking, making them ideal for busy days and on-the-go snacking.
- Prep Time: 10 minutes
- Cook Time: 0 minutes
- Total Time: 2 hours 10 minutes
- Yield: 10-12 bars 1x
- Category: Snack
- Cuisine: American
Ingredients
- 2 cups (180g) old-fashioned rolled oats
- 1 cup (240ml) nut butter (peanut, almond, or cashew butter)
- ⅓ cup (113g) honey
- 1 teaspoon vanilla extract
- 2 tablespoons chia seeds (optional)
- ½ cup (90g) mini chocolate chips (use dairy-free if preferred)
- 2 tablespoons flaxseed meal (optional)
- ¼ teaspoon salt
Instructions
- Line an 8×8-inch (20×20 cm) baking dish with parchment paper, letting the edges hang over for easy removal.
- In a large mixing bowl, combine 1 cup (240ml) nut butter, ⅓ cup (113g) honey, and 1 teaspoon vanilla extract. Stir gently but thoroughly until smooth and well blended. Warm nut butter slightly if thick.
- Add 2 cups (180g) rolled oats, 2 tablespoons chia seeds, 2 tablespoons flaxseed meal, ½ cup (90g) mini chocolate chips, and ¼ teaspoon salt to the wet mixture. Stir until oats and seeds are evenly coated and mixture is sticky but not runny.
- Transfer the mixture into the prepared pan. Press firmly and evenly with a spatula or back of a spoon to compact the mixture.
- Cover the pan with plastic wrap and refrigerate for at least 2 hours until firm.
- Lift the mixture out using parchment paper edges and slice into 10-12 bars. Serve immediately or after resting for a few hours.
Notes
Use room temperature nut butter for easier mixing. Chilling the bars for at least 2 hours is essential to prevent crumbling. Press the mixture firmly into the pan for best texture. For vegan version, substitute honey with maple syrup or agave nectar and use dairy-free chocolate chips. Mix-ins like dried cranberries or nuts can be swapped for chocolate chips. Store bars in an airtight container in the fridge for up to 1 week or freeze for up to 3 months.
Nutrition
- Serving Size: 1 bar (assuming 12 b
- Calories: 180
- Fat: 9
- Carbohydrates: 20
- Fiber: 3
- Protein: 5
Keywords: no-bake granola bars, chewy granola bars, travel snacks, easy granola bars, healthy snacks, nut butter bars, honey granola bars