“Can you believe the cake is still sitting there, naked and sad?” my sister texted me just an hour before the graduation party was supposed to start. Honestly, I was scrambling—between last-minute decorations and a mountain of other errands, the idea of whipping up a cake that looked as good as it tasted felt like a stretch. But here’s the thing about this perfect customizable graduation sheet cake with vibrant buttercream: it’s the kind of recipe you can trust to save the day without breaking a sweat.
I remember that moment well because this cake wasn’t always my go-to. It started as a bit of a happy accident during one chaotic celebration when I grabbed some leftover cake mix, threw in easy tweaks, and ended up with a crowd-pleasing dessert that practically vanished before I could blink. The vibrant buttercream? That was my secret weapon—bright, bold, and totally forgiving if you’re not a pro decorator.
Since then, this recipe has become my quiet champion for graduations, birthdays, or any time I need a cake that feels special but doesn’t send me into a frenzy. It’s customizable, forgiving, and best of all, it lets me add a splash of personality with colorful, creamy frosting that’s as fun to make as it is to eat. No fancy tools or complicated steps—just good ingredients and a little creativity. This cake stuck because it turns moments that could be stressful into something deliciously simple and joyful. And, honestly, that’s why I keep coming back to it.
Why You’ll Love This Recipe
After countless trials (and a few frosting disasters), I’m confident this customizable graduation sheet cake with vibrant buttercream is a winner in so many ways. Here’s why it’s become a staple in my kitchen:
- Quick & Easy: From mixing to frosting, you’ll have this cake ready in under 90 minutes—ideal for last-minute parties or busy days.
- Simple Ingredients: No need for exotic items; everything is probably in your pantry already, making it accessible and stress-free.
- Perfect for Celebrations: Whether it’s a graduation, birthday, or casual get-together, this cake adapts to your vibe with customizable flavors and colors.
- Crowd-Pleaser: Kids, adults, picky eaters—all agree this cake hits the spot every time.
- Unbelievably Delicious: The tender, moist crumb combined with the creamy, vibrant buttercream creates a flavor and texture combo that’s just right.
What sets this recipe apart? It’s the versatility and the foolproof buttercream frosting. I’ve tested blending different extracts and switching up the color palettes to match any theme—from classic blue and gold for graduations to pastel tones for spring celebrations. Plus, the frosting stays silky smooth and spreadable, even if you’re decorating in a rush. This isn’t just a cake you bake; it’s a canvas for your creativity that tastes like a dream.
And trust me, there’s something about serving a cake that looks vibrant and festive without the usual stress that makes any gathering feel a little more special.
What Ingredients You Will Need
This recipe relies on simple, wholesome ingredients that deliver bold flavor and a moist, tender texture without complicated steps or hard-to-find items. Most are pantry staples, and I’ll point out easy substitutions or tweaks along the way.
- For the Cake Batter:
- All-purpose flour (2 ½ cups / 315g) – provides structure and a soft crumb
- Granulated sugar (2 cups / 400g) – balances sweetness and tenderness
- Baking powder (2 ½ tsp) – helps the cake rise beautifully
- Baking soda (1 tsp) – adds extra lift
- Salt (½ tsp) – enhances overall flavor
- Unsalted butter (½ cup / 113g), softened – adds richness and moisture
- Whole milk (1 cup / 240ml), room temperature – keeps the batter smooth
- Large eggs (3), room temperature – for structure and binding
- Vanilla extract (1 tbsp) – classic flavor base; feel free to substitute with almond extract for a twist
- Optional: Food coloring gel (a few drops) – for adding subtle or bold hues to the batter
- For the Vibrant Buttercream Frosting:
- Unsalted butter (1 cup / 227g), softened – the creamy base
- Powdered sugar (4 cups / 480g), sifted – for smooth sweetness
- Heavy cream or whole milk (2-3 tbsp / 30-45ml) – adjusts frosting consistency
- Vanilla extract (1 tsp) – flavor enhancer
- Food coloring gel (various colors) – I prefer brands like AmeriColor for their rich pigments and true vibrancy
- Optional: Gel paste for shimmer or edible glitter if you want to add an extra-special touch
For gluten-free fans, swapping all-purpose flour with a 1:1 gluten-free blend works well here. Dairy-free eaters can replace butter with vegan margarine and milk with almond or oat milk to keep things tasty and suitable for all guests.
In summer, I sometimes swap vanilla for lemon zest and juice in the frosting, which adds a fresh zing that pairs perfectly with the moist cake base. It’s all about making the cake your own!
Equipment Needed
- 9×13-inch (23×33 cm) sheet cake pan – a standard size that bakes evenly; if you don’t have one, a similar-sized glass or metal pan works great
- Mixing bowls – at least two, preferably medium and large
- Electric mixer or stand mixer – helpful for smooth batter and silky buttercream; a hand mixer works fine too
- Measuring cups and spoons – accuracy matters for baking success
- Rubber spatula – for scraping down the sides of bowls and folding ingredients
- Cooling rack – to cool the cake evenly and prevent sogginess
- Offset spatula or butter knife – perfect for spreading the buttercream evenly
- Piping bags and assorted tips (optional) – if you want to get fancy with your decorating
For those on a budget, you can skip specialty tools like piping tips and still get a beautiful finish by simply spreading the buttercream with a spatula. Over the years, I’ve learned that the right tools help, but the best results come from practice and patience. Keeping your butter soft but not melted makes smoothing the frosting way easier, too!
Preparation Method
- Prep your pan and preheat the oven: Grease and flour your 9×13-inch pan or line with parchment paper. Preheat the oven to 350°F (175°C). This step ensures the cake releases easily and bakes evenly.
- Mix dry ingredients: In a large bowl, whisk together 2 ½ cups all-purpose flour, 2 cups sugar, 2 ½ teaspoons baking powder, 1 teaspoon baking soda, and ½ teaspoon salt. This ensures even distribution of leavening agents, so your cake rises uniformly.
- Cream butter and sugar: In a separate bowl, beat ½ cup softened unsalted butter with an electric mixer on medium speed until creamy and smooth, about 2-3 minutes. Gradually add the sugar and continue beating until fluffy (around 3-4 minutes). This creates a light texture essential for a tender crumb.
- Add eggs and vanilla: Beat in 3 large eggs, one at a time, mixing well after each addition. Stir in 1 tablespoon vanilla extract. Incorporating eggs slowly helps the batter emulsify, preventing curdling or separation.
- Alternate adding dry ingredients and milk: Reduce mixer speed to low. Add the dry ingredients in three batches, alternating with 1 cup of whole milk, starting and ending with the dry mixture. Mix just until combined after each addition to avoid overmixing, which can make the cake tough.
- Add color (optional): If you want a tinted cake base, fold in a few drops of food coloring gel gently with a spatula until the shade is even. This step lets you customize the cake for school colors or personal taste.
- Pour batter and bake: Spread batter evenly in the prepared pan. Bake for 35-40 minutes or until a toothpick inserted in the center comes out clean. Avoid opening the oven too early to prevent sinking.
- Cool completely: Let the cake cool in the pan on a wire rack for 15 minutes, then carefully invert onto the rack to cool fully before frosting. This prevents the buttercream from melting when applied.
- Make the buttercream: Beat 1 cup softened unsalted butter on medium speed until creamy, about 2 minutes. Gradually add 4 cups sifted powdered sugar, alternating with 2-3 tablespoons heavy cream or milk, beating well after each addition. Mix in 1 teaspoon vanilla extract. Adjust consistency with more cream or sugar as needed—frosting should be smooth and spreadable but hold its shape.
- Add color to buttercream: Divide frosting into bowls and tint with food coloring gels to your desired shades. Mix thoroughly for vibrant, even color. This step brings the festive look to life.
- Frost and decorate: Spread a thin crumb coat over the cake and chill for 15 minutes to lock in crumbs. Then apply a final thick layer of buttercream. Use piping bags for borders, lettering, or fun accents if you like. The frosting is forgiving, so don’t worry about perfection!
Tip: If your buttercream feels too stiff, add a splash more cream and beat again. If too soft, add extra powdered sugar in small amounts. It’s all about finding that sweet spot.
Cooking Tips & Techniques
Here are some lessons learned from my many attempts making this graduation sheet cake:
- Room temperature ingredients: This is non-negotiable. Eggs and milk mix better and create a smoother batter when not cold.
- Don’t overmix the batter: Once you add the flour, stir gently and just enough to combine. Overworking the flour develops gluten, leading to a dense cake.
- Use gel food coloring: Liquid colors can thin your frosting and make it runny. Gel colors give you that punchy vibrancy without messing with texture.
- Crumb coat before the final layer: It traps crumbs, so your finished frosting stays silky and clean-looking.
- Chill the cake after crumb coating: Even 15 minutes in the fridge makes spreading the final buttercream layer so much easier.
- Multitask smartly: While the cake cools, whip up your buttercream. It saves time and keeps everything moving efficiently.
Once, I tried skipping the crumb coat in a hurry and ended up with crumbs all over my buttercream. Lesson learned! Now, I never skip that step—even if I’m short on time.
Variations & Adaptations
This recipe is a great base to personalize depending on your taste, dietary needs, or occasion:
- Flavor swaps: Replace vanilla with almond, lemon, or even coffee extract in the batter and buttercream for a unique twist.
- Dietary adaptations: Use gluten-free flour blends to make it safe for gluten-sensitive guests. Swap dairy butter and milk for coconut oil and almond milk for a dairy-free version.
- Seasonal changes: Add fresh berries or citrus zest to the cake batter or use natural flavor extracts to match the time of year.
- Decorating styles: Instead of a smooth buttercream finish, try piping rosettes or stars for a textured effect. You can also top with edible flowers or sprinkles for added flair.
- Personal favorite: I once made a version with a layer of homemade raspberry jam in the middle and paired it with a lemon buttercream. It was a crowd favorite and looked stunning with fresh berries on top.
Serving & Storage Suggestions
This graduation sheet cake is best served at room temperature to enjoy the full flavor and creamy texture of the buttercream. If you’re preparing ahead, keep it covered tightly with plastic wrap or stored in an airtight container to prevent drying out.
If refrigerated, bring the cake out 30 minutes before serving to soften the buttercream. For longer storage, it freezes beautifully—wrap tightly in plastic wrap and foil. Thaw overnight in the fridge for best results.
Pair this cake with a fresh fruit salad or light whipped cream for a balanced treat. For beverages, a cold glass of milk or a cup of coffee complements the sweet, buttery flavors perfectly.
Flavors often deepen after a day or two, so leftovers (if there are any!) taste even better the next day. Just don’t expect that to happen very often!
Nutritional Information & Benefits
Per serving (based on 12 servings): approximately 350 calories, 18g fat, 45g carbohydrates, 3g protein.
The cake’s primary ingredients provide energy and satisfaction, while butter and eggs add richness and essential nutrients like vitamin A and protein. Using real butter and whole milk contributes to a more natural flavor profile compared to processed alternatives.
For those watching carbs or gluten, consider the substitutions mentioned earlier to make this dessert fit your dietary needs without sacrificing taste.
From my experience, enjoying treats like this cake mindfully as part of celebrations helps keep balance without guilt—it’s about joy and connection after all.
Conclusion
This perfect customizable graduation sheet cake with vibrant buttercream has become my reliable choice for celebrations that need a little sweetness without fuss. The recipe’s flexibility lets you tailor flavors and colors to any event, making it uniquely yours. I love how it brings people together with its moist crumb and creamy, colorful frosting that’s fun to make and eat.
Whether you keep it classic or mix in your own twist, this cake welcomes creativity and delivers comfort every time. I’d love to hear how you put your spin on it or what colors you choose for your next celebration. Happy baking, and here’s to many joyful moments marked by simple, delicious homemade cake!
Frequently Asked Questions
Can I make this cake a day ahead?
Yes! Bake and frost the cake the day before. Store it covered in the fridge and bring it to room temperature before serving for best texture and flavor.
What if I don’t have a mixer?
You can mix the batter and frosting by hand with a whisk or sturdy spoon, but it will take more elbow grease. Just beat the butter until soft before adding other ingredients.
Can I use a different pan size?
Absolutely. A 9×13-inch pan is ideal, but if you use a smaller pan, expect a thicker cake and longer baking time. Adjust accordingly and watch for doneness.
How do I fix buttercream that’s too runny?
Pop it in the fridge for 10-15 minutes to firm up, then beat again. Adding a bit more powdered sugar also helps thicken it.
What’s the best way to get vibrant colors without artificial dyes?
Natural options like beet juice or matcha powder can add color, but they might alter flavor slightly. Gel food coloring gives the brightest results with minimal taste change.
By the way, if you’re interested in other quick and comforting recipes for busy days, you might enjoy my easy cheesy single serve lasagna or the creamy keto crack chicken with bacon. Both are lifesavers when time is tight but flavor matters.
Pin This Recipe!

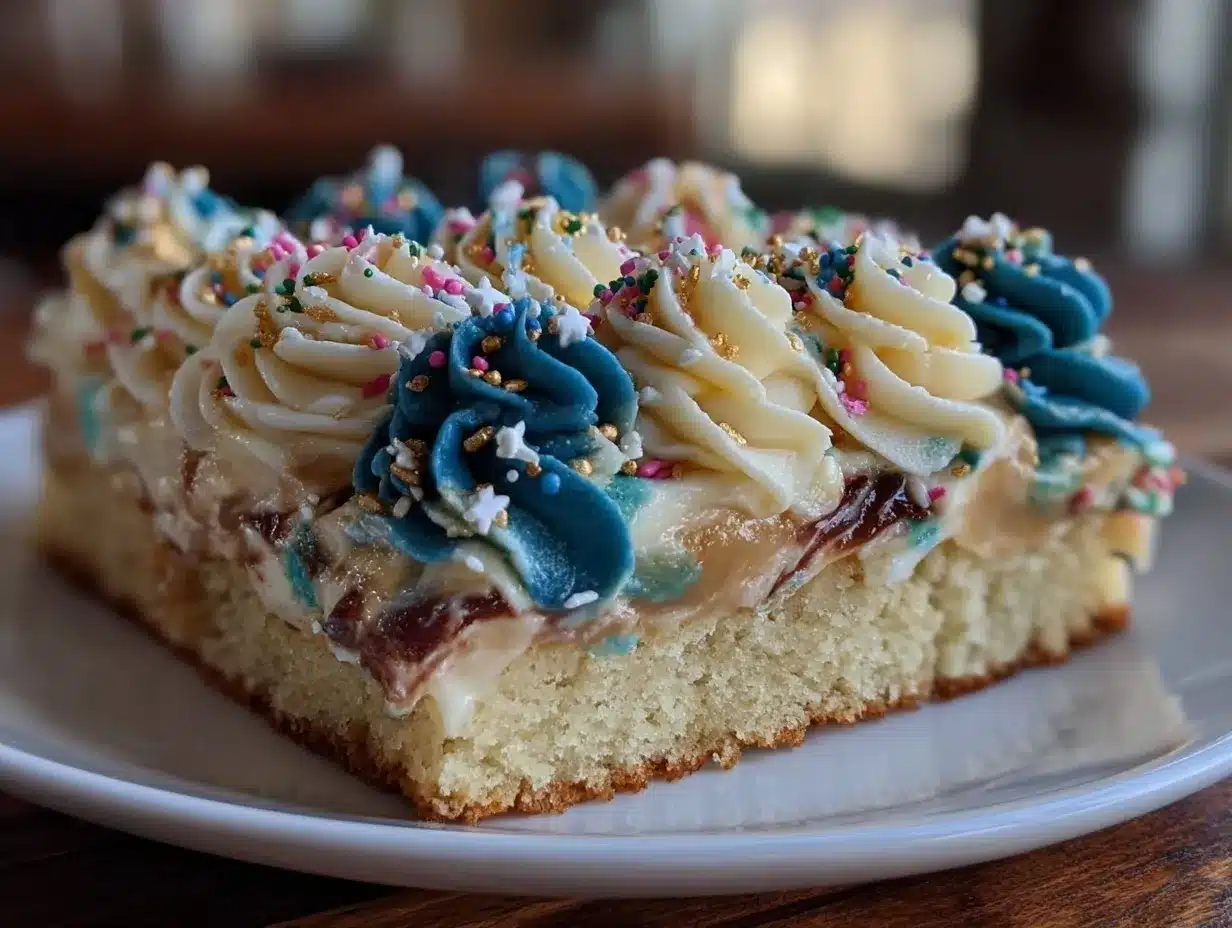
Perfect Customizable Graduation Sheet Cake Recipe with Easy Vibrant Buttercream Decorating Tips
A quick and easy customizable graduation sheet cake with vibrant buttercream frosting that’s perfect for celebrations and adaptable to your personal taste and dietary needs.
- Prep Time: 20 minutes
- Cook Time: 40 minutes
- Total Time: 1 hour
- Yield: 12 servings 1x
- Category: Dessert
- Cuisine: American
Ingredients
- 2 ½ cups all-purpose flour (315g)
- 2 cups granulated sugar (400g)
- 2 ½ teaspoons baking powder
- 1 teaspoon baking soda
- ½ teaspoon salt
- ½ cup unsalted butter (113g), softened
- 1 cup whole milk (240ml), room temperature
- 3 large eggs, room temperature
- 1 tablespoon vanilla extract (or almond extract as a substitute)
- Food coloring gel (a few drops, optional)
- For the buttercream frosting:
- 1 cup unsalted butter (227g), softened
- 4 cups powdered sugar (480g), sifted
- 2–3 tablespoons heavy cream or whole milk (30-45ml)
- 1 teaspoon vanilla extract
- Food coloring gel (various colors)
- Optional: Gel paste for shimmer or edible glitter
Instructions
- Grease and flour a 9×13-inch sheet cake pan or line with parchment paper. Preheat oven to 350°F (175°C).
- In a large bowl, whisk together flour, sugar, baking powder, baking soda, and salt.
- In a separate bowl, beat ½ cup softened unsalted butter with an electric mixer on medium speed until creamy, about 2-3 minutes. Gradually add sugar and beat until fluffy, about 3-4 minutes.
- Beat in eggs one at a time, mixing well after each addition. Stir in vanilla extract.
- Reduce mixer speed to low. Add dry ingredients in three batches, alternating with milk, starting and ending with dry ingredients. Mix just until combined after each addition.
- If desired, fold in a few drops of food coloring gel gently with a spatula until evenly tinted.
- Pour batter evenly into prepared pan. Bake for 35-40 minutes or until a toothpick inserted in the center comes out clean.
- Cool cake in pan on a wire rack for 15 minutes, then invert onto rack to cool completely before frosting.
- To make buttercream, beat 1 cup softened unsalted butter on medium speed until creamy, about 2 minutes. Gradually add powdered sugar, alternating with heavy cream or milk, beating well after each addition. Mix in vanilla extract. Adjust consistency as needed.
- Divide frosting into bowls and tint with food coloring gels to desired shades.
- Spread a thin crumb coat over the cake and chill for 15 minutes. Apply a final thick layer of buttercream. Decorate with piping bags and tips if desired.
Notes
Use room temperature ingredients for best results. Do not overmix the batter to avoid a dense cake. Use gel food coloring for vibrant colors without affecting frosting texture. Crumb coat before final frosting layer to trap crumbs. Chill cake after crumb coat for easier frosting application. Adjust buttercream consistency by adding more cream or powdered sugar as needed.
Nutrition
- Serving Size: 1 slice (1/12 of cak
- Calories: 350
- Fat: 18
- Carbohydrates: 45
- Protein: 3
Keywords: graduation cake, sheet cake, buttercream frosting, customizable cake, easy cake recipe, vibrant frosting, celebration cake