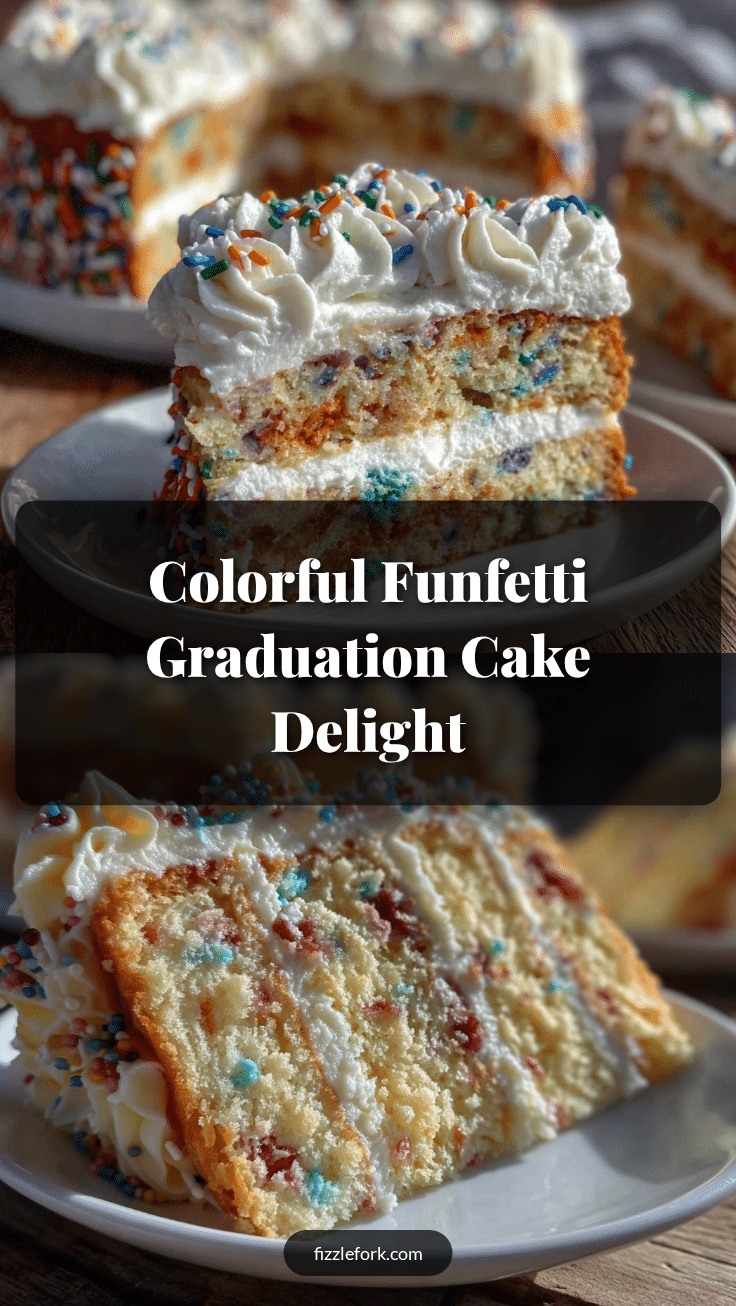
It was one of those last-minute, slightly chaotic afternoons when I found myself staring at a blank cake stand and a looming graduation party just hours away. Honestly, I was half panicked—no fancy bakeries nearby and no time to experiment with complicated recipes. Then, I remembered the funfetti cake mix tucked away in my pantry, a forgotten gem from a previous baking spree. I figured, why not give it a whirl, but with a twist: I’d bring in the school colors, bright and bold, to make the cake feel truly special.
What started as a quick fix turned into a burst of creativity as I mixed colorful sprinkles right into the batter, and then piped frosting streaked with the vibrant hues of the graduate’s alma mater. The smell of vanilla and sugar, mingled with those confetti colors, filled the kitchen with a sort of hopeful energy—you know, that buzz you get when something unexpected just works out. By the time the cake was ready, friends were already asking for the recipe, and the graduate’s smile said it all.
That cake stuck with me—not just because it tasted like celebration, but because it felt personal, like a little edible tribute to hard work and new beginnings. It’s the kind of recipe that’s easy enough to throw together when time’s tight, yet impressive enough to make anyone feel like the star of the day.
Why You’ll Love This Recipe
- Quick & Easy: Comes together in under 45 minutes, perfect for last-minute parties or spontaneous celebrations.
- Simple Ingredients: Uses pantry staples with a handful of colorful sprinkles to bring that festive funfetti magic.
- Perfect for Graduation & Celebrations: Customizable with school colors, making it a standout centerpiece for any milestone event.
- Crowd-Pleaser: Kids and adults alike are drawn to the cheerful look and moist, tender crumb that’s not overly sweet.
- Unbelievably Delicious: The classic vanilla base with bursts of sprinkles creates a delightful texture and visual pop that’s pure comfort food.
This recipe isn’t just another funfetti cake. The real secret is in how the sprinkles are folded gently into a rich, creamy batter—avoiding that dreaded “bleeding” of colors—and how the frosting is swirled with vibrant stripes matching your school colors. It’s the kind of cake that makes you close your eyes after the first bite and think, “Yeah, this was worth the fuss.” Perfect for impressing guests without hours of work, it adds an instant party vibe to any graduation table.
What Ingredients You Will Need
This recipe uses simple, wholesome ingredients to deliver bold flavor and satisfying texture without the fuss. You likely have most of these in your kitchen already, and the sprinkles and food coloring are easy to customize depending on your school’s colors.
- For the Cake Batter:
- 2 ½ cups (312g) all-purpose flour (I recommend King Arthur Flour for best texture)
- 2 ½ tsp baking powder
- ½ tsp salt
- 1 cup (226g) unsalted butter, softened (adds richness and moisture)
- 1 ¾ cups (350g) granulated sugar
- 4 large eggs, room temperature
- 1 tbsp pure vanilla extract
- 1 cup (240ml) whole milk, room temperature (can swap for almond milk for dairy-free)
- ½ cup (90g) rainbow sprinkles (use firm, non-melting sprinkles to avoid color bleeding)
- For the Frosting:
- 1 cup (226g) unsalted butter, softened
- 4 cups (480g) powdered sugar, sifted
- 2-3 tbsp whole milk or heavy cream
- 2 tsp pure vanilla extract
- Gel food coloring in your school colors (I prefer AmeriColor gels for vibrant shades)
- Extra sprinkles for decoration
For those wanting to switch things up, you can substitute gluten-free flour blends for an allergy-friendly option, or swap out the butter for vegan margarine if needed. The key is to keep your sprinkles firm and non-melting to maintain that iconic funfetti look.
Equipment Needed
- Two 9-inch round cake pans (preferably non-stick or well-greased)
- Mixing bowls (one large for batter, one for frosting)
- Electric mixer or stand mixer (hand mixers can work but might take longer)
- Measuring cups and spoons for accuracy
- Rubber spatula (for folding sprinkles gently)
- Offset spatula or butter knife (for frosting application)
- Cooling racks to cool cakes evenly
- Optional: Piping bags and round tips for decorative frosting swirls
I’ve tried this recipe with both hand mixers and stand mixers; honestly, the stand mixer speeds things up and gives a smoother batter, but if you’re like me and don’t want to haul out all that equipment, a hand mixer works just fine. When it comes to cake pans, I suggest investing in good quality ones since they heat evenly and prevent sticking, which is a small but satisfying detail that makes cleanup easier.
Preparation Method
- Preheat your oven to 350°F (175°C). Grease and flour your two 9-inch cake pans, or line the bottoms with parchment paper. This helps the cakes release easily after baking. (5 minutes)
- Mix dry ingredients: In a medium bowl, whisk together the flour, baking powder, and salt. Set aside. This ensures even distribution of leavening agents so your cake rises perfectly. (3 minutes)
- Cream butter and sugar: In a large bowl, beat the softened butter and granulated sugar with an electric mixer on medium speed until light and fluffy—this usually takes about 3-4 minutes. The texture should look pale and smooth. (4 minutes)
- Add eggs and vanilla: Beat in the eggs, one at a time, making sure each is fully incorporated before adding the next. Then mix in the vanilla extract. The batter may look slightly curdled here; that’s normal. (3 minutes)
- Combine wet and dry: Alternately add the dry ingredients and milk in three parts, starting and ending with the dry ingredients. Mix gently on low speed to avoid overmixing, which can make the cake dense. The batter should be smooth and creamy. (5 minutes)
- Fold in sprinkles: Using a rubber spatula, gently fold in the sprinkles. Be careful not to overmix or the colors will bleed into the batter, turning it a dull shade. (2 minutes)
- Divide batter evenly: Pour the batter evenly between the two prepared pans. Smooth the tops with a spatula to ensure even baking. (2 minutes)
- Bake: Place pans in the oven and bake for 28-32 minutes, or until a toothpick inserted in the center comes out clean. Rotate pans halfway through baking for even heat distribution. The cakes should spring back lightly when pressed. (30 minutes)
- Cool: Let cakes cool in their pans for 10 minutes before transferring them to wire racks to cool completely. This prevents soggy bottoms and makes frosting easier. (30 minutes)
- Make the frosting: Beat softened butter on medium speed until creamy. Gradually add sifted powdered sugar, alternating with milk or cream, until you reach a spreadable consistency. Mix in vanilla extract. Divide frosting into separate bowls and tint each with your gel colors. (10 minutes)
- Assemble: Place one cake layer on your serving plate. Spread an even layer of frosting on top. Add the second cake layer and cover the entire cake with a thin crumb coat. Chill for 15 minutes to set. Then apply the final colorful frosting layers using a spatula or piping bags for stripes or swirls. (20 minutes)
- Decorate: Sprinkle extra colorful sprinkles on top, focusing on the edges for a festive look. Chill the cake briefly before serving to let the frosting set. (10 minutes)
Keep an eye on the cake during baking—ovens vary, and you don’t want it to dry out. Also, chilling the crumb coat is a little trick I picked up after a frosting disaster; it helps keep the layers neat and makes the final decorating step a breeze.
Cooking Tips & Techniques
One of the keys to a perfect funfetti cake is handling the sprinkles correctly. I’ve learned the hard way that folding them in gently is crucial to keep those vibrant dots intact. Stirring too aggressively turns the batter into a pastel mess, which just isn’t as fun.
Also, always use gel food coloring rather than liquid. Liquid colors can thin your frosting and dull the vibrancy. Gel colors give that punch of bright shade without messing with texture. And if you want those sharp color stripes in the frosting, freezing the tinted frosting for a few minutes before piping helps it hold shape better.
Timing is another biggie. Don’t rush cooling the cakes. Frosting warm cake leads to melty messes. I sometimes speed things up by popping the layers into the fridge for a bit but never freeze before frosting, or the texture suffers.
Finally, when assembling your cake, a thin crumb coat is your best friend. It traps loose crumbs and creates a smooth surface for the final frosting. Patience here pays off big time in presentation.
Variations & Adaptations
- Dietary: Use gluten-free flour blends to make this cake gluten-free. For dairy-free, swap butter with plant-based margarine and use almond or oat milk.
- Flavor Twists: Add lemon zest to the batter for a subtle citrus note, or fold in mini chocolate chips for extra indulgence.
- Seasonal: Swap rainbow sprinkles with school-color-themed sprinkles or edible glitter for extra sparkle. In spring, add fresh berries between layers for freshness.
- Cooking Methods: You can bake this batter in cupcake liners for individual funfetti treats, adjusting baking times accordingly (about 18-20 minutes).
- Personal Variation: I once made this cake with a whipped cream cheese frosting tinted in school colors instead of buttercream. It was lighter and tangy, which balanced the sweet cake beautifully.
Serving & Storage Suggestions
Serve this funfetti graduation cake chilled or at room temperature. The frosting firms up nicely in the fridge, making slicing cleaner. For presentation, I like to add a scattering of fresh flowers or small edible stars matching the theme around the cake plate.
This cake pairs wonderfully with a simple vanilla bean ice cream or a glass of sparkling lemonade—refreshing and bright alongside the sweet, colorful cake.
Store leftover cake covered tightly in the refrigerator for up to 4 days. For longer storage, wrap cake layers well in plastic wrap and freeze for up to 2 months. Thaw overnight in the fridge before frosting or serving.
When reheating slices, bring them to room temperature first or warm gently in a microwave for about 10 seconds—too much heat softens the frosting too much.
Over time, the flavors meld and the cake becomes even more tender, making the next-day slices a special treat.
Nutritional Information & Benefits
This funfetti cake has approximately 350-400 calories per slice, depending on serving size and frosting thickness. It’s a treat, rich in butter and sugar, but made with real ingredients and no artificial flavors.
The vanilla extract adds natural aroma without extra calories, and the sprinkles provide a festive look with minimal impact on nutrition. For a slightly healthier spin, swapping half the butter for applesauce or yogurt can reduce fat content.
Gluten-free and dairy-free options make this recipe flexible for many dietary needs, though the cake does contain eggs and sugar, so it’s best enjoyed in moderation.
From a wellness perspective, this cake is perfect for marking special milestones—it’s about joy and celebration, a reminder to savor those moments with a sweet bite.
Conclusion
The perfect funfetti graduation cake with vibrant school colors is more than just a dessert; it’s a joyful celebration in every slice. Whether you’re scrambling last minute or planning ahead, this recipe offers a reliable, visually stunning centerpiece that brings smiles and memories.
Feel free to tweak the colors, flavors, and frosting styles to suit your taste and the graduate’s personality. I’ve made it countless times, each version a little different but always a hit.
Honestly, I keep this recipe close because it’s that dependable burst of color and sweetness that turns any graduation into a festive occasion. Can’t wait to hear how you make it your own!
FAQs
Can I use regular sprinkles for the funfetti cake?
Yes, but choose firm, non-melting sprinkles to avoid color bleeding in the batter. Avoid using ones labeled as “edible glitter” or very soft sprinkles that melt easily.
How do I prevent the cake from drying out?
Don’t overbake—start checking 3-4 minutes before the timer. Also, store the cake tightly wrapped to keep moisture in, and consider brushing layers with simple syrup for extra moistness.
Can I make the funfetti cake ahead of time?
Absolutely! Bake and frost the cake a day ahead and store it in the refrigerator. Bring it to room temperature before serving for the best flavor and texture.
What’s the best way to get vibrant school colors in the frosting?
Use gel food coloring, which provides intense color without thinning the frosting. Mix colors gradually to reach your desired shade.
Is there a vegan version of this funfetti cake?
You can try substituting eggs with flax eggs or commercial egg replacers, use plant-based butter and milk, and pick vegan sprinkles. Results vary, so some testing might be needed for texture.
Pin This Recipe!
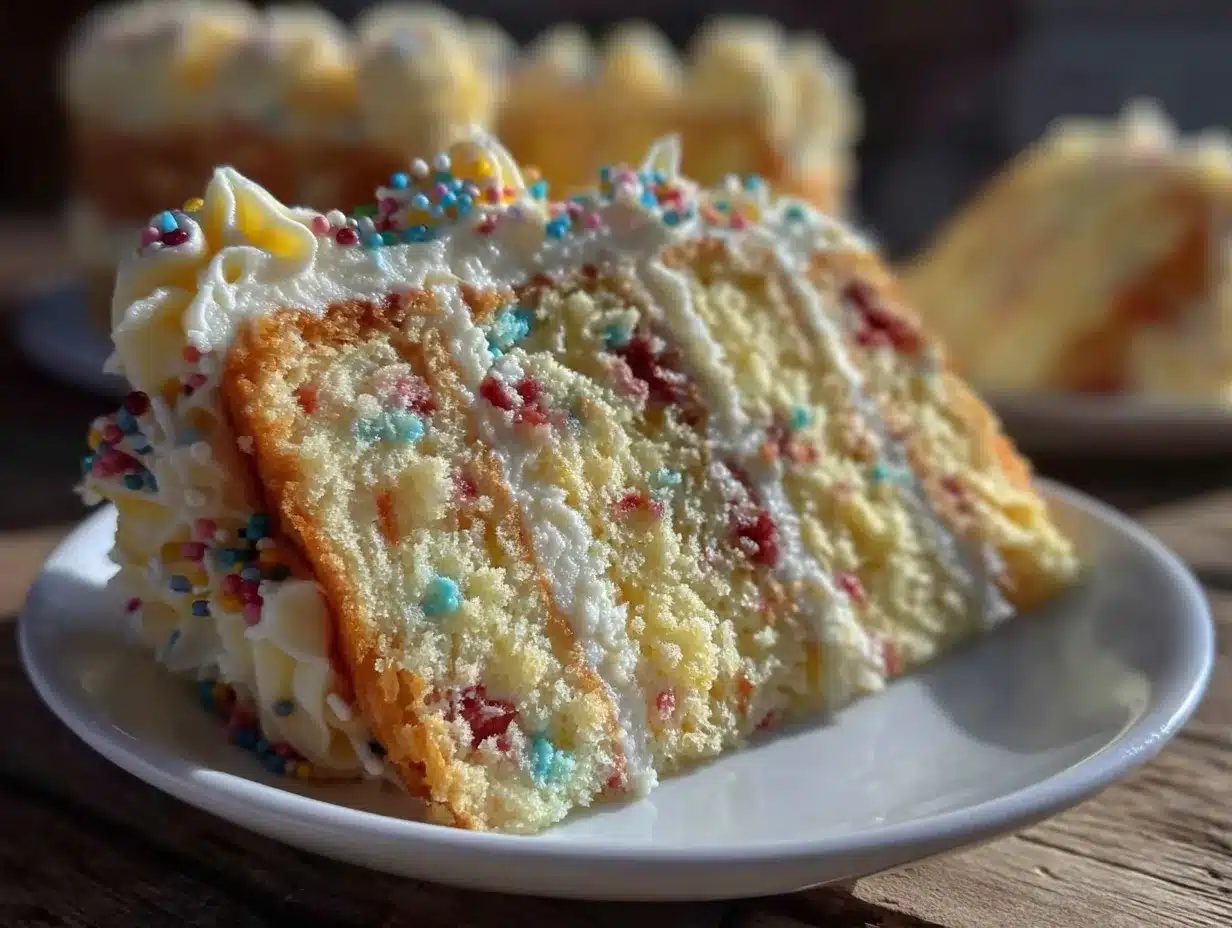
Perfect Funfetti Graduation Cake
A quick and easy funfetti cake recipe with vibrant school colors, perfect for graduation celebrations. This moist vanilla cake is filled with colorful sprinkles and topped with a matching striped frosting.
- Prep Time: 20 minutes
- Cook Time: 30 minutes
- Total Time: 50 minutes
- Yield: 12 servings 1x
- Category: Dessert
- Cuisine: American
Ingredients
- 2 ½ cups (312g) all-purpose flour
- 2 ½ tsp baking powder
- ½ tsp salt
- 1 cup (226g) unsalted butter, softened
- 1 ¾ cups (350g) granulated sugar
- 4 large eggs, room temperature
- 1 tbsp pure vanilla extract
- 1 cup (240ml) whole milk, room temperature
- ½ cup (90g) rainbow sprinkles (firm, non-melting)
- For the Frosting:
- 1 cup (226g) unsalted butter, softened
- 4 cups (480g) powdered sugar, sifted
- 2–3 tbsp whole milk or heavy cream
- 2 tsp pure vanilla extract
- Gel food coloring in your school colors
- Extra sprinkles for decoration
Instructions
- Preheat your oven to 350°F (175°C). Grease and flour two 9-inch cake pans or line with parchment paper.
- In a medium bowl, whisk together flour, baking powder, and salt. Set aside.
- In a large bowl, beat softened butter and granulated sugar with an electric mixer on medium speed until light and fluffy, about 3-4 minutes.
- Beat in eggs one at a time, fully incorporating each before adding the next. Mix in vanilla extract.
- Alternately add dry ingredients and milk in three parts, starting and ending with dry ingredients. Mix gently on low speed until smooth.
- Gently fold in sprinkles with a rubber spatula, being careful not to overmix to avoid color bleeding.
- Divide batter evenly between prepared pans and smooth tops.
- Bake for 28-32 minutes or until a toothpick inserted in the center comes out clean. Rotate pans halfway through baking.
- Cool cakes in pans for 10 minutes, then transfer to wire racks to cool completely.
- For frosting, beat softened butter until creamy. Gradually add powdered sugar alternating with milk or cream until spreadable. Mix in vanilla extract.
- Divide frosting into bowls and tint with gel food coloring as desired.
- Place one cake layer on serving plate, spread an even layer of frosting on top. Add second layer and cover entire cake with a thin crumb coat. Chill 15 minutes.
- Apply final colorful frosting layers using spatula or piping bags for stripes or swirls.
- Decorate with extra sprinkles on edges. Chill briefly before serving to set frosting.
Notes
Use firm, non-melting sprinkles to avoid color bleeding. Fold sprinkles gently into batter. Use gel food coloring for vibrant frosting without thinning. Chill crumb coat before final frosting to keep layers neat. Avoid overbaking to keep cake moist. Store cake tightly wrapped to maintain moisture.
Nutrition
- Serving Size: 1 slice (1/12 of cak
- Calories: 375
- Sugar: 38
- Sodium: 280
- Fat: 18
- Saturated Fat: 11
- Carbohydrates: 52
- Fiber: 1
- Protein: 4
Keywords: funfetti cake, graduation cake, colorful cake, vanilla cake, celebration cake, easy cake recipe, school colors cake