“You’ve got to see this,” my friend texted me one sleepy Saturday afternoon, along with a blurry photo of a delicate pink swirl that looked like a tiny rose. Honestly, I was skeptical. Butter cookies with royal icing—fancy, yes, but could they really look that impressive? I wasn’t sure, but the idea stuck in my head.
That evening, after a rather chaotic day juggling work calls and a tottering pile of laundry, I found myself craving something simple yet satisfying. I rummaged through my pantry, and with only a handful of ingredients, I decided to try my hand at those rose-shaped butter cookies with royal icing—something quick, pretty, and just a little bit magical.
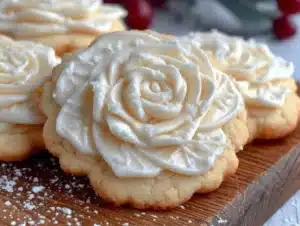
The first batch came out uneven, the petals a bit clumsy, but the buttery aroma filled the kitchen in a comforting way. After a few tweaks, I nailed it: crisp yet tender cookies shaped like tiny roses, each petal iced with that glossy, smooth royal icing that sets just right. The surprising part? The whole process was easier than I imagined, and the results were stunning enough to impress even the toughest cookie critics.
Now, these perfect rose-shaped butter cookies have become my go-to treat whenever I want to add a little artistry to my baking without turning it into a full-on project. They’re delicate, charming, and honestly, a sweet little moment of calm in my sometimes hectic days. If you’ve ever wished to bake something that looks as good as it tastes—but without a stressful mess—this recipe is your friend.
Why You’ll Love This Perfect Rose-Shaped Butter Cookies Recipe
This recipe is the kind of baking that feels special but doesn’t steal your whole afternoon. After several test runs and adapting it to real-life kitchen chaos, here’s why it stands out:
- Quick & Easy: In under an hour, you can have a batch of elegant butter cookies ready to enjoy or gift, perfect for those last-minute celebrations or cozy tea times.
- Simple Ingredients: No need for exotic spices or hard-to-find items—just classic pantry staples like butter, sugar, and eggs, plus a basic royal icing you can whip up in minutes.
- Perfect for Gifting & Special Occasions: Whether it’s Mother’s Day, bridal showers, or an afternoon treat, these rose-shaped cookies bring a charming element to any table.
- Crowd-Pleaser: Kids get excited about the shapes, adults love the buttery, melt-in-your-mouth texture, and the icing adds just the right touch of sweetness.
- Unbelievably Delicious: The butter cookies have that tender crumb that feels both rich and light, while the royal icing adds a delicate, crisp finish that holds its shape beautifully.
What sets this recipe apart is the technique for shaping the cookie dough into roses—a simple trick I picked up after a few attempts that transforms basic dough into edible flowers. Plus, the royal icing tutorial shows you how to get that smooth, glossy finish that hardens perfectly without cracking. It’s not just another butter cookie recipe; it’s the one that makes you pause and admire your baking handiwork before the first bite.
If you’ve ever been intrigued by the idea of baking pretty treats but felt overwhelmed by complicated decorating, this recipe is like a friendly nudge to get you started.
What Ingredients You Will Need for Perfect Rose-Shaped Butter Cookies
This recipe uses simple, wholesome ingredients to deliver bold flavor and a satisfying texture without fuss. Most are classic pantry staples, and substitutions are easy if needed.
- For the Butter Cookies:
- Unsalted butter, softened (I like using Plugrá for its creaminess)
- Granulated sugar (regular white sugar works great)
- Large eggs, room temperature (helps the dough come together smoothly)
- All-purpose flour (for a gluten-free option, swap with almond flour but expect a softer texture)
- Pure vanilla extract (adds warmth and depth)
- A pinch of salt (balances the sweetness)
- For the Royal Icing:
- Powdered sugar, sifted (make sure it’s really fine for smooth icing)
- Pasteurized egg whites or meringue powder (safer and easier to handle than raw egg whites)
- Fresh lemon juice or water (for thinning the icing)
- Food coloring gel (optional, for those pretty pastel rose hues)
When selecting your butter, avoid margarine or spreads as they change the texture. If fresh lemon juice isn’t handy for royal icing, distilled water works fine, but lemon adds a subtle zing that cuts sweetness. For seasonal flair, you can even add a hint of rose water to the icing—just a drop, or it gets overpowering.
Equipment Needed
- Mixing bowls – I recommend a sturdy glass bowl for the dough and a separate one for icing.
- Electric hand mixer or stand mixer – makes creaming butter and sugar effortless.
- Rolling pin – to roll out the dough evenly.
- Rose-shaped cookie cutter or a set of circle cutters in graduated sizes to build the rose shape manually.
- Baking sheets lined with parchment paper or silicone mats – for easy cleanup and perfect cookie bottoms.
- Piping bags with small round tips – essential for piping the royal icing petals and details. If you don’t have piping tips, a small zip-top bag with a snipped corner works in a pinch.
- Cooling racks – to let the cookies cool completely before icing.
If you don’t own a stand mixer, no worries—an electric hand mixer or even vigorous hand-mixing will work, just a little more elbow grease. For the cookie cutter, I personally find that using graduated round cutters stacked from largest to smallest makes shaping the petals simpler than buying a specialized cutter. Also, keeping your rolling pin lightly floured prevents dough sticking, which is a small but game-changing tip.
Preparation Method
- Cream the Butter and Sugar (5-7 minutes): In a large bowl, beat 1 cup (227g) softened unsalted butter with ¾ cup (150g) granulated sugar using an electric mixer until light and fluffy. The texture should almost look like whipped cream with a pale color. This step is crucial for tender cookies.
- Add Eggs and Vanilla (2 minutes): Beat in 1 large egg and 1 teaspoon vanilla extract until fully combined. The mixture will look smooth and glossy.
- Mix Dry Ingredients (1 minute): Whisk together 2¾ cups (345g) all-purpose flour and ¼ teaspoon salt in a separate bowl.
- Combine Wet and Dry (2-3 minutes): Gradually add the flour mixture to the butter mixture, mixing on low speed until the dough just comes together. Avoid overmixing to keep cookies tender.
- Chill the Dough (at least 1 hour): Flatten the dough into a disc, wrap in plastic, and refrigerate. Chilling firms the dough for easier rolling and helps cookies hold their shape.
- Roll and Cut the Dough (10 minutes): On a lightly floured surface, roll the chilled dough to about ⅛-inch (3 mm) thickness. Using graduated round cutters (about 3 inches, 2.5 inches, and 2 inches diameter), cut out circles to form the rose petals.
- Shape the Roses (15 minutes): Stack 3 to 4 circles per cookie, overlapping slightly, and gently pinch or curve edges to resemble rose petals. Place them on parchment-lined baking sheets.
- Bake (12-15 minutes): Preheat oven to 350°F (175°C). Bake cookies until the edges are just golden. Let cool completely on racks before decorating.
- Prepare Royal Icing (5 minutes): In a clean bowl, beat 3 cups (360g) powdered sugar with 2 tablespoons pasteurized egg whites and 1 tablespoon lemon juice until thick but pipeable. Adjust consistency with water or more sugar.
- Pipe the Icing (20-30 minutes): Using a piping bag fitted with a small round tip, carefully pipe icing onto each petal, starting from the outer edge and working inward to mimic natural rose layering. Let the icing dry at room temperature for several hours until firm.
Pro tip: If the dough feels too soft while rolling, pop it back in the fridge for 10 minutes. Also, don’t skip chilling the cookies after baking if you want the icing to set without smudging. I found that letting the cookies dry overnight yields the best crisp finish.
Cooking Tips & Techniques
Getting these rose-shaped butter cookies just right takes a bit of finesse, but a few tricks make a big difference. First, always use cold butter when mixing to avoid greasy dough. The chilling periods are key for maintaining shape, so don’t rush these steps.
When shaping the rose petals, gently overlapping the dough circles and pinching them slightly creates a lovely layered effect. It’s okay if the petals aren’t perfect—natural imperfections add charm.
For the royal icing, consistency is everything. Too thick and it’s hard to pipe; too thin and the icing will run. I usually start thick and add small amounts of water to reach the perfect flow.
Don’t try to ice warm cookies or the icing will melt and lose detail. Let them cool completely on racks.
One mistake I made early on was overbaking the cookies, which made them too crisp and cracked the icing. Watch the edges carefully and pull them out once they’re just golden.
Multitasking tip: While cookies bake, prepare your icing. This way, once cookies cool, you can start decorating immediately without losing momentum.
Variations & Adaptations for Rose-Shaped Butter Cookies
Want to tweak the recipe? Here are some ideas I’ve played with over time:
- Flavor Variations: Add a teaspoon of lemon zest or almond extract to the dough for a fresh twist. For a floral hint, a few drops of rose water in the icing add subtle aroma without overpowering.
- Dietary Adaptations: Substitute the all-purpose flour with a gluten-free blend to make these suitable for gluten intolerance. Use dairy-free margarine or coconut oil for a vegan-friendly version, though texture will be slightly different.
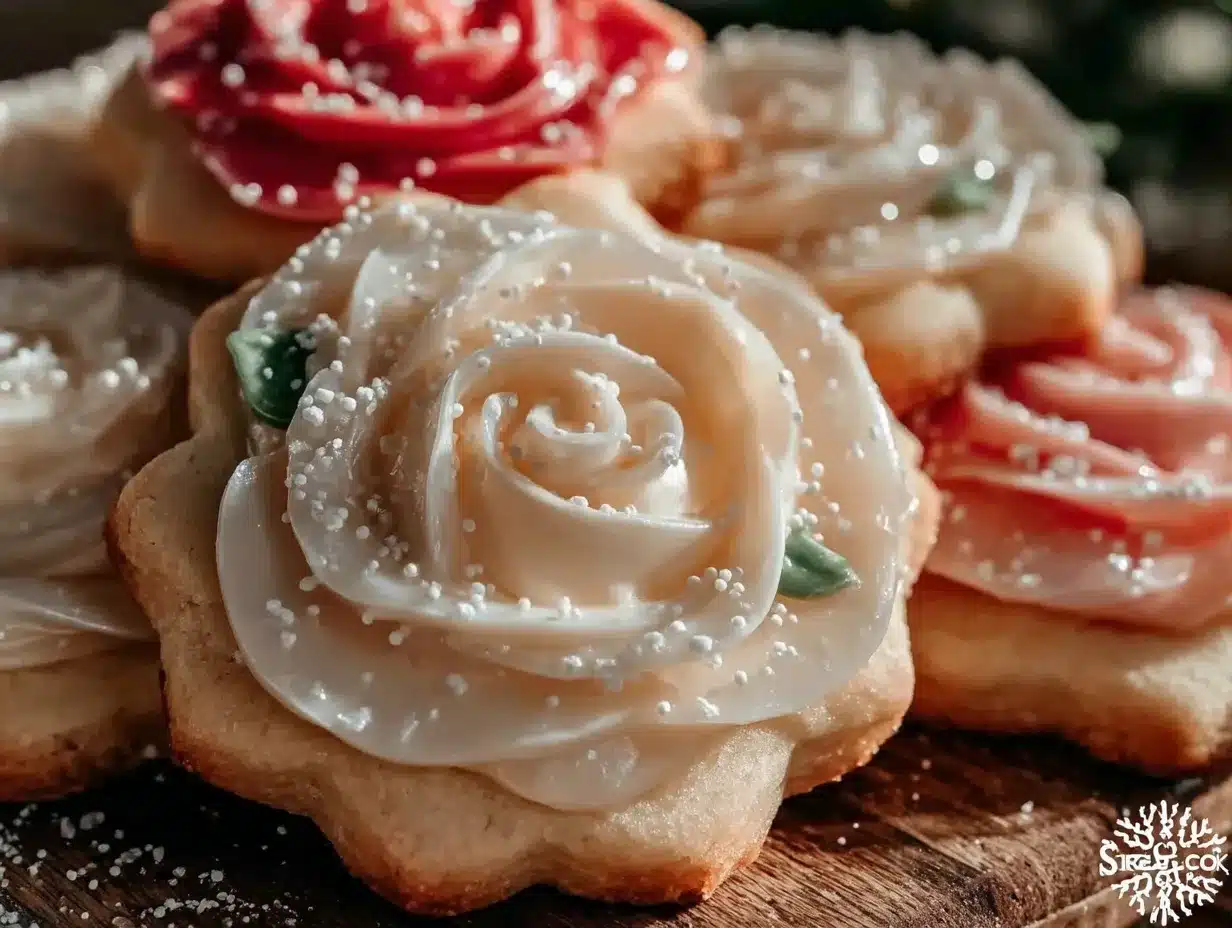
- Colorful Icing: Instead of classic white, tint the royal icing with pastel food gels—soft pinks, lavender, or mint green create beautiful roses perfect for baby showers or spring gatherings.
- Alternative Shaping: Don’t have circle cutters? Use a sharp knife to cut squares and gently fold edges to mimic petals. It’s less precise but still delightful.
- Cooking Method: While baking is best, I’ve experimented with a toaster oven for small batches with good results, just watch timing closely.
One of my favorite variations is to pair these rose cookies with a batch of brown butter snickerdoodles for a mix of floral elegance and cozy spice in the same cookie box.
Serving & Storage Suggestions
These rose-shaped butter cookies are best served at room temperature, allowing the buttery flavor and royal icing’s crisp texture to shine. They make a lovely accompaniment to afternoon tea, coffee, or even a chilled glass of milk.
For presentation, arrange them on a pretty platter or stack in a decorative tin lined with parchment. They’re also wonderful as edible gifts wrapped in cellophane tied with a satin ribbon.
Store the cookies in an airtight container at room temperature for up to 5 days. If you need to keep them longer, they freeze well—just layer parchment paper between cookies and thaw at room temperature before serving.
Reheating is generally not recommended as it softens the icing and can dull the delicate texture. However, if you prefer a slightly softer cookie, a quick 5-second zap in the microwave can do the trick.
Over time, the flavors mellow and the royal icing hardens further, making them perfect for preparing ahead of parties or events.
Nutritional Information & Benefits
Each butter cookie is a treat with approximately 120-150 calories depending on size and icing thickness. The key ingredients—unsalted butter and eggs—provide healthy fats and protein, while powdered sugar adds sweetness.
Though these cookies are a sweet indulgence, the use of real butter and natural vanilla makes them satisfyingly rich without artificial additives. You can control sweetness by moderating the icing amount.
For those with dietary concerns, the recipe’s flexibility allows gluten-free and vegan adaptations. Just note that royal icing contains egg whites or meringue powder, which may not be suitable for some allergies.
From a wellness perspective, I see these cookies as an occasional delight that pairs perfectly with wholesome meals like my lemon lava cake dessert, balancing indulgence with mindful eating.
Conclusion
Perfect rose-shaped butter cookies with royal icing are proof that beautiful baking doesn’t need to be complicated or intimidating. They bring a touch of artistry and a lot of buttery, sweet joy to any occasion.
Feel free to customize the colors, flavors, or shapes to suit your style—and don’t worry if your first batch isn’t flawless. Baking is as much about the process as the result, and these cookies are friendly enough for beginners yet impressive enough to wow guests.
Personally, these cookies remind me that even in busy days, there’s room for a moment of calm creativity and a little sweetness. I hope you find the same joy in making and sharing them.
If you’re looking for more easy, delicious recipes that combine comfort and approachable cooking, you might enjoy the cozy crockpot French onion soup or the crispy air fryer loaded potato skins—both favorites in my kitchen.
Frequently Asked Questions About Perfect Rose-Shaped Butter Cookies
How do I prevent butter cookies from spreading too much in the oven?
Make sure your dough is well-chilled before baking and avoid using too much butter. Also, line your baking sheet with parchment paper or a silicone mat to keep cookies in place.
Can I make the royal icing ahead of time?
Yes, royal icing can be made a day ahead. Cover tightly with plastic wrap to prevent drying and stir well before piping. If it thickens too much, thin with a few drops of water.
What if I don’t have a piping bag or tips?
A small zip-top plastic bag with a tiny corner cut off works well for piping in a pinch. Just keep the cut small for better control.
Can I use powdered egg whites instead of fresh egg whites for the royal icing?
Absolutely. Meringue powder is a safer and more convenient option, especially if you’re concerned about raw eggs. Follow package instructions for best results.
How long do these rose-shaped butter cookies stay fresh?
Stored in an airtight container at room temperature, they stay fresh for up to 5 days. Freezing them extends shelf life to about a month—just thaw before serving.
Pin This Recipe!
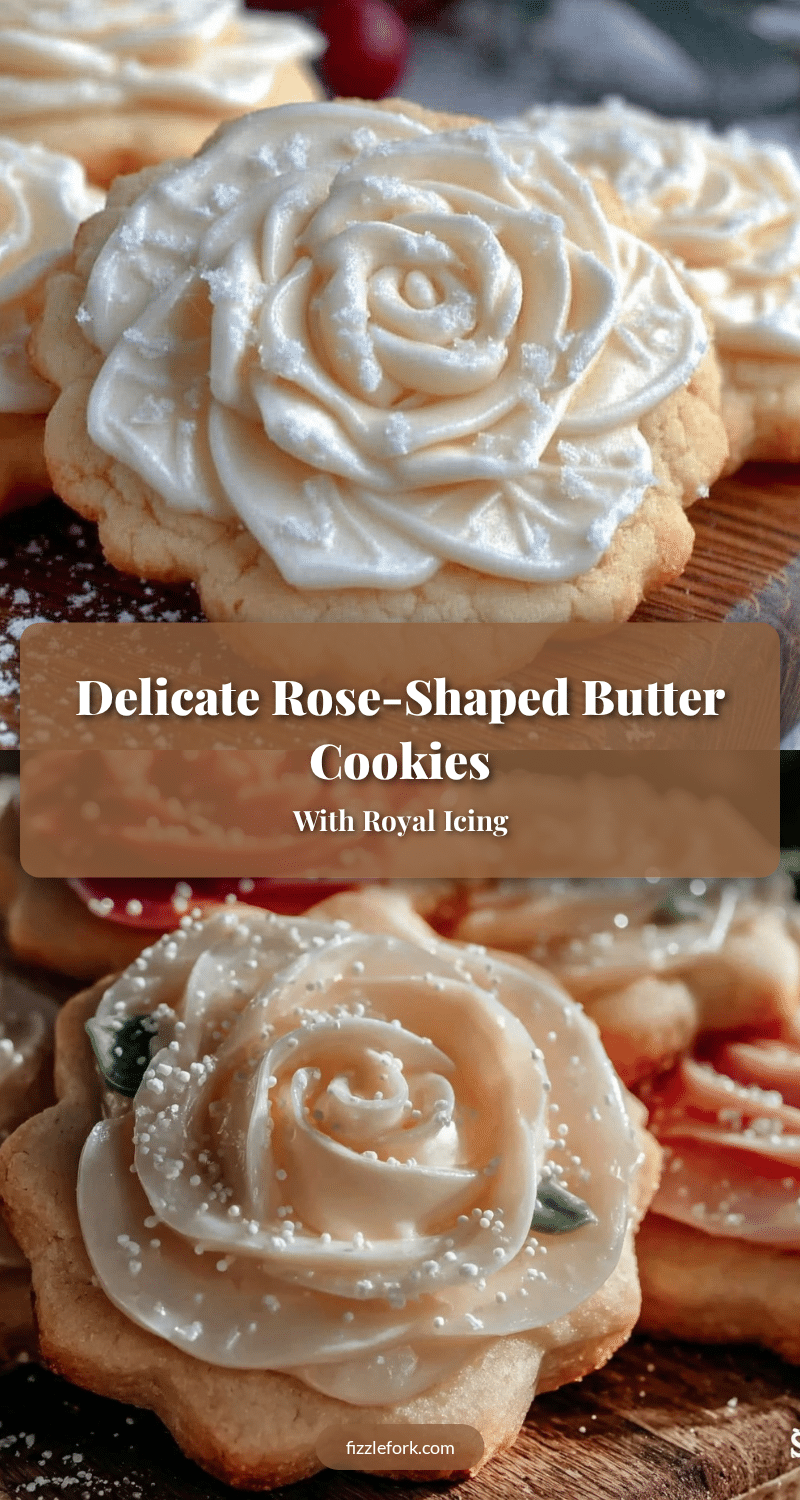
Perfect Rose-Shaped Butter Cookies with Royal Icing
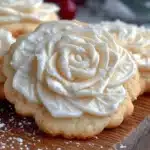
Delicate, buttery cookies shaped like tiny roses and decorated with smooth, glossy royal icing. This easy recipe yields tender, crisp cookies perfect for gifting or special occasions.
- Prep Time: 20 minutes
- Cook Time: 15 minutes
- Total Time: 1 hour 35 minutes
- Yield: 24 cookies 1x
- Category: Dessert
- Cuisine: American
Ingredients
- 1 cup (227g) unsalted butter, softened
- 3/4 cup (150g) granulated sugar
- 1 large egg, room temperature
- 2 3/4 cups (345g) all-purpose flour
- 1/4 teaspoon salt
- 1 teaspoon pure vanilla extract
- 3 cups (360g) powdered sugar, sifted
- 2 tablespoons pasteurized egg whites or meringue powder
- 1 tablespoon fresh lemon juice or water
- Food coloring gel (optional)
Instructions
- Cream the butter and sugar in a large bowl using an electric mixer until light and fluffy, about 5-7 minutes.
- Beat in the egg and vanilla extract until fully combined, about 2 minutes.
- Whisk together the flour and salt in a separate bowl.
- Gradually add the flour mixture to the butter mixture, mixing on low speed until the dough just comes together, about 2-3 minutes. Avoid overmixing.
- Flatten the dough into a disc, wrap in plastic, and refrigerate for at least 1 hour.
- On a lightly floured surface, roll the chilled dough to about 1/8-inch (3 mm) thickness.
- Using graduated round cutters (about 3 inches, 2.5 inches, and 2 inches diameter), cut out circles to form the rose petals.
- Stack 3 to 4 circles per cookie, overlapping slightly, and gently pinch or curve edges to resemble rose petals. Place on parchment-lined baking sheets.
- Preheat oven to 350°F (175°C). Bake cookies for 12-15 minutes until edges are just golden. Let cool completely on racks.
- Prepare royal icing by beating powdered sugar with egg whites and lemon juice until thick but pipeable, about 5 minutes. Adjust consistency with water if needed.
- Using a piping bag fitted with a small round tip, pipe icing onto each petal starting from the outer edge inward to mimic rose layering.
- Let icing dry at room temperature for several hours until firm.
Notes
Chill dough thoroughly before rolling to prevent spreading. Use cold butter for best texture. Let cookies cool completely before icing to avoid melting. Royal icing can be made a day ahead and stored covered. If dough is too soft while rolling, chill again for 10 minutes. Avoid overbaking to prevent cracked icing.
Nutrition
- Serving Size: 1 cookie
- Calories: 135
- Sugar: 11
- Sodium: 55
- Fat: 7
- Saturated Fat: 4.5
- Carbohydrates: 18
- Protein: 1.5
Keywords: butter cookies, royal icing, rose-shaped cookies, easy cookie recipe, homemade cookies, decorative cookies, baking tutorial