I burnt the garlic in this recipe three times before I understood what I was doing wrong. Not a little scorched around the edges—I mean acrid, bitter, ruin-your-whole-kitchen burnt. The first time, I just tossed minced garlic straight into the air fryer basket with the chicken thighs and hoped for the best. Big mistake. The garlic turned into tiny black pebbles of regret while the chicken was still pale and sad. The second time, I tried adding it halfway through, but by then the chicken had already crisped up and the garlic just sat on top, raw and aggressive. The third attempt I convinced myself I had it figured out, nope, still a mess. It took me a solid week of eating mediocre chicken to realize the problem wasn’t the recipe, it was my impatience. I was treating air fryer garlic parmesan chicken thighs like they could handle the same shortcuts as stovetop cooking.
Once I slowed down and actually paid attention to how the air fryer circulates heat, everything clicked. The garlic needed protection, basically a little shield of oil and cheese so it could melt into the chicken instead of burning into oblivion. And the chicken itself, those bone-in skin-on thighs I used to avoid because they took too long, turned out to be the star. The skin gets this shatter-crisp texture that honestly beats fried chicken, and the meat underneath stays so juicy it almost falls apart when you poke it with a fork. I started making these crispy air fryer garlic parmesan chicken thighs every Sunday just to have leftovers for lunch, and my husband started hovering around the kitchen twenty minutes before they were done, pretending he wasn’t waiting.
This recipe is the one that made me stop side-eyeing my air fryer and start genuinely loving it. It’s not fancy or complicated, but it does require you to trust the process and not rush the garlic.
Why You’ll Love This Recipe
These crispy air fryer garlic parmesan chicken thighs have become my most-requested dinner, and not just because they’re fast. They solve the problem of wanting fried-chicken-level crunch without standing over a pot of hot oil. I’ve tested this recipe at least a dozen times, tweaking temperatures and timing, and what I landed on is the version that works every single time, no matter what brand of air fryer you own.
- Ready in under 30 minutes: From fridge to plate in about 25 minutes, which is faster than driving to the store for takeout.
- Pantry-friendly ingredients: You probably already have garlic powder, parmesan, and olive oil in your kitchen right now.
- Perfect for busy weeknights: This is the dinner you make when you forgot to thaw anything and need something satisfying fast.
- Crowd-pleaser guaranteed: My picky-eater nephew asked for seconds, and he normally only eats chicken nuggets shaped like dinosaurs.
- Restaurant-quality texture: The skin gets so crispy it crackles when you bite into it, but the meat stays tender and juicy.
What makes this version different from every other air fryer chicken recipe out there is the garlic treatment. Instead of burning or overpowering, the garlic gets suspended in a buttery parmesan coating that crisps up into a golden crust. It’s not just another chicken recipe—it’s the one that made me actually look forward to cooking on Tuesday nights.
There’s something about that first bite that makes you close your eyes for a second. The crunch, the savory garlic, the salty parmesan, it all comes together in a way that feels way more luxurious than the effort you put in. Whether you’re feeding a family or just yourself with leftovers for tomorrow’s lunch, these thighs deliver comfort without the guilt or the grease.
What Ingredients You Will Need
This recipe uses simple, everyday ingredients to create something that tastes like you spent way more effort than you actually did. Most of these are probably already in your fridge or pantry, which is exactly how I like my weeknight dinners.
- Bone-in, skin-on chicken thighs (4 to 6 thighs, about 2 pounds total): Don’t try to substitute boneless skinless here. The skin is what gets shatter-crisp in the air fryer, and the bone keeps the meat from drying out. I prefer thighs from a local butcher when I can get them, but grocery store packs work fine too.
- Fresh garlic (4 to 5 cloves, minced): This is non-negotiable. Pre-minced garlic in a jar has a different moisture content and burns faster. Take the extra 30 seconds to mince fresh cloves.
- Grated parmesan cheese (½ cup, preferably the real stuff in a wedge): The green canister stuff works in a pinch, but freshly grated parmesan melts better and doesn’t have the anti-caking agents that can make the coating gummy. I like Parmigiano-Reggiano for the nutty flavor.
- Olive oil (2 tablespoons): Helps the seasoning stick and encourages browning. You could use avocado oil if that’s what you have, but olive oil adds a little flavor.
- Butter (1 tablespoon, melted): This is my secret for getting the garlic to actually stick to the chicken instead of sliding off into the bottom of the air fryer basket.
- Garlic powder (1 teaspoon): Not the same as fresh garlic. The powder adds a deeper, almost roasted garlic flavor that rounds out the fresh stuff.
- Paprika (1 teaspoon): I use sweet paprika for color and a mild sweetness. Smoked paprika would change the flavor profile entirely, but it’s good if you want a smokier vibe.
- Dried Italian seasoning (1 teaspoon): A blend of oregano, basil, and rosemary works beautifully here. If you don’t have it, just use dried oregano.
- Salt and black pepper (1 teaspoon salt, ½ teaspoon pepper): Adjust to your taste, but don’t skimp on the salt. It helps the skin crisp up.
- Fresh parsley (for garnish, optional): Adds a pop of color and freshness that cuts through the richness.
For the best texture, look for chicken thighs that are roughly the same size so they cook evenly. If some are significantly larger than others, you might need to add a few extra minutes to the cooking time. I’ve also found that letting the chicken sit at room temperature for about 10 minutes before seasoning helps the coating adhere better, but it’s not a dealbreaker if you’re in a rush.
Equipment Needed
You don’t need a professional kitchen to nail this recipe, but having the right tools makes everything easier. Here’s what you’ll need:
- Air fryer (any size that fits 4 to 6 thighs in a single layer): I use a 6-quart basket-style air fryer, but oven-style works too. Just watch the cooking time, oven-style air fryers sometimes run a minute or two slower.
- Mixing bowls (one medium, one small): For combining the seasoning mixture and for tossing the chicken.
- Tongs: For flipping the chicken without burning your fingers. Silicone-tipped ones won’t scratch your air fryer basket.
- Sharp knife and cutting board: For mincing the garlic and chopping parsley.
- Meat thermometer: This is the most important tool you might not own yet. Chicken thighs need to reach 165°F internally, and a thermometer takes the guesswork out of it. I’ve overcooked enough chicken to know that visual cues lie.
- Pastry brush or small spoon: For brushing the butter-garlic mixture onto the chicken. A brush gives more even coverage, but a spoon works fine.
- Paper towels: For patting the chicken dry before seasoning. This step matters more than you think.
If you don’t own an air fryer yet, you can still make these in a convection oven at 400°F, but you’ll need to flip the chicken halfway through and expect slightly less crispy skin. I’ve also seen people use a wire rack set inside a baking sheet to mimic the air circulation, and it works okay but not as well as the real thing.
For budget-friendly options, I started with a $40 air fryer from a discount store and it worked perfectly for years. You don’t need a fancy one with digital presets, just something that gets hot and has a fan.
Preparation Method

This is where the magic happens. Follow these steps closely, especially the order of operations, and you’ll end up with the crispiest, most flavorful chicken thighs you’ve ever made at home.
- Pat the chicken thighs dry with paper towels. This is the most important step for crispy skin. Moisture is the enemy of crunch. Remove any excess fat or loose skin, but leave most of the skin intact. Let the chicken sit on a plate while you prepare the seasoning mixture, about 5 minutes.
- In a small bowl, combine the melted butter, minced garlic, olive oil, garlic powder, paprika, Italian seasoning, salt, and pepper. Stir until it forms a thick, fragrant paste. The butter should be melted but not hot—you don’t want to cook the garlic before it hits the air fryer.
- Place the chicken thighs in a medium bowl and pour the seasoning mixture over them. Use your hands (yes, get in there) to massage the mixture into every nook and cranny, especially under the skin if you can get your fingers in there. Don’t be shy about it. The chicken should be thoroughly coated, with no dry patches.
- Sprinkle the grated parmesan cheese over the seasoned chicken thighs. Toss gently to distribute, but try to keep most of the cheese on the skin side. Press it in lightly so it adheres. The parmesan will form a crust as it cooks, so you want it clinging to the chicken, not falling off into the basket.
- Preheat your air fryer to 400°F (200°C) for 3 to 5 minutes. Preheating ensures the chicken starts cooking immediately, which helps the skin crisp up faster. If your air fryer doesn’t have a preheat function, just run it empty for a few minutes.
- Arrange the chicken thighs in the air fryer basket in a single layer, skin side up. Make sure they’re not touching each other. If they’re crowded, the steam can’t escape and you’ll end up with soggy skin. Cook in batches if necessary—I’ve done it before and it’s worth the extra 10 minutes.
- Cook at 400°F for 18 to 22 minutes, depending on the size of your thighs. Do not flip them halfway through. The skin needs to stay facing up to get crispy. If your air fryer has a tendency to burn the bottom, you can flip them at the 12-minute mark, but I prefer not to.
- Check the internal temperature at the thickest part of the thigh, avoiding the bone. You’re looking for 165°F. If they’re not there yet, cook in 2-minute increments until they hit the mark. The skin should be deep golden brown and visibly crispy.
- Let the chicken rest in the air fryer basket (turned off) for 2 to 3 minutes. This allows the juices to redistribute so they don’t run out when you cut into the chicken. If you skip this step, you’ll have dry chicken and a puddle of juice on your plate.
- Garnish with fresh parsley and serve immediately. The crispy skin will start to soften after about 10 minutes, so eat them while they’re hot.
One thing I learned the hard way: don’t open the air fryer basket too often to check on them. Every time you open it, heat escapes and the cooking time extends. Trust the process and wait until at least the 15-minute mark before peeking.
Cooking Tips & Techniques
After burning garlic and serving sad, soggy chicken more times than I’d like to admit, I’ve gathered a few tricks that make this recipe foolproof. These are the things I wish someone had told me before I started.
The garlic trick: Mixing the minced garlic with melted butter and oil before adding it to the chicken prevents it from burning. The fat surrounds the garlic particles and creates a barrier that slows down the cooking process. If you just sprinkle raw garlic on chicken, it will burn in the air fryer every single time. Trust me, I tested this theory extensively (and regretfully).
Don’t overcrowd the basket: This is the number one mistake people make with air fryers. If the chicken thighs are touching, the steam gets trapped and the skin stays rubbery. Leave at least half an inch of space between each piece. If you have to cook in batches, keep the first batch warm in a 200°F oven while the second batch cooks.
Patting dry is not optional: I know it seems like a small step, but moisture on the skin creates steam, and steam prevents crisping. Use multiple paper towels and really press them into the skin. You’d be surprised how much moisture comes off even after you think they’re dry.
Let the chicken come to room temperature: Cold chicken straight from the fridge will cook unevenly, with the outside drying out before the inside is done. Let the seasoned chicken sit on the counter for 10 to 15 minutes before air frying. This is especially important if you’re using thick thighs.
Use a meat thermometer: I cannot stress this enough. Chicken thighs are forgiving, but they’re not invincible. Overcook them and they get tough; undercook them and, well, you know. A $10 instant-read thermometer is the best investment you’ll make for your kitchen. I have one that clips to my fridge so I never misplace it.
Timing is everything: Start checking the temperature at the 18-minute mark for average-sized thighs. If you’re using jumbo thighs, expect closer to 22 or even 24 minutes. Write down what works for your specific air fryer because they all run slightly differently.
Variations & Adaptations
One of the best things about this recipe is how easily it adapts to whatever you have on hand or whatever cravings you’re dealing with. Here are some variations I’ve tried and loved.
Spicy buffalo version: Add 1 tablespoon of hot sauce (I like Frank’s RedHot) to the butter mixture and reduce the olive oil by half. Toss the cooked chicken in additional hot sauce before serving. It’s not quite traditional buffalo wings, but it scratches that itch without the deep frying.
Lemon herb twist: Replace the Italian seasoning with 1 tablespoon of fresh lemon zest and 1 teaspoon of dried thyme. The lemon cuts through the richness of the parmesan and makes the chicken taste brighter. I make this version in the spring when I want something lighter.
Low-carb and keto-friendly: This recipe is already pretty low in carbs, but you can skip the parmesan if you’re watching your dairy intake and just use the butter-garlic mixture. The chicken will still be crispy, just less cheesy. You could also add a tablespoon of almond flour to the seasoning for extra crunch.
Dairy-free adaptation: Use vegan butter or coconut oil instead of regular butter, and replace the parmesan with nutritional yeast (about 3 tablespoons). The nutritional yeast gives a similar umami flavor without the dairy. It’s not exactly the same, but it’s surprisingly good.
Oven-baked method: If you don’t have an air fryer, bake the chicken at 425°F on a wire rack set inside a baking sheet. Bake for 25 to 30 minutes, flipping once at the 15-minute mark. The skin won’t be quite as crispy, but the flavor will still be there.
I’ve also tried adding a pinch of cayenne pepper for heat and a teaspoon of honey for sweetness. The honey version caramelizes beautifully in the air fryer and creates a sticky, sweet-savory crust that my kids absolutely love.
Serving & Storage Suggestions
These chicken thighs are best served hot and fresh, but they’re still pretty good the next day if you handle them right. Here’s what I’ve learned about serving and storing them.
Serving temperature: Serve immediately after resting. The crispy skin is at its peak within the first 5 minutes off the heat. If you need to hold them for a bit, place them on a wire rack in a 200°F oven to keep the bottom from getting soggy.
What to serve with them: These thighs pair beautifully with a simple side salad dressed with lemon vinaigrette, or with roasted vegetables like asparagus or broccoli. For a heartier meal, try them with creamy Tuscan shrimp orzo for a complete dinner that feels fancy but comes together fast. I also love serving them alongside flavorful honey garlic grilled chicken thighs when I’m feeding a crowd and want to offer two different flavor profiles.
Storing leftovers: Place cooled chicken thighs in an airtight container and refrigerate for up to 4 days. Do not stack them on top of each other if you can avoid it, the skin will stick together and get soggy. I use a single layer with parchment paper between pieces.
Reheating: The air fryer is the best way to reheat these. Set it to 375°F and warm the thighs for 3 to 4 minutes, flipping once. The microwave will make the skin rubbery, so avoid it if you can. If you’re in a hurry, a hot skillet with a splash of oil works in a pinch.
Freezing: You can freeze cooked chicken thighs for up to 3 months. Wrap each thigh individually in plastic wrap, then place them in a freezer bag. To reheat, thaw in the refrigerator overnight and then crisp them up in the air fryer at 375°F for 5 to 6 minutes.
The flavors actually deepen after a day in the fridge, so leftovers make excellent chicken salad or topping for a green salad. I’ve even chopped them up and thrown them into a quick pasta with olive oil and cherry tomatoes for a next-day lunch that takes 5 minutes.
Nutritional Information & Benefits
These chicken thighs are indulgent but not unreasonable for a regular dinner rotation. Here’s a rough breakdown per serving (one thigh with skin, assumes 4 servings total):
- Calories: Approximately 380-420 calories
- Protein: 28-32 grams
- Fat: 28-32 grams (mostly from skin and olive oil)
- Carbohydrates: 2-4 grams
- Fiber: 0 grams
- Sugar: 0 grams
Chicken thighs are actually a great source of selenium, which supports thyroid function, and niacin, which helps with energy metabolism. The skin contains collagen, which is good for joint health and skin elasticity. That said, the skin is also where most of the fat lives, so if you’re watching your saturated fat intake, you can remove it before eating (but honestly, why would you?).
This recipe is naturally gluten-free and low-carb, making it suitable for keto and paleo diets with minor adjustments. It contains dairy from the parmesan and butter, but as I mentioned earlier, those are easy to substitute.
From a wellness perspective, I love that this recipe lets me enjoy crispy, satisfying chicken without deep frying. The air fryer uses a fraction of the oil, so you’re getting that crave-worthy texture with way less fat and fewer calories than traditional fried chicken. It’s comfort food that doesn’t make you feel heavy afterward.
Conclusion
These crispy air fryer garlic parmesan chicken thighs are the kind of recipe that makes you feel like a better cook than you actually are. They’re forgiving enough for beginners but impressive enough to serve to guests who think you spent hours in the kitchen. The combination of crunchy skin, juicy meat, and savory garlic-parmesan flavor is hard to beat, especially when it comes together in under 30 minutes.
I love that this recipe has become my go-to for those nights when I want something that feels special but doesn’t require a trip to the store or a complicated prep list. It’s proof that you don’t need fancy techniques or obscure ingredients to make something genuinely delicious. Just good chicken, a little patience, and an air fryer that does most of the work for you.
If you try this recipe, I’d love to hear how it turned out. Leave a comment below with your favorite variation or any tweaks you made. And if you’re looking for another easy weeknight dinner, check out these easy slow cooker honey garlic chicken thighs for a completely different but equally delicious take on chicken thighs. Happy cooking, and don’t burn the garlic!
Frequently Asked Questions
Can I use boneless skinless chicken thighs instead?
You can, but the results won’t be as crispy and the cooking time will be shorter, about 12 to 15 minutes. Boneless thighs cook faster and don’t have the skin to crisp up, so you’ll lose that signature crunch. If you’re in a pinch, go for it, but bone-in skin-on is really the star here.
Why is my chicken skin not getting crispy?
Most likely, the chicken wasn’t patted dry enough before seasoning, or the air fryer basket was overcrowded. Moisture and steam are the enemies of crispy skin. Next time, use extra paper towels and make sure there’s space between each thigh. Also, check that your air fryer is actually reaching 400°F—some models run cooler than they claim.
Can I prep these ahead of time?
Yes, you can season the chicken up to 24 hours in advance and keep it covered in the refrigerator. The flavors will actually meld together more deeply. Just let the chicken sit at room temperature for 10 minutes before air frying to ensure even cooking. Don’t add the parmesan until right before cooking, or it can get soggy.
How do I keep the parmesan from burning?
This is a common concern, but the butter and oil mixture protects the parmesan from direct heat. As long as you’re cooking at 400°F and not higher, and you’ve mixed the cheese into the fat mixture rather than sprinkling it on dry, it should brown beautifully without burning. If your air fryer runs hot, try reducing the temperature to 375°F and adding a few extra minutes.
What if I don’t have an air fryer?
You can bake these in a conventional oven at 425°F on a wire rack set inside a baking sheet. The wire rack allows air to circulate underneath, which helps the bottom crisp up. Bake for 25 to 30 minutes, flipping once at the 15-minute mark. The skin won’t be quite as shatter-crisp, but the flavor will still be fantastic.
Pin This Recipe!
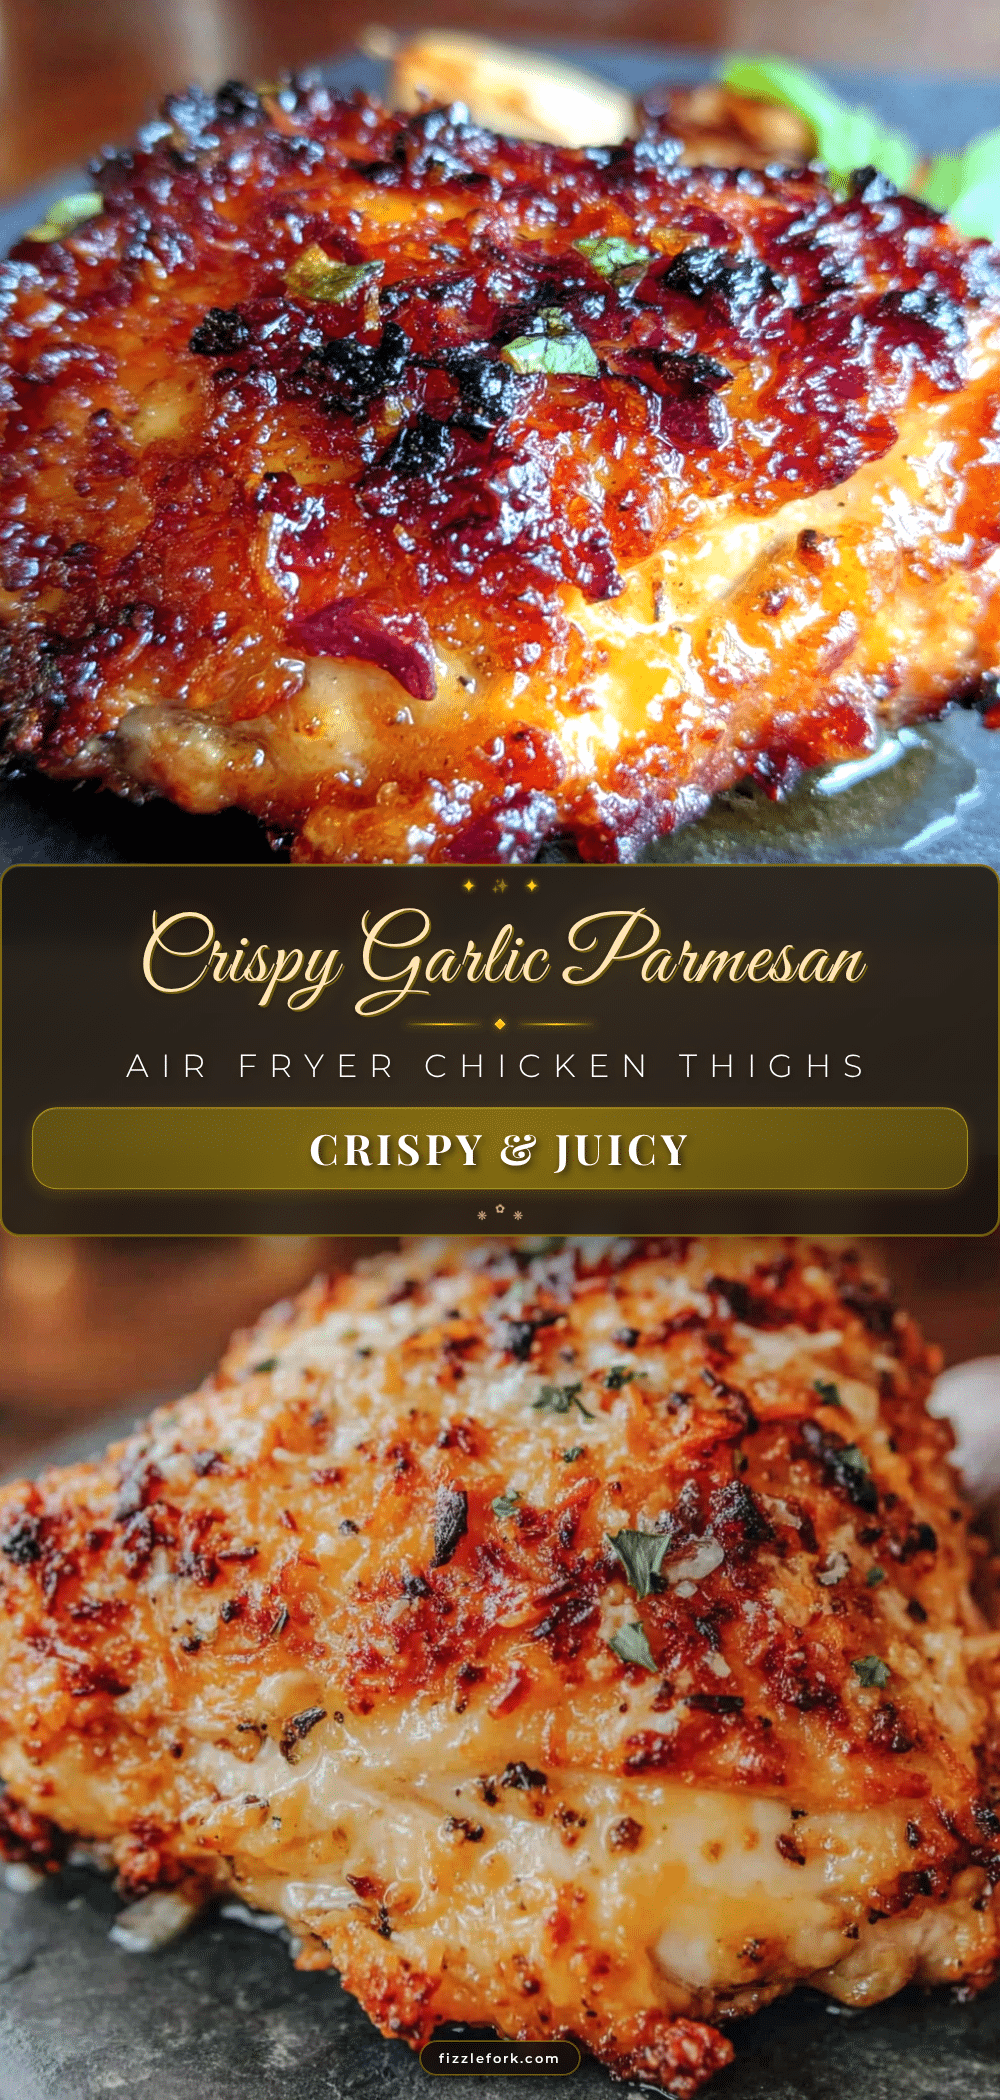
Crispy Air Fryer Garlic Parmesan Chicken Thighs: Easy Best Recipe

These crispy air fryer garlic parmesan chicken thighs are the kind of recipe that makes you feel like a better cook than you actually are. They’re forgiving enough for beginners but impressive enough to serve to guests who think you spent hours in the kitchen.
- Prep Time: 10 minutes
- Cook Time: 20 minutes
- Total Time: 30 minutes
- Yield: 4 servings 1x
- Category: Main Course
- Cuisine: American
Ingredients
- 4 to 6 bone-in, skin-on chicken thighs (about 2 pounds total)
- 4 to 5 cloves fresh garlic, minced
- ½ cup grated parmesan cheese (preferably freshly grated)
- 2 tablespoons olive oil
- 1 tablespoon butter, melted
- 1 teaspoon garlic powder
- 1 teaspoon paprika (sweet paprika recommended)
- 1 teaspoon dried Italian seasoning
- 1 teaspoon salt
- ½ teaspoon black pepper
- Fresh parsley for garnish (optional)
Instructions
- Pat the chicken thighs dry with paper towels. Remove any excess fat or loose skin, but leave most of the skin intact. Let the chicken sit on a plate while you prepare the seasoning mixture, about 5 minutes.
- In a small bowl, combine the melted butter, minced garlic, olive oil, garlic powder, paprika, Italian seasoning, salt, and pepper. Stir until it forms a thick, fragrant paste.
- Place the chicken thighs in a medium bowl and pour the seasoning mixture over them. Use your hands to massage the mixture into every nook and cranny, especially under the skin if possible.
- Sprinkle the grated parmesan cheese over the seasoned chicken thighs. Toss gently to distribute, keeping most of the cheese on the skin side. Press it in lightly so it adheres.
- Preheat your air fryer to 400°F (200°C) for 3 to 5 minutes.
- Arrange the chicken thighs in the air fryer basket in a single layer, skin side up. Make sure they’re not touching each other. Cook in batches if necessary.
- Cook at 400°F for 18 to 22 minutes, depending on the size of your thighs. Do not flip them halfway through.
- Check the internal temperature at the thickest part of the thigh, avoiding the bone. You’re looking for 165°F. If not there yet, cook in 2-minute increments until they hit the mark.
- Let the chicken rest in the air fryer basket (turned off) for 2 to 3 minutes.
- Garnish with fresh parsley and serve immediately.
Notes
Patting the chicken dry is crucial for crispy skin. Mixing minced garlic with melted butter and oil prevents it from burning. Do not overcrowd the air fryer basket. Let chicken come to room temperature before cooking for even results. Use a meat thermometer to ensure doneness.
Nutrition
- Serving Size: 1 chicken thigh
- Calories: 400
- Sodium: 650
- Fat: 30
- Saturated Fat: 9
- Carbohydrates: 3
- Protein: 30
Keywords: air fryer chicken thighs, garlic parmesan chicken, crispy chicken thighs, easy chicken recipe, weeknight dinner, gluten-free chicken, low-carb chicken


