That first slice — the one where you can see the three distinct ribbons of color running through the golden crumb — still stops me every time. I was maybe twelve, standing on a step stool in my grandmother’s kitchen, watching her pull a bundt pan from the oven. She didn’t call it Neapolitan. She called it “that pretty cake” and served it on a chipped milk glass stand. I remember thinking it looked like something you’d see in a magazine, but it tasted like the kind of secret that only family gets to know.
Years later, when I started developing my own version, I realized the trick wasn’t just about getting three batters into one pan. It was about making each flavor stand on its own while still playing nice together. The chocolate needed to be deep, not just sweet. The strawberry had to taste like real berries, not syrup. And the vanilla — well, the vanilla had to be the quiet anchor that held everything together. This Perfect Neapolitan Marble Bundt Cake is the result of too many test bakes to count, a few spectacular failures, and one very patient husband who ate every single one.
What I love most about this cake is how it looks like you spent hours fussing over it. But honestly? The technique is simpler than you’d think. And once you master the layering, you’ll never look at a plain bundt cake the same way again.
Why You’ll Love This Recipe
This isn’t just another pretty cake. It’s the kind of dessert that makes people stop mid-conversation and ask for the recipe. Here’s why I keep coming back to it:
- Three Flavors, One Cake : Rich chocolate, sweet strawberry, and classic vanilla all in one slice. No more fighting over which flavor to make.
- Stunning Presentation : The marbled swirl pattern looks bakery-level impressive with zero decorating skills required.
- Simple Ingredients : You probably have most of these in your pantry right now. No specialty extracts or hard-to-find items.
- Perfect for Any Occasion : Birthday parties, brunches, potlucks, or just a Tuesday that needs a little extra sweetness.
- Make-Ahead Friendly : This cake actually tastes better the next day. The flavors meld together beautifully overnight.
- Beginner-Proof Technique : If you can scoop batter into a pan, you can make this. The marbling hides any imperfections.
What makes this version different from the rest? Most Neapolitan cakes use artificial strawberry flavoring or boxed mixes. I developed this from scratch using real freeze-dried strawberries for that authentic, fruity taste without watery results. The chocolate layer gets a double dose of cocoa — both natural and Dutch-process — for depth that doesn’t overpower the other flavors. And the vanilla base is tender and buttery, the perfect canvas for those bold stripes.
This is the cake you make when you want to impress without the stress. It’s nostalgic, it’s beautiful, and honestly, it tastes like childhood in the best possible way.
What Ingredients You Will Need
This recipe uses simple, everyday ingredients to create something that looks and tastes anything but ordinary. Each component plays a specific role in building that perfect Neapolitan flavor and tender crumb.
For the Vanilla Base:
- 2 ¾ cups (345g) all-purpose flour — Spoon and level for accuracy. Too much flour makes the cake dense.
- 2 ½ teaspoons baking powder — Fresh baking powder is crucial for proper rise. Check the date!
- ½ teaspoon salt — Balances the sweetness and enhances flavor.
- 1 cup (226g) unsalted butter, softened — I prefer Land O’Lakes for consistent results. Room temperature is non-negotiable here.
- 2 cups (400g) granulated sugar — Creates that tender, fine crumb.
- 4 large eggs, room temperature — Cold eggs will seize the batter. Let them sit out for 30 minutes.
- 1 tablespoon vanilla extract — Use pure vanilla, not imitation. It makes a real difference.
- 1 cup (240ml) whole milk, room temperature — Whole milk gives the richest texture, but 2% works in a pinch.
For the Chocolate Swirl:
- ¼ cup (60ml) warm milk — Helps the cocoa dissolve smoothly.
- 3 tablespoons Dutch-process cocoa powder — I use Rodelle for its deep, dark color and smooth flavor.
- 2 tablespoons natural unsweetened cocoa powder — The combination gives both color and complexity.
- 2 tablespoons granulated sugar — Balances the bitterness of the cocoa.
- ½ teaspoon vanilla extract — Rounds out the chocolate flavor.
For the Strawberry Swirl:
- ½ cup (15g) freeze-dried strawberries — Not fresh or frozen! Freeze-dried berries add intense flavor without extra moisture.
- 2 tablespoons whole milk — Helps create a paste-like consistency.
- 1 tablespoon granulated sugar — Enhances the natural sweetness of the berries.
- ¼ teaspoon vanilla extract — Bridges the strawberry and vanilla flavors.
For the Glaze (Optional but Recommended):
- 1 cup (120g) powdered sugar
- 2-3 tablespoons whole milk
- ½ teaspoon vanilla extract
- Pinch of salt
Ingredient Tip: If you can’t find freeze-dried strawberries, you can substitute 2 tablespoons of strawberry jam. Just know the color will be less vibrant and the flavor slightly more muted. I’ve tested both, and freeze-dried is worth the hunt — check the dried fruit aisle or Amazon.
Equipment Needed
You don’t need a professional bakery setup for this one. Here’s what you’ll need:
- 10-12 cup bundt pan — The classic fluted shape is essential for that signature look. Nordic Ware is my go-to brand; it heats evenly and releases cakes beautifully.
- Stand mixer or hand mixer — Either works. I use my KitchenAid for the vanilla base, but a hand mixer gets the job done too.
- Large mixing bowls — You’ll need at least three for separating the batters.
- Medium bowls — For the chocolate and strawberry mixtures.
- Whisk — For combining dry ingredients.
- Rubber spatula — For folding and scraping every bit of batter.
- Food processor or blender — For grinding the freeze-dried strawberries into powder.
- Cooling rack — Essential for even cooling and preventing a soggy bottom.
- Non-stick baking spray with flour — This is non-negotiable for bundt pans. Regular cooking spray won’t cut it.
Budget Tip: If you don’t own a bundt pan, you can use a 9×13 inch baking dish. The marbling effect will be different — more of a swirl pattern on top — but the taste is just as good. Just reduce the baking time by about 10 minutes and start checking for doneness earlier.
Preparation Method
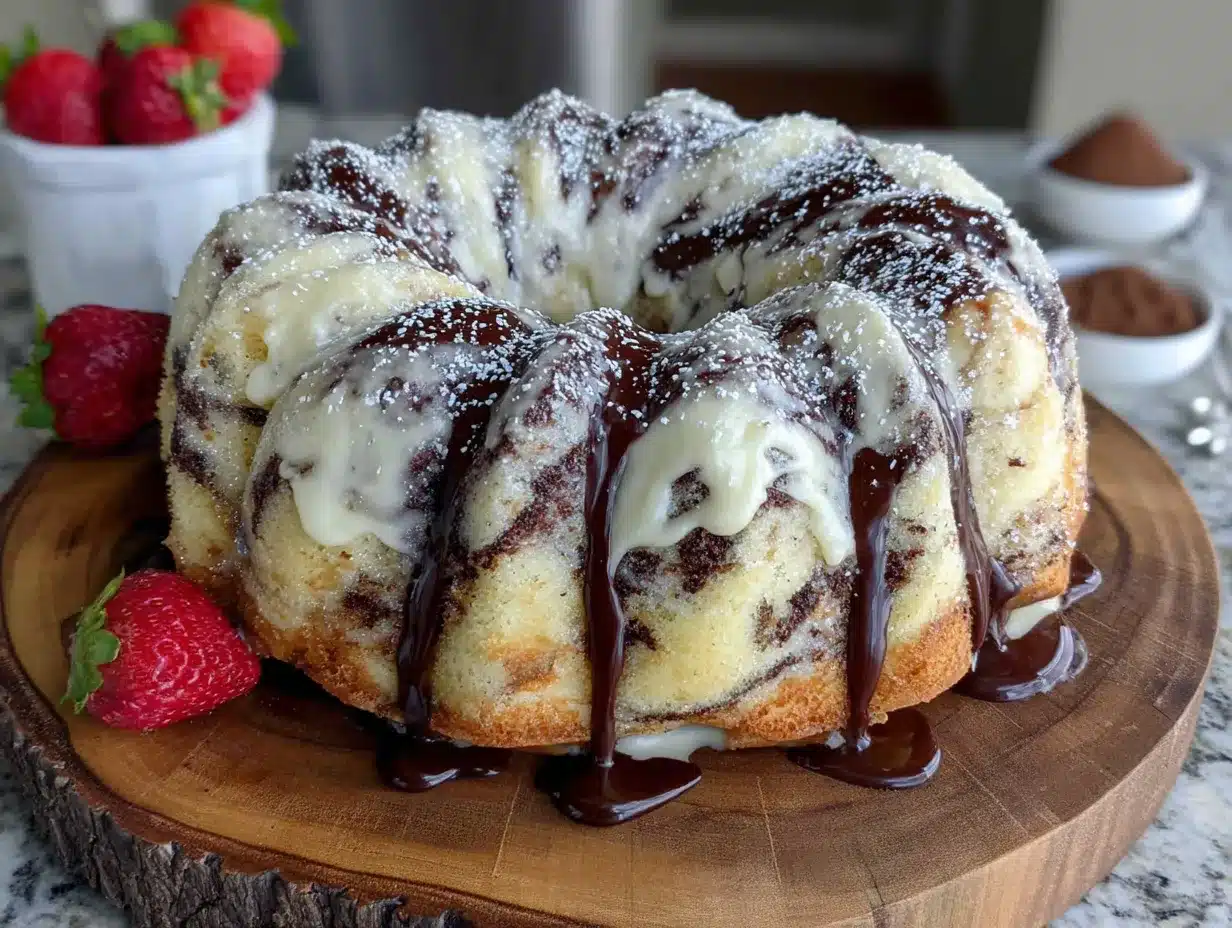
Let’s walk through this step by step. I promise it’s easier than it looks.
Step 1: Prep Your Pan and Oven
Preheat your oven to 350°F (175°C). Generously spray your bundt pan with non-stick baking spray that contains flour. Get into every nook and cranny — those fluted edges are notorious for sticking. Set the pan aside while you make the batter.
Step 2: Make the Strawberry Powder
Place the freeze-dried strawberries in a food processor or blender. Pulse until they become a fine, pink powder. You should have about 3 tablespoons of powder. Set this aside. If you don’t have a food processor, put the berries in a zip-top bag and crush them with a rolling pin. It takes a little more elbow grease, but it works.
Step 3: Combine Dry Ingredients
In a medium bowl, whisk together the flour, baking powder, and salt. Set aside. This ensures even distribution of the leavening agents — no one wants a pocket of baking powder in their slice.
Step 4: Cream Butter and Sugar
In the bowl of a stand mixer fitted with the paddle attachment, beat the softened butter and granulated sugar on medium speed for 3-4 minutes. You’re looking for a light, fluffy texture — pale yellow and airy. Scrape down the sides and bottom of the bowl halfway through. This step is crucial for a tender crumb.
Step 5: Add Eggs and Vanilla
Add the eggs one at a time, beating well after each addition. The batter might look slightly curdled at this point — that’s okay. Add the vanilla extract and beat until combined. Scrape the bowl again.
Step 6: Alternate Flour and Milk
With the mixer on low speed, add the flour mixture in three additions, alternating with the milk in two additions. Start and end with the flour. Mix just until combined — overmixing will make the cake tough. Use a rubber spatula to give the batter a final fold from the bottom up, ensuring everything is incorporated.
Step 7: Divide the Batter
Weigh or measure the batter into three equal portions. You’ll need about 2 cups of batter for each portion. Place one portion in a separate bowl (this will be the vanilla layer).
Step 8: Make the Chocolate Swirl
In a small bowl, whisk together the warm milk, both cocoa powders, sugar, and vanilla extract until smooth. Fold this mixture into one of the remaining batter portions until fully combined. The batter will be dark and glossy.
Step 9: Make the Strawberry Swirl
In another small bowl, combine the strawberry powder, milk, sugar, and vanilla extract. Stir until it forms a thick paste. Fold this into the last batter portion until the pink color is even throughout. Don’t worry if it looks slightly speckled — those tiny berry bits will disappear during baking.
Step 10: Layer the Batters
Here’s the fun part. Spoon the vanilla batter into the prepared bundt pan, spreading it evenly. Next, spoon the chocolate batter on top of the vanilla, trying to keep it in an even layer. Finally, spoon the strawberry batter on top. Use a butter knife or skewer to gently swirl the batters together — insert the knife to the bottom of the pan and make figure-eight motions. Don’t over-swirl, or you’ll lose the distinct stripes.
Step 11: Bake
Bake for 45-55 minutes, or until a long skewer inserted into the center comes out clean or with a few moist crumbs. The top should be golden brown and spring back when lightly touched. Start checking at 45 minutes — ovens vary, and you don’t want a dry cake.
Step 12: Cool and Remove
Let the cake cool in the pan on a wire rack for exactly 15 minutes. This is critical — too short and it will stick, too long and it will steam and become soggy. After 15 minutes, invert the pan onto the rack and lift it off gently. Let the cake cool completely before glazing, about 1-2 hours.
Step 13: Make the Glaze
Whisk together the powdered sugar, milk, vanilla, and salt until smooth. Adjust consistency with more milk or sugar as needed. Drizzle over the cooled cake, letting it cascade down the sides naturally.
Cooking Tips & Techniques
I learned most of these the hard way — through cracked cakes, stuck pans, and one particularly sad bundt that looked more like a crater than a cake. Here’s what I wish someone had told me:
Room Temperature Ingredients Are Not Optional. Cold butter doesn’t cream properly. Cold eggs can curdle your batter. Cold milk won’t emulsify. Set everything out 30-60 minutes before you start. Your cake will rise higher and have a more tender crumb.
Don’t Skip the Pan Prep. I know it’s tempting to just spray and go, but bundt pans are divas. Use a baking spray that contains flour, and get into every crevice. I use a pastry brush to make sure the spray reaches all the fluted edges. Trust me on this.
The Swirl Technique Matters. Less is more. Three or four figure-eight motions are plenty. If you over-swirl, you’ll end up with a muddy brown cake instead of distinct stripes. You want ribbons of color, not a tie-dye mess.
Check for Doneness Early. Every oven runs differently. Start checking at 45 minutes. A wooden skewer should come out clean or with a few moist crumbs — not wet batter. If the top is browning too quickly, tent it loosely with foil for the last 10-15 minutes.
Cooling Is a Two-Step Process. The 15-minute rest in the pan is non-negotiable. If you try to remove it too early, the cake will fall apart. If you wait too long, condensation will make it stick. Set a timer. I’ve ruined more bundts by getting distracted than by any other mistake.
Variations & Adaptations
One of the best things about this cake is how flexible it is. Here are some variations I’ve tested and loved:
Dairy-Free Version: Substitute the butter with a high-quality vegan butter stick (not spreadable margarine) and use oat milk or almond milk. The texture will be slightly less tender, but the flavor still shines. I’ve had good luck with Miyoko’s vegan butter.
Gluten-Free Adaptation: Use a 1:1 gluten-free flour blend that contains xanthan gum. Cup4Cup and King Arthur both work well. Add an extra tablespoon of milk to compensate for the drier flour. The crumb will be a bit more delicate, so handle with care.
Berry Swap: Don’t love strawberry? Use freeze-dried raspberries or blueberries instead. The technique is exactly the same — just grind them into a powder. Raspberry gives a slightly tarter flavor that plays beautifully with the chocolate.
Chocolate Intensity Upgrade: For serious chocolate lovers, add ½ cup of mini chocolate chips to the chocolate batter portion. They’ll create little pockets of melted chocolate throughout the dark stripes. I did this for a birthday party once and it was gone in ten minutes.
Citrus Twist: Add 1 tablespoon of lemon zest to the vanilla batter and use lemon juice in the glaze instead of vanilla. The bright citrus cuts through the richness and makes the cake feel lighter. Perfect for spring brunches.
Serving & Storage Suggestions
This cake is a showstopper at room temperature, but here’s how to make the most of it:
Serving: Slice with a serrated knife for clean cuts. Serve plain or with a dollop of lightly sweetened whipped cream and fresh berries. The contrast of the creamy topping against the tender cake is pure magic. For an extra indulgent touch, warm individual slices in the microwave for 10-15 seconds before serving.
Storage: Store the cake in an airtight container at room temperature for up to 3 days. If you’ve glazed it, place a piece of wax paper between the cake and the lid to prevent the glaze from sticking. Do not refrigerate — it will dry out the cake.
Freezing: This cake freezes beautifully. Wrap the unglazed, cooled cake tightly in plastic wrap, then in aluminum foil. Freeze for up to 3 months. Thaw overnight in the refrigerator, then bring to room temperature before glazing and serving. I always bake an extra one for the freezer around the holidays.
Flavor Development: Here’s a little secret — this cake actually tastes better on day two. The flavors meld together and the crumb becomes even more moist. If you can resist eating it immediately, wrap it tightly and let it sit overnight. You’ll thank me tomorrow.
Nutritional Information & Benefits
Let’s be real — this is a treat, not a health food. But knowing what’s in it helps with mindful indulgence. Per slice (based on 12 servings):
- Calories: 385
- Fat: 18g
- Carbohydrates: 52g
- Protein: 6g
- Sugar: 33g
- Fiber: 1g
Health Highlights: The strawberries provide a small amount of vitamin C and antioxidants, even in freeze-dried form. The eggs contribute high-quality protein and choline for brain health. And using real butter means you’re getting vitamin A and healthy saturated fats — not the processed oils found in many boxed mixes.
Dietary Considerations: This recipe contains dairy, eggs, and gluten. For allergen-friendly versions, see the Variations section above. It’s naturally nut-free, making it a safe option for school events or parties where allergies are a concern.
I believe in balance. This cake is meant to be enjoyed in moderation — a slice with coffee on a Sunday morning or as a celebration centerpiece. Food should bring joy, not guilt.
Conclusion
This Perfect Neapolitan Marble Bundt Cake is more than just a pretty dessert. It’s the cake that brings people to the table, that sparks conversations about childhood memories and favorite flavors. It’s the kind of recipe that becomes a tradition — the one your family requests for birthdays, holidays, and just-because Tuesdays.
What I love most is how forgiving it is. The marbling hides any imperfections, the flavors are forgiving, and the result always looks like you spent hours perfecting it. Whether you’re an experienced baker or someone who’s never made a bundt cake before, I promise you can do this. And when you pull that beautiful striped cake out of the pan and hear the “oohs” and “aahs,” you’ll know exactly why I keep coming back to this recipe.
I’d love to hear how yours turns out! Leave a comment below and let me know what variations you tried, or tag me in your photos. Did you swap the strawberry for raspberry? Add chocolate chips to the dark layer? I’m always looking for new ideas to test in my kitchen. Happy baking, friend!
Frequently Asked Questions
Can I use fresh strawberries instead of freeze-dried?
I don’t recommend it. Fresh strawberries contain too much water, which will make the strawberry portion of the batter dense and soggy. Freeze-dried strawberries give you concentrated flavor without the moisture issues. If you absolutely must substitute, use 2 tablespoons of strawberry jam and reduce the milk in the strawberry mixture to 1 tablespoon.
Why did my cake stick to the pan?
This usually happens for one of three reasons: you didn’t use enough baking spray, you didn’t use a spray with flour, or you didn’t let it cool for the full 15 minutes. Next time, be generous with the spray and use a pastry brush to work it into all the crevices. And set that timer — 15 minutes is the sweet spot.
Can I make this cake in advance?
Absolutely! This cake actually improves overnight. Bake it a day ahead, let it cool completely, wrap it tightly in plastic wrap, and store at room temperature. Glaze it just before serving for the freshest look. You can also freeze the unglazed cake for up to 3 months.
How do I get cleaner stripes in my cake?
The key is layering the batters evenly and swirling gently. Spoon each batter in an even layer — don’t just plop it in the center. When you swirl, use a butter knife or skewer and make only 3-4 figure-eight motions. Over-swirling creates a muddy look. Practice makes perfect!
Can I use this recipe for cupcakes or a layer cake?
Yes, but the technique changes slightly. For cupcakes, layer the batters in the liners and swirl with a toothpick. Bake at 350°F for 18-22 minutes. For a layer cake, you’ll need to decide which flavor goes where — I recommend vanilla layers with chocolate and strawberry filling between them. The marbling effect works best in a bundt pan.
Pin This Recipe!
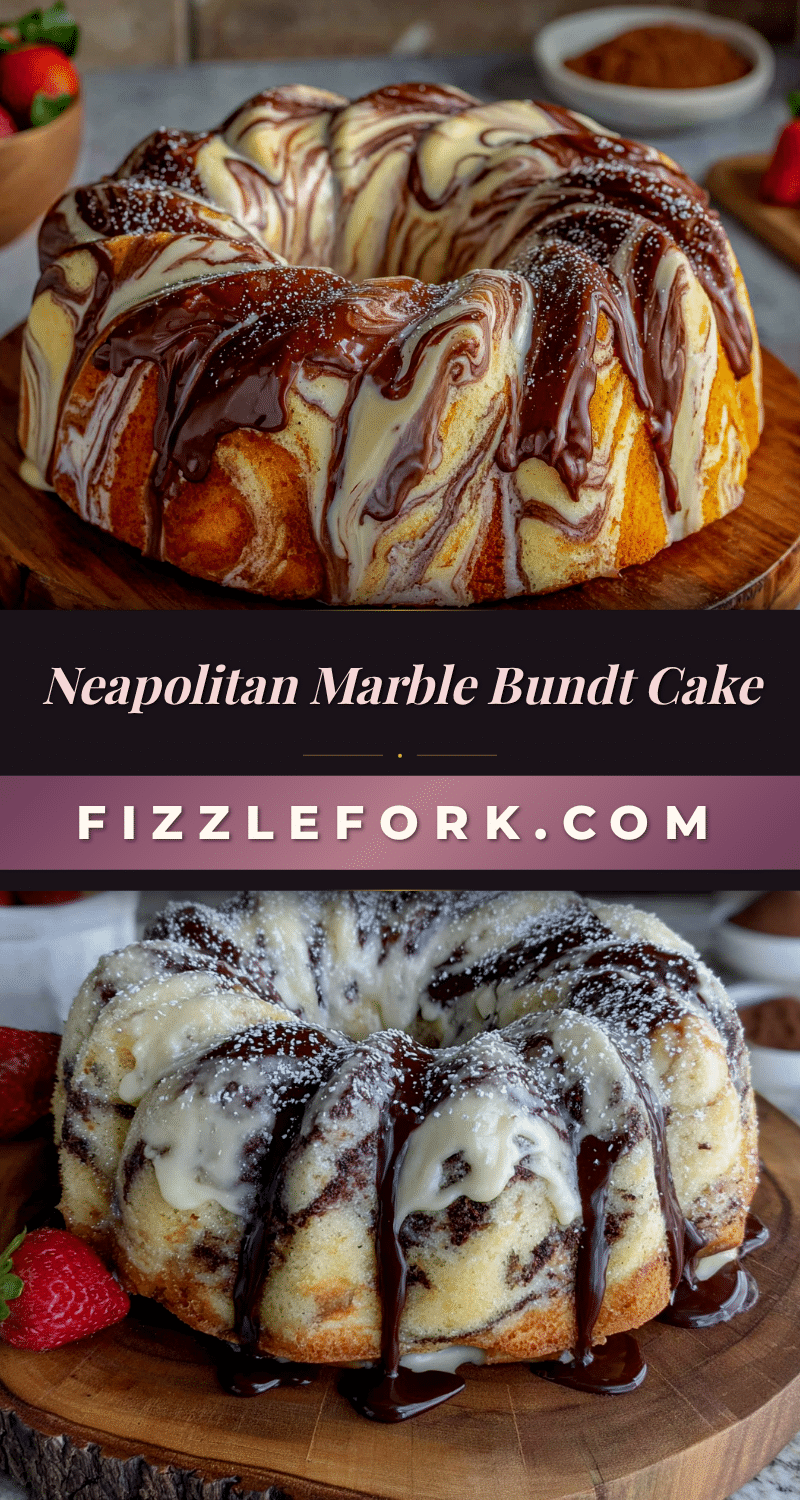
Perfect Neapolitan Marble Bundt Cake: Easy Vanilla, Chocolate & Strawberry Swirl
A stunning three-flavor bundt cake with rich chocolate, sweet strawberry, and classic vanilla swirls. This from-scratch recipe uses real freeze-dried strawberries and a double dose of cocoa for authentic flavor that looks bakery-level impressive with zero decorating skills required.
- Prep Time: 30 minutes
- Cook Time: 50 minutes
- Total Time: 1 hour 20 minutes
- Yield: 12 servings 1x
- Category: Dessert
- Cuisine: American
Ingredients
- 2 ¾ cups (345g) all-purpose flour
- 2 ½ teaspoons baking powder
- ½ teaspoon salt
- 1 cup (226g) unsalted butter, softened
- 2 cups (400g) granulated sugar
- 4 large eggs, room temperature
- 1 tablespoon vanilla extract
- 1 cup (240ml) whole milk, room temperature
- ¼ cup (60ml) warm milk
- 3 tablespoons Dutch-process cocoa powder
- 2 tablespoons natural unsweetened cocoa powder
- 2 tablespoons granulated sugar
- ½ teaspoon vanilla extract
- ½ cup (15g) freeze-dried strawberries
- 2 tablespoons whole milk
- 1 tablespoon granulated sugar
- ¼ teaspoon vanilla extract
- 1 cup (120g) powdered sugar
- 2–3 tablespoons whole milk
- ½ teaspoon vanilla extract
- Pinch of salt
Instructions
- Preheat oven to 350°F (175°C). Generously spray a 10-12 cup bundt pan with non-stick baking spray containing flour, getting into all crevices. Set aside.
- Place freeze-dried strawberries in a food processor or blender and pulse until fine powder forms (about 3 tablespoons). Set aside.
- In a medium bowl, whisk together flour, baking powder, and salt. Set aside.
- In a stand mixer with paddle attachment, beat softened butter and 2 cups granulated sugar on medium speed for 3-4 minutes until light and fluffy. Scrape bowl halfway through.
- Add eggs one at a time, beating well after each addition. Add 1 tablespoon vanilla extract and beat until combined. Scrape bowl again.
- With mixer on low, add flour mixture in three additions, alternating with 1 cup milk in two additions, starting and ending with flour. Mix just until combined. Fold with rubber spatula.
- Divide batter into three equal portions (about 2 cups each). Set one portion aside for vanilla layer.
- For chocolate swirl: In a small bowl, whisk together warm milk, both cocoa powders, 2 tablespoons sugar, and ½ teaspoon vanilla until smooth. Fold into one batter portion until fully combined.
- For strawberry swirl: In another small bowl, combine strawberry powder, 2 tablespoons milk, 1 tablespoon sugar, and ¼ teaspoon vanilla to form a thick paste. Fold into remaining batter portion until evenly pink.
- Layer batters in prepared pan: spoon vanilla batter evenly, then chocolate batter on top, then strawberry batter on top. Use a butter knife or skewer to gently swirl with 3-4 figure-eight motions.
- Bake for 45-55 minutes until a skewer inserted in center comes out clean or with few moist crumbs. Start checking at 45 minutes.
- Cool in pan on wire rack for exactly 15 minutes. Invert onto rack and remove pan. Cool completely, about 1-2 hours.
- For glaze: Whisk together powdered sugar, 2-3 tablespoons milk, ½ teaspoon vanilla, and pinch of salt until smooth. Adjust consistency as needed. Drizzle over cooled cake.
Notes
Room temperature ingredients are essential for best results. The cake actually tastes better on day two as flavors meld. For cleaner stripes, don’t over-swirl – 3-4 figure-eight motions is plenty. If using a 9×13 pan instead, reduce baking time by about 10 minutes. Freeze-dried strawberries are preferred over fresh or frozen to avoid excess moisture.
Nutrition
- Serving Size: 1 slice
- Calories: 385
- Sugar: 33
- Sodium: 220
- Fat: 18
- Saturated Fat: 11
- Carbohydrates: 52
- Fiber: 1
- Protein: 6
Keywords: Neapolitan cake, marble bundt cake, vanilla chocolate strawberry cake, bundt cake recipe, easy dessert, birthday cake, strawberry cake, chocolate cake, vanilla cake


