It was a Tuesday night, and the only thing I wanted was pepperoni pizza sliders. Not a whole pizza, not delivery, not even a proper slice. Just those little pull-apart buns, all buttery on top and oozing with cheese in the middle. The kind you eat standing up at the counter, napkin tucked into your collar, trying to convince yourself you’ll stop at three. (Spoiler: you won’t.)
I had a package of Hawaiian rolls sitting on the counter, leftover pepperoni from a charcuterie board I’d made over the weekend, and a block of mozzarella that was staring at me from the fridge. It wasn’t a planned dinner. It was one of those nights where you just need something fast, something familiar, something that doesn’t require a recipe card or a trip to the store. I pulled the rolls apart, layered everything in, brushed the tops with garlic butter, and threw them in the oven. Twenty minutes later, I had the kind of dinner that makes you wonder why you ever bother with anything more complicated.
These sliders are not fancy. They’re not supposed to be. They’re the weeknight hero you didn’t know you needed—the one that gets dinner on the table in under thirty minutes and makes everyone at the table happy. No drama, no fuss, just warm, melty, pepperoni pizza goodness in a soft, pull-apart bun. Honestly, I’ve made them for game day parties, for lazy Sunday afternoons, and for those nights when the kids are hangry and you need a win. They deliver every single time.
So if you’re looking for a recipe that feels like a hug in food form, you’ve found it. Let’s get into it.
Why You’ll Love This Recipe
I’ve tested this recipe about a dozen times, tweaking the cheese ratio, the butter topping, the bake time—all so you don’t have to. Here’s why these sliders are worth every single calorie:
- Quick & Easy: From start to table in under 25 minutes. No dough to knead, no sauce to simmer, no complicated steps. Just assemble, bake, and devour.
- Simple Ingredients: You probably have everything you need in your kitchen right now. Hawaiian rolls, pepperoni, mozzarella, pizza sauce, butter, and a few pantry staples. That’s it.
- Perfect for Any Occasion: Game day, movie night, birthday parties, potlucks, or just a Tuesday when you need dinner to be fun. These sliders fit every single scenario.
- Crowd-Pleaser: I’ve served these to kids, adults, picky eaters, and pizza snobs. They disappear within minutes. Every single time.
- Unbelievably Delicious: The combination of soft, buttery rolls, gooey melted cheese, crispy pepperoni, and that garlic-herb butter topping is pure comfort food magic.
What makes this recipe different from the rest? It’s the butter topping. I brush the tops of the rolls with a mixture of melted butter, garlic powder, Italian seasoning, and a pinch of red pepper flakes. It bakes into the buns, creating a golden, flavorful crust that takes these sliders from good to absolutely irresistible. Plus, I use a blend of mozzarella and provolone for the perfect melt—stretchy, creamy, and never greasy.
This is the kind of recipe that makes you close your eyes after the first bite. It’s comfort food at its finest—fast, satisfying, and guaranteed to make everyone happy.
What Ingredients You Will Need
This recipe uses simple, everyday ingredients to deliver maximum flavor with minimal effort. Here’s what you’ll need:
For the Sliders
- 1 package (12 count) Hawaiian sweet rolls (I recommend King’s Hawaiian for that soft, slightly sweet texture that balances the savory fillings perfectly)
- 1/2 cup pizza sauce (use your favorite jarred brand or homemade; I like Rao’s for its rich flavor and clean ingredients)
- 1 1/2 cups shredded mozzarella cheese (freshly shredded melts better than pre-shredded, which contains anti-caking agents)
- 1/2 cup shredded provolone cheese (adds a creamy, nutty depth that mozzarella alone can’t match)
- 3/4 cup mini pepperoni slices (regular pepperoni works too; just chop it into smaller pieces for even distribution)
- 1/4 cup grated Parmesan cheese (for that salty, umami kick on top)
For the Garlic Butter Topping
- 4 tablespoons unsalted butter, melted
- 1 teaspoon garlic powder (not garlic salt—you want the flavor without extra sodium)
- 1 teaspoon Italian seasoning
- 1/4 teaspoon red pepper flakes (optional, but highly recommended for a subtle kick)
- 1 tablespoon chopped fresh parsley (for garnish; dried works in a pinch, but fresh is prettier)
Ingredient Tips: If you can’t find Hawaiian rolls, brioche slider buns are a great substitute—they have a similar sweetness and soft texture. For a spicier version, use spicy pepperoni or add a drizzle of hot honey before serving. And if you’re feeding a crowd, double the recipe and bake in a 9×13-inch dish instead.
I always use full-fat mozzarella for the best melt. Low-fat versions tend to get rubbery and don’t have that same stretchy, gooey quality that makes these sliders so satisfying. Trust me on this one.
Equipment Needed
You don’t need a lot of fancy equipment for this recipe, which is part of why I love it so much. Here’s what you’ll need:
- 9×13-inch baking dish (a 9×9-inch dish works too if you’re making a smaller batch; just adjust the roll count accordingly)
- Sharp knife or serrated bread knife (for slicing the rolls in half horizontally without squishing them)
- Small mixing bowl (for the garlic butter topping)
- Pastry brush (for brushing the butter evenly over the rolls; a spoon works in a pinch, but a brush gives better coverage)
- Aluminum foil (for covering the sliders during the first part of baking to prevent over-browning)
- Cutting board (for assembling and slicing)
If you don’t have a pastry brush, just use a spoon to drizzle the butter over the rolls and spread it around with the back of the spoon. It won’t be as even, but it’ll still taste amazing. And if you’re using a glass baking dish, reduce the oven temperature by 25°F to prevent the bottoms from burning.
Preparation Method
Let’s get these sliders into the oven. Follow these steps, and you’ll have dinner ready before you know it.
-
Preheat your oven to 350°F (175°C). Spray your 9×13-inch baking dish with nonstick cooking spray or grease it lightly with butter. This prevents the rolls from sticking and makes cleanup a breeze.
-
Prepare the rolls. Without separating the individual rolls, carefully slice the entire block of Hawaiian rolls in half horizontally. Use a serrated knife and a gentle sawing motion to keep the rolls intact. You should have one large top half and one large bottom half. Place the bottom half in the prepared baking dish.
-
Layer the fillings. Spread the pizza sauce evenly over the bottom half of the rolls. Don’t go overboard—you want enough to flavor each bite, but not so much that the rolls get soggy. Sprinkle half of the shredded mozzarella and provolone over the sauce. Arrange the pepperoni slices in a single layer over the cheese. Top with the remaining mozzarella and provolone. Finally, sprinkle the grated Parmesan over everything.
-
Top with the other half. Place the top half of the rolls over the fillings, pressing down gently to help everything stick together.
-
Make the garlic butter topping. In a small bowl, whisk together the melted butter, garlic powder, Italian seasoning, and red pepper flakes (if using). Brush this mixture generously over the tops of the rolls. Make sure every bun gets some butter—this is what creates that golden, flavorful crust.
-
Bake covered. Cover the dish with aluminum foil and bake for 15 minutes. This traps steam and helps the cheese melt evenly without burning the tops.
-
Bake uncovered. Remove the foil and bake for another 5-7 minutes, until the tops are golden brown and the cheese is bubbly around the edges. Keep an eye on them—you want them golden, not burnt.
-
Rest and serve. Let the sliders rest in the dish for 5 minutes before slicing. This allows the cheese to set slightly so the sliders hold their shape when you pull them apart. Sprinkle with fresh parsley, slice along the seams of the rolls, and serve warm.
Pro tip: For extra crispy edges, remove the foil for the last 10 minutes of baking instead of 5. The tops will be darker and the edges will have a slight crunch that contrasts beautifully with the soft, pillowy centers.
One time I forgot to cover the sliders during the first bake, and the tops got too dark while the cheese inside was still cold. Don’t be like me—use the foil. It makes a real difference.
Cooking Tips & Techniques
After making these sliders more times than I can count, I’ve picked up a few tricks that make them even better. Here’s what I’ve learned:
Don’t over-saturate the rolls. It’s tempting to load up on pizza sauce, but too much liquid will make the bottom rolls soggy. Use just enough to coat the surface—about 1/2 cup is perfect for a standard 12-pack of rolls.
Shred your own cheese. Pre-shredded cheese is coated with anti-caking agents that prevent it from melting smoothly. For the gooiest, stretchiest, most beautiful melt, buy a block of mozzarella and shred it yourself. It takes two extra minutes and the difference is huge.
Let them rest before slicing. I know it’s hard to wait when the kitchen smells like garlic butter and melted cheese, but those 5 minutes of resting time are crucial. If you cut into them too soon, the cheese will ooze out and the sliders won’t hold their shape. Patience pays off here.
Use a serrated knife to slice. A sharp serrated knife cuts through the rolls cleanly without squishing them. Run the knife along the seams where the rolls naturally separate, and you’ll get perfect individual sliders every time.
Double the butter topping. Honestly, I always make a little extra garlic butter and brush it on halfway through the uncovered bake. It adds another layer of flavor and keeps the tops from drying out. If you’re feeling indulgent, this is the way to go.
I once forgot the garlic powder in the butter topping and the sliders were still delicious—but they were missing that punch of flavor that makes them truly special. Don’t skip it. It’s a small ingredient that makes a big difference.
Variations & Adaptations
One of the best things about this recipe is how easily it adapts to different tastes and dietary needs. Here are some of my favorite variations:
Meat Lover’s Sliders: Add cooked crumbled Italian sausage, chopped bacon, and diced ham along with the pepperoni. It’s over the top in the best possible way—perfect for game day or when you’re feeding a hungry crowd.
Vegetarian Version: Skip the pepperoni and load up with sautéed mushrooms, bell peppers, onions, and black olives. You can also add fresh spinach leaves for extra color and nutrients. The vegetables add moisture and flavor, so you won’t miss the meat at all.
Spicy Buffalo Chicken Sliders: Swap the pizza sauce for buffalo sauce, replace the pepperoni with shredded cooked chicken, and use a blend of mozzarella and blue cheese. Top with a drizzle of ranch dressing before serving. These are dangerously good.
Gluten-Free Option: Use gluten-free slider buns (Udi’s and Schär both make good options) and double-check that your pepperoni and pizza sauce are gluten-free. The baking time may be slightly shorter, so keep an eye on them.
Low-Carb / Keto Version: Use large portobello mushroom caps as the “buns” and fill them with the usual pizza toppings. Bake at 375°F for 12-15 minutes, until the mushrooms are tender and the cheese is bubbly. It’s not quite the same experience, but it scratches the pizza itch without the carbs.
My personal favorite variation? I add a layer of pickled jalapeños between the cheese and pepperoni. The acidity cuts through the richness and adds a bright, spicy kick that takes the sliders to a whole new level. Try it—you’ll thank me.
Serving & Storage Suggestions
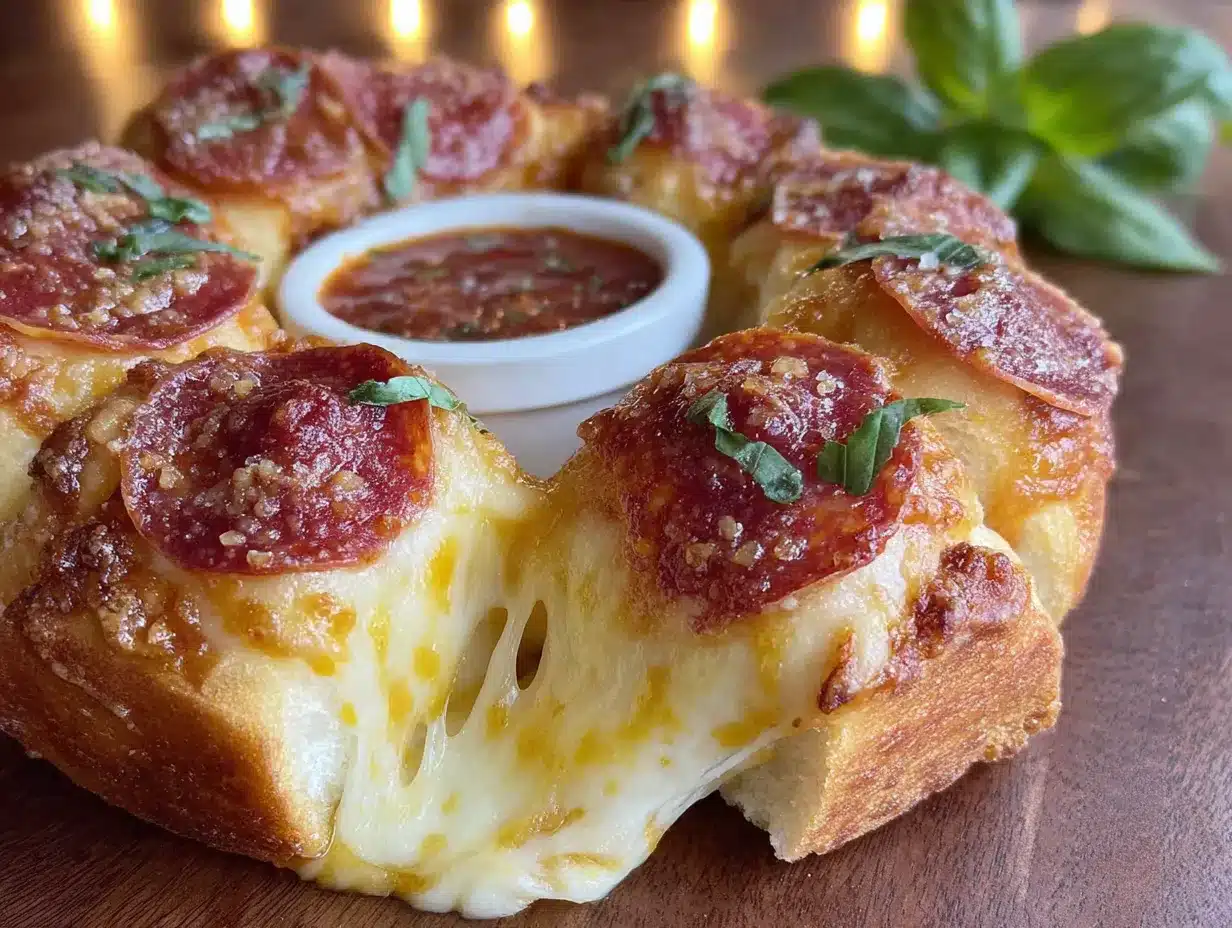
These sliders are best served warm, straight from the oven, when the cheese is still stretchy and the tops are perfectly golden. I like to arrange them on a large platter with a small bowl of extra pizza sauce for dipping. It’s not necessary—they’re plenty saucy on their own—but it’s fun and adds to the experience.
What to serve with them: A simple green salad with a tangy vinaigrette balances the richness of the sliders perfectly. I also love serving them alongside crispy baked buffalo cauliflower bites for a game day spread that’s hard to beat. For a heartier meal, try them with creamy loaded baked potato soup—it’s the ultimate comfort food combo.
Storage: Leftover sliders (if you have any) can be stored in an airtight container in the refrigerator for up to 3 days. The rolls will soften slightly, but the flavor is still fantastic.
Reheating: The best way to reheat these sliders is in a 350°F oven for 5-7 minutes, covered with foil to prevent drying out. You can also use an air fryer at 325°F for 3-4 minutes—the tops get nice and crispy. Avoid the microwave, which makes the rolls rubbery and the cheese tough.
Freezing: These sliders freeze beautifully. Assemble them completely but don’t bake. Wrap the dish tightly in plastic wrap, then a layer of aluminum foil, and freeze for up to 3 months. When you’re ready to bake, thaw in the refrigerator overnight, then bake as directed, adding 5-10 minutes to the covered baking time.
I’ve noticed that the flavors actually meld together even more after a day in the fridge. The second-day sliders are different—softer, more cohesive, almost like a pizza casserole. They’re delicious in their own way, so don’t be afraid of leftovers.
Nutritional Information & Benefits
Let’s be real—these sliders are indulgent. But that doesn’t mean they can’t fit into a balanced diet. Here’s the estimated nutritional breakdown for one slider (based on 12 servings):
- Calories: 245
- Protein: 12g
- Fat: 14g
- Carbohydrates: 18g
- Fiber: 1g
- Sugar: 5g
- Sodium: 580mg
Health Highlights: Pepperoni and cheese provide a good amount of protein, which helps keep you full and satisfied. Mozzarella is a good source of calcium and phosphorus, both important for bone health. The tomato-based pizza sauce contains lycopene, a powerful antioxidant linked to heart health and reduced inflammation.
Dietary Considerations: This recipe is not gluten-free, low-carb, or vegetarian as written, but as I mentioned above, it’s easy to adapt. To reduce sodium, use low-sodium pepperoni and pizza sauce. For a lighter version, use part-skim mozzarella and reduce the butter topping by half.
I’m not a nutritionist, and I don’t pretend to be one. But I do believe that food should be enjoyed, and that includes indulgent dishes like these sliders. Balance is key—enjoy them on game day, movie night, or whenever you need a little comfort, and pair them with lighter meals the rest of the week.
Conclusion
These easy pull-apart pepperoni pizza sliders are everything I want in a recipe: fast, delicious, and guaranteed to make everyone happy. They’re the kind of dish that feels special without requiring hours in the kitchen—a rare and wonderful thing in my book.
I love how customizable they are. You can load them up with your favorite pizza toppings, make them spicy or mild, go vegetarian or meat-lover style. They work for game day, for weeknight dinners, for birthday parties, for Tuesday nights when you just need a win. They’re forgiving, adaptable, and absolutely delicious.
So go ahead and make these sliders. Experiment with the fillings, double the butter topping, add those jalapeños if you’re feeling brave. And when you do, come back and tell me how they turned out. Leave a comment, share a photo, tag me on social media—I want to see your version. These sliders are meant to be shared, after all.
Now go preheat your oven. Dinner’s about to get a whole lot more fun.
Frequently Asked Questions
Can I make these pepperoni pizza sliders ahead of time?
Absolutely. Assemble the sliders completely, cover, and refrigerate for up to 24 hours before baking. When you’re ready, bake as directed, adding 5-10 minutes to the covered baking time since the rolls will be cold. This is a great option for party prep or busy weeknights.
Can I use different types of rolls?
Yes, but Hawaiian sweet rolls really are the best choice for this recipe. Their slight sweetness balances the savory, salty fillings perfectly. Brioche slider buns are a good second choice. Avoid crusty rolls or dense breads—they won’t give you that soft, pillowy texture that makes these sliders so addictive.
How do I prevent the bottoms from getting soggy?
Don’t overdo the pizza sauce—1/2 cup is plenty for 12 rolls. Also, make sure your sauce isn’t too watery. If you’re using a thin, watery sauce, simmer it on the stove for 5-10 minutes to thicken it before spreading it on the rolls. And always bake the sliders on the middle rack of the oven, not the bottom, to ensure even heat distribution.
Can I freeze unbaked sliders?
Yes, and I do this all the time. Assemble the sliders completely but don’t bake. Wrap the dish tightly in plastic wrap, then a layer of aluminum foil. Freeze for up to 3 months. To bake, thaw in the refrigerator overnight, then bake as directed, adding 5-10 minutes to the covered baking time. They taste just as good as fresh.
What’s the best way to reheat leftover sliders?
The oven is your best bet. Preheat to 350°F, cover the sliders with foil, and bake for 5-7 minutes. This restores the softness of the rolls and melts the cheese without drying anything out. An air fryer at 325°F for 3-4 minutes also works great. Avoid the microwave—it makes the rolls chewy and the cheese tough.
Pin This Recipe!
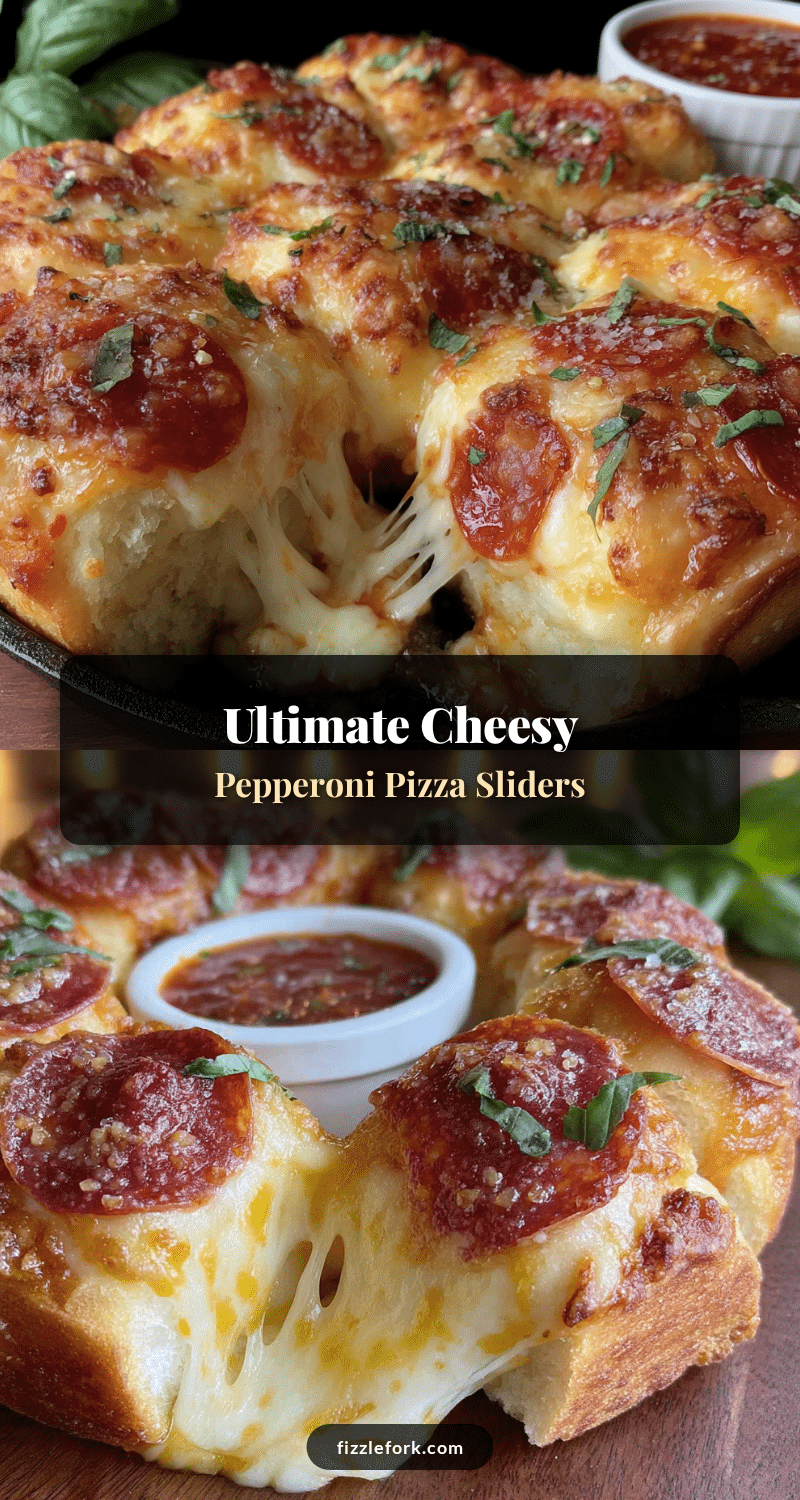
Best Easy Pepperoni Pizza Sliders Recipe
These easy pull-apart pepperoni pizza sliders are fast, delicious, and guaranteed to make everyone happy. Made with Hawaiian rolls, pepperoni, mozzarella, and a garlic butter topping, they’re perfect for game day, movie night, or a quick weeknight dinner.
- Prep Time: 10 minutes
- Cook Time: 20 minutes
- Total Time: 30 minutes
- Yield: 12 sliders 1x
- Category: Main Course
- Cuisine: American
Ingredients
- 1 package (12 count) Hawaiian sweet rolls
- 1/2 cup pizza sauce
- 1 1/2 cups shredded mozzarella cheese
- 1/2 cup shredded provolone cheese
- 3/4 cup mini pepperoni slices
- 1/4 cup grated Parmesan cheese
- 4 tablespoons unsalted butter, melted
- 1 teaspoon garlic powder
- 1 teaspoon Italian seasoning
- 1/4 teaspoon red pepper flakes (optional)
- 1 tablespoon chopped fresh parsley (for garnish)
Instructions
- Preheat your oven to 350°F (175°C). Spray a 9×13-inch baking dish with nonstick cooking spray or grease lightly with butter.
- Without separating the individual rolls, carefully slice the entire block of Hawaiian rolls in half horizontally. Place the bottom half in the prepared baking dish.
- Spread the pizza sauce evenly over the bottom half of the rolls. Sprinkle half of the shredded mozzarella and provolone over the sauce. Arrange the pepperoni slices in a single layer over the cheese. Top with the remaining mozzarella and provolone. Sprinkle the grated Parmesan over everything.
- Place the top half of the rolls over the fillings, pressing down gently.
- In a small bowl, whisk together the melted butter, garlic powder, Italian seasoning, and red pepper flakes (if using). Brush this mixture generously over the tops of the rolls.
- Cover the dish with aluminum foil and bake for 15 minutes.
- Remove the foil and bake for another 5-7 minutes, until the tops are golden brown and the cheese is bubbly around the edges.
- Let the sliders rest in the dish for 5 minutes before slicing. Sprinkle with fresh parsley, slice along the seams of the rolls, and serve warm.
Notes
For extra crispy edges, remove the foil for the last 10 minutes of baking instead of 5. Don’t over-saturate the rolls with pizza sauce to prevent sogginess. Shred your own cheese for the best melt. Let the sliders rest before slicing to allow the cheese to set. Double the butter topping for extra flavor.
Nutrition
- Serving Size: 1 slider
- Calories: 245
- Sugar: 5
- Sodium: 580
- Fat: 14
- Saturated Fat: 7
- Carbohydrates: 18
- Fiber: 1
- Protein: 12
Keywords: pepperoni pizza sliders, easy sliders, Hawaiian roll sliders, pizza sliders, game day appetizer, weeknight dinner


