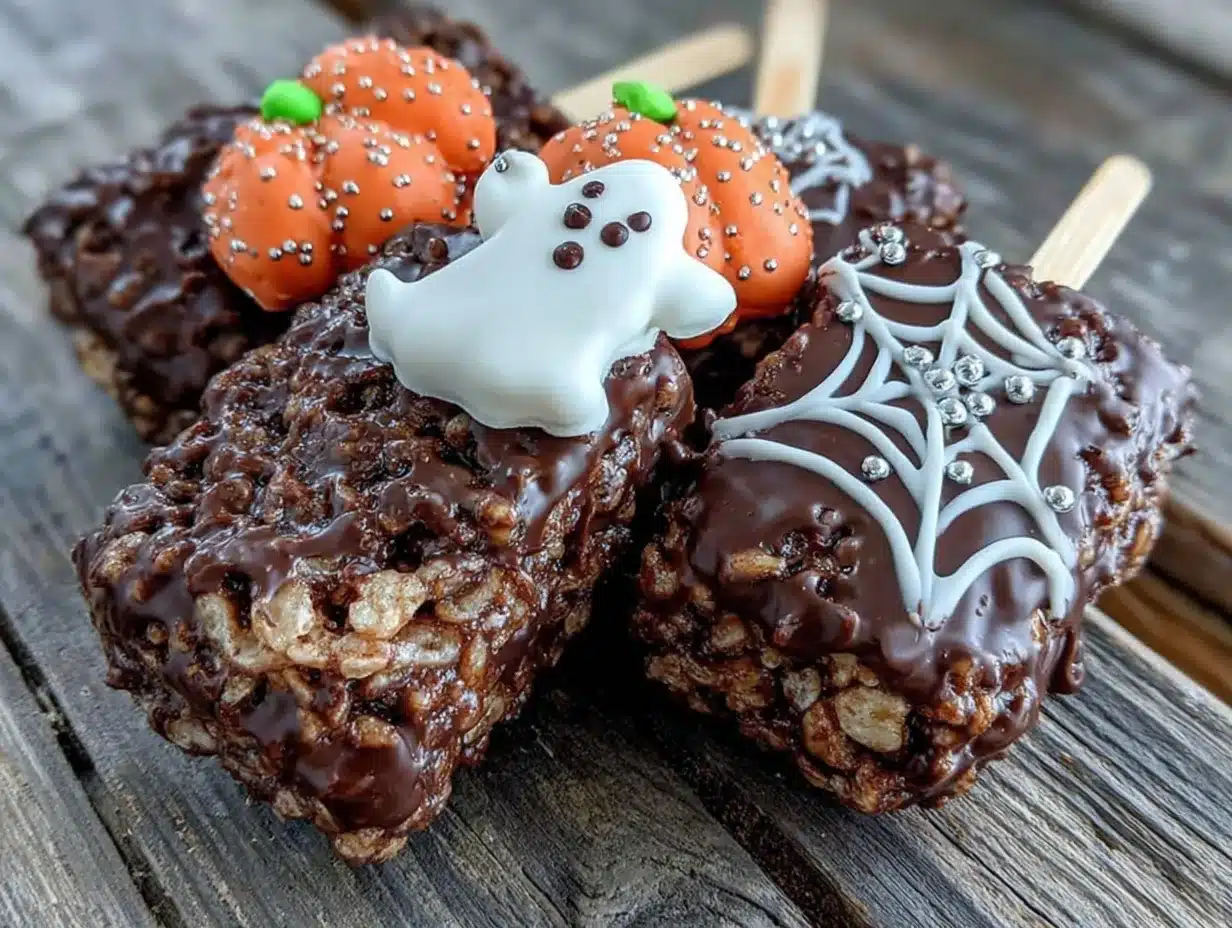
I need a Halloween treat that doesn’t require me to babysit a stove while kids are rifling through the costume bin. That’s the thought that hit me last October when I realized we had exactly zero spooky snacks planned for the class party, and the clock was ticking. Rice Krispie treats are already the gold standard of kid-friendly baking—no oven required, minimal meltdown potential—but they needed a serious costume upgrade. The answer was obvious once I stopped overthinking it: stick them on a lollipop stick and let the decorating chaos begin.
These Easy Halloween Rice Krispie Treat Pops are basically the culinary equivalent of a great costume: simple base, maximum personality. You get the same buttery, marshmallow-soft crunch everyone already loves, but now they’re dressed up like mummies, monsters, and jack-o’-lanterns. And honestly? The decorating part is where the real magic happens. I handed my niece a bowl of candy eyes and watched her turn a perfectly good Rice Krispie square into a three-eyed alien with sprinkles for antennae. She was six, and she nailed it.
What I love most about this recipe is that it solves the actual problem of Halloween snacking. You need something portable, something that won’t melt into a puddle of sugar goo, and something that actually looks festive without requiring a pastry degree. These pops check every box. They’re sturdy enough for a classroom party, cute enough for a Halloween dessert table, and simple enough that your five-year-old can help without you wanting to pull your hair out. That’s not nothing. That’s a Halloween win.
So whether you’re hosting a spooky movie night, sending treats to school, or just want an excuse to eat marshmallows while wearing a witch hat, these pops are your answer. They come together in about twenty minutes, and the decorating possibilities are pretty much endless.
Why You’ll Love This Recipe
Let me tell you why these Easy Halloween Rice Krispie Treat Pops have become my go-to for every October gathering. I’ve tested probably a dozen different Halloween treat recipes over the years, and this one keeps winning for all the right reasons.
- No Oven Required: This is a stovetop-and-microwave situation. No preheating, no watching the clock, no wondering if your oven runs hot. Just melt, stir, press, and decorate.
- Kid-Friendly From Start to Finish: My kids help with every single step. They stir the marshmallows (carefully), they press the mixture into the pan, and they go absolutely wild with the decorating. It’s the rare recipe where the process is as fun as the eating.
- Perfect for Parties and Classrooms: These pops are individually portioned, which means no double-dipping, no sticky fingers fighting over the same pan, and easy transport. I’ve packed them in treat bags for school parties and arranged them on a platter for Halloween gatherings—they work both ways.
- Endlessly Customizable: You can make mummies, monsters, pumpkins, ghosts, spiders, or just let your kids go wild with sprinkles and candy eyes. Every batch turns out different, and that’s the whole point.
- Actually Delicious: Let’s not forget the most important part. These still taste like the classic Rice Krispie treats you grew up loving. The buttery marshmallow base, the satisfying crunch, the slight chewiness—it’s all there. The decorations are just a bonus.
What really sets this recipe apart is how forgiving it is. I’ve made these while simultaneously helping with homework, answering the door for delivery, and trying to keep the dog from eating a dropped marshmallow. They still turned out perfect. The marshmallow mixture stays workable for a surprisingly long time, so you’re not racing against the clock. And the decorating part can happen whenever you have a free moment—even the next day if you need to break it up.
This is the kind of recipe that makes you feel like a Halloween hero without actually having to do much work. And honestly? That’s exactly the kind of recipe I want in my back pocket come October.
What Ingredients You Will Need
The beauty of these Easy Halloween Rice Krispie Treat Pops is that the ingredient list is almost embarrassingly short. You probably have most of these in your pantry right now. Let me walk you through what you’ll need and why each ingredient matters.
For the Rice Krispie Base
- 6 cups Rice Krispies cereal (or any crispy rice cereal—store brands work fine, but I find the name-brand holds its crunch a little longer)
- 4 tablespoons unsalted butter (salted butter works in a pinch, just reduce any added salt. I use unsalted so I can control the salt level myself)
- 1 package (10 oz) marshmallows (standard size, not mini—though mini marshmallows melt faster if that’s what you have. Jet-Puffed is my go-to brand for consistent melting)
- 1/4 teaspoon vanilla extract (pure vanilla if you have it, imitation is fine. This is optional but adds a lovely warmth to the flavor)
- Pinch of salt (don’t skip this—it balances the sweetness and makes the buttery flavor pop)
For the Pops and Decorating
- 12-15 lollipop sticks (or sturdy paper straws, or even pretzel sticks if you want a salty-sweet combo. I buy the 6-inch lollipop sticks from the craft store—they’re cheap and work perfectly)
- 1 cup white candy melts or white chocolate chips (candy melts are easier to work with because they don’t require tempering, but white chocolate chips taste better. Wilton candy melts are my preferred brand for consistent melting)
- 1/2 cup green candy melts (for monster and Frankenstein looks. You can also use food coloring to tint white melts)
- 1/2 cup orange candy melts (for pumpkin faces. Again, tinting white melts works too)
- Candy eyes (the little round ones with black pupils—get the mix of sizes for variety. Wilton makes good ones, and they’re available at most grocery stores)
- Orange and black sprinkles (jimmies, nonpareils, or sanding sugar—whatever you have)
- Black decorating gel (for drawing faces. This is easier than piping melted chocolate and much more forgiving)
- Optional: Coconut flakes (for ghost pops—tint them green for monster hair or leave them white for spooky ghosts)
- Optional: Pretzel sticks (broken in half for monster arms or spider legs)
Ingredient Selection Tips
I’ve learned a few things the hard way. First, don’t use stale marshmallows. Fresh marshmallows melt into a smooth, glossy mixture. Stale ones get grainy and don’t bind the cereal as well. If your marshmallows are a little old, add an extra tablespoon of butter to help things along.
Second, the candy melts matter more than you’d think. Cheap candy melts can seize up or develop a weird chalky texture. I’ve had the best luck with Wilton brand, but Ghirardelli melting wafers are also excellent and taste noticeably better. If you’re using white chocolate chips instead of melts, add a teaspoon of coconut oil or shortening to help them melt smoothly.
And finally, don’t skimp on the candy eyes. They’re the single most important decorating element. Without them, your mummy is just a white blob. With them, you suddenly have a character. I buy the big tub of mixed-size eyes from Amazon every fall—they last through multiple batches and holiday parties.
Equipment Needed
You don’t need a fancy kitchen to make these Easy Halloween Rice Krispie Treat Pops. Here’s what you’ll actually use:
- Large pot or Dutch oven: You need something big enough to stir the cereal and marshmallow mixture without spilling over. A 5-quart pot works great. I use my enameled cast iron Dutch oven because it distributes heat evenly and nothing sticks to it.
- 9×13-inch baking pan: This is the standard size for a full batch. If you only have an 8×8 pan, you’ll get thicker pops—just adjust your cutting size. Line it with parchment paper for easy removal.
- Parchment paper: Absolutely non-negotiable. Line your pan and also have a sheet ready for the finished pops to set on. Wax paper works in a pinch but parchment is more reliable.
- Sharp knife or bench scraper: For cutting the cooled treats into squares. A bench scraper gives you cleaner edges than a knife.
- Microwave-safe bowl: For melting the candy coatings. Glass or ceramic works best. Plastic can get weirdly hot and isn’t ideal for melting.
- Spatula: A silicone spatula is ideal for stirring the marshmallow mixture and for spreading the candy coating. Wooden spoons work too, but the marshmallow sticks to them more.
- Lollipop sticks: 6-inch sticks are standard. You can find them at craft stores, party supply stores, or online. Paper straws are a good eco-friendly alternative.
- Small piping bags or zip-top bags: For drizzling the melted candy. A zip-top bag with the corner snipped off works just as well as a proper piping bag.
If you don’t have lollipop sticks, don’t panic. I’ve used pretzel sticks (the thick ones), paper straws, and even wooden skewers with the sharp ends cut off. The pretzel sticks add a nice salty contrast, but they’re not as sturdy. Paper straws are cute but can get soggy if the treats sit out for a while. Lollipop sticks are really the best option for structure.
One thing I wish someone had told me: spray your spatula with nonstick cooking spray before you start stirring the marshmallow mixture. It makes cleanup about a thousand times easier. Same goes for your hands when you’re pressing the mixture into the pan—spray them lightly and nothing sticks.
Preparation Method
Alright, let’s make these Easy Halloween Rice Krispie Treat Pops. I’ve broken this down into clear steps so you can follow along without any surprises. Trust me, if I can do this while simultaneously refereeing a sibling argument and answering texts from the class mom, you can do this.
Step 1: Prepare Your Pan and Tools
Line your 9×13-inch baking pan with parchment paper, leaving some overhang on two opposite sides. This gives you handles to lift the treats out later. Spray the parchment lightly with nonstick cooking spray. Set aside.
Measure out your 6 cups of Rice Krispies cereal into a large bowl and set it nearby. Have your lollipop sticks ready. Get your decorating supplies organized. Trust me, once the marshmallow mixture is ready, you won’t want to be hunting for sprinkles.
Step 2: Melt the Butter and Marshmallows
In your large pot, melt the 4 tablespoons of unsalted butter over medium-low heat. Stir it occasionally so it melts evenly without browning. You want it just melted, not sizzling or turning golden.
Add the entire package of marshmallows to the pot. Stir constantly with your silicone spatula until the marshmallows are completely melted and the mixture is smooth. This takes about 5-7 minutes. Don’t walk away during this step—marshmallows can burn quickly if you’re not paying attention.
Once the marshmallows are melted, remove the pot from the heat. Stir in the 1/4 teaspoon vanilla extract and the pinch of salt. The mixture should be glossy, thick, and smell like buttery heaven.
Step 3: Combine with Cereal
Pour the 6 cups of Rice Krispies cereal into the pot with the marshmallow mixture. Fold everything together gently but thoroughly. You want every single piece of cereal coated in that sticky, sweet marshmallow goodness. Don’t stir too aggressively or you’ll crush the cereal and end up with dense, sad treats.
Work quickly here—the mixture starts to set as it cools. If it becomes too stiff to stir easily, you can pop the pot back on low heat for 30 seconds to soften it up.
Step 4: Press Into the Pan
Transfer the mixture to your prepared pan. Spray your hands lightly with nonstick cooking spray (or rub them with a little butter) and press the mixture evenly into the pan. Press firmly but don’t compact it too much—you want the treats to hold together without being rock hard.
Let the treats cool completely at room temperature. This takes about 30-45 minutes. Don’t rush this step. If you try to cut them while they’re still warm, they’ll crumble and fall apart. Patience is your friend here.
Step 5: Cut Into Shapes
Once the treats are completely cool, lift them out of the pan using the parchment paper overhang. Place them on a cutting board. Use a sharp knife or bench scraper to cut them into rectangles or squares. I usually aim for about 2×3-inch rectangles—big enough to decorate easily but small enough to be a single-serving pop.
You can also use Halloween-themed cookie cutters to cut fun shapes. Ghosts, pumpkins, and bats work great. Just press the cutter firmly through the treats and lift. The scraps make excellent chef’s snacks.
Step 6: Insert the Sticks
Gently insert a lollipop stick into the bottom of each treat, pushing about halfway through. Be careful not to push all the way through the top. The stick should be secure but not poking out the other side.
Place the pops on a parchment-lined baking sheet. At this point, you can refrigerate them for 10-15 minutes to firm them up before decorating. Cold treats hold their shape better when you dip them in melted candy.
Step 7: Melt the Candy Coating
In separate microwave-safe bowls, melt your candy melts according to package directions. I usually do white, orange, and green. Microwave in 30-second intervals, stirring between each, until smooth. If the candy seems too thick, add a teaspoon of coconut oil or shortening to thin it out.
Step 8: Decorate Your Pops
This is where the fun really starts. Here are a few ideas to get you going:
Mummy Pops: Dip the entire pop in white candy coating. Let the excess drip off, then place on parchment. While the coating is still wet, add two candy eyes. Use a piping bag or zip-top bag with a small corner snipped off to drizzle more white coating in a crisscross pattern over the eyes to create mummy bandages.
Monster Pops: Dip in green candy coating. Add two candy eyes. Use black decorating gel to draw a mouth and maybe some stitches. Add sprinkles for monster warts or hair.
Pumpkin Pops: Dip in orange candy coating. Use black decorating gel to draw a jack-o’-lantern face. Add a small piece of green candy melt or a green sprinkle on top for the stem.
Ghost Pops: Dip in white candy coating. Add two candy eyes and use black gel to draw a small ghost mouth. You can also add a little white coconut flake “hair” if you’re feeling fancy.
Step 9: Let Them Set
Place the decorated pops back on the parchment-lined baking sheet. Let them set completely at room temperature, about 20-30 minutes. If you’re in a hurry, you can pop them in the refrigerator for 10 minutes.
Cooking Tips & Techniques
I’ve made these Easy Halloween Rice Krispie Treat Pops more times than I can count, and I’ve learned a few things the hard way. Let me save you some trouble.
Don’t Overheat the Marshmallows. This is the number one mistake I see people make. Marshmallows that get too hot or cook too long become tough and rubbery when they cool. You want them just melted—smooth and glossy, not bubbling or browning. Keep the heat on medium-low and stir constantly. The second they’re smooth, pull them off the heat.
Butter Your Spatula and Hands. I cannot stress this enough. Marshmallow mixture sticks to everything. Spray your spatula with nonstick spray before you start stirring. Spray your hands before you press the mixture into the pan. It makes the whole process infinitely less frustrating.
Work Quickly but Gently. The marshmallow mixture starts setting the moment it cools. You have maybe 5-7 minutes of workable time before it becomes too stiff to shape. But don’t panic—just move efficiently. Fold the cereal in quickly, press it into the pan, and smooth the top. If the mixture does get too stiff, a quick 30-second zap in the microwave will soften it back up.
Let Them Cool Completely Before Cutting. I know you’re excited. I know the kids are hovering. But cutting warm Rice Krispie treats is a recipe for crumbly disaster. Give them a full 45 minutes to cool and set. They should feel firm to the touch, not squishy. If you can, refrigerate them for 15 minutes before cutting—it makes for cleaner edges.
Thin Your Candy Coating. Candy melts straight out of the package are often too thick for dipping. Add a teaspoon of coconut oil or shortening and stir until smooth. The coating should be thin enough to drip off easily but thick enough to coat the pop completely. If it’s too thin, it’ll run off and pool at the bottom. If it’s too thick, it’ll clump and look lumpy.
Use a Piping Bag for Details. A zip-top bag with a tiny corner snipped off works perfectly for drizzling mummy bandages or drawing small details. You get much more control than trying to use a spoon or a toothpick. Practice on a piece of parchment first if you’re nervous.
Double Up on Candy Eyes for Mummies. Here’s a trick I figured out after my first batch of mummy pops looked like sad ghosts: use two candy eyes per mummy, but place them slightly apart. Then drizzle the white coating in a crisscross pattern over them. The eyes peek through the bandages, and the effect is instantly recognizable. Without the eyes, they just look like blobs.
Make Extra. These disappear fast. I always double the batch if I’m bringing them to a party or school event. They keep well for several days in an airtight container, so making extra never goes to waste.
Variations & Adaptations
One of the best things about these Easy Halloween Rice Krispie Treat Pops is how easy they are to customize. Here are some variations I’ve tried and loved.
Dietary Adaptations
Gluten-Free Version: Rice Krispies are naturally gluten-free, but check the label—some brands use malt flavoring that contains gluten. Look for certified gluten-free crispy rice cereal. Everything else in the recipe is naturally gluten-free, so you’re good to go.
Vegan Version: Use vegan marshmallows (Dandies brand works great) and vegan butter. Most candy melts are accidentally vegan, but check the label to be sure. The texture is slightly different—vegan marshmallows don’t get quite as gooey—but the flavor is still delicious.
Nut-Free Version: This recipe is naturally nut-free as written. Just double-check your candy melts and sprinkles for any nut-based ingredients or cross-contamination warnings.
Flavor Twists
Chocolate Base: Add 1/4 cup of cocoa powder to the marshmallow mixture after it melts, or use chocolate-flavored crispy rice cereal. The chocolate version makes amazing monster pops with green candy coating.
Peanut Butter: Stir in 1/4 cup of creamy peanut butter with the marshmallows. The peanut butter adds richness and pairs perfectly with the chocolate candy coating. If you’re feeling ambitious, make these gooey football-shaped Reeses peanut butter stuffed brownie cookies for a peanut butter overload.
Caramel Apple: Use caramel-flavored candy melts for dipping and add a sprinkle of cinnamon sugar on top. It gives you that caramel apple vibe without the mess of actual caramel.
Different Decorating Themes
Spider Pops: Dip in black or dark chocolate candy coating. Add two candy eyes and insert broken pretzel sticks on either side for spider legs. Eight legs total, four on each side.
Frankenstein Pops: Dip in green coating. Use black decorating gel to draw a flat-top hairline, stitches on the forehead, and a grumpy mouth. Add two candy eyes and a small bolt-shaped sprinkle on each side of the neck.
Witch Pops: Dip in purple or green coating. Use black gel to draw a witch hat on top. Add candy eyes and a small orange sprinkle for a wart on the nose.
Serving & Storage Suggestions
These Easy Halloween Rice Krispie Treat Pops are incredibly versatile when it comes to serving. Here’s how I handle them.
Serving Ideas
Arrange the pops upright in a large pumpkin-shaped vase or a cauldron for a dramatic centerpiece. I use a clean flower vase filled with candy corn or black beans to hold the sticks in place. It looks festive and keeps the pops accessible for grabbing.
For classroom parties, I wrap each pop individually in clear treat bags and tie them with orange and black ribbon. They travel well and stay fresh for days. If you’re serving them at a party, arrange them on a platter with the sticks pointing outward like a spooky sunflower.
These pops pair beautifully with other Halloween treats. Set them out alongside a batch of perfect Halloween sugar cookies with royal icing ghosts and pumpkins for a dessert table that looks straight out of a magazine. Or serve them with a perfect witch cauldron green punch for a complete Halloween party spread.
Storage Instructions
Store undecorated Rice Krispie treats in an airtight container at room temperature for up to 5 days. Layer them between sheets of parchment paper so they don’t stick together. Don’t refrigerate them—the fridge dries them out and makes them hard.
Decorated pops should be stored in a single layer in an airtight container. If you need to stack them, use parchment paper between layers and be careful not to smush the decorations. They’ll keep for 3-4 days at room temperature.
You can freeze undecorated Rice Krispie treats for up to 3 months. Wrap them individually in plastic wrap, then place in a freezer bag. Thaw at room temperature for about 30 minutes before decorating and serving. Don’t freeze decorated pops—the candy coating can develop condensation and get sticky.
Reheating Notes
Honestly, these are best eaten at room temperature. If they’ve been stored and seem a little firm, let them sit out for 10-15 minutes before serving. The marshmallow softens up again and they get that perfect chewy texture.
If you absolutely must reheat them (say, you want that slightly warm, gooey experience), pop one in the microwave for 5-7 seconds. Any longer and the candy coating will melt into a puddle. Trust me on this one.
Nutritional Information & Benefits
Let’s be real—these are a treat, not a health food. But here’s what you’re looking at per pop (based on 15 pops per batch, undecorated):
| Nutrient | Amount Per Pop |
|---|---|
| Calories | 180-220 |
| Total Fat | 6-8g |
| Saturated Fat | 3-4g |
| Carbohydrates | 32-38g |
| Sugar | 18-22g |
| Protein | 1-2g |
| Sodium | 180-220mg |
The candy coating and decorations will add additional calories and sugar, obviously. But here’s the thing—these are meant to be a fun, occasional treat. They’re perfect for Halloween parties, classroom celebrations, or a special movie night. One pop is satisfying without being over-the-top.
If you’re looking for a slightly lighter option, you can use reduced-sugar marshmallows and a sugar-free chocolate coating. The texture won’t be quite the same, but it’s a decent compromise. For a protein-packed breakfast option that’s actually good for you, check out these healthy high-protein overnight oats with Greek yogurt and chia seeds.
One thing I appreciate about this recipe is that it’s naturally free of common allergens like eggs and nuts (depending on your decorations). It’s also easy to make vegan or gluten-free with simple substitutions, so almost everyone can enjoy a pop.
Conclusion
These Easy Halloween Rice Krispie Treat Pops have become a non-negotiable part of our October routine, and I honestly can’t imagine celebrating Halloween without them now. They’re the perfect combination of nostalgic comfort food and festive creativity—the kind of treat that makes kids light up and adults secretly steal from the platter when no one’s looking.
What I love most is how adaptable they are. You can make them as simple or as elaborate as you want. Some years I go all out with multiple colors and intricate designs. Other years, I hand the kids a bowl of candy eyes and let them go wild. Both approaches result in something delicious and memorable.
I’d love to see what you create with this recipe. Tag me in your photos, leave a comment below with your favorite decorating ideas, or share your own variations. The best part of this recipe community is seeing how everyone puts their own spin on things. And if you have a Halloween tradition that involves a specific treat, please tell me about it—I’m always looking for new ideas to add to our rotation.
So grab your marshmallows, get your candy eyes ready, and let’s make some spooky magic. Happy Halloween, friends. May your treats be delicious and your tricks be minimal.
Frequently Asked Questions
Can I use regular chocolate chips instead of candy melts?
Yes, but there’s a catch. Regular chocolate chips contain cocoa butter and don’t melt as smoothly for dipping. They’ll still taste great, but the texture won’t be as glossy and they may not set as firmly. Add a teaspoon of coconut oil or shortening to help them melt smoothly. For the best results, use melting wafers or candy melts specifically designed for dipping.
How far in advance can I make these pops?
You can make the Rice Krispie base up to 5 days ahead and store it in an airtight container at room temperature. Decorate them the day you plan to serve them for the freshest look. The candy coating can develop condensation if stored too long, and the candy eyes might fall off over time. If you need to make everything at once, they’ll still be good for 3-4 days in an airtight container.
My marshmallow mixture turned out hard and rubbery. What went wrong?
This usually happens when the marshmallows are overheated or cooked too long. Marshmallows should be melted just until smooth—not bubbling or browned. Keep the heat on medium-low and stir constantly. If the mixture does get too hard, you can try adding a tablespoon of butter and reheating gently, but it’s often better to start fresh. Low and slow is the key here.
Can I freeze these pops?
You can freeze undecorated Rice Krispie treats for up to 3 months. Wrap them individually in plastic wrap, then place in a freezer bag. Thaw at room temperature before decorating. Don’t freeze decorated pops—the candy coating can develop condensation and the decorations may slide off or become sticky.
My kids want to help. What steps are safe for young children?
Kids can help with almost everything except the stovetop melting. Let them measure the cereal, stir the marshmallow mixture (with supervision once it’s off the heat), press the mixture into the pan (with buttered hands), and go absolutely wild with the decorating. The decorating step is where kids really shine—give them a variety of sprinkles, candy eyes, and gels, and let their imagination run wild. Just be prepared for some truly creative color combinations.
Pin This Recipe!

Easy Halloween Rice Krispie Treat Pops: Fun & Spooky Snack
These Easy Halloween Rice Krispie Treat Pops are the perfect no-bake Halloween treat. They’re portable, kid-friendly, and endlessly customizable with mummy, monster, and pumpkin decorations.
- Prep Time: 15 minutes
- Cook Time: 10 minutes
- Total Time: 25 minutes
- Yield: 12-15 servings 1x
- Category: Dessert
- Cuisine: American
Ingredients
- 6 cups Rice Krispies cereal
- 4 tablespoons unsalted butter
- 1 package (10 oz) marshmallows
- 1/4 teaspoon vanilla extract
- Pinch of salt
- 12–15 lollipop sticks
- 1 cup white candy melts or white chocolate chips
- 1/2 cup green candy melts
- 1/2 cup orange candy melts
- Candy eyes
- Orange and black sprinkles
- Black decorating gel
- Optional: Coconut flakes
- Optional: Pretzel sticks
Instructions
- Line a 9×13-inch baking pan with parchment paper, leaving overhang. Spray lightly with nonstick cooking spray.
- In a large pot, melt 4 tablespoons unsalted butter over medium-low heat.
- Add the entire package of marshmallows and stir constantly until completely melted and smooth, about 5-7 minutes.
- Remove from heat and stir in 1/4 teaspoon vanilla extract and a pinch of salt.
- Pour in 6 cups Rice Krispies cereal and fold gently until all cereal is coated.
- Transfer mixture to prepared pan. Spray hands with nonstick spray and press evenly into pan.
- Let cool completely at room temperature, about 30-45 minutes.
- Lift treats out using parchment overhang and cut into 2×3-inch rectangles or use Halloween cookie cutters.
- Insert a lollipop stick into the bottom of each treat, pushing about halfway through.
- Place pops on a parchment-lined baking sheet and refrigerate for 10-15 minutes to firm up.
- In separate microwave-safe bowls, melt white, green, and orange candy melts in 30-second intervals, stirring between each, until smooth.
- Decorate pops as desired: dip in melted candy coating, add candy eyes, and use black decorating gel for faces. For mummies, drizzle white coating in a crisscross pattern over eyes.
- Let decorated pops set at room temperature for 20-30 minutes, or refrigerate for 10 minutes.
Notes
Don’t overheat marshmallows or they become tough. Butter your spatula and hands to prevent sticking. Let treats cool completely before cutting. Thin candy coating with coconut oil if needed. Store undecorated treats in an airtight container at room temperature for up to 5 days. Freeze undecorated treats for up to 3 months.
Nutrition
- Serving Size: 1 pop
- Calories: 200
- Sugar: 20
- Sodium: 200
- Fat: 7
- Saturated Fat: 3.5
- Carbohydrates: 35
- Protein: 1.5
Keywords: Halloween, Rice Krispie treats, pops, no-bake, kid-friendly, spooky, mummy, monster, pumpkin