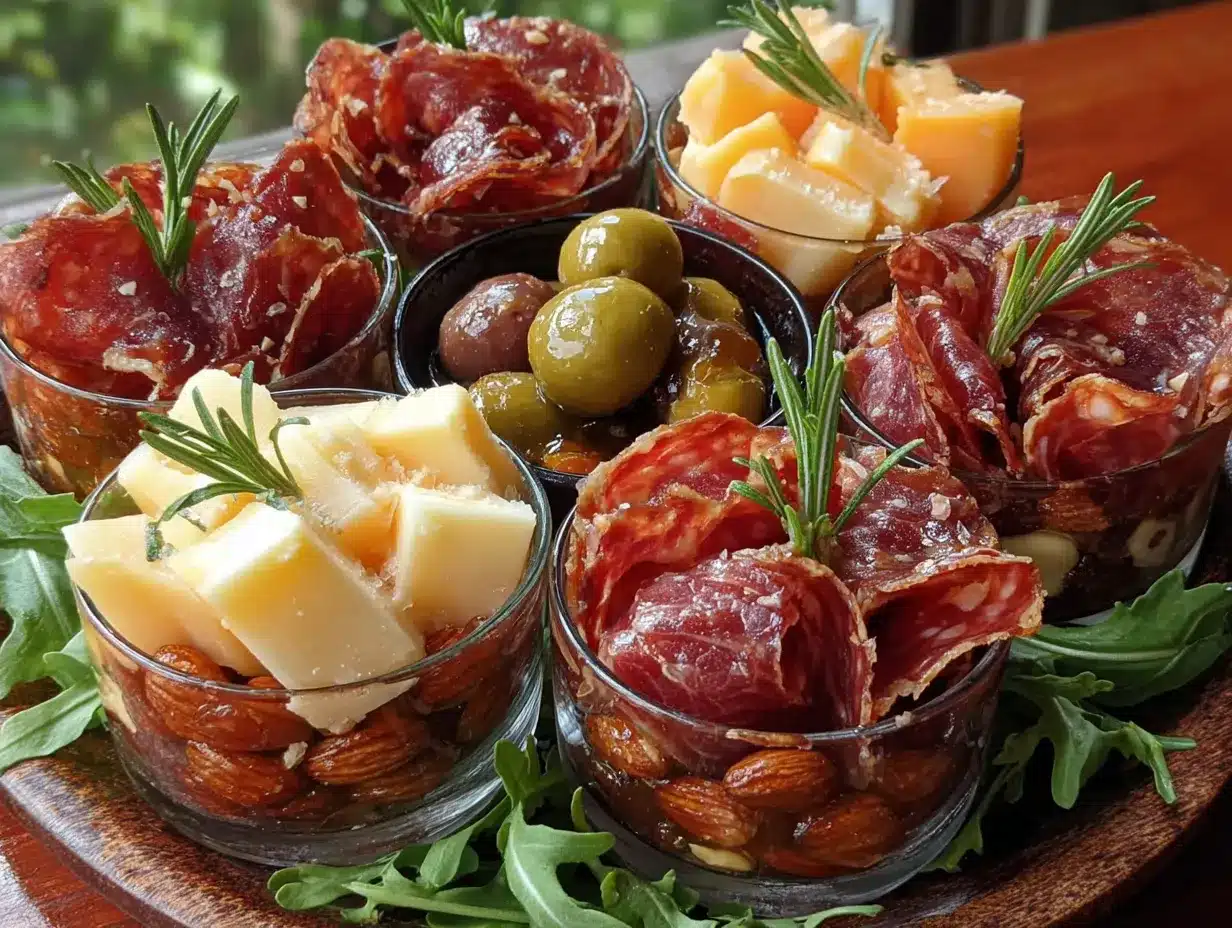
“Wait—these are mine to keep?” My friend Jen stared at the little cup I handed her, filled with salami roses, tiny cheese cubes, and a single chocolate-covered almond perched on top like a crown. It was her birthday party, and I’d spent the afternoon assembling these instead of bringing the usual bag of chips. She held it like it was a bouquet. And honestly? That’s when I knew the mini charcuterie cup thing wasn’t just cute—it was kind of genius.
I’d been seeing them all over Pinterest, of course. But I figured they were one of those things that looked good in photos but fell apart in real life. Too fussy. Too precious. Not enough food. But standing there watching people grab a cup and not have to hover awkwardly over a board, trying to figure out if it was rude to take the last piece of prosciutto? Something clicked. These weren’t just appetizers. They were a whole vibe shift for party food.
So I went home and started testing. Too big, and they felt wasteful. Too small, and people were hunting for more. Wrong cheese-to-meat ratio? Absolute chaos in a cup. But after a few rounds—and one very sad cup that was basically just olives—I landed on a formula that just works. These easy mini charcuterie cups are the party appetizer idea you didn’t know you needed, but once you try them, you’ll wonder how you ever hosted without them.
Why You’ll Love This Recipe
Let me tell you why these little cups have basically taken over my party planning. They solve problems you didn’t even realize you had.
- No Grabbing, No Germs : Everyone gets their own personal cup. No double-dipping, no hovering, no “wait, was that my hand?” It’s the most hygienic way to serve finger food, and honestly, after the last few years, that matters.
- Prep-Ahead Dream : You can assemble these hours before your party starts. Stick them in the fridge, and when guests arrive, just pull them out. No last-minute arranging, no frantic cheese slicing while people are knocking at the door.
- Perfectly Portioned : No more giant boards where half the cheese gets dried out and nobody touches the weird pickles. Each cup is just enough—satisfying but not overwhelming. People can grab one and mingle, no plate required.
- Endlessly Customizable : Don’t like blue cheese? Leave it out. Have a vegetarian friend? Load up on extra veggies and cheese. These cups are basically a choose-your-own-adventure for party food.
- Visually Stunning, Zero Effort : I’m not gonna lie—they look impressive. The layers of color, the little salami roses, the pop of fresh fruit. But it takes maybe 15 minutes to put together a batch. Maximum payoff, minimum fuss.
This isn’t just another appetizer. It’s the kind of thing that makes people say “Oh, these are so cute!” and then immediately ask for the recipe. And the best part? You probably already have most of the ingredients in your fridge right now.
What Ingredients You Will Need
The beauty of these mini charcuterie cups is that there’s no strict rulebook. But after testing a dozen combinations, I’ve found a few key players that just work together. Here’s what I use for my go-to version.
For the Meat Layer
- 4 ounces salami (I prefer Genoa salami—it’s got that nice marbled fat that keeps it from drying out)
- 4 ounces prosciutto (look for thinly sliced, but not so thin it falls apart when you try to fold it)
- 2 ounces pepperoni (the little mini ones are perfect, or just slice regular pepperoni into quarters)
For the Cheese Layer
- 4 ounces sharp cheddar, cut into ½-inch cubes (I like Cabot’s Seriously Sharp—it holds up well)
- 4 ounces baby mozzarella balls (the little ciliegine size, drained well—pat them dry so they don’t make the cups soggy)
- 2 ounces gouda or your favorite semi-soft cheese, cut into small wedges
For the Crunch and Fruit
- ½ cup red seedless grapes, halved if they’re large (green works too, but red just looks prettier against the cheese)
- ¼ cup dried apricots or figs, sliced into strips
- ¼ cup roasted almonds (smoked almonds are incredible here—adds a whole other layer of flavor)
- ¼ cup mini pretzels or small crackers (I like the little stick pretzels—they fit perfectly upright)
For the Garnish (Optional But Worth It)
- Fresh rosemary sprigs (they look like little trees and smell amazing)
- Honey drizzle (a tiny squeeze over the cheese before serving—trust me on this)
- Flaky sea salt (just a pinch on top of the mozzarella)
One thing I learned the hard way: don’t skip patting the mozzarella dry. I made a batch once where the cheese was still a little wet, and by the time guests arrived, the bottom of the cups were swimming in milky liquid. Not cute. So take that extra 30 seconds to blot them with a paper towel.
And here’s a pro tip from my own kitchen: if you’re making these for a party where people will be standing and eating, skip the crackers that crumble easily. Those big, sturdy round crackers—the ones that look like little water biscuits—hold up way better than flaky ones. I learned that one the messy way too.
Equipment Needed
You don’t need anything fancy here. That’s kind of the point.
- 12 small cups or glasses (4-ounce plastic cups work great for parties, but I’ve used small mason jars, shot glasses, even those little paper cone cups—anything that holds about 4-6 ounces works)
- Cutting board and sharp knife (a good chef’s knife makes all the difference for clean cheese cubes)
- Small cookie scoop or melon baller (not required, but it helps portion out the nuts and dried fruit evenly)
- Toothpicks or small skewers (for easy grabbing—plus they look cute sticking out of the cups)
- Paper towels (for blotting the mozzarella, seriously, don’t skip this)
If you don’t have small cups, you can use a muffin tin! Just line each cup with a small piece of parchment paper or a mini cupcake liner, and you’ve got a makeshift charcuterie cup situation. I’ve done this for a backyard barbecue where I forgot to buy cups, and it worked perfectly.
Preparation Method
Alright, let’s build these little beauties. It’s easier than you think.
- Prep your ingredients first. Cut the cheddar into ½-inch cubes. Slice the gouda into small wedges. Halve the grapes if they’re big. Slice the dried apricots into thin strips. Pat the mozzarella balls dry with a paper towel. Having everything ready before you start assembling makes the whole process feel like a factory line—in a good way.
- Make the salami roses. Take 3-4 slices of salami and overlap them slightly in a straight line. Fold the whole strip in half lengthwise. Then roll it up tightly from one end, kind of like you’re rolling a sleeping bag. When you let go, the edges will fan out like a rose. It takes about 10 seconds once you get the hang of it. (If this feels too fiddly, just fold each slice into quarters—it looks fine, I promise.)
- Layer the cups. Start with something heavy at the bottom. I like to put a few almonds and a couple of dried apricot strips in first. This gives the cup some weight and keeps everything from shifting around.
- Add the cheese. Drop in 2-3 cubes of cheddar, 1-2 mozzarella balls, and a wedge of gouda. Don’t overthink the placement—just scatter them in there. The visual appeal comes from the variety, not perfect symmetry.
- Tuck in the meat. Place your salami rose (or folded salami) on one side of the cup, leaning against the edge. Drape a piece of prosciutto on the other side, letting it ripple and fold naturally. Add a few pepperoni slices in between. This should take about 30 seconds per cup.
- Add the fruit and crunch. Tuck in a few grape halves. Stick a mini pretzel or cracker upright into the side, so it’s peeking out. Add a couple more almonds if there’s room. You want the cup to look full but not overflowing—like it’s generously packed, not stuffed.
- Garnish. Poke a small rosemary sprig into the side for that “I’m a fancy caterer” look. If you’re doing the honey drizzle, add that right before serving—just a tiny squeeze over the cheese. A pinch of flaky sea salt on the mozzarella is optional but highly recommended.
- Chill until serving. Cover the cups loosely with plastic wrap and refrigerate for up to 4 hours. Take them out about 15 minutes before serving to let the cheese come to room temperature—it tastes so much better that way.
One thing I always tell people: don’t stress about making each cup identical. The beauty of charcuterie is that every cup is a little different. Some might have more grapes, others more cheese. That’s fine. It adds character. And honestly, nobody’s comparing cups—they’re too busy eating them.
Cooking Tips & Techniques
I’ve made probably 200 of these cups over the last year (not exaggerating—I brought them to every single gathering), and I’ve collected a few hard-won lessons.
Don’t overfill the cups. I know it’s tempting to pack them full because you want people to feel like they’re getting their money’s worth. But if the cup is too full, everything falls out when someone tries to grab something. Leave about a half-inch of space at the top. Trust me on this.
Keep wet and dry ingredients separated. Grapes and mozzarella release moisture. Crackers and pretzels soak it up and get sad. I learned this the hard way when I made a batch the night before a party and woke up to soggy pretzels. Now I add the crunchy stuff right before serving, or I put them in a little separate pile on top where they stay dry.
Use room temperature cheese for better flavor. Cold cheese is muted cheese. If you’re prepping ahead, keep the cups in the fridge but pull them out 20 minutes before guests arrive. The difference is night and day—the cheddar gets creamier, the gouda gets that beautiful buttery texture.
Make extra salami roses. They’re the most visually striking element, and people love them. But they’re also the first thing to get eaten. I always make 2-3 extra per batch because inevitably, someone will ask for “just one more of those pretty meat flowers.”
If you’re serving these outdoors, skip the honey drizzle. It attracts bees and wasps like crazy. I learned this at a summer picnic when a wasp literally landed on someone’s cup. Stick to the dry garnish for outdoor events.
And here’s a funny failure story: I once tried to make these with all the cheese cut into tiny stars using cookie cutters. Looked adorable in photos. Took forever. And honestly? Nobody cared. The cheese tasted the same. So save yourself the effort and just cube it. Your guests will be just as happy, and you’ll have 30 extra minutes to enjoy the party.
Variations & Adaptations
These cups are basically a blank canvas. Here are some of my favorite twists.
The Breakfast Charcuterie Cup
Swap the salami for breakfast sausage links (cut into bite-sized pieces), use sharp white cheddar and brie, add fresh berries instead of grapes, and top with a mini pancake or waffle wedge. I made these for a brunch party and they were gone in 10 minutes.
The Vegetarian Version
Skip the meat entirely and double up on cheese—try a mix of aged gouda, fresh mozzarella, and a tangy goat cheese. Add roasted red pepper strips, marinated artichoke hearts, and some olives. The saltiness from the olives and artichokes replaces the savory hit you’d normally get from the meat.
The Sweet and Spicy Version
Use spicy soppressata instead of salami, add a drizzle of hot honey over the cheese, and throw in some candied pecans alongside the almonds. The combination of heat from the meat, sweetness from the honey, and crunch from the nuts is absolutely addictive.
The Kid-Friendly Cup
Stick to mild cheeses (colby jack, mild cheddar), use turkey pepperoni instead of salami, and add some apple slices (tossed in lemon juice so they don’t brown). Skip the fancy garnishes and let the kids pick their own combos from a little buffet of ingredients.
Honestly, the best part about these cups is how forgiving they are. You can swap almost anything. Don’t like almonds? Use pecans or walnuts. Can’t find dried apricots? Dried cranberries work great. The formula is basically: meat + cheese + fruit + crunch = magic.
Serving & Storage Suggestions
These cups are at their best when served slightly chilled but not ice-cold. I like to pull them out of the fridge about 15 minutes before guests arrive. If you’re serving them at a buffet, arrange them on a large tray or platter in neat rows—it looks so satisfying.
For drinks, these pair beautifully with a crisp white wine like Sauvignon Blanc or a light red like Pinot Noir. If you’re doing cocktails, a gin and tonic or a simple spritz cuts through the richness of the cheese perfectly. And if you’re serving these alongside other appetizers, they go great with something like easy cheesy one skillet ground beef and rice for a heartier spread.
Storage: If you have leftovers (unlikely, but possible), cover the cups with plastic wrap and refrigerate for up to 2 days. The crackers will get soft, so I’d recommend removing those first and adding fresh ones when you serve them again. The meat and cheese actually taste better the next day—the flavors meld together in a really nice way.
Freezing: I don’t recommend freezing these. The cheese gets crumbly, the grapes turn to mush, and the meat loses its texture. These are strictly a make-ahead-and-refrigerate situation.
Reheating: You don’t! These are served cold or at room temperature. But if you want to add a warm element, you can serve a small bowl of warm honey or fig jam on the side for dipping.
One thing I love about these cups is how the flavors develop over time. The prosciutto gets a little more tender, the cheese absorbs the subtle saltiness from the meat, and the dried fruit plumps up slightly. If you can make them 2-3 hours ahead, they’ll actually taste better than fresh.
Nutritional Information & Benefits
Let’s be real—these are party appetizers, not health food. But they do have some surprising nutritional perks.
Estimated per cup (based on 12 servings):
- Calories: 180-220
- Protein: 12-15g
- Fat: 14-18g
- Carbohydrates: 6-8g
- Fiber: 1-2g
- Sugar: 4-5g (naturally occurring from fruit)
The cheese provides a good amount of calcium and protein, which helps keep you full longer than plain crackers or chips. Almonds are packed with vitamin E and healthy monounsaturated fats. Grapes offer antioxidants like resveratrol. And the dried fruit gives you a little fiber boost.
If you’re watching your sodium, you can use low-sodium meats and unsalted nuts. For a lower-fat version, swap some of the cheese for extra vegetables like cucumber rounds or bell pepper strips. And if you’re dairy-free, there are some really good plant-based cheeses now—I like the ones made from cashews for this application.
These cups are naturally gluten-free if you skip the crackers and pretzels. Just use extra nuts or veggie sticks for crunch instead. And they’re also keto-friendly if you stick to the meat, cheese, and nuts without the fruit.
Conclusion
Look, I’m not saying these mini charcuterie cups will change your life. But they might change your party game. There’s something about handing someone a little cup of perfectly paired bites that feels personal, thoughtful, and just a little bit fancy—without being fussy.
I love that I can make these in advance, that they work for everything from casual game nights to holiday parties, and that I can customize them for whoever’s coming over. They’ve become my go-to “I don’t know what to bring” dish, and every single time, someone asks for the recipe.
So go ahead and give them a try. Mix up the ingredients, make them your own, and don’t stress about perfection. The best charcuterie cup is the one that makes you happy—and makes your guests feel special. And if you come up with a killer combination I haven’t tried, drop it in the comments. I’m always looking for new ideas.
Happy snacking!
Frequently Asked Questions
Can I make these cups a day ahead?
Yes, but with one caveat: add the crunchy elements (crackers, pretzels) and any fresh herbs right before serving. Everything else can be assembled up to 24 hours in advance. Just cover them tightly with plastic wrap and keep them refrigerated.
What’s the best cup size to use?
4-ounce cups are perfect. They’re big enough to hold a satisfying assortment but small enough that people don’t feel overwhelmed. Shot glasses work for a smaller, cocktail-party version. Just adjust your portions accordingly.
Can I make these nut-free?
Absolutely. Just skip the almonds and use extra crackers, pretzels, or even small cheese straws for crunch. You can also add more dried fruit or even some dark chocolate chips for a sweet-savory contrast.
How many cups should I make per person?
If these are the only appetizer, plan on 2-3 cups per person. If you’re serving a full meal afterward or have other snacks, 1-2 cups per person is plenty. For a party of 12, I usually make 18-24 cups and rarely have leftovers.
What if I don’t have time to make salami roses?
No problem at all. Just fold the salami slices into quarters or roll them into simple cylinders. They won’t look as fancy, but they’ll taste exactly the same. The cups will still be beautiful with all the other colorful ingredients layered in.
Pin This Recipe!
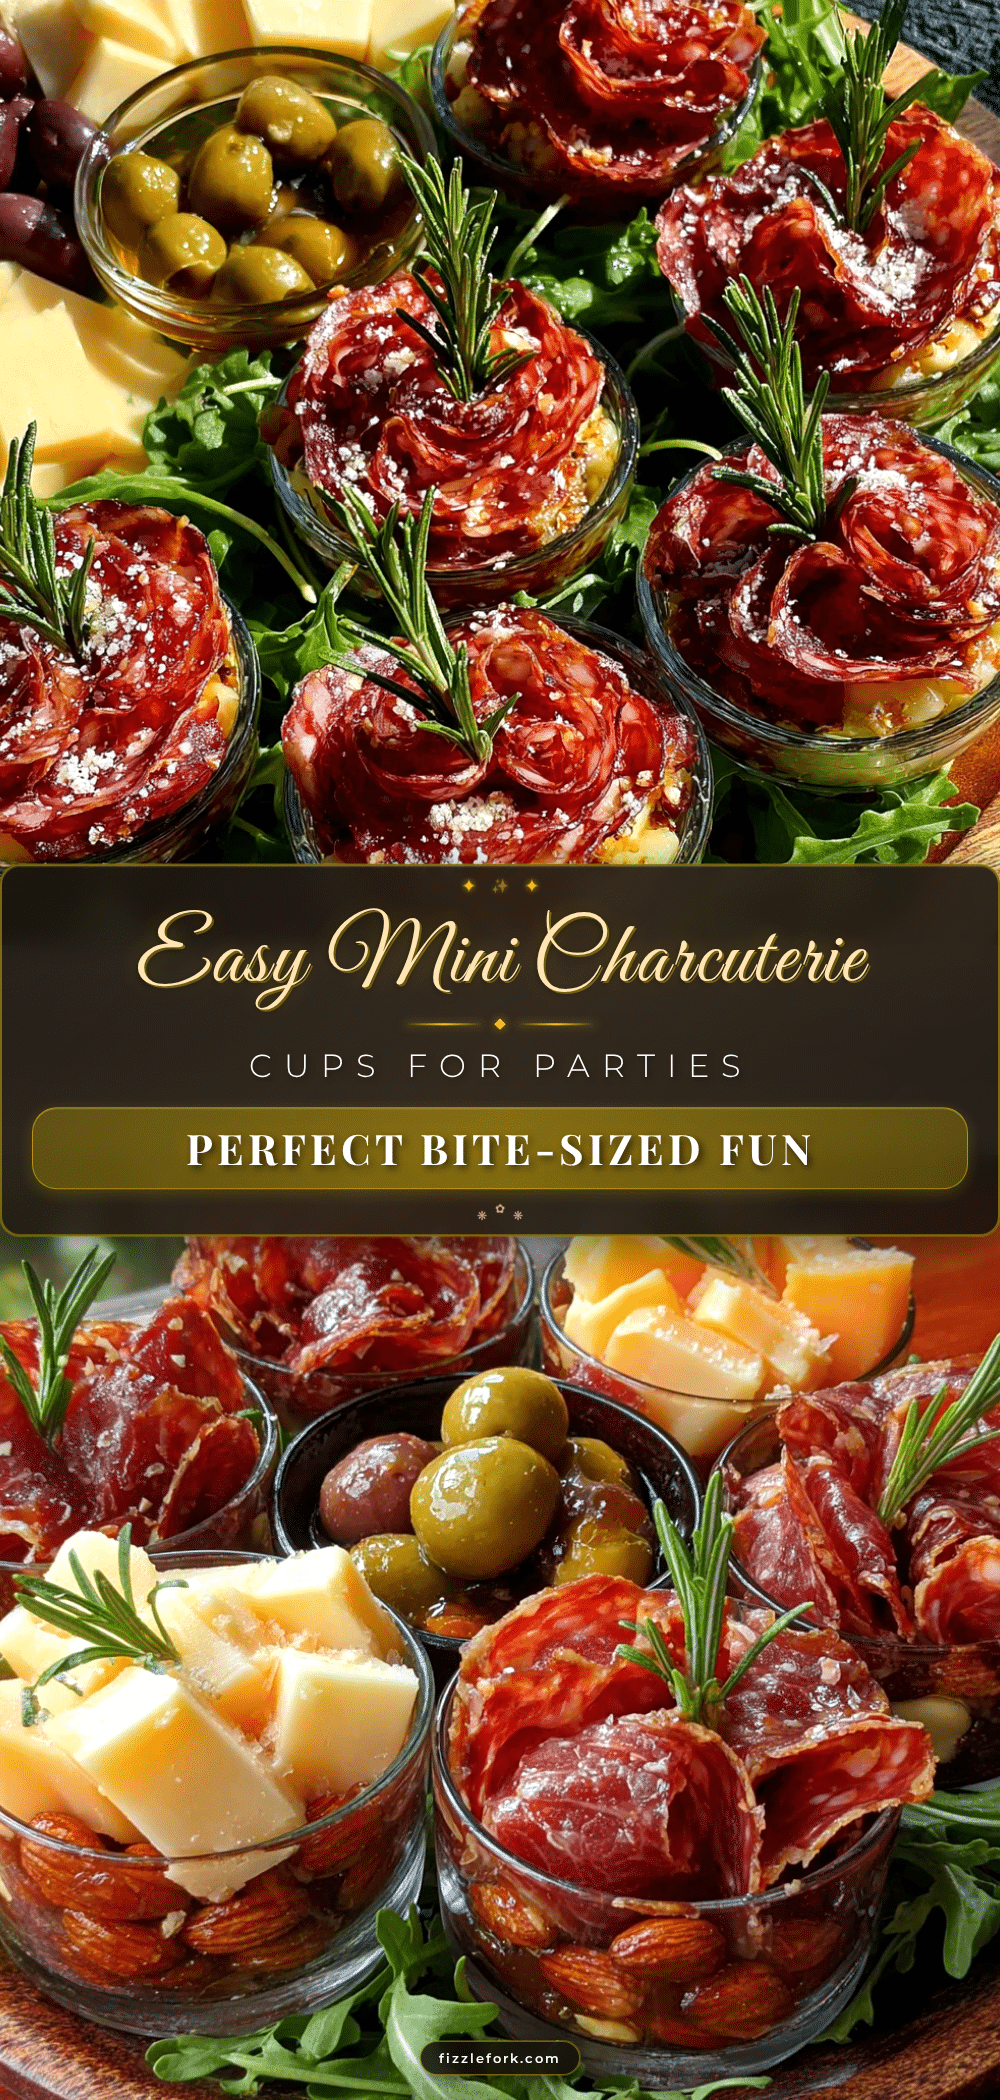
Easy Mini Charcuterie Cups: Perfect Party Appetizer Idea
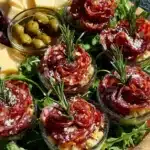
These easy mini charcuterie cups are the perfect party appetizer—personalized, hygienic, and endlessly customizable. Each cup is filled with salami roses, cheese cubes, fresh fruit, and crunchy nuts, making them a visually stunning and hassle-free finger food for any gathering.
- Prep Time: 15 minutes
- Cook Time: 0 minutes
- Total Time: 15 minutes
- Yield: 12 servings 1x
- Category: Appetizer
- Cuisine: American
Ingredients
- 4 ounces salami (preferably Genoa salami)
- 4 ounces prosciutto (thinly sliced)
- 2 ounces pepperoni (mini or quartered regular)
- 4 ounces sharp cheddar cheese, cut into ½-inch cubes
- 4 ounces baby mozzarella balls (ciliegine size), drained and patted dry
- 2 ounces gouda or semi-soft cheese, cut into small wedges
- ½ cup red seedless grapes, halved if large
- ¼ cup dried apricots or figs, sliced into strips
- ¼ cup roasted almonds (smoked almonds recommended)
- ¼ cup mini pretzels or small sturdy crackers
- Fresh rosemary sprigs for garnish (optional)
- Honey for drizzling (optional)
- Flaky sea salt for garnish (optional)
Instructions
- Prep your ingredients first: Cut cheddar into ½-inch cubes, slice gouda into small wedges, halve grapes if large, slice dried apricots into thin strips, and pat mozzarella balls dry with a paper towel.
- Make the salami roses: Overlap 3-4 slices of salami in a straight line, fold the strip in half lengthwise, then roll tightly from one end to form a rose shape. Alternatively, fold each slice into quarters.
- Layer the cups: Start with a few almonds and dried apricot strips at the bottom of each cup for weight.
- Add the cheese: Drop in 2-3 cubes of cheddar, 1-2 mozzarella balls, and a wedge of gouda per cup.
- Tuck in the meat: Place a salami rose on one side of the cup, drape a piece of prosciutto on the other side, and add a few pepperoni slices.
- Add the fruit and crunch: Tuck in grape halves, stick a mini pretzel or cracker upright, and add more almonds if space allows. Ensure cups are full but not overflowing.
- Garnish: Insert a rosemary sprig into the side. If using, drizzle honey over cheese and sprinkle flaky sea salt on mozzarella just before serving.
- Chill until serving: Cover cups loosely with plastic wrap and refrigerate for up to 4 hours. Remove from fridge 15 minutes before serving to let cheese come to room temperature.
Notes
Pat mozzarella dry to prevent soggy cups. Add crunchy elements like crackers and pretzels just before serving to maintain texture. For outdoor events, skip honey drizzle to avoid attracting insects. Make extra salami roses as they are popular. Cups can be assembled up to 24 hours ahead, but add fresh garnishes and crunchy items before serving.
Nutrition
- Serving Size: 1 cup
- Calories: 200
- Sugar: 4.5
- Sodium: 450
- Fat: 16
- Saturated Fat: 7
- Carbohydrates: 7
- Fiber: 1.5
- Protein: 13.5
Keywords: mini charcuterie cups, party appetizer, charcuterie board, finger food, easy appetizer, salami roses, cheese cups, customizable appetizer