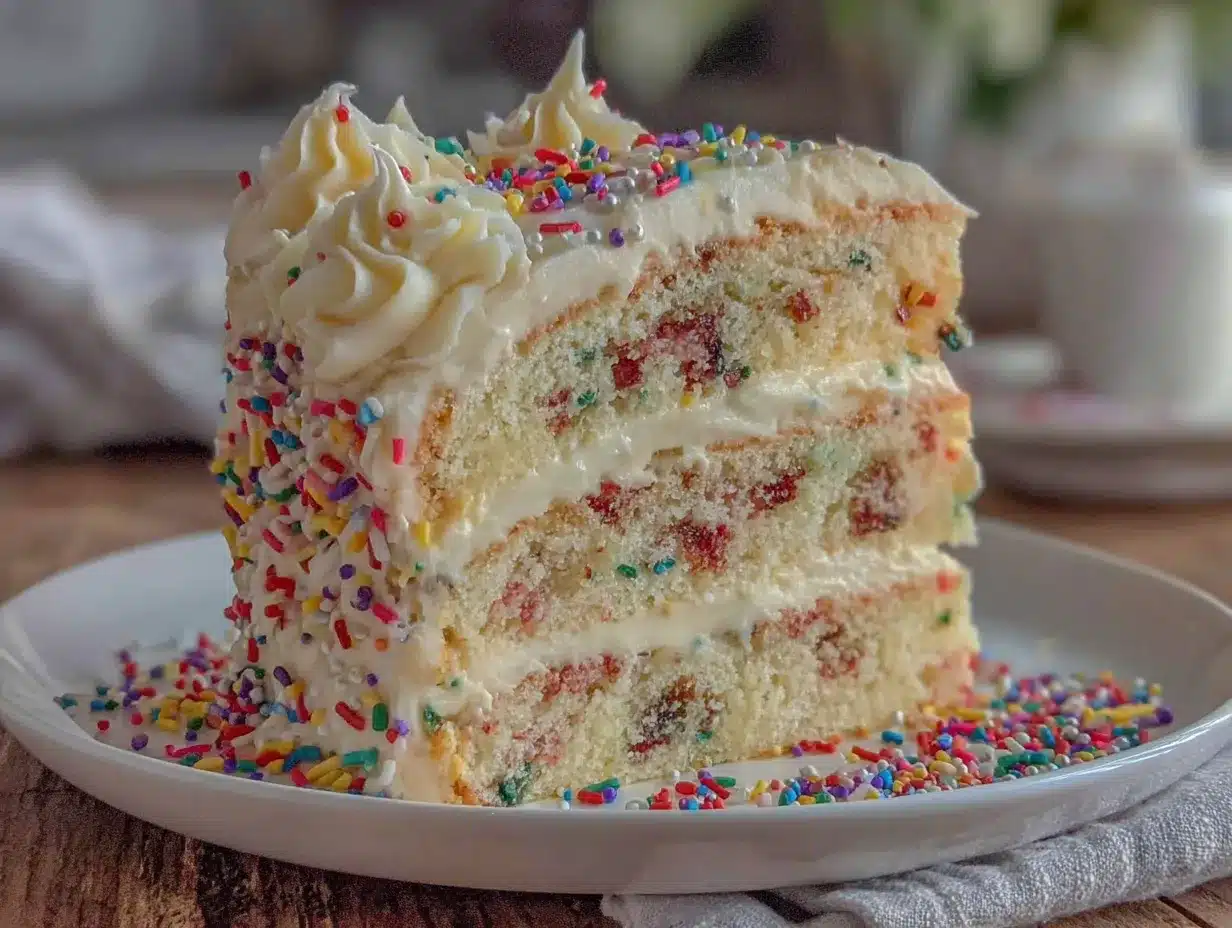
The pan came back to the kitchen with nothing but a few smears of buttercream on the sides. My sister-in-law looked at me, fork still in hand, and said, “You’re making that for my birthday next month, right?” It wasn’t even her birthday party. She just happened to be standing near the dessert table when the cake disappeared. That was the moment I knew this funfetti sheet cake had officially earned its spot in my permanent recipe rotation.
I didn’t grow up making funfetti cake from a box. Honestly, I was kind of a snob about it for years. I thought sprinkles belonged on cookies and ice cream, not baked into a cake that I’d actually put effort into. Then my niece turned six, and my sister asked if I could make something “really colorful and really fun” for her class party. I caved. I figured I’d doctor up a box mix and call it a day. But the night before, I got this itch to make it from scratch — not out of ambition, but out of a weird fear that the box version wouldn’t feel special enough. So I stayed up way too late testing ratios, folding in sprinkles, and praying the colors wouldn’t just bleed into a gray mess.
Spoiler: they didn’t. That first scratch-made funfetti sheet cake was lopsided and the frosting was a little too soft, but the kids lost their minds. And honestly? So did the adults. There’s something about a tender, buttery vanilla cake studded with tiny pops of color that makes everyone act like they’re at a birthday party, even on a random Tuesday. This version is the one I’ve tweaked over the last three years — less sweet than the bakery style, sturdy enough for a sheet pan, and topped with the kind of vanilla buttercream that makes you close your eyes after the first bite. It’s the cake I bring to potlucks, bake for no reason at all, and yes, make on request for every single family birthday now. I think it’ll become that for you too.
Why You’ll Love This Recipe
This isn’t just another funfetti cake recipe. I tested this one about seven times before I got the crumb exactly right — tender but not fragile, moist but not dense. And the buttercream? It’s the kind that pipes beautifully but also tastes like real butter and vanilla, not just powdered sugar.
- Quick & Easy : From start to finish, this cake is ready in under an hour. No layering, no torting, no stress. Just mix, bake, frost, and decorate.
- Simple Ingredients : You probably already have most of these in your pantry. No specialty flours, no obscure extracts, no hunting down hard-to-find sprinkles.
- Perfect for Celebrations : Birthdays, holidays, office parties, bake sales, or just a Tuesday that needs a little extra joy. This cake fits every occasion.
- Crowd-Pleaser : Kids love the rainbow speckles. Adults love the balanced sweetness. Everyone goes back for seconds.
- Unbelievably Delicious : The texture is what gets people. It’s soft and moist with a fine, even crumb. The buttercream is silky and rich without being cloying.
What makes this version different? It’s the method. I use room temperature ingredients (non-negotiable for that tender texture), and I add the sprinkles at just the right moment so they don’t bleed. The result is a clean, beautiful crumb with distinct pops of color. Plus, the buttercream uses a secret step — whipping the butter for a full five minutes before adding anything else — that gives it a light, almost whipped texture you won’t get from a standard recipe.
This is the kind of cake that makes you feel like a hero at a party without spending all day in the kitchen. It’s reliable. It’s forgiving. And it’s genuinely, deeply delicious. I’ve made it for picky eaters, for people who “don’t like cake,” and for folks who claim they’re watching their sugar. They all ate it. Every single time.
What Ingredients You Will Need
This recipe uses simple, everyday ingredients to build something truly special. Each one plays a specific role in creating that soft, tender crumb and rich, creamy frosting. Here’s what you’ll need and why each ingredient matters.
For the Cake
- 2 ½ cups (315g) all-purpose flour — Spoon and level it. Don’t scoop directly from the bag or you’ll end up with a dry cake. I prefer Gold Medal or King Arthur for consistent results.
- 2 teaspoons baking powder — This gives the cake its rise. Make sure it’s fresh (test it by dropping a little in hot water — it should fizz).
- ½ teaspoon baking soda — Helps with browning and tenderness. Just a tiny bit balances the acidity from the buttermilk.
- ½ teaspoon salt — Don’t skip this. Salt doesn’t make the cake salty; it makes the sweetness taste more pronounced and balances the flavors.
- 1 cup (226g) unsalted butter, softened — Use real butter, not margarine. Let it sit on the counter for about an hour until it’s soft enough that your finger leaves an indent without sinking all the way through.
- 1 ½ cups (300g) granulated sugar — Regular white sugar. It creams beautifully with the butter and gives the cake structure.
- 3 large eggs, room temperature — Cold eggs will seize the butter and ruin your emulsion. Place them in a bowl of warm water for 5 minutes if you forgot to take them out ahead of time.
- 1 tablespoon vanilla extract — Pure vanilla, not imitation. It makes a real difference in flavor. I like Nielsen-Massey or simply organic store brand.
- 1 cup (240ml) buttermilk, room temperature — Buttermilk makes the cake incredibly tender. If you don’t have it, add 1 tablespoon of lemon juice or white vinegar to regular milk and let it sit for 5 minutes.
- ½ cup (80g) rainbow sprinkles — Use jimmies (the long, skinny ones), not nonpareils (the tiny round balls). Nonpareils bleed color into the batter and turn everything gray. Jimmies hold their shape and color.
For the Vanilla Buttercream
- 1 ½ cups (339g) unsalted butter, softened — Yes, a lot of butter. That’s what makes this frosting so good. Use high-quality butter like Kerrygold or Plugrà for the best flavor.
- 4 cups (480g) powdered sugar, sifted — Sifting removes lumps and gives you a silky-smooth frosting. Don’t skip this step, even if you’re in a hurry.
- 2 teaspoons vanilla extract — Again, pure vanilla. This is the main flavor in the frosting, so make it count.
- ¼ teaspoon salt — Balances the sweetness and brings out the vanilla flavor.
- 2-4 tablespoons heavy cream — Use as needed to reach the perfect spreading consistency. Start with 2 tablespoons and add more if the frosting feels too stiff.
For Decoration (Optional)
- Extra rainbow sprinkles — For the top. I like to pile them on generously right after frosting.
- Fresh berries or edible flowers — A nice touch for a more grown-up presentation. Raspberries or strawberries work beautifully.
Equipment Needed
You don’t need a fancy bakery setup for this cake. Most of these tools are probably already in your kitchen.
- 13×18-inch sheet pan (half-sheet pan) — This is the standard size for a sheet cake. If you only have a 9×13-inch pan, you can use it, but the cake will be thicker and need to bake about 10 minutes longer. I like Nordic Ware or USA Pan for even baking and easy release.
- Stand mixer or hand mixer — A stand mixer makes creaming the butter and sugar much easier, but a hand mixer works perfectly too. Just be prepared to hold it for a few minutes.
- Large mixing bowls — At least two: one for dry ingredients and one for wet.
- Whisk — For combining dry ingredients. A fork works in a pinch.
- Rubber spatula — For folding in the sprinkles and scraping down the bowl. A silicone spatula is my go-to.
- Parchment paper — Line your pan with this for easy lifting and zero sticking. I always extend it over the edges to create “handles.”
- Cooling rack — The cake needs to cool completely before frosting. A wire rack lets air circulate underneath so the bottom doesn’t get soggy.
- Offset spatula — For spreading the buttercream smoothly. A regular butter knife works, but an offset spatula makes it look professional.
- Sifter or fine-mesh strainer — For sifting the powdered sugar. A strainer works just as well if you don’t have a sifter.
If you don’t have a stand mixer, don’t worry. I’ve made this cake with a hand mixer and a lot of elbow grease, and it came out just as good. The only difference is you’ll need to cream the butter and sugar for a full 3-4 minutes instead of 2-3, since hand mixers are a little less powerful. Also, if you don’t have a sheet pan, you can use a 9×13-inch pan and adjust the baking time. Just keep an eye on it and test with a toothpick.
Preparation Method
Let’s make this cake. I’ve broken everything down into clear steps so you can follow along without any confusion. Trust the process and don’t rush — each step builds on the last one.
Step 1: Preheat and Prep
Preheat your oven to 350°F (175°C). Line your 13×18-inch sheet pan with parchment paper, letting it hang over the long sides by about 2 inches. Lightly grease the parchment and the exposed sides of the pan with butter or non-stick spray. This double-layer protection ensures the cake releases perfectly.
Step 2: Mix the Dry Ingredients
In a medium bowl, whisk together the flour, baking powder, baking soda, and salt. Whisk for about 20 seconds to aerate the flour and distribute the leaveners evenly. Set this aside. Don’t skip the whisking — it’s faster than sifting and does the same job.
Step 3: Cream the Butter and Sugar
In the bowl of your stand mixer fitted with the paddle attachment (or using a hand mixer), beat the softened butter on medium speed for 1 minute until it’s smooth and creamy. Add the granulated sugar and beat on medium-high speed for 3-4 minutes. The mixture should look light, fluffy, and pale in color. Scrape down the sides and bottom of the bowl at least once during this process. This step is crucial — proper creaming creates air pockets that give the cake its tender texture.
Step 4: Add the Eggs and Vanilla
Add the eggs one at a time, beating well after each addition (about 30 seconds per egg). Scrape down the bowl after the second egg. Add the vanilla extract and beat for another 30 seconds. The mixture should look smooth and slightly glossy. If it looks curdled or separated, your eggs were probably too cold. Don’t panic — it will usually come back together once you add the flour.
Step 5: Alternate the Dry and Wet Ingredients
With the mixer on low speed, add about one-third of the flour mixture to the butter mixture. Mix until just combined. Pour in half of the buttermilk and mix until just combined. Repeat with another third of the flour, the remaining buttermilk, and finally the last third of the flour. Mix each addition only until you can’t see the dry ingredients anymore. Overmixing at this stage develops gluten and makes the cake tough. Stop the mixer and give the bowl a final scrape with a spatula to make sure everything is incorporated.
Step 6: Fold in the Sprinkles
This is the most important step. Remove the bowl from the mixer and add the rainbow sprinkles. Use a rubber spatula to fold them in gently — about 10 to 12 strokes. Do not overmix. You want the sprinkles distributed evenly without stirring so much that their colors start to bleed. The batter will be thick and fluffy. If you see streaks of color in the batter, you’ve mixed too much. It’s okay — the cake will still taste great, it just won’t have as many distinct colored specks.
Step 7: Bake the Cake
Pour the batter into the prepared sheet pan and spread it evenly with the spatula. Give the pan a gentle tap on the counter to release any air bubbles. Bake for 20-25 minutes, or until the top is golden brown and a toothpick inserted in the center comes out clean or with a few moist crumbs. The cake should spring back when lightly touched. Start checking at 18 minutes if your oven runs hot. Let the cake cool in the pan on a wire rack for 15 minutes, then use the parchment handles to lift it out and transfer it to the rack to cool completely. Do not frost a warm cake — the buttercream will melt into a puddle.
Step 8: Make the Vanilla Buttercream
While the cake cools, make the frosting. In the bowl of your stand mixer fitted with the paddle attachment, beat the softened butter on medium speed for 5 full minutes. Yes, five minutes. Scrape down the bowl after 2 minutes and again after 4. This step creates that light, airy texture that makes this buttercream so special. After 5 minutes, the butter should look pale, fluffy, and almost doubled in volume.
With the mixer on low speed, add the sifted powdered sugar one cup at a time, mixing until just combined after each addition. Add the vanilla and salt, then increase the speed to medium-high and beat for 2 minutes. Add the heavy cream, one tablespoon at a time, and beat for another minute until the frosting is smooth, spreadable, and silky. If it’s too stiff, add another tablespoon of cream. If it’s too soft, add a little more powdered sugar.
Step 9: Frost and Decorate
Once the cake is completely cool, spread the buttercream evenly over the top using your offset spatula. Start in the center and work your way out to the edges. Don’t worry about making it perfect — a rustic, swoopy finish looks homemade and inviting. Immediately sprinkle extra rainbow sprinkles over the frosting before it sets. If you wait too long, they won’t stick. Slice into squares and serve.
Cooking Tips & Techniques
I’ve made this cake enough times to learn what works and what absolutely doesn’t. Here are the tips I wish someone had told me before my first attempt.
Room temperature ingredients are not optional. I know it’s tempting to use cold eggs and cold buttermilk straight from the fridge, but trust me on this. Cold ingredients don’t emulsify properly with the butter, which means your batter will look curdled and your cake will be denser. Set everything out on the counter at least an hour before you start baking. If you forget, place the eggs in a bowl of warm water for 5 minutes and microwave the buttermilk for 15 seconds.
Don’t overmix the batter once the flour goes in. This is the number one mistake I see home bakers make. Gluten develops when flour mixes with liquid and gets agitated. The more you mix, the tougher the cake. Mix just until you can’t see streaks of flour anymore, then stop. A few small lumps are fine — they’ll bake out.
Use jimmies, not nonpareils. I learned this the hard way. Nonpareils (the tiny round sprinkles) bleed their color into the batter almost immediately, turning your beautiful white cake into a sad, gray-ish mess. Jimmies (the long, skinny sprinkles) hold their shape and color much better. If you can only find nonpareils, toss them in a tablespoon of flour before adding them to the batter to minimize bleeding.
Let the cake cool completely before frosting. I know you’re impatient. I am too. But if you frost a warm cake, the buttercream will melt and slide right off. You’ll end up with a sad, greasy mess. Give it at least an hour on the cooling rack. If you’re in a hurry, pop it in the fridge for 20 minutes after it’s reached room temperature.
Whip the butter for a full 5 minutes for the frosting. This is the secret to bakery-quality buttercream. Most recipes tell you to beat the butter for a minute or two, but that extra time creates a lighter, fluffier texture that makes the frosting feel almost like whipped cream. Set a timer. Don’t cheat.
If your buttercream looks curdled or separated, don’t panic. This usually happens when the butter is too cold or the liquid is added too quickly. Just keep beating on medium-high speed for another 2-3 minutes. It will come back together. If it doesn’t, warm the bowl slightly by holding it over a pot of simmering water for a few seconds, then beat again.
Variations & Adaptations
This funfetti sheet cake is incredibly adaptable. Here are some of my favorite variations, all tested and approved.
Gluten-Free Version: Substitute the all-purpose flour with a good 1:1 gluten-free baking flour blend. I’ve had great results with King Arthur Measure for Measure and Bob’s Red Mill 1-to-1. Add ¼ teaspoon of xanthan gum if your blend doesn’t already include it. The texture will be slightly more delicate, so handle the cake gently when transferring it. Everything else stays the same.
Dairy-Free Version: Use vegan butter sticks (like Miyoko’s or Country Crock Plant Butter) in place of dairy butter. For the buttermilk, add 1 tablespoon of lemon juice to 1 cup of unsweetened oat milk or almond milk and let it sit for 5 minutes. For the buttercream, use vegan butter and substitute the heavy cream with full-fat oat milk or canned coconut cream (the solid part only). The flavor will be slightly different, but still delicious.
Lemon Funfetti Cake: Add the zest of 2 lemons to the sugar and rub it in with your fingers before creaming with the butter. This releases the lemon oils and infuses the entire cake with bright citrus flavor. You can also add 1 tablespoon of lemon juice to the batter along with the vanilla. For the buttercream, replace the vanilla with 1 teaspoon of lemon extract or 2 tablespoons of fresh lemon juice.
Chocolate Funfetti Cake: Replace ¼ cup (30g) of the all-purpose flour with ¼ cup (25g) of unsweetened cocoa powder. Sift it together with the other dry ingredients. Use rainbow sprinkles or, for a more sophisticated look, use white or pastel sprinkles against the dark chocolate backdrop. This version pairs beautifully with the vanilla buttercream — the contrast is stunning.
Birthday Cake Cupcakes: This batter makes about 24 standard cupcakes. Line two muffin tins with paper liners and fill each about two-thirds full. Bake at 350°F (175°C) for 16-18 minutes. The baking time is shorter, so start checking at 15 minutes. Frost with the same buttercream and top with sprinkles for an easy, portable treat.
Serving & Storage Suggestions
This cake is best served at room temperature. The buttercream softens slightly, and the cake crumb is at its most tender. If you’ve refrigerated the cake, let it sit on the counter for about 30 minutes before serving.
For presentation, I like to cut the sheet cake into 24 squares (6 rows by 4 columns). Use a sharp chef’s knife and wipe it clean between cuts for neat edges. Arrange the squares on a large platter or cake stand. A few fresh berries scattered around the platter add a pop of color and a touch of sophistication.
This cake pairs beautifully with a tall glass of cold milk, a hot cup of coffee, or a scoop of vanilla ice cream. If you’re serving it at a party, consider setting up a small dessert bar with other handheld treats like peanut butter banana oat energy bites or lazy girl ricotta pasta bake for a sweet-and-savory spread.
Storage: Store leftover cake in an airtight container at room temperature for up to 3 days. If your kitchen is warm, refrigerate it — the buttercream can soften too much in a hot environment. The cake actually tastes even better on day two, as the flavors meld together. Just bring it back to room temperature before serving for the best texture.
Freezing: This cake freezes beautifully. You can freeze the unfrosted cake layers wrapped tightly in plastic wrap and then foil for up to 3 months. Thaw overnight in the refrigerator, then bring to room temperature before frosting. You can also freeze the frosted cake — place it in the freezer unwrapped for 1 hour until the buttercream is firm, then wrap it in plastic wrap and foil. Thaw in the refrigerator overnight. The buttercream might look slightly different after thawing, but a quick stir with a spatula will bring it back.
Reheating: If you want that just-baked warmth, microwave individual slices for 10-15 seconds. The buttercream will soften, and the cake will taste fresh from the oven. Don’t overdo it, or the buttercream will melt completely.
Nutritional Information & Benefits
Let’s be real — this is a celebration cake, not a health food. But here’s the estimated nutritional breakdown per serving (1 square, based on 24 servings):
| Nutrient | Amount Per Serving |
|---|---|
| Calories | 385 |
| Total Fat | 22g |
| Saturated Fat | 13g |
| Cholesterol | 85mg |
| Sodium | 210mg |
| Total Carbohydrates | 46g |
| Sugars | 34g |
| Protein | 4g |
While this cake is definitely a treat, it does have a few redeeming qualities. The butter provides a small amount of vitamin A and healthy fats. Eggs add high-quality protein and choline, which supports brain health. And let’s be honest — sometimes the best thing you can do for your mental health is eat a slice of cake and enjoy it without guilt.
If you’re looking for a healthier option, you can reduce the sugar in the cake to 1 cup (200g) without significantly affecting the texture. The cake will be slightly less sweet, but the buttercream will still provide plenty of sweetness. You can also use a sugar substitute like Swerve or monk fruit sweetener in the cake, but I can’t vouch for the results — I haven’t tested it extensively.
This recipe contains dairy, eggs, and gluten. For allergen-friendly versions, see the variations section above. If you’re serving a crowd with dietary restrictions, it’s always a good idea to have a few healthy high-protein overnight oats or turkey spinach pinwheels on hand as alternatives.
Conclusion
This funfetti sheet cake with vanilla buttercream is everything a celebration cake should be — easy to make, impossible to resist, and guaranteed to make people smile. It’s the kind of recipe that becomes a tradition, the one your friends will text you about before their next party, the one your kids will ask for on their birthdays for years to come.
I love this recipe because it’s forgiving. It doesn’t demand perfection. You can frost it messily, pile on the sprinkles, cut it into uneven squares, and it will still be the first thing to disappear from the dessert table. It’s a reminder that baking doesn’t have to be complicated to be extraordinary. Sometimes the simplest things — butter, sugar, flour, and a handful of rainbow sprinkles — are exactly what you need.
Now I want to hear from you. Have you tried this cake? Did you add your own twist? Did your family fight over the last piece? Drop a comment below and tell me about it. Tag me in your photos on social media — I love seeing your creations. And if you have a favorite variation I haven’t mentioned, please share it. This recipe is meant to be adapted and shared and loved. So go ahead, make a mess, eat the sprinkles straight from the jar, and enjoy every single bite.
Frequently Asked Questions
Can I use a different size pan?
Absolutely. You can use a 9×13-inch pan, but the cake will be thicker and need to bake for 30-35 minutes instead of 20-25. You can also use two 9-inch round pans for a layer cake — bake for 25-30 minutes and double the buttercream recipe for filling and frosting.
Why did my sprinkles bleed into the batter?
This usually happens when you use nonpareils (the tiny round sprinkles) instead of jimmies (the long skinny ones). Nonpareils dissolve more easily in the batter. If you only have nonpareils, toss them in a tablespoon of flour before adding them to the batter to help absorb some of the moisture.
Can I make this cake ahead of time?
Yes! You can bake the cake up to 2 days in advance. Wrap it tightly in plastic wrap once it’s completely cool and store it at room temperature. Frost it the day you plan to serve it for the best presentation. The buttercream can also be made ahead and stored in the refrigerator for up to a week — just bring it to room temperature and re-whip before using.
My buttercream turned out too soft. What did I do wrong?
This usually means your butter was too soft when you started, or you added too much heavy cream. Try refrigerating the buttercream for 15-20 minutes to firm it up, then re-whip it. If it’s still too soft, beat in a little more sifted powdered sugar until it reaches the right consistency.
Can I use salted butter instead of unsalted?
You can, but reduce or omit the added salt in the recipe. Salted butter has varying amounts of salt depending on the brand, so it’s harder to control the final flavor. I recommend sticking with unsalted butter so you can control the salt level yourself.
Pin This Recipe!
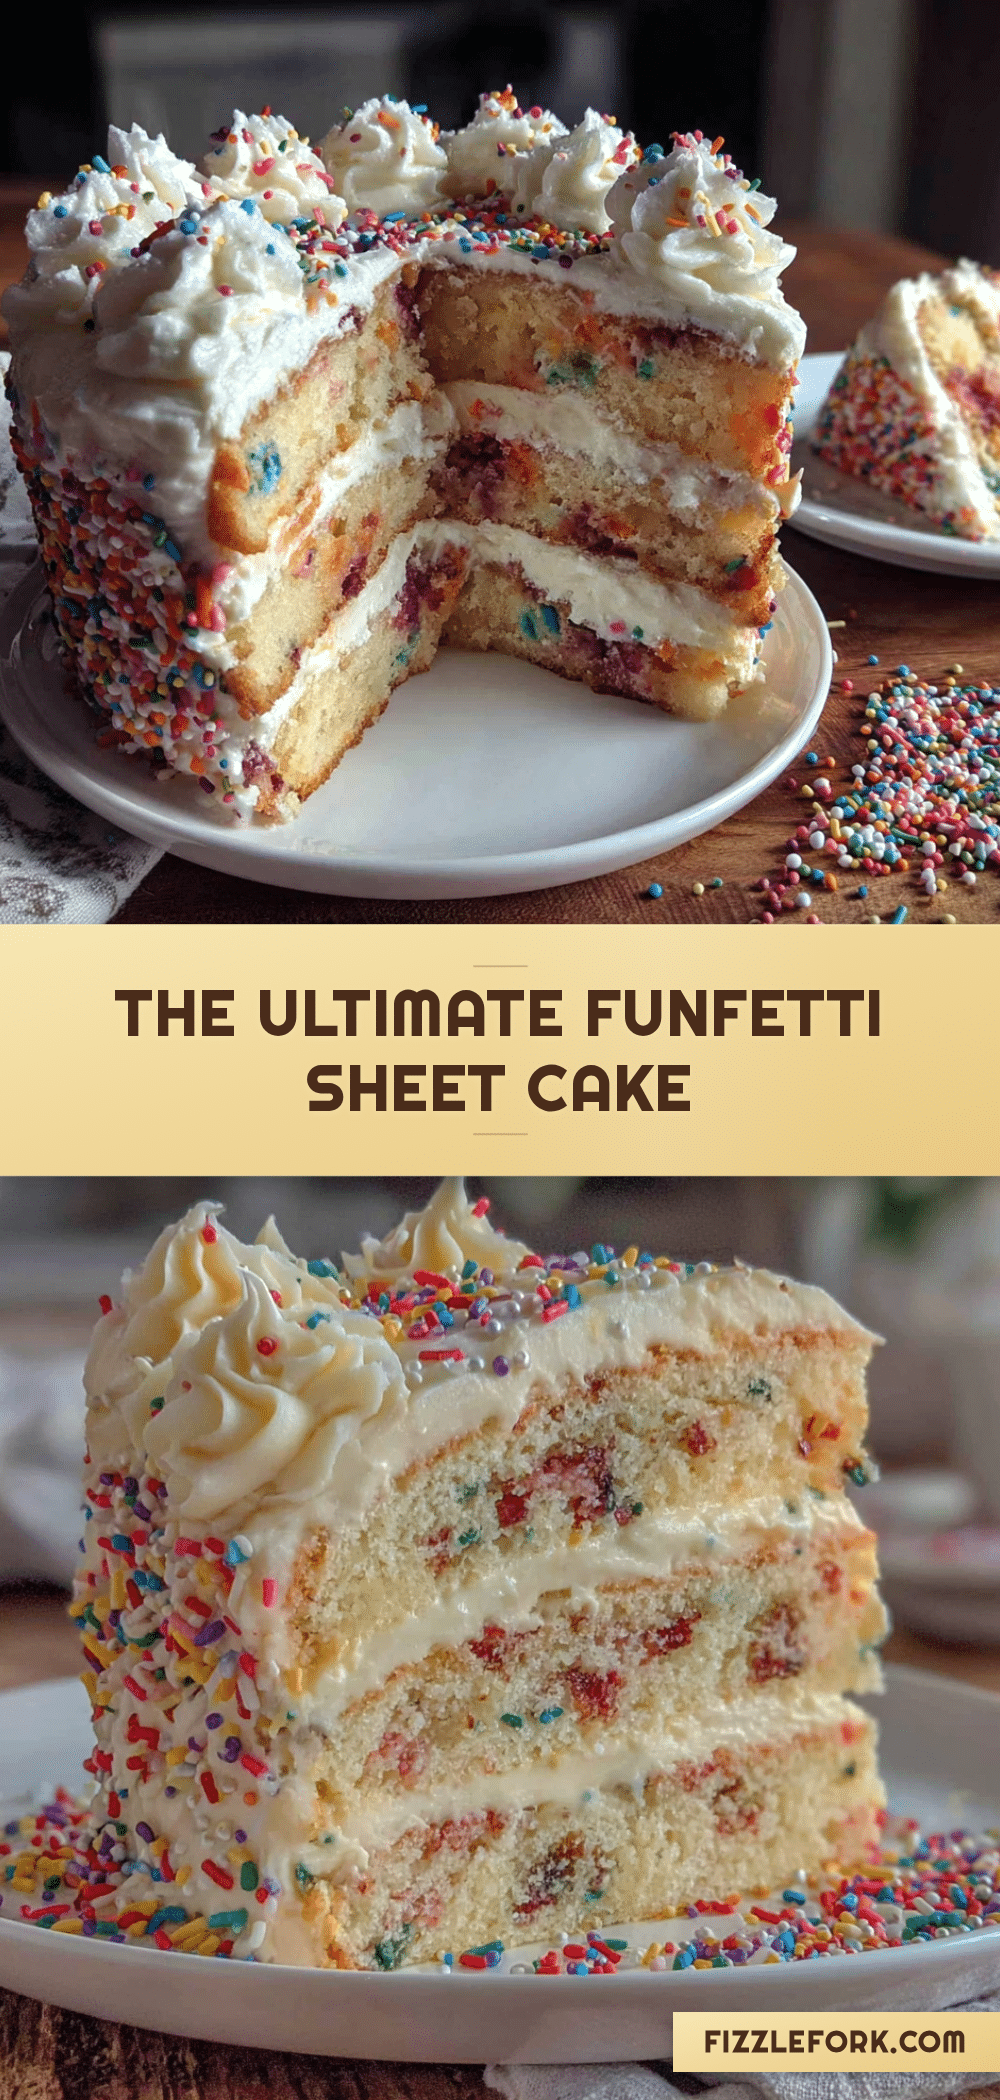
Best Funfetti Sheet Cake Recipe with Vanilla Buttercream
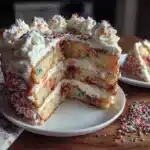
A tender, buttery vanilla sheet cake studded with rainbow sprinkles and topped with a silky vanilla buttercream. Perfect for birthdays, celebrations, or any day that needs a little extra joy.
- Prep Time: 20 minutes
- Cook Time: 25 minutes
- Total Time: 45 minutes
- Yield: 24 servings 1x
- Category: Dessert
- Cuisine: American
Ingredients
- 2 ½ cups (315g) all-purpose flour
- 2 teaspoons baking powder
- ½ teaspoon baking soda
- ½ teaspoon salt
- 1 cup (226g) unsalted butter, softened
- 1 ½ cups (300g) granulated sugar
- 3 large eggs, room temperature
- 1 tablespoon vanilla extract
- 1 cup (240ml) buttermilk, room temperature
- ½ cup (80g) rainbow sprinkles (jimmies)
- 1 ½ cups (339g) unsalted butter, softened (for buttercream)
- 4 cups (480g) powdered sugar, sifted
- 2 teaspoons vanilla extract (for buttercream)
- ¼ teaspoon salt (for buttercream)
- 2–4 tablespoons heavy cream
- Extra rainbow sprinkles for decoration (optional)
- Fresh berries or edible flowers for decoration (optional)
Instructions
- Preheat oven to 350°F (175°C). Line a 13×18-inch sheet pan with parchment paper, letting it hang over the long sides. Lightly grease the parchment and exposed pan sides.
- In a medium bowl, whisk together flour, baking powder, baking soda, and salt for about 20 seconds. Set aside.
- In a stand mixer with paddle attachment, beat softened butter on medium speed for 1 minute until smooth. Add sugar and beat on medium-high for 3-4 minutes until light and fluffy. Scrape down bowl.
- Add eggs one at a time, beating well after each addition. Add vanilla and beat for 30 seconds.
- With mixer on low, add one-third of the flour mixture, mixing until just combined. Add half the buttermilk, mixing until just combined. Repeat with another third of flour, remaining buttermilk, and final third of flour. Do not overmix.
- Remove bowl from mixer. Fold in rainbow sprinkles with a rubber spatula using 10-12 strokes. Do not overmix.
- Pour batter into prepared pan and spread evenly. Tap pan gently on counter. Bake for 20-25 minutes until golden and a toothpick inserted in center comes out clean. Cool in pan on wire rack for 15 minutes, then lift out and cool completely.
- For buttercream: In stand mixer with paddle attachment, beat softened butter on medium speed for 5 full minutes, scraping bowl occasionally. On low, add sifted powdered sugar one cup at a time, mixing until just combined. Add vanilla and salt, then beat on medium-high for 2 minutes. Add heavy cream one tablespoon at a time, beating for 1 minute until smooth and spreadable.
- Once cake is completely cool, spread buttercream evenly over top. Immediately sprinkle extra rainbow sprinkles on top. Slice into squares and serve.
Notes
Use jimmies (long skinny sprinkles) not nonpareils to prevent color bleeding. Room temperature ingredients are essential for best texture. Whip butter for a full 5 minutes for light buttercream. Cake can be made 2 days ahead; frost before serving.
Nutrition
- Serving Size: 1 square
- Calories: 385
- Sugar: 34
- Sodium: 210
- Fat: 22
- Saturated Fat: 13
- Carbohydrates: 46
- Protein: 4
Keywords: funfetti cake, sheet cake, vanilla buttercream, birthday cake, sprinkle cake, easy cake recipe