Rosa wasn’t trying to impress anyone. I’d stopped by her house on a Thursday afternoon to drop off a book I’d borrowed months ago, and the smell hit me before I even made it past the screen door. Something warm and floral—orange, maybe, but deeper than that. Anise, it turned out. And butter. Lots of butter.
She was pulling these golden rounds off a baking sheet, dusting them with sugar like it was nothing. Like she hadn’t just created the most intoxicating smell I’d encountered all year. “Oh, that’s just pan de muerto,” she said when I asked, wiping her hands on her apron. “My grandmother’s recipe. I make it every November.” She said it the way someone might say they made a pot of coffee. No big deal. Meanwhile, I was practically drooling on her kitchen floor.
I watched her work for a while—the way she handled the dough with such confidence, no measuring spoons in sight. She let me try a piece warm from the oven, and honestly? I almost cried. Not because it was sad, but because it was so good it caught me off guard. The bread was pillowy soft with this subtle licorice warmth from the anise, and the orange zest brightened everything up. She shrugged when I gushed. “It’s just bread.”
But it wasn’t just bread. It was the kind of bread that makes you want to call your own grandmother, or bake for someone you love, or sit in a warm kitchen on a cold day and feel like everything might actually be okay. I asked for the recipe, and she scribbled it on a scrap of paper—measurements in handfuls and pinches. It took me three tries to get it right, but now it’s my November ritual too. Maybe you’ve been there? The recipe that wasn’t supposed to be special, but ended up being everything.
Why You’ll Love This Recipe
This pan de muerto isn’t just another holiday bread—it’s the one that makes you slow down and actually taste it. I’ve tested this version about a dozen times, tweaking the orange and anise balance until it felt just right. Trust me, it’s worth every minute.
- Warm, Cozy Flavors : The orange zest and anise create this incredible aromatic combination that fills your whole house. It’s like a hug for your senses.
- Simple Ingredients : You probably already have most of these in your pantry. No weird specialty items or expensive imports.
- Perfect for Celebrations : Traditionally made for Día de Muertos, but honestly? It’s great for any fall gathering, cozy evening, or Tuesday that needs a little magic.
- Crowd-Pleaser : I’ve brought this to potlucks and family dinners, and people always ask for the recipe. Kids love the soft, sweet bread, and adults appreciate the sophisticated flavor.
- Surprisingly Doable : Even if you’re nervous about working with yeast, this dough is forgiving. I messed up my first batch and it still turned out delicious.
What makes this recipe different from others you’ll find online? It’s the balance. A lot of pan de muerto recipes go heavy on the orange or skip the anise entirely. But that combination—the bright citrus cutting through the warm, almost spicy anise—is what makes this bread sing. Plus, I’ve added a few tricks I learned from Rosa herself, like letting the orange zest sit with the sugar first to release all those oils. Small things, big difference.
This is comfort food with history. It’s the kind of bread that makes you close your eyes after the first bite, not because you’re being dramatic, but because it genuinely tastes that good. Perfect for cold evenings, rough days, or anytime you need something warm and sweet to remind you that simple things are often the best things.
What Ingredients You Will Need
This recipe uses straightforward ingredients, but each one plays an important role in creating that signature texture and flavor. Here’s what you’ll need to gather:
For the Dough
- 4 cups (500g) all-purpose flour – plus extra for dusting. I prefer King Arthur Flour for consistent results, but any good brand works.
- 1/2 cup (100g) granulated sugar
- 1 teaspoon salt
- 1 packet (2 1/4 teaspoons) active dry yeast – or one standard envelope. Make sure it’s fresh, not expired.
- 1/2 cup (120ml) whole milk – warmed to about 110°F. Too hot will kill the yeast, too cold won’t activate it.
- 1/4 cup (60ml) water – also warmed
- 3 large eggs – room temperature is key here. Cold eggs will shock the dough.
- 1/2 cup (113g) unsalted butter – softened, cut into small pieces. I use Kerrygold for its rich flavor.
- 2 teaspoons orange zest – from about 1 large orange. Go for organic if you can, since you’re eating the peel.
- 1 teaspoon anise seeds – lightly crushed with a mortar and pestle or the bottom of a pan. This releases the oils.
- 1 teaspoon vanilla extract – pure, not imitation
For the Topping & Glaze
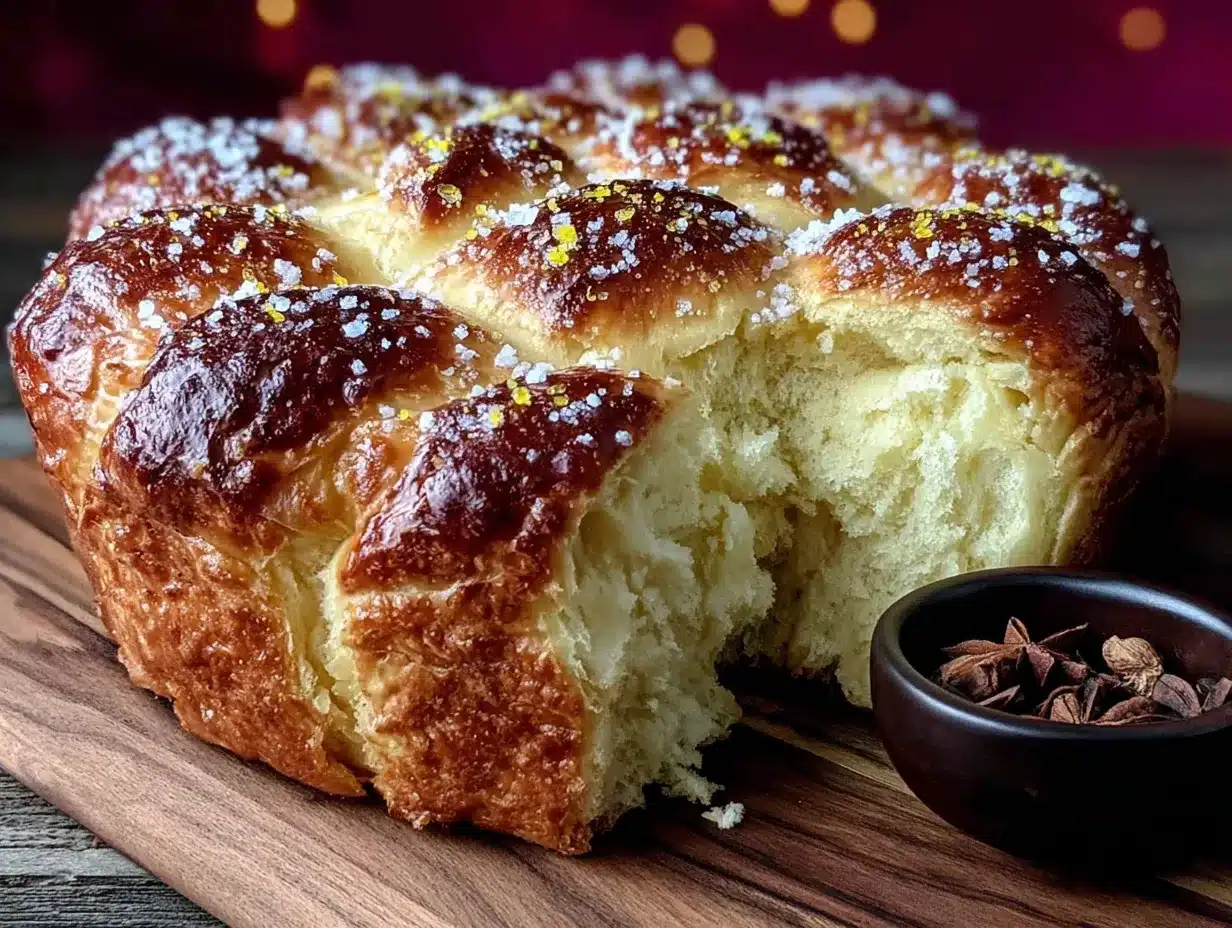
- 1/4 cup (50g) granulated sugar – for dusting
- 1/4 cup (60g) unsalted butter – melted, for brushing
- 1 tablespoon orange zest – mixed into the sugar for the topping
- Optional: 1 tablespoon anise seeds – for garnish on top
Ingredient Tips: If you can’t find anise seeds, you can substitute with fennel seeds for a similar but milder licorice flavor. For a dairy-free version, use oat milk and vegan butter—I’ve tested it and it works, though the texture is slightly less tender. And about the orange zest: don’t skip it. The oil in the zest is what gives the bread its bright, aromatic quality. Bottled orange juice won’t do the same thing.
I also recommend buying whole anise seeds rather than pre-ground. They keep their flavor much longer, and crushing them fresh right before using makes a noticeable difference. Trust me on this one.
Equipment Needed
You don’t need a fancy kitchen to make this bread. Here’s what you’ll actually use:
- Large mixing bowl – glass or stainless steel works best. Plastic can hold onto odors.
- Stand mixer with dough hook – optional, but makes kneading much easier. I use my KitchenAid for this.
- Baking sheet – lined with parchment paper or a silicone mat
- Measuring cups and spoons
- Kitchen scale – honestly, this is a game-changer for bread. Weighing flour is more accurate than scooping.
- Microplane or fine grater – for zesting the orange
- Mortar and pestle – or a small pan and the bottom of a measuring cup, for crushing anise seeds
- Pastry brush – for buttering the baked bread
- Clean kitchen towel – for covering the dough while it rises
- Thermometer – helpful for checking milk temperature, but you can also test it with your wrist
If you don’t have a stand mixer, you can absolutely knead by hand. It’ll take about 10-12 minutes of elbow grease, but there’s something meditative about it. I actually prefer hand-kneading when I’m feeling stressed. And if you don’t have a microplane, a regular box grater’s fine side works for zesting—just be careful not to get the bitter white pith.
Preparation Method
Let’s make some bread. Take your time with this one—it’s not complicated, but it does need patience. The smell alone will be worth it.
- Bloom the yeast. In a small bowl, combine the warmed milk and water. Sprinkle the yeast and 1 tablespoon of the sugar over the top. Let it sit for 5-10 minutes until it’s foamy and smells like bread. If it doesn’t foam, your yeast might be dead—start over with fresh yeast.
- Infuse the sugar. In a large mixing bowl (or the bowl of your stand mixer), combine the remaining sugar and the orange zest. Use your fingers to rub them together until the sugar turns fragrant and slightly orange-colored. This releases the essential oils from the zest. It smells incredible.
- Mix the dry ingredients. Add the flour, salt, and crushed anise seeds to the sugar mixture. Whisk together to combine.
- Add the wet ingredients. Make a well in the center of the flour mixture. Pour in the yeast mixture, eggs, and vanilla extract. If using a stand mixer, use the paddle attachment on low speed until a shaggy dough forms. If mixing by hand, use a wooden spoon.
- Incorporate the butter. Switch to the dough hook if using a mixer. Add the softened butter pieces one at a time, mixing on medium-low until each piece is incorporated before adding the next. This takes about 3-4 minutes. The dough will look messy at first—that’s normal. Keep going.
- Knead the dough. Increase speed to medium and knead for 8-10 minutes (12-15 minutes if by hand). The dough should become smooth, elastic, and slightly tacky but not sticky. It should pass the windowpane test—stretch a small piece thin enough to see light through without it tearing.
- First rise. Shape the dough into a ball and place it in a lightly oiled bowl, turning to coat. Cover with a clean kitchen towel and let it rise in a warm, draft-free spot for 1.5 to 2 hours, until doubled in size. I like to put mine in the oven with the light on—it stays perfectly warm.
- Shape the loaves. Punch down the dough gently to release the air. Turn it out onto a lightly floured surface. Divide into 2 equal pieces for standard loaves, or keep it as one large piece for a showstopper. Divide one of the pieces into smaller balls for the bone decorations (traditionally they look like bones or teardrops). Shape the main piece into a round loaf and place on your prepared baking sheet. Attach the decorative pieces by pressing them gently into the dough.
- Second rise. Cover the shaped loaves loosely with the towel and let rise again for 45-60 minutes, until puffy and almost doubled. They should look pillowy.
- Preheat and bake. About 20 minutes before the second rise is done, preheat your oven to 350°F (175°C). Bake the loaves for 25-30 minutes, until deeply golden brown on top and hollow-sounding when tapped on the bottom. If the tops brown too quickly, tent loosely with foil.
- Finish with butter and sugar. Let the bread cool on the pan for 5 minutes, then transfer to a wire rack. While still warm, brush generously with melted butter. Mix the remaining sugar with extra orange zest and sprinkle all over the top. The butter will make the sugar stick and create that gorgeous, slightly crunchy coating.
Pro tip: Don’t skip the butter-sugar step. This is what gives pan de muerto its signature sweet, glossy finish. I’ve tried it without and it’s just not the same—dry and sad. The butter soak keeps the bread moist and adds richness.
Cooking Tips & Techniques
I’ve made this recipe enough times to know where things can go wrong. Here’s what I’ve learned the hard way:
Temperature matters more than you think. Your milk should feel like warm bathwater—not hot enough to hurt your wrist, but definitely warm. I killed my yeast twice before I started using a thermometer. Now I don’t guess anymore.
Don’t over-flour your surface. This dough is supposed to be slightly tacky. If you add too much flour while shaping, the bread will turn out dense and heavy. Trust the process—it’ll firm up as it rises.
Patience with the butter. When you’re adding butter to the dough, it will look like a greasy mess at first. I remember my first batch looking so wrong I almost threw it out. But keep mixing. Eventually it comes together into this silky, beautiful dough. The butter needs time to emulsify.
Anise intensity. Anise can be overpowering if you use too much. I once doubled the amount thinking “more flavor is better”—big mistake. It tasted like black licorice candy, not bread. Stick with the teaspoon, and crush the seeds lightly rather than grinding them to powder.
Multitasking tip: While your dough is doing its first rise, zest your orange and mix it with the sugar for the topping. You can also measure out your butter and set your eggs out to come to room temperature. Little prep steps save you from scrambling later.
Consistency check: If your dough feels too dry during kneading, add water one tablespoon at a time. If it’s too sticky, add flour one tablespoon at a time. Weather affects dough—humid days need less flour, dry days need more. You’ll get a feel for it.
Variations & Adaptations
This recipe is flexible. Here are some ways I’ve played with it over the years:
- Chocolate Orange Version: Add 1/4 cup cocoa powder to the flour mixture and reduce the flour by the same amount. The anise and chocolate together are surprisingly good—like a fancy Mexican hot chocolate in bread form.
- Dairy-Free Adaptation: Use oat milk instead of whole milk and vegan butter. I’ve tested this with Miyoko’s butter and it worked beautifully. The texture is slightly less tender but still delicious.
- Spiced Variation: Add 1/2 teaspoon cinnamon and 1/4 teaspoon nutmeg along with the anise. This gives it more of a holiday spice profile that’s perfect for Christmas baking.
- Gluten-Free Option: I won’t lie—this is tricky with gluten-free flour. I’ve had moderate success using Cup4Cup brand, but the texture is more cake-like than bread-like. If you need gluten-free, I’d recommend finding a recipe specifically developed for it.
- Individual Buns: Instead of shaping one large loaf, divide the dough into 12 equal pieces and shape into rounds. Bake for 18-20 minutes instead of 25-30. Perfect for sharing or freezing individually.
My personal favorite variation? The chocolate orange one. I made it last November for a friend’s Día de Muertos gathering and people couldn’t stop talking about it. The anise adds this unexpected warmth that keeps you coming back for another bite.
Serving & Storage Suggestions
Pan de muerto is best served warm, but honestly, it’s pretty amazing at room temperature too. Here’s how I like to do it:
Serving: Slice the bread into wedges and serve alongside a cup of Mexican hot chocolate or café de olla. The spiced, slightly bitter coffee balances the sweet, buttery bread perfectly. You can also serve it with a dollop of whipped cream or a drizzle of dulce de leche if you’re feeling extra indulgent.
Presentation: Place the whole loaf on a wooden board or a colorful platter. Dust with a little extra orange sugar right before serving for that bakery-worthy look. If you’re serving it for Día de Muertos, arrange it on an ofrenda with marigolds and photos of loved ones—it’s a beautiful tradition.
Storage: Keep leftover bread in an airtight container at room temperature for up to 3 days. The sugar coating might soften slightly, but it’s still delicious. Do not refrigerate—it dries out the bread faster.
Freezing: This bread freezes beautifully. Wrap the cooled, unsugared loaf tightly in plastic wrap, then in foil. Freeze for up to 3 months. When ready to serve, thaw overnight in the fridge, then reheat in a 300°F oven for 10 minutes. Brush with butter and add the sugar topping after reheating.
Reheating: For that just-baked experience, pop slices in a toaster oven or air fryer at 350°F for 3-4 minutes. The outside gets slightly crisp while the inside stays soft. It’s dangerous how good this is.
Flavor development: Here’s a secret—the bread actually tastes better the next day. The anise and orange flavors meld together overnight, creating a more complex, rounded taste. So don’t stress if you’re making it a day ahead. It’s almost better that way.
Nutritional Information & Benefits
Let’s be real—this is a treat, not a health food. But it does have some redeeming qualities:
- Estimated per serving (1/12 of recipe): 320 calories, 12g fat, 48g carbs, 7g protein, 18g sugar
- Anise seeds are known for their digestive properties. Traditionally, they’ve been used to soothe upset stomachs and reduce bloating. So consider this bread… functional?
- Orange zest contains vitamin C and antioxidants. It also adds flavor without extra sugar or artificial ingredients.
- Eggs and butter provide protein and healthy fats that make this bread more satisfying than your average sweet pastry.
Dietary considerations: This recipe contains gluten, dairy, and eggs. It is not suitable for vegans or those with celiac disease without modifications. I’ve included dairy-free options in the variations section, but the gluten-free adaptation is still a work in progress.
My personal take? Food like this is about more than numbers. It’s about tradition, connection, and the simple joy of sharing something homemade. One slice with your morning coffee won’t derail anything. It might even make your day better.
Conclusion
This pan de muerto has become more than just a recipe to me. It’s a November ritual, a way to slow down and remember what matters. Every time I make it, I think about Rosa in her kitchen, not making a big deal out of something extraordinary. That’s the energy I try to bring to my own baking now.
The orange and anise combination is truly special—bright and warm, familiar and surprising all at once. It’s the kind of bread that makes you want to sit down, take a deep breath, and actually taste what you’re eating. In a world that moves too fast, that’s a gift.
I hope you’ll try this recipe and make it your own. Maybe you’ll add a little more orange zest, or skip the anise entirely, or shape it into something completely different. That’s the beauty of baking—it’s yours to play with. If you do make it, I’d love to hear how it turned out. Drop a comment below, share a photo, or tell me about your own kitchen rituals. Happy baking, friends. And remember—sometimes the best recipes come from people who weren’t even trying to impress you.
Frequently Asked Questions
Can I make pan de muerto without a stand mixer?
Absolutely! You can knead this dough by hand. It takes about 12-15 minutes of consistent kneading, but it’s totally doable. In fact, some bakers prefer hand-kneading because they can feel the dough’s texture more precisely.
Why isn’t my dough rising?
Most likely, your yeast is dead or your liquid was too hot. Check that your milk and water were between 105-115°F. If they were hotter than 130°F, the yeast died. Also, make sure your yeast isn’t expired. If it doesn’t foam within 10 minutes of mixing with warm liquid, start over with fresh yeast.
Can I skip the anise seeds?
You can, but the bread will lose a lot of its traditional character. If you don’t like licorice flavor, try substituting fennel seeds instead—they’re milder and sweeter. Or just leave them out entirely and add an extra teaspoon of orange zest.
How do I store leftover pan de muerto?
Keep it in an airtight container at room temperature for up to 3 days. Don’t refrigerate it—the fridge dries out bread faster than anything. If it starts to get stale, toast slices lightly or warm them in the oven for a few minutes.
Can I freeze this bread?
Yes! Freeze the unsugared loaf wrapped tightly in plastic wrap and foil for up to 3 months. When you’re ready to eat it, thaw overnight in the fridge, reheat in a 300°F oven for 10 minutes, then brush with butter and add the sugar topping. It’ll taste almost as good as fresh.
Pin This Recipe!
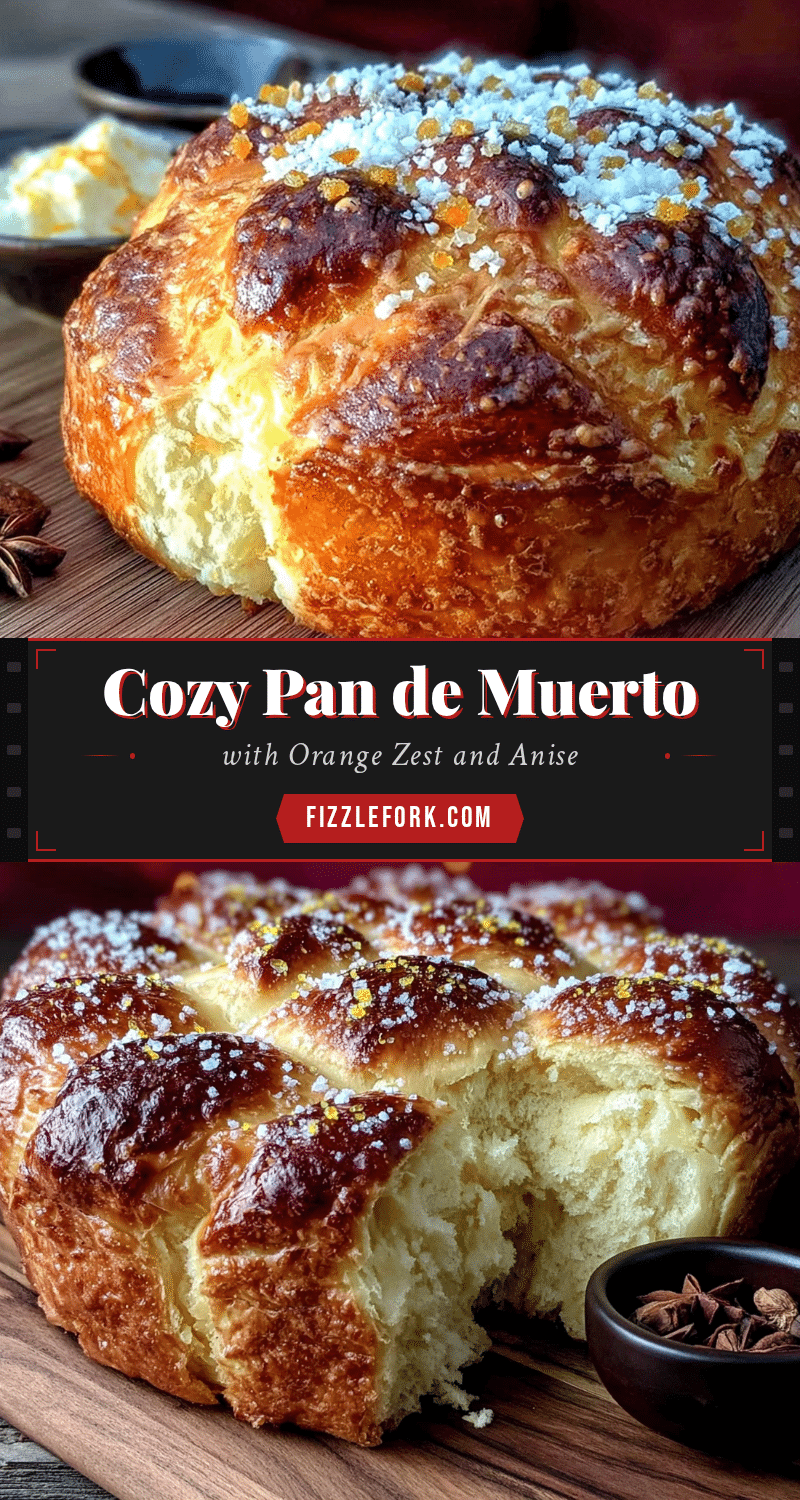
Best Homemade Pan de Muerto with Orange Zest and Anise

This pan de muerto is a warm, aromatic bread with orange zest and anise, perfect for Día de Muertos or any cozy fall gathering. It’s surprisingly doable, even for novice bakers, and yields a pillowy soft loaf with a sweet, buttery finish.
- Prep Time: 30 minutes
- Cook Time: 30 minutes
- Total Time: 3 hours (including rising time)
- Yield: 12 servings 1x
- Category: Bread
- Cuisine: Mexican
Ingredients
- 4 cups (500g) all-purpose flour, plus extra for dusting
- 1/2 cup (100g) granulated sugar
- 1 teaspoon salt
- 1 packet (2 1/4 teaspoons) active dry yeast
- 1/2 cup (120ml) whole milk, warmed to about 110°F
- 1/4 cup (60ml) water, warmed
- 3 large eggs, room temperature
- 1/2 cup (113g) unsalted butter, softened and cut into small pieces
- 2 teaspoons orange zest (from about 1 large orange)
- 1 teaspoon anise seeds, lightly crushed
- 1 teaspoon vanilla extract
- 1/4 cup (50g) granulated sugar (for topping)
- 1/4 cup (60g) unsalted butter, melted (for brushing)
- 1 tablespoon orange zest (mixed into topping sugar)
- Optional: 1 tablespoon anise seeds (for garnish)
Instructions
- Bloom the yeast: In a small bowl, combine warmed milk and water. Sprinkle yeast and 1 tablespoon of the sugar over the top. Let sit for 5-10 minutes until foamy.
- Infuse the sugar: In a large mixing bowl, combine remaining sugar and orange zest. Rub together with fingers until fragrant and slightly orange-colored.
- Mix dry ingredients: Add flour, salt, and crushed anise seeds to the sugar mixture. Whisk to combine.
- Add wet ingredients: Make a well in the center. Pour in yeast mixture, eggs, and vanilla extract. Mix with paddle attachment on low speed until a shaggy dough forms.
- Incorporate butter: Switch to dough hook. Add softened butter pieces one at a time, mixing on medium-low until each is incorporated (about 3-4 minutes).
- Knead dough: Increase speed to medium and knead for 8-10 minutes (12-15 minutes by hand) until smooth, elastic, and slightly tacky. Should pass windowpane test.
- First rise: Shape dough into a ball, place in lightly oiled bowl, turn to coat. Cover with towel and let rise in warm, draft-free spot for 1.5 to 2 hours until doubled.
- Shape loaves: Punch down dough. Turn onto floured surface. Divide into 2 equal pieces. Divide one piece into smaller balls for bone decorations. Shape main piece into round loaf on prepared baking sheet. Attach decorative pieces.
- Second rise: Cover shaped loaves loosely with towel and let rise for 45-60 minutes until puffy and almost doubled.
- Preheat and bake: Preheat oven to 350°F (175°C). Bake loaves for 25-30 minutes until deeply golden brown and hollow-sounding when tapped. Tent with foil if browning too quickly.
- Finish with butter and sugar: Let cool on pan for 5 minutes, then transfer to wire rack. While still warm, brush generously with melted butter. Mix remaining sugar with extra orange zest and sprinkle all over top.
Notes
Don’t skip the butter-sugar step—it gives the bread its signature sweet, glossy finish. The bread actually tastes better the next day as flavors meld. For dairy-free, use oat milk and vegan butter. For gluten-free, use Cup4Cup brand but expect a more cake-like texture.
Nutrition
- Serving Size: 1 slice (1/12 of rec
- Calories: 320
- Sugar: 18
- Sodium: 210
- Fat: 12
- Saturated Fat: 7
- Carbohydrates: 48
- Fiber: 2
- Protein: 7
Keywords: pan de muerto, Mexican bread, orange zest, anise, Día de Muertos, holiday bread, yeast bread, traditional Mexican recipe