The woman at the next stall watched me stare at her gingerbread cookies for a solid minute before she finally spoke. “You keep looking at them like they might run away,” she said, not unkindly. I laughed and admitted I was trying to figure out how she got the molasses flavor to taste so deep and warm, not sharp and one-note like mine always turned out. She didn’t give me a recipe right then. Instead, she handed me a cookie wrapped in wax paper and told me to come back on Saturday with my notebook.
Her name was Margaret, and she’d been selling at that market for thirty years. That Saturday, she walked me through her gingerbread method while we stood between bins of apples and late-season squash. She talked about letting the spices sit in the butter before adding anything else, about using blackstrap molasses for complexity and a touch of brown sugar to soften the bite. I scribbled notes on a napkin while a customer interrupted us twice. Honestly, I didn’t think about cheesecake at all that day. But later, staring at my leftover gingerbread batter and a block of cream cheese that needed using, something clicked.
These cozy gingerbread cheesecake bars for the holidays happened because two good things refused to stay separate. The spicy, dark gingerbread crust cradles a silky cream cheese filling that doesn’t compete with it — it just makes the whole thing feel softer, creamier, more forgiving. The first time I pulled a pan of these out of the oven, the kitchen smelled like December in a way no single dessert ever had before. Maybe you’ve been there, standing over a warm pan wondering why you hadn’t thought of this sooner. That’s how this recipe stayed with me. It’s not fussy or precious. It’s just two things that belong together, finally meeting on a baking sheet.
Why You’ll Love This Recipe
These gingerbread cheesecake bars aren’t just another holiday dessert to shuffle onto the cookie tray. They’re the kind of thing that makes people stop mid-conversation and ask for the recipe before they’ve even swallowed. I’ve tested this one at four different holiday gatherings, and every time, someone corners me by the sink wanting to know how it comes together so fast.
- Quick & Easy : No water bath, no fussy crust pressing, no cracking worries. You’re looking at about 20 minutes of active work and the oven does the rest. Perfect for those December days when you have three other things to bring somewhere.
- Simple Ingredients : You probably already have molasses, flour, butter, and cream cheese in your kitchen right now. No specialty extracts or hard-to-find spice blends. Just real pantry staples doing good work.
- Perfect for Holiday Gatherings : These bars travel well, slice cleanly, and look beautiful on a platter next to cookies and fudge. They’re equally at home at a cookie swap, a casual family dinner, or a more dressed-up holiday party.
- Crowd-Pleaser : People who swear they don’t like gingerbread love these. People who think cheesecake is too heavy love these. The balance hits something that pleases almost everyone.
- Unbelievably Delicious : The texture is what gets people. That soft, almost cake-like gingerbread layer with the cool, creamy cheesecake on top — it’s comfort food that feels a little fancy without trying too hard.
What makes this recipe different from all the other gingerbread-cheesecake hybrids out there? It’s the technique of blooming the spices in warm butter before mixing the crust. That little step changes everything. The ginger, cinnamon, and cloves stop tasting like individual spices and start tasting like something deeper, something that tastes like the holidays should. It’s not just another version — it’s the version I’d make for anyone I wanted to impress without breaking a sweat.
What Ingredients You Will Need
This recipe leans on ingredients that do double duty — the same molasses that gives the crust its deep color also keeps it tender, and the cream cheese filling uses just enough sugar to balance the tang without getting cloying. Here’s what you’ll need to pull it all together.
For the Gingerbread Crust
- All-purpose flour, 200g (1 2/3 cups) — spooned and leveled, not scooped straight from the bag
- Unsalted butter, 113g (1/2 cup or 1 stick), melted — I use Kerrygold for the richness, but any good unsalted butter works
- Molasses, 120ml (1/2 cup) — blackstrap gives a deeper, more complex flavor; regular works too but the result will be sweeter and lighter
- Light brown sugar, 100g (1/2 cup, packed) — dark brown sugar works if that’s what you have, but light keeps the molasses flavor more forward
- Ground ginger, 2 teaspoons — fresh ground from a spice shop is noticeably brighter, but grocery store ginger works fine
- Ground cinnamon, 1 1/2 teaspoons
- Ground cloves, 1/2 teaspoon — go easy here; cloves are strong and can overpower everything
- Baking soda, 1/2 teaspoon — this reacts with the molasses to help the crust rise just slightly
- Salt, 1/4 teaspoon — fine sea salt, not flaky
- Large egg, 1, at room temperature (adds structure and richness)
- Vanilla extract, 1 teaspoon (use pure, not imitation, for the best flavor)
For the Cheesecake Layer
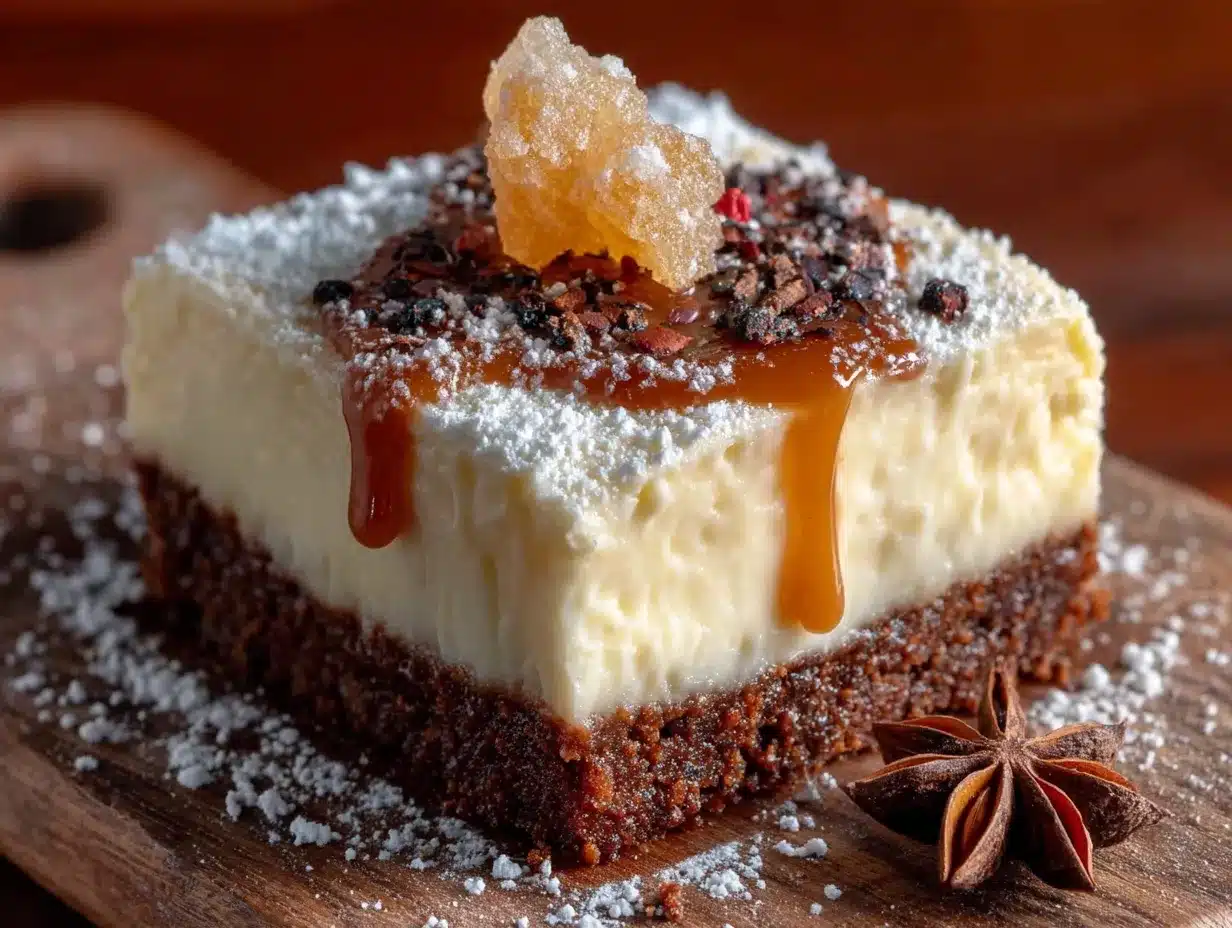
- Full-fat cream cheese, 452g (two 8-ounce blocks), softened — Philadelphia is my go-to; the texture is consistently reliable and it melts smoothly without lumps
- Granulated sugar, 100g (1/2 cup) — not too much; you want the tang of the cream cheese to come through
- Large eggs, 2, at room temperature — cold eggs will make the filling seize up
- Sour cream, 60ml (1/4 cup) — full-fat adds silkiness; Greek yogurt can substitute in a pinch
- Vanilla extract, 1 teaspoon
- All-purpose flour, 15g (2 tablespoons) — this tiny amount stabilizes the filling and prevents cracking
- Pinch of salt, just a small one to balance sweetness
For the Optional Topping
- Whipped cream, for serving (optional but highly recommended)
- Ground cinnamon, for dusting
- Crystallized ginger, finely chopped, for garnish (adds a lovely spicy chew)
For the molasses, I recommend Grandma’s Molasses or Brer Rabbit if you’re using regular. For blackstrap, Plantation Blackstrap is my favorite — it’s dark, almost bitter, and gives the crust that grown-up complexity that makes people ask what your secret is. If you’re using blackstrap for the first time, don’t be alarmed by how thick it is. That’s normal. Just measure it in a liquid measuring cup sprayed lightly with oil, and it’ll slide right out.
Equipment Needed
You don’t need a lot of special gear for these bars, which is part of why I make them so often during the busy holiday season. Here’s what you’ll actually use:
- 9×9-inch square baking pan — glass or metal both work; glass takes slightly longer to bake through. If you only have an 8×8, the bars will be thicker and need about 5 extra minutes in the oven.
- Parchment paper — the kind with the slight curl on the edges is easiest to press into corners. Cut two strips that overhang on opposite sides to create a sling for lifting the bars out cleanly.
- Electric hand mixer or stand mixer — a hand mixer is honestly easier for the cheesecake layer because you’re mixing a small amount and a stand mixer’s paddle can struggle to reach the bottom of the bowl. I’ve made these with a whisk and strong arms too, but the mixer saves time.
- Large mixing bowl — for the crust mixture
- Medium mixing bowl — for the cheesecake filling
- Rubber spatula — get a good one; the cheap ones bend too much and leave streaks of unmixed filling
- Sharp knife — for clean slices; run it under hot water and wipe between cuts for the neatest edges
If you don’t have parchment paper, you can grease the pan thoroughly with butter and dust it with flour, but the bars will be harder to remove cleanly. I once forgot parchment and spent fifteen minutes coaxing the first bar out with a butter knife. Not my finest moment. The parchment sling is worth the small effort.
Preparation Method
Let me walk you through this step by step. The whole process takes about 20 minutes of active work, then the oven handles the rest. Take your time with the cream cheese — it needs to be properly soft or you’ll end up with lumps.
- Preheat and prep the pan. Preheat your oven to 350°F (175°C). Cut two strips of parchment paper, each about 8 inches wide and 14 inches long. Lay one strip across the pan from left to right, and the other from front to back, pressing them into the corners. The overhang on all four sides is your sling. Set the pan aside.
- Bloom the spices. In a small saucepan or microwave-safe bowl, melt the 113g (1/2 cup) of butter. Add the ground ginger, cinnamon, and cloves directly to the warm butter. Stir and let it sit for 1 minute. This step wakes up the spices and makes them taste toasty and aromatic rather than raw. You’ll smell the difference immediately — it’ll smell like a gingerbread house.
- Mix the wet crust ingredients. In a large bowl, whisk together the melted butter-spice mixture, 120ml (1/2 cup) molasses, 100g (1/2 cup packed) brown sugar, 1 egg, and 1 teaspoon vanilla. Whisk until smooth and glossy. The mixture will look dark and almost liquid. That’s correct.
- Add the dry crust ingredients. Add 200g (1 2/3 cups) flour, 1/2 teaspoon baking soda, and 1/4 teaspoon salt to the wet mixture. Fold with a rubber spatula until just combined. Do not overmix — a few streaks of flour are okay. Overmixing makes the crust tough. The batter will be thick and slightly sticky, like a soft cookie dough.
- Press the crust into the pan. Transfer the crust mixture to your prepared pan. Use a spatula or your lightly dampened fingers to press it evenly into the bottom. Press it all the way to the edges and into the corners. The layer should be even, about 1/4-inch thick. Don’t worry if it looks thin — it will puff slightly as it bakes.
- Bake the crust. Place the pan in the preheated oven and bake for 10 minutes. The crust will look set and slightly puffed but not browned. Remove it from the oven and let it cool on a wire rack for 10 minutes while you make the filling. Leave the oven on.
- Make the cheesecake filling. In a medium bowl, beat the softened cream cheese with an electric hand mixer on medium speed until smooth and completely lump-free, about 2 minutes. Scrape down the sides and bottom of the bowl with a spatula. Add 100g (1/2 cup) granulated sugar and beat for another minute until light and fluffy.
- Add the eggs. Add the eggs one at a time, beating on low speed after each just until incorporated. Overbeating at this stage adds too much air and can cause cracks later. After the second egg, the mixture should look smooth and slightly glossy.
- Finish the filling. Add 60ml (1/4 cup) sour cream, 1 teaspoon vanilla, 15g (2 tablespoons) flour, and a pinch of salt. Beat on low until just combined. Scrape the bowl one more time and give it a few gentle folds with the spatula to catch anything the mixer missed. The filling should be silky and pourable.
- Assemble the bars. Pour the cheesecake filling over the pre-baked crust. Use the spatula to spread it evenly to the edges. Tap the pan gently on the counter a few times to release any air bubbles. Don’t skip this — trapped air creates uneven spots as the bars bake.
- Bake the bars. Place the pan back in the oven and bake for 25 to 30 minutes. The edges should look set and slightly puffed, but the center should still jiggle slightly when you gently shake the pan. A toothpick inserted near the center should come out with a few moist crumbs, not wet batter. Overbaking is the main cause of cracks, so err on the side of slightly underdone.
- Cool completely. Place the pan on a wire rack and let the bars cool at room temperature for 1 hour. Then cover loosely with plastic wrap and refrigerate for at least 4 hours, or overnight. Chilling is essential — the bars need this time to set properly for clean slicing.
- Slice and serve. Once fully chilled, lift the bars out of the pan using the parchment sling. Place on a cutting board and use a sharp knife to slice into 16 squares (4 rows by 4 rows). For the cleanest cuts, wipe the knife clean between each slice. Serve cold or at room temperature with a dollop of whipped cream and a dusting of cinnamon.
Cooking Tips & Techniques
I’ve made these bars more times than I can count, and I’ve learned a few things the hard way so you don’t have to. Here are the tips that make the biggest difference.
Room temperature ingredients matter more than you think. Cold cream cheese creates lumps that no amount of beating will fully smooth out. Cold eggs can seize the filling and make it grainy. Take both out of the fridge 30 to 45 minutes before you start. If you forget, cut the cream cheese into cubes and microwave it at 50% power in 10-second bursts until it feels soft to the touch — not hot, just yielding.
The water bath is optional. Unlike a full cheesecake, these bars don’t need a water bath because the crust provides stability and the shallow layer of filling bakes evenly. But if you want extra insurance against cracking, place a shallow pan of hot water on the bottom rack of the oven while the bars bake. The steam keeps the surface from drying out too quickly.
Don’t overmix the crust. I learned this one the hard way after making a batch that came out tough and almost bread-like. The molasses and butter create a tender crumb, but overworking the flour develops gluten and ruins that soft texture. Mix until you don’t see dry flour anymore, then stop. A few streaks are fine.
Watch for the jiggle. The biggest mistake people make is overbaking the cheesecake layer. The center should still wobble when you gently shake the pan at the 25-minute mark. If it looks completely firm, you’ve gone too far. Carryover cooking will finish setting the center as the bars cool. I once left a pan in for 35 minutes because I was distracted by a phone call, and the result was a dense, cracked top that still tasted good but wasn’t nearly as pretty.
Patience with chilling is non-negotiable. I know it’s hard to wait when your kitchen smells like gingerbread and vanilla. But slicing these bars too early is like trying to cut warm fudge — you’ll get a mess. Four hours minimum in the fridge, overnight is better. The filling firms up and the flavors meld together in a way that’s noticeably better the next day.
Variations & Adaptations
One of the things I love about this recipe is how adaptable it is. Here are a few ways to make it your own based on what you have or who you’re feeding.
Gluten-Free Version: Substitute the all-purpose flour in both the crust and filling with a good 1:1 gluten-free baking flour blend. I’ve had excellent results with King Arthur Measure for Measure. The crust will be slightly more crumbly, so press it firmly into the pan and chill it for 10 minutes before the initial bake. The texture is still lovely — just a little more delicate.
Spice It Up or Down: Not everyone loves cloves as much as I do. If you’re making these for a crowd with varied tastes, reduce the cloves to 1/4 teaspoon and add an extra 1/4 teaspoon of ginger or a pinch of nutmeg instead. For a bolder spice profile, add 1/4 teaspoon of cardamom and a pinch of black pepper. The pepper doesn’t make it spicy in the heat sense — it just adds a subtle warmth that deepens the gingerbread flavor.
Chocolate-Gingerbread Swirl: This is my personal favorite variation. Before pouring the cheesecake filling over the crust, melt 60g (1/2 cup) of dark chocolate chips and let it cool slightly. Dollop the chocolate over the cheesecake filling and use a knife to swirl it gently. You’ll get these beautiful ribbons of chocolate running through the creamy layer. It’s a little extra work but very impressive on a holiday dessert table.
Dairy-Free Adaptation: Use a plant-based cream cheese alternative (Miyoko’s is my top choice for texture), coconut cream instead of sour cream, and vegan butter in the crust. The texture will be slightly less firm, so chill the bars for a full 8 hours before slicing. The flavor is still fantastic — the gingerbread does most of the heavy lifting anyway.
Mini Bar Version: Press the crust into a lined 8×8 pan and bake for 8 minutes instead of 10. Pour the filling over and bake for 18 to 20 minutes. You’ll get 9 slightly thicker bars that are perfect for gifting. I like to wrap them individually in parchment and tie with kitchen twine for a homemade holiday gift that looks thoughtful without requiring a lot of fuss.
Serving & Storage Suggestions
These bars are flexible when it comes to serving, which is exactly what you need during the chaotic holiday season. Here’s how to handle them from the fridge to the table.
Serving Temperature: I prefer these bars cold, straight from the fridge, when the cheesecake layer is firm and the gingerbread crust is dense and fudgy. But they’re also lovely at room temperature, where the texture softens and the spices bloom a bit more. If you’re serving them at a party, let them sit out for 15 to 20 minutes before slicing. That takes the chill off without making them too soft.
Presentation Ideas: A simple dusting of powdered sugar and a dollop of lightly sweetened whipped cream is all you really need. For a more dressed-up look, add a few pieces of crystallized ginger on top and a light grating of fresh nutmeg. If you’re feeling extra festive, drizzle a little caramel sauce over the plate before setting the bar on top. The caramel and gingerbread combination is genuinely magical.
What to Serve Alongside: These bars pair beautifully with a cup of strong coffee or a chai latte. For a dessert spread, I like to serve them alongside a plate of simple butter cookies and a bowl of fresh cranberry sauce for contrast. They also work well on a cookie tray — just cut them smaller, into 20 or 24 pieces, so they fit in with the other sweets.
Storage Instructions: Store the bars in an airtight container in the refrigerator for up to 5 days. Layer them between sheets of parchment paper so they don’t stick together. The flavor actually improves after day two — the spices settle and the cheesecake layer firms up beautifully.
Freezing: These bars freeze exceptionally well. Once fully chilled and sliced, arrange them in a single layer on a baking sheet and freeze for 1 hour. Then transfer the frozen bars to a freezer-safe container or zip-top bag, layering parchment between them. They’ll keep for up to 3 months. To serve, thaw in the refrigerator overnight or at room temperature for about 30 minutes.
Reheating: I don’t recommend reheating these bars. The cheesecake layer is meant to be served cold or at room temperature. If you want a warm dessert, try warming just the gingerbread crust side briefly under the broiler for 30 seconds — but honestly, they’re better cold.
Nutritional Information & Benefits
Let’s be real — these are a holiday dessert, not a health food. But that doesn’t mean they can’t fit into a balanced approach to eating, especially when you’re mindful of portions.
Estimated Nutritional Values (per bar, based on 16 servings):
- Calories: 285
- Total Fat: 17g
- Saturated Fat: 10g
- Cholesterol: 75mg
- Sodium: 180mg
- Total Carbohydrates: 30g
- Dietary Fiber: 0.5g
- Sugars: 20g
- Protein: 4g
Health Highlights: The molasses in the crust is actually a decent source of iron, magnesium, and calcium — it’s one of the few sweeteners that offers more than empty calories. The ginger in the spice blend is known for its anti-inflammatory properties and can help with digestion after a heavy holiday meal. And the cream cheese provides some calcium and protein, though it’s mostly there for the creamy texture we all love.
Dietary Considerations: This recipe contains gluten (from the flour), dairy (from the butter, cream cheese, and sour cream), and eggs. For gluten-free and dairy-free options, check the variations section above. These bars are not suitable for vegans as written, but the dairy-free adaptation gets close. They are nut-free, which makes them a safe choice for school or office holiday parties where nut allergies are a concern.
My Personal Take: I don’t believe in demonizing dessert. The holidays are a time for celebration and connection, and food is part of that. These bars are rich and indulgent, but one bar satisfies a sweet craving completely — I’ve never seen anyone go back for a third. They’re the kind of treat you can enjoy without guilt, especially when you’re sharing them with people you love.
Conclusion
These cozy gingerbread cheesecake bars for the holidays have become my most-requested dessert for December gatherings, and I think I finally understand why. They hit that sweet spot between familiar and surprising — everyone knows gingerbread, everyone knows cheesecake, but putting them together feels like discovering something new. The spicy, tender crust and the cool, creamy filling work together in a way that’s greater than the sum of their parts.
What I love most about this recipe is how forgiving it is. You don’t need to be a pastry chef to pull these off. You just need good ingredients, a little patience for the chilling step, and the willingness to share. Because honestly, these bars taste better when you’re passing them across a table to someone who’s about to take their first bite and discover something wonderful.
I’d love to hear how yours turn out. Did you try one of the variations? Add your own twist? Leave a comment below and tell me about it — those stories are my favorite part of running this blog. And if you make these for a holiday gathering, tag me in your photos. Nothing makes me happier than seeing these bars on your table.
Now go preheat that oven. The holidays are waiting, and these bars aren’t going to bake themselves.
Frequently Asked Questions
Can I make these gingerbread cheesecake bars ahead of time?
Absolutely. In fact, I recommend it. These bars need at least 4 hours of chilling time, but they’re even better after a full day in the fridge. You can make them up to 3 days in advance and store them covered in the refrigerator. They also freeze beautifully for up to 3 months — just thaw overnight in the fridge before serving.
Why did my cheesecake layer crack on top?
Cracking usually happens for one of two reasons: overbaking or overmixing. If the center is completely firm when you take the pan out of the oven, you’ve baked it too long. Next time, pull it when the center still jiggles slightly. Overmixing the filling after adding the eggs also introduces too much air, which expands and then collapses in the oven, causing cracks. Mix on low speed and stop as soon as the eggs are incorporated.
Can I use a different size pan?
Yes, but the baking time will change. For a 9×13-inch pan, the layers will be thinner and the bars will bake in about 18 to 22 minutes. For an 8×8-inch pan, the bars will be thicker and need about 30 to 35 minutes. In any case, use the jiggle test to determine doneness rather than relying solely on time.
Can I substitute the molasses with something else?
Molasses is essential for the gingerbread flavor, but if you’re in a pinch, you can use dark corn syrup or maple syrup. The flavor will be noticeably different — lighter, less complex, and sweeter — but the texture will still work. If you use maple syrup, reduce the brown sugar by 2 tablespoons since maple syrup is sweeter than molasses.
How do I get clean, neat slices?
The secret is patience and a sharp knife. Chill the bars for the full 4 hours minimum — overnight is better. Use a long, sharp knife and run it under hot water, then dry it off, before each cut. Wipe the blade clean between slices. This prevents the cheesecake from dragging and gives you those beautiful, clean edges that look so professional on a platter.
Pin This Recipe!
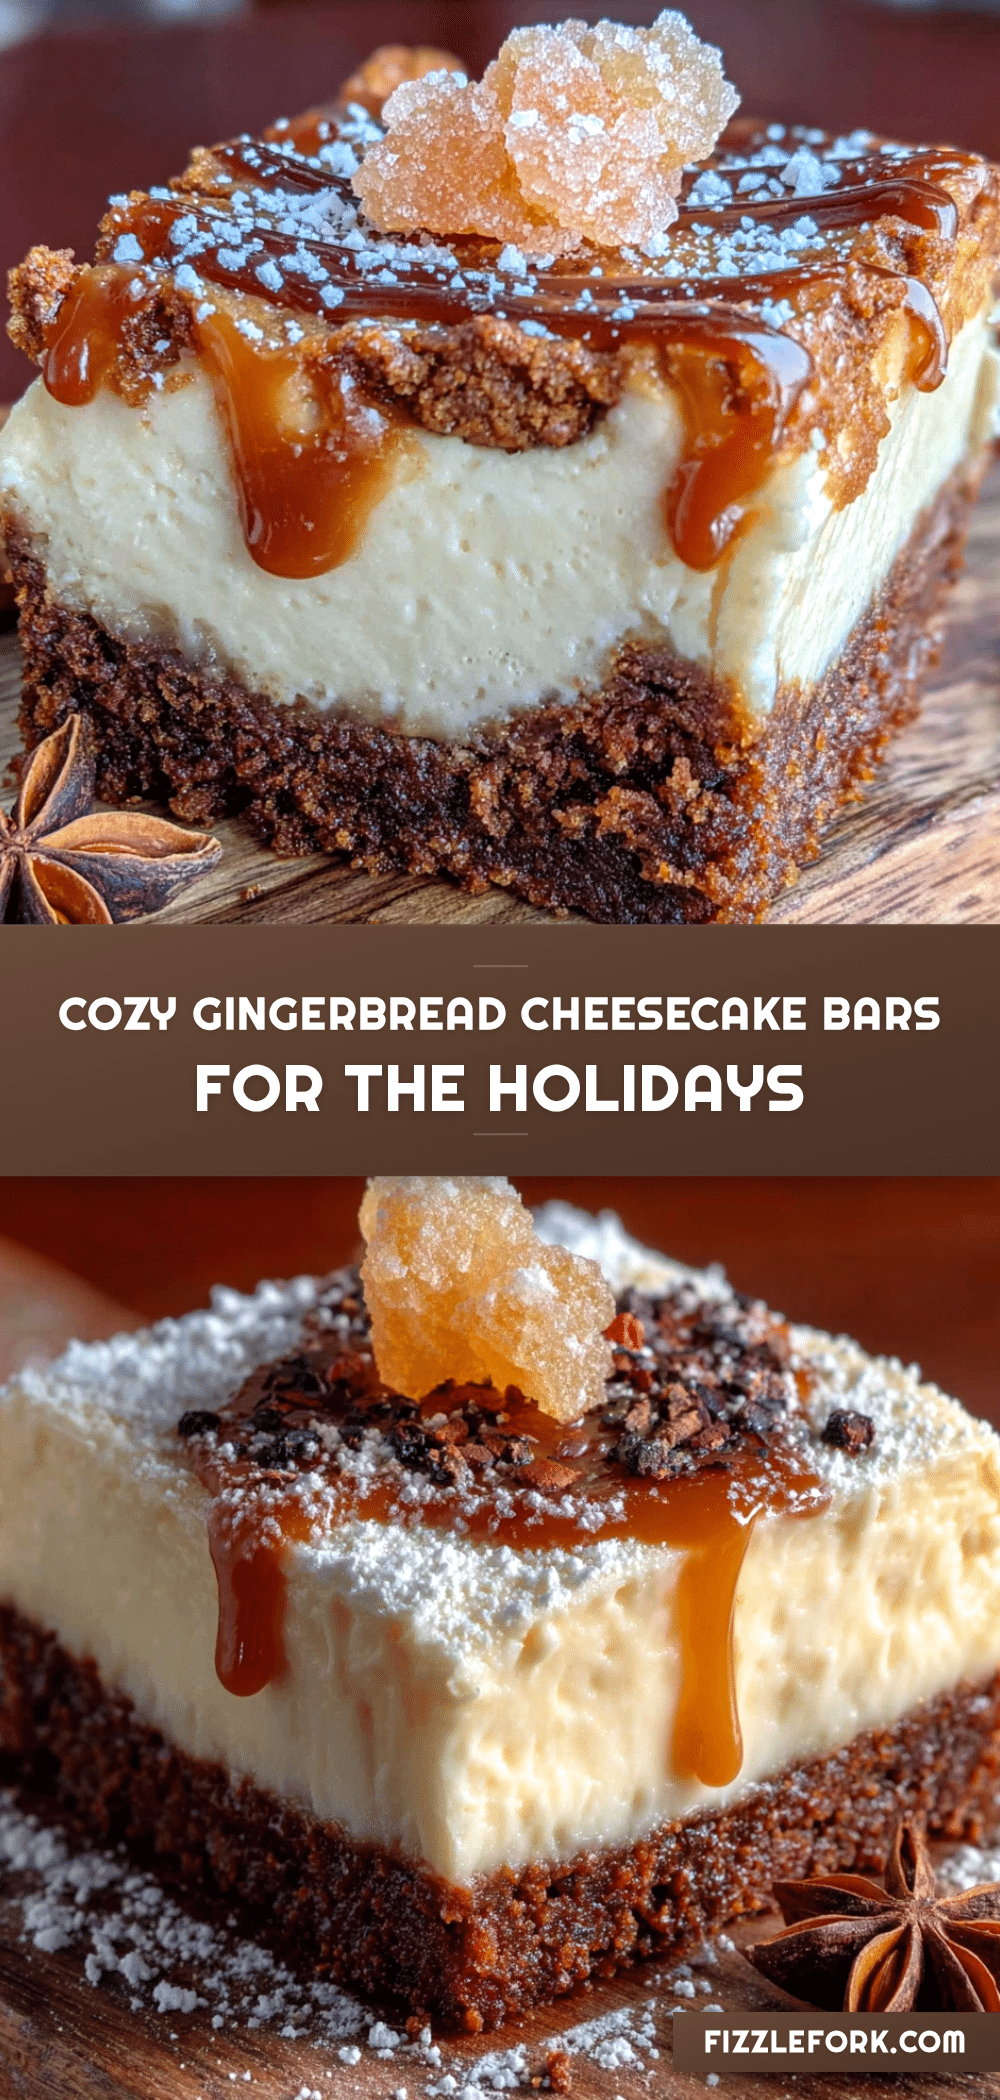
Cozy Gingerbread Cheesecake Bars: Easy Holiday Dessert
These cozy gingerbread cheesecake bars combine a spicy, dark gingerbread crust with a silky cream cheese filling for the perfect holiday dessert. Quick and easy to make with no water bath required, they’re a crowd-pleaser that travels well and slices cleanly.
- Prep Time: 20 minutes
- Cook Time: 35 minutes
- Total Time: 5 hours (including chilling)
- Yield: 16 bars 1x
- Category: Dessert
- Cuisine: American
Ingredients
- For the Gingerbread Crust:
- 200g (1 2/3 cups) all-purpose flour, spooned and leveled
- 113g (1/2 cup or 1 stick) unsalted butter, melted
- 120ml (1/2 cup) molasses (blackstrap preferred for deeper flavor)
- 100g (1/2 cup, packed) light brown sugar
- 2 teaspoons ground ginger
- 1 1/2 teaspoons ground cinnamon
- 1/2 teaspoon ground cloves
- 1/2 teaspoon baking soda
- 1/4 teaspoon fine sea salt
- 1 large egg, at room temperature
- 1 teaspoon pure vanilla extract
- For the Cheesecake Layer:
- 452g (two 8-ounce blocks) full-fat cream cheese, softened
- 100g (1/2 cup) granulated sugar
- 2 large eggs, at room temperature
- 60ml (1/4 cup) full-fat sour cream
- 1 teaspoon pure vanilla extract
- 15g (2 tablespoons) all-purpose flour
- Pinch of salt
- For the Optional Topping:
- Whipped cream, for serving
- Ground cinnamon, for dusting
- Crystallized ginger, finely chopped, for garnish
Instructions
- Preheat your oven to 350°F (175°C). Cut two strips of parchment paper, each about 8 inches wide and 14 inches long. Lay one strip across a 9×9-inch square baking pan from left to right, and the other from front to back, pressing them into the corners to create a sling. Set aside.
- In a small saucepan or microwave-safe bowl, melt the 113g (1/2 cup) of butter. Add the ground ginger, cinnamon, and cloves directly to the warm butter. Stir and let it sit for 1 minute to bloom the spices.
- In a large bowl, whisk together the melted butter-spice mixture, 120ml (1/2 cup) molasses, 100g (1/2 cup packed) brown sugar, 1 egg, and 1 teaspoon vanilla until smooth and glossy.
- Add 200g (1 2/3 cups) flour, 1/2 teaspoon baking soda, and 1/4 teaspoon salt to the wet mixture. Fold with a rubber spatula until just combined. Do not overmix.
- Transfer the crust mixture to the prepared pan. Use a spatula or lightly dampened fingers to press it evenly into the bottom, all the way to the edges and into the corners. The layer should be about 1/4-inch thick.
- Bake the crust for 10 minutes until set and slightly puffed but not browned. Remove from the oven and let cool on a wire rack for 10 minutes while you make the filling. Leave the oven on.
- In a medium bowl, beat the softened cream cheese with an electric hand mixer on medium speed until smooth and completely lump-free, about 2 minutes. Scrape down the sides and bottom of the bowl. Add 100g (1/2 cup) granulated sugar and beat for another minute until light and fluffy.
- Add the eggs one at a time, beating on low speed after each just until incorporated. Do not overbeat.
- Add 60ml (1/4 cup) sour cream, 1 teaspoon vanilla, 15g (2 tablespoons) flour, and a pinch of salt. Beat on low until just combined. Scrape the bowl and give it a few gentle folds with a spatula.
- Pour the cheesecake filling over the pre-baked crust. Spread it evenly to the edges. Tap the pan gently on the counter a few times to release any air bubbles.
- Bake for 25 to 30 minutes. The edges should look set and slightly puffed, but the center should still jiggle slightly when you gently shake the pan. A toothpick inserted near the center should come out with a few moist crumbs, not wet batter.
- Place the pan on a wire rack and let the bars cool at room temperature for 1 hour. Then cover loosely with plastic wrap and refrigerate for at least 4 hours, or overnight.
- Once fully chilled, lift the bars out of the pan using the parchment sling. Place on a cutting board and use a sharp knife to slice into 16 squares (4 rows by 4 rows). Wipe the knife clean between each slice. Serve cold or at room temperature with a dollop of whipped cream and a dusting of cinnamon.
Notes
Room temperature ingredients are crucial for a smooth filling. The water bath is optional but can help prevent cracking. Do not overbake; the center should still jiggle slightly when done. Chilling for at least 4 hours (preferably overnight) is essential for clean slicing. For gluten-free, use a 1:1 gluten-free flour blend. For dairy-free, use plant-based cream cheese, coconut cream, and vegan butter.
Nutrition
- Serving Size: 1 bar
- Calories: 285
- Sugar: 20
- Sodium: 180
- Fat: 17
- Saturated Fat: 10
- Carbohydrates: 30
- Fiber: 0.5
- Protein: 4
Keywords: gingerbread cheesecake bars, holiday dessert, easy cheesecake bars, gingerbread dessert, Christmas dessert, cream cheese bars, molasses dessert


