This was supposed to be a fancy layered chocolate mousse. I had the good ramekins out, the expensive dark chocolate, the whole plan. But somewhere between the kids asking for snacks for the third time and me answering a text from my sister, I grabbed the instant pudding mix instead of the cocoa powder. The power didn’t go out, but my cooking confidence sure did for a second there. I stared at the box in my hand, already committed, and felt that familiar wave of “well, this is going to be a disaster” wash over me.
I mean, I had already promised the kids we would make something fun for Halloween. They had been asking all week. And here I was, holding a box of instant pudding instead of the fancy ingredients I had planned. Honestly, I almost just ordered pizza and called it a night. But I had the crushed Oreos from a baking project earlier, and the gummy worms were sitting in the pantry from a grocery run two weeks ago. You know that feeling when you just go with it because you are too tired to pivot? That was me.
So I made the pudding, crushed the cookies, and threw it all together in some clear plastic cups I found under the sink. I figured we would eat it and move on. But when my youngest saw the layers of dark “dirt” and the gummy worms poking out, her face lit up. She called it a graveyard. And honestly, it was better than anything I could have planned. The creamy pudding, the crunchy cookie crumble, the silly little decorations — it worked. It was fast, it was fun, and nobody missed the fancy mousse. That night, sitting on the kitchen floor with chocolate smeared on three little faces, I realized this was the recipe that would stick. Not the one I had planned, but the one that actually happened.
Why You’ll Love This Recipe
Let me tell you why these spooky graveyard dirt pudding cups have become my go-to for Halloween. First off, they come together in under 15 minutes. I am not exaggerating. If you can whisk and crumble, you can make this. No oven required, no complicated techniques, and definitely no stress. That is a win in my book, especially on a busy weeknight when the kids are bouncing off the walls with Halloween excitement.
- Quick & Easy : From start to finish, you are looking at about 15 minutes of active work. The rest is just chilling time in the fridge. Perfect for those nights when you promised a treat but ran out of steam.
- Simple Ingredients : Instant chocolate pudding, milk, Oreos, and some gummy worms. That is it. You probably have most of these in your pantry right now. No fancy grocery store trips needed.
- Perfect for Halloween Parties : These little cups are a hit at school parties, family gatherings, or just a fun Friday night treat. Kids love them, and adults secretly love them too.
- Crowd-Pleaser : I have yet to meet a kid who turns down chocolate pudding and crushed cookies. It is basically a guaranteed win.
- Unbelievably Customizable : You can go spooky, silly, or elegant. Add candy bones, ghost Peeps, or just keep it simple with worms. It works every time.
What makes this different from other dirt pudding recipes? It is the texture. I use a specific ratio of pudding to milk that gives you a creamy, not-too-runny base. And the Oreo crumble? I leave some chunks in there for that satisfying crunch. It is not just another version — it is the version that actually works for real life. The one that lets you feel like a Halloween hero without breaking a sweat.
This recipe is the kind that makes you close your eyes after the first bite. It is comfort food reimagined — faster, simpler, but with the same soul-soothing satisfaction. Perfect for impressing the kids without stress, or turning a regular Tuesday into something a little spooky and fun.
What Ingredients You Will Need
This recipe uses simple, store-bought ingredients to deliver maximum fun with minimum fuss. No weird stuff here — just the good old classics that make everyone happy.
- 1 (3.9 oz) box instant chocolate pudding mix (I recommend Jell-O brand for consistent results. The cook-and-serve version will not work the same, so stick with instant.)
- 2 cups cold whole milk (You can use 2% or even oat milk in a pinch. The pudding will be slightly less creamy, but it still sets up fine. For the best texture, go with whole milk.)
- 1 (14.3 oz) package Oreo cookies (Regular or Double Stuf both work. You will use about 20 cookies for the crumble. Save a few for crushing on top later if you want extra crunch.)
- 1 cup gummy worms (I like the sour ones for a little tangy kick against the sweet pudding. Trolli or Black Forest both work great. You can also use gummy spiders or bugs.)
- Optional decorations : Candy bones, ghost Peeps, green colored coconut flakes for “grass,” or small tombstone cookies. These are purely for fun and totally optional.
For the pudding, make sure your milk is cold. I learned this the hard way — warm milk makes the pudding clumpy and weird. Take it straight from the fridge. If you are using a dairy-free milk, check the label. Some plant-based milks have a thinner consistency and might need a little less liquid. Start with 1 3/4 cups and add more if needed.
The Oreos are the star of the dirt layer. I have tried using chocolate wafer cookies or even brownie crumbles, but nothing beats the classic Oreo. The cream filling adds a subtle sweetness that balances the dark cocoa flavor. For a fun twist, you can use the Halloween-themed Oreos with orange filling. They look extra festive, and the taste is the same.
Gummy worms are non-negotiable in my house. My kids would riot if I tried to skip them. But if you have a gummy aversion, you can use candy corn, chocolate spiders, or even just a sprinkle of orange and black sprinkles. The point is to make it spooky and fun.
Equipment Needed
You do not need much for this recipe, which is part of the beauty. Here is what you will need:
- Large mixing bowl (Any bowl works. I use my grandmother’s old Pyrex bowl because it feels right, but a plastic one from the dollar store does the same job.)
- Whisk (A hand whisk is fine. If you have an electric mixer, you can use it on low speed, but honestly, whisking by hand takes two minutes and saves on cleanup.)
- Measuring cups (For the milk. A liquid measuring cup is best for accuracy.)
- Ziploc bag or rolling pin (For crushing the Oreos. You can also use a food processor, but I find the bag method more satisfying and less messy. Plus, the kids love helping with this part.)
- Clear plastic cups or small glass jars (The clear cups let you see the layers, which is half the fun. I use 7-ounce cups. You can also use small mason jars or even disposable shot glasses for mini versions.)
- Spatula (For scraping every last bit of pudding. Waste not, want not.)
- Refrigerator (For chilling. You need at least 30 minutes, but an hour is better.)
If you do not have a Ziploc bag, you can put the Oreos between two sheets of wax paper and crush them with a heavy pan. It works, but it is a little messier. The food processor is the fastest option, but it can turn the cookies into dust if you are not careful. Pulse, do not hold down the button.
Preparation Method
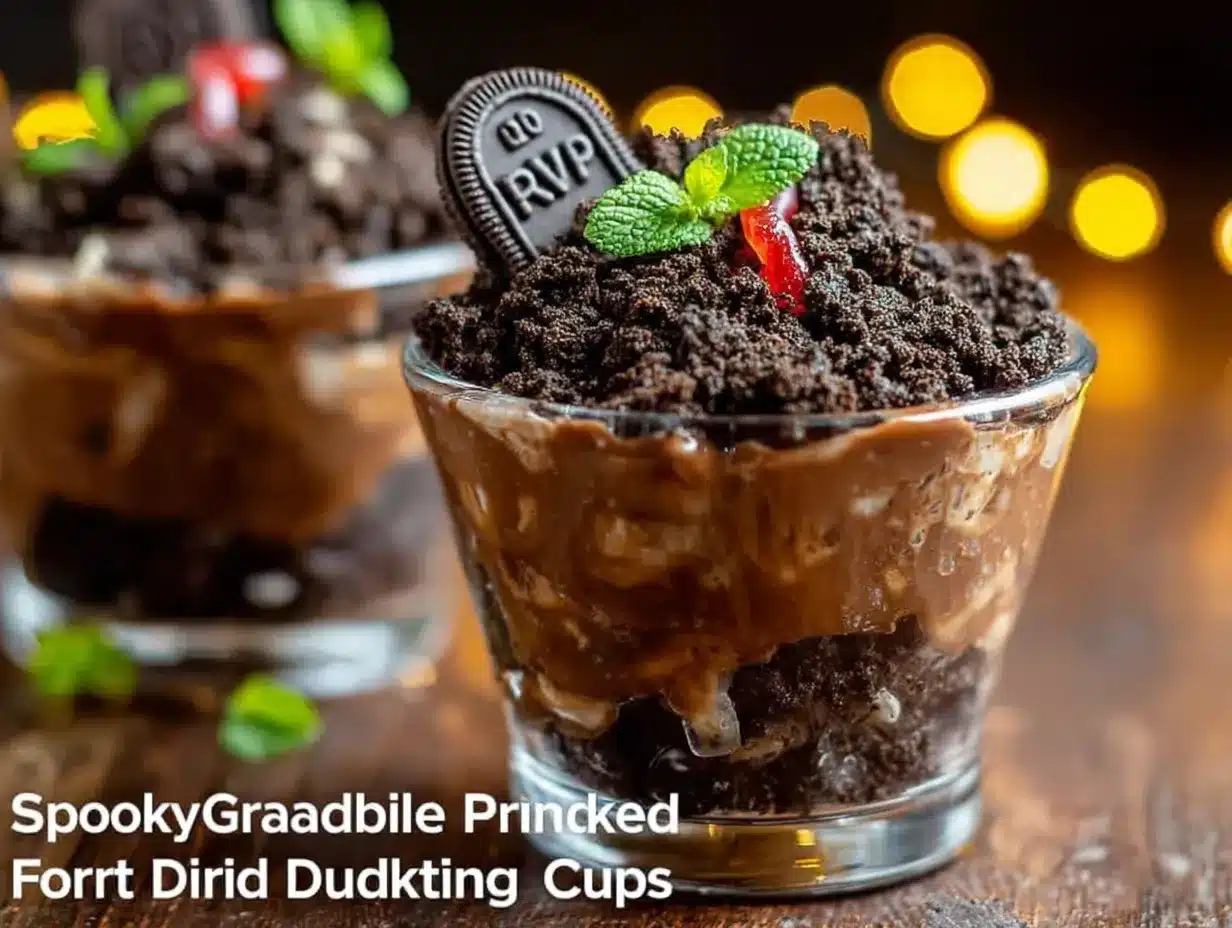
Alright, let us get to the fun part. Follow these steps, and you will have spooky graveyard dirt pudding cups in no time.
- Make the pudding. In your large mixing bowl, pour the instant chocolate pudding mix. Add the 2 cups of cold milk. Whisk vigorously for about 2 minutes until the mixture thickens. It will start off thin, but keep whisking. You will feel it get heavier. That is the magic of instant pudding. Let it sit for 5 minutes to fully set. (Pro tip: If you are using a dairy-free milk, let the pudding sit for an extra 2-3 minutes. Some alternatives take longer to thicken.)
- Crush the Oreos. While the pudding is setting, grab your Oreos. Place about 20 cookies in a large Ziploc bag. Seal it tight, squeezing out the air. Now, go to town. Use a rolling pin, a heavy pan, or even your fists. You want a mix of fine crumbs and small chunks. Some people like a uniform crumb, but I prefer texture. Leave some pea-sized pieces for that satisfying crunch. (Warning: This step is loud. If the kids are asleep, you might want to use a food processor instead.)
- Layer the cups. Take your clear cups or jars. Start with a layer of crushed Oreos at the bottom — about 2 tablespoons per cup. This is the “dirt” base. Then, spoon or pipe the pudding on top. Fill each cup about three-quarters full. You want enough room for the topping and decorations. Use a spatula to level the pudding. Tap the cup gently on the counter to settle the layers.
- Add the dirt topping. Sprinkle another generous layer of crushed Oreos on top of the pudding. This is the surface of your graveyard. Make it thick enough to hide the pudding completely. You want it to look like real dirt. (I usually use about 3 tablespoons per cup for the top layer.)
- Decorate the graveyard. Now for the fun part. Stick gummy worms into the dirt so they look like they are crawling out. Push them in at different angles — some deep, some halfway. You can add candy bones, ghost Peeps, or small tombstone cookies. If you are using green coconut flakes for grass, sprinkle them around the edges. Let your creativity run wild. (One year, my son added a tiny plastic skeleton hand. It was terrifying and hilarious.)
- Chill and serve. Place the cups in the refrigerator for at least 30 minutes. This lets the flavors meld and the pudding set completely. If you are in a rush, 15 minutes works, but the texture is better with a longer chill. Serve cold straight from the fridge. The contrast between the cold, creamy pudding and the crunchy Oreo is perfection.
One thing I learned the hard way — do not assemble these too far in advance. The Oreo crumbs will eventually get soggy from the moisture in the pudding. If you are making them for a party, assemble them no more than 4 hours ahead. You can prep the pudding and crumbs separately the night before and layer them right before serving.
Cooking Tips & Techniques
I have made these dirt pudding cups more times than I can count, and I have learned a few things along the way. Let me share so you do not make the same mistakes I did.
First, the pudding consistency is everything. If your pudding is too runny, it will soak into the Oreo crumbs and turn everything into a brown mush. The fix is simple — let the pudding set for the full 5 minutes before layering. And use cold milk. I cannot stress this enough. Warm milk will give you a sad, soupy mess. If you accidentally use warm milk, pop the bowl in the fridge for 10 minutes before assembling.
Second, the Oreo crush matters. If you grind them into a fine powder, it looks like dirt but lacks texture. If you leave them too chunky, they do not look like soil. Aim for a mix of fine crumbs and small pebbles. I like to crush about three-quarters of the cookies finely and then add a few roughly crushed ones for texture. It gives that authentic “digging in the garden” feel.
Third, do not overfill the cups. Leave about half an inch of space at the top. This gives you room to decorate without making a mess. Trust me, nothing is worse than a gummy worm that falls off because the cup is too full. I learned this when my nephew tried to stick a worm in and it launched across the kitchen. We found it three days later under the fridge.
Fourth, if you are making these for a party, set up a decorating station. Let the kids (or adults) add their own gummy worms and decorations. It is a great activity and takes the pressure off you. Plus, everyone gets to customize their own graveyard. My sister-in-law made these for a Halloween potluck, and people were taking photos of their creations. It was adorable.
Finally, if you want a cleaner look, use a piping bag or a Ziploc with the corner snipped off to add the pudding. This keeps the sides of the cup clean so you can see the beautiful layers. If you do not care about presentation (and honestly, sometimes I do not), just spoon it in. It tastes the same either way.
Variations & Adaptations
One of the best things about this recipe is how easy it is to change up. Here are some variations I have tried and loved.
Dairy-Free Version : Use a plant-based milk like oat or almond milk with a dairy-free instant pudding mix. I have tried this with oat milk, and it works beautifully. The texture is slightly less creamy, but the flavor is still spot on. Use vegan Oreos (the original ones are actually vegan) and skip the gummy worms if they contain gelatin. You can find vegan gummy worms at most health food stores.
Peanut Butter Twist : Add a layer of peanut butter between the Oreo crust and the pudding. Just warm up a few tablespoons of peanut butter in the microwave for 15 seconds and drizzle it over the crumbs. It adds a salty, nutty flavor that pairs perfectly with the chocolate. My husband calls these “Reese’s graveyard cups,” and they disappear fast.
Mint Chocolate Version : Use mint-flavored Oreos (the ones with green filling) and add a drop of peppermint extract to the pudding. Top with a few Andes mints for a refreshing twist. This is my personal favorite for Christmas, but it works for Halloween too. The green filling looks like creepy slime.
Spicy Aztec : Add a pinch of cayenne pepper and a dash of cinnamon to the pudding mix before whisking. The heat sneaks up on you and pairs surprisingly well with the chocolate. I made these for a grown-up Halloween party, and they were a hit. Just be careful with the cayenne — a little goes a long way.
Mini Bite-Sized Cups : Use shot glasses or small plastic cups for a party platter. These are perfect for classroom parties or buffets. You can make about 24 mini cups from one batch. Kids love the tiny size, and it keeps the mess manageable.
If you are feeling adventurous, try adding a layer of chocolate mousse instead of pudding. It takes more time, but the texture is incredible. I did this once for a fancy dinner party, and people thought I had spent hours on it. Little did they know it was still mostly Oreos and gummy worms.
Serving & Storage Suggestions
These spooky graveyard dirt pudding cups are best served cold. Take them straight from the fridge and serve immediately. The contrast between the chilled pudding and the crunchy Oreo topping is what makes them so satisfying. If they sit out too long, the crumbs will soften, and the worms might get a little sticky.
For presentation, arrange the cups on a platter with some fake spider webs or plastic spiders around them. It makes for a great centerpiece at a Halloween party. I like to put a few extra gummy worms on the platter for snacking. You can also add a small sign that says “Enter if you dare” or “Beware of the Graveyard.” It is a small touch that makes a big impression.
These pair well with hot apple cider, pumpkin spice lattes, or even a glass of cold milk. For a grown-up version, serve them with a dark beer or a bourbon cocktail. The chocolate and malt flavors complement the drink nicely.
As for storage, keep the cups in the refrigerator, covered with plastic wrap or lids. They will stay fresh for up to 3 days. After that, the Oreo crumbs start to get soggy, and the gummy worms lose their chewiness. If you want to prep ahead, make the pudding and crush the Oreos separately. Store them in the fridge and pantry, respectively, and assemble the cups the day you plan to serve them.
I do not recommend freezing these. The pudding will become watery when thawed, and the texture will be off. Trust me, I tried it once when I had leftovers. It was not worth it. Just make a smaller batch if you are worried about waste.
One more thing — the flavors actually get better after a few hours in the fridge. The Oreo crumbs absorb a little moisture and soften slightly, creating a more cohesive texture. So if you can, let them chill for at least an hour before serving. Your patience will be rewarded.
Nutritional Information & Benefits
Let us be real — this is a treat, not a health food. But I believe in knowing what you are eating so you can enjoy it without guilt. Here is the approximate nutritional breakdown for one serving (based on 6 cups):
| Nutrient | Amount Per Serving |
|---|---|
| Calories | 380 |
| Total Fat | 14g |
| Saturated Fat | 5g |
| Cholesterol | 10mg |
| Sodium | 450mg |
| Total Carbohydrates | 62g |
| Dietary Fiber | 2g |
| Sugars | 42g |
| Protein | 6g |
From a health perspective, there are a few bright spots. The milk provides calcium and vitamin D, which are good for bone health. The cocoa in the pudding and Oreos contains antioxidants called flavonoids, which have been linked to heart health. And if you use the sour gummy worms, you get a tiny bit of vitamin C. I am reaching here, I know, but every little bit counts.
If you are watching your sugar intake, you can use sugar-free pudding mix and sugar-free Oreos. The taste is slightly different, but it works. You can also cut the portion size in half by making mini cups. That way, you get the fun without overdoing it.
This recipe contains dairy, gluten, and soy. If you have allergies, check the labels on your pudding mix and Oreos. There are gluten-free chocolate sandwich cookies available, and dairy-free milk works as a substitute. Always read the ingredient list to be safe.
Conclusion
So there you have it — my accidental graveyard dirt pudding cups that turned into a Halloween tradition. This recipe is proof that sometimes the best things come from moments of chaos. I mean, I was one wrong ingredient away from ordering takeout, and instead, I stumbled onto something that makes my kids light up every time.
I hope you give these a try, whether it is for a Halloween party, a classroom treat, or just a random Tuesday that needs a little spooky fun. Customize them however you like — add more worms, skip the bones, or go wild with the decorations. That is the beauty of this recipe. It is forgiving, it is fast, and it is ridiculously fun.
If you make these, I would love to hear about it. Drop a comment below and tell me how your graveyard turned out. Did your kids help crush the Oreos? Did you add a secret ingredient? Share your spooky creations. And if you are looking for more easy Halloween treats, check out my Halloween puppy chow or these no-bake pumpkin cheesecake bites. They are just as easy and just as fun.
Until next time, happy haunting and happy eating!
Frequently Asked Questions
Can I use homemade chocolate pudding instead of instant?
Yes, you can. Just make sure it is fully cooled and thickened before layering. Homemade pudding is richer, but it takes more time. If you are in a rush, stick with instant.
How far in advance can I make these?
You can assemble them up to 4 hours ahead. Any longer, and the Oreo crumbs will get soggy. You can prep the components a day ahead and layer them the day of serving.
Can I use a different type of cookie?
Absolutely. Chocolate wafer cookies, gluten-free chocolate cookies, or even crushed brownies work. Just make sure they are dry and crumbly for that dirt-like texture.
What if I do not have clear cups?
You can use any small bowl or cup. The layers will not be visible, but it will taste the same. Mason jars, small ramekins, or even paper cups work fine.
Can I make these vegan?
Yes. Use a dairy-free milk and vegan instant pudding mix. Original Oreos are vegan. Look for vegan gummy worms made without gelatin. It is easy to adapt.
Pin This Recipe!
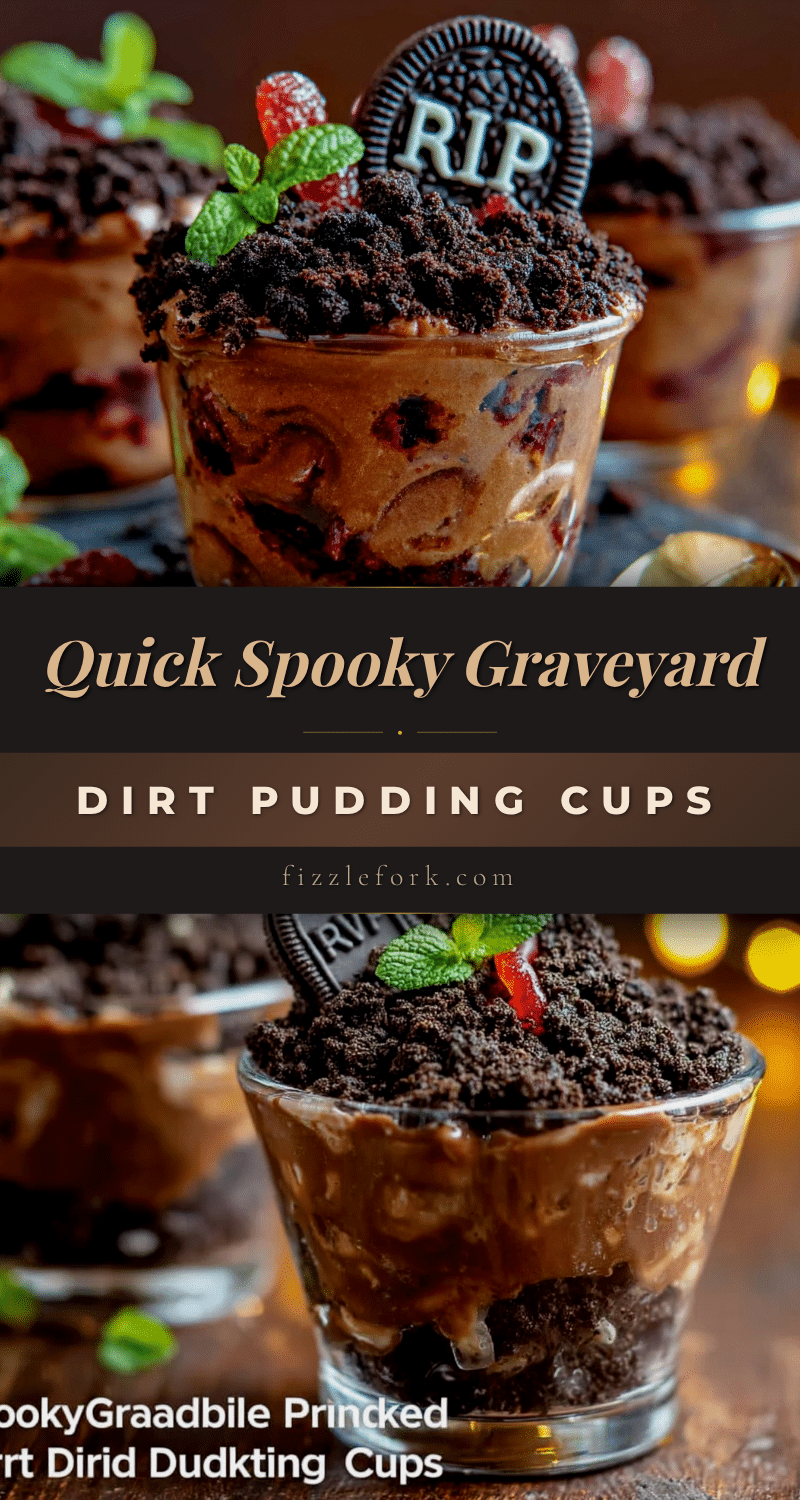
Best Spooky Graveyard Dirt Pudding Cups – Easy Recipe

These spooky graveyard dirt pudding cups are a quick and easy Halloween treat made with creamy chocolate pudding, crushed Oreos, and gummy worms. Perfect for parties or a fun family activity, they come together in under 15 minutes.
- Prep Time: 15 minutes
- Cook Time: 0 minutes
- Total Time: 45 minutes
- Yield: 6 servings 1x
- Category: Dessert
- Cuisine: American
Ingredients
- 1 (3.9 oz) box instant chocolate pudding mix
- 2 cups cold whole milk
- 1 (14.3 oz) package Oreo cookies (about 20 cookies)
- 1 cup gummy worms
- Optional decorations: candy bones, ghost Peeps, green colored coconut flakes, small tombstone cookies
Instructions
- Make the pudding: In a large mixing bowl, combine the instant chocolate pudding mix and 2 cups cold milk. Whisk vigorously for about 2 minutes until thickened. Let sit for 5 minutes to fully set.
- Crush the Oreos: Place about 20 Oreos in a large Ziploc bag. Seal and crush with a rolling pin or heavy pan until you have a mix of fine crumbs and small chunks.
- Layer the cups: In clear cups or jars, add a layer of crushed Oreos (about 2 tablespoons per cup) as the base. Spoon or pipe the pudding on top, filling each cup about three-quarters full. Tap gently to settle.
- Add the dirt topping: Sprinkle another generous layer of crushed Oreos (about 3 tablespoons per cup) on top of the pudding to completely cover it.
- Decorate the graveyard: Stick gummy worms into the dirt at different angles. Add optional decorations like candy bones, ghost Peeps, or green coconut flakes.
- Chill and serve: Refrigerate for at least 30 minutes (1 hour is better) before serving. Serve cold.
Notes
Do not assemble too far in advance (max 4 hours) to prevent soggy Oreo crumbs. Use cold milk for best pudding consistency. For a cleaner look, use a piping bag to add pudding. The flavors improve after a few hours in the fridge.
Nutrition
- Serving Size: 1 cup
- Calories: 380
- Sugar: 42
- Sodium: 450
- Fat: 14
- Saturated Fat: 5
- Carbohydrates: 62
- Fiber: 2
- Protein: 6
Keywords: Halloween dessert, dirt pudding, graveyard cups, chocolate pudding, Oreo dessert, no-bake, easy Halloween treat


