Liz wasn’t trying to impress anyone. I’d stopped by her place last October to drop off a slow cooker I’d borrowed, and the sight hit me before I even got past the front door. There, on a simple wooden board, sat a cluster of cheese cubes carved into tiny skulls, their grape “brains” peeking out from the top. She was standing in her kitchen in an old concert t-shirt, casually arranging them next to a pile of crackers like it was the most normal thing in the world.
“Oh, those?” she said when she caught me staring. “Just something quick for the kids’ Halloween party tomorrow.” Quick. She said it like it was nothing. But let me tell you, those little cheddar grape skulls were the most brilliant thing I’d seen all spooky season. I mean, who thinks of combining sharp cheddar with sweet grapes and turning them into something that looks like it belongs in a haunted house? Liz, apparently. And she wasn’t even trying to be clever about it.
I stood there for a solid minute just looking at the board. The contrast of the orange cheddar against the deep purple grapes, the way the skull shapes made everything feel festive without being over-the-top, and the fact that it all came together in maybe ten minutes—honestly, it stopped me cold. Maybe you’ve been there, where you see someone make something so simple yet so perfect that you feel a little silly for never thinking of it yourself.
I asked her how she did it, and she just shrugged and pointed to a tiny skull-shaped cookie cutter sitting in her drying rack. That was it. No special technique, no complicated recipe. Just a cutter, some good cheddar, and a handful of grapes. She said she’d seen something similar on Pinterest but wanted to make it her own. And that’s the thing about the best recipes, isn’t it? They come from people who aren’t trying to show off. They just make something good because it makes sense for the moment.
I’ve been making these spooky cheddar grape skulls every Halloween since that afternoon. They’re the first thing I put on any charcuterie board this time of year, and honestly, they get more attention than anything else. There’s something about a cheese skull that makes people smile—and then eat three of them before the party even starts.
Why You’ll Love This Recipe
Let’s be real for a second. Halloween food can be a mixed bag. You’ve got your creepy cupcakes that take three hours to decorate, your mummy hot dogs that fall apart, and then there’s this—a recipe that actually works without any stress. I’ve tested these spooky cheddar grape skulls at four different Halloween gatherings now, and they’ve never let me down. Here’s why they’re worth your time:
- Quick & Easy: Comes together in under 15 minutes, which is perfect when you’re already juggling costume emergencies and last-minute candy runs.
- Simple Ingredients: No fancy grocery trips needed. You likely already have cheddar cheese and grapes in your kitchen. The skull-shaped cookie cutter is the only special item, and it costs about five bucks.
- Perfect for Halloween: Great for parties, trick-or-treat snack tables, or just making your regular Tuesday dinner feel a little more festive.
- Crowd-Pleaser: Kids love the skull shapes, adults appreciate the sophisticated flavor combo, and everyone eats them before you can restock the board.
- Unbelievably Delicious: The sharp, salty cheddar paired with the sweet, juicy grapes is a classic combination that never gets old. The skull shape just makes it more fun.
What makes these different from every other Halloween snack out there is the simplicity. You’re not making something that looks scary—you’re making something that looks clever. The skull shape adds a playful spooky vibe without being gory or over-the-top. Plus, the texture contrast between firm cheese and soft grapes is honestly addictive. I’ve watched people eat six of these in a row without blinking.
This recipe isn’t just good—it’s the kind that makes you close your eyes after the first bite. It’s Halloween food reimagined: faster, easier, but with the same festive satisfaction. Perfect for impressing guests without breaking a sweat, or turning a simple snack into something memorable.
What Ingredients You Will Need
This recipe uses simple, wholesome ingredients to deliver bold flavor and a spooky presentation without any fuss. The beauty of these spooky cheddar grape skulls is that you only need three main components, plus a few optional extras for serving. Here’s what you’ll need to grab:
- Sharp cheddar cheese block, 8 ounces (about 226 grams) – Look for a block that’s at least 1 inch thick. Pre-sliced cheese won’t work here because you need enough depth to cut the skull shapes. I recommend Tillamook or Cabot for that perfect sharp, creamy texture that holds up well to cutting.
- Red seedless grapes, 1 cup (about 150 grams) – You want firm, plump grapes that aren’t too soft. Red grapes give the best visual contrast against the orange cheddar, but green grapes work too if that’s what you have. Just make sure they’re seedless, obviously.
- Skull-shaped cookie cutter, about 1.5 inches (4 cm) – This is the star of the show. You can find these at craft stores, online, or in Halloween baking sections. Get a metal one if you can—they cut through cheese more cleanly than plastic.
For serving, you might also want:
- Crackers – Plain water crackers or buttery Ritz-style crackers work beautifully. The neutral flavor lets the cheese and grapes shine.
- Fresh rosemary or thyme sprigs – For garnish, if you’re feeling fancy. It adds a nice herbal touch and makes the board look more intentional.
- Optional dipping sauces – Honey mustard or a balsamic glaze pairs surprisingly well with the cheddar and grapes.
When selecting your cheddar, here’s a tip I learned the hard way: don’t get the super-aged stuff. Extra-sharp cheddar that’s been aged over a year can be crumbly and hard to cut cleanly. Go for a medium-sharp cheddar that’s firm but still has some give. You want the cheese to hold its shape after cutting, not fall apart into little crumbles.
For the grapes, try to find ones that are roughly the same size. You’ll be halving them and placing them on top of the cheese skulls, so uniform grapes make the final presentation look more polished. If some grapes are too large, just trim them down a bit with a paring knife—nobody will know.
One more thing about the cookie cutter: if you can’t find a skull shape, don’t panic. You can use any small Halloween-themed cutter—pumpkins, ghosts, bats—and the concept works the same way. I’ve even used a tiny flower cutter in a pinch and called them “spooky flowers.” It works.
Equipment Needed
You don’t need a professional kitchen to make these spooky cheddar grape skulls. In fact, you probably already own most of what you need. Here’s the short list:
- Skull-shaped cookie cutter (about 1.5 inches) – This is non-negotiable for the skull shape. Find one at craft stores or online. I got mine for $4 at a Halloween pop-up shop and it’s lasted three seasons.
- Sharp knife – A chef’s knife or a utility knife works fine. You’ll use it to slice the cheese block and halve the grapes. Make sure it’s sharp to avoid crushing the cheese.
- Cutting board – A sturdy wooden or plastic board. Avoid glass cutting boards because they dull your knife and can be slippery when cutting cheese.
- Small paring knife – Optional but helpful for trimming grape halves to fit perfectly on the skulls.
- Serving platter or charcuterie board – Any flat surface works. I like using a dark slate board because it makes the orange cheese and purple grapes pop visually.
- Paper towels – For patting grapes dry. Wet grapes make the cheese slippery and harder to work with.
If you don’t have a skull cookie cutter, you can use a small paring knife to carve the skull shapes freehand. It takes a little more time and patience, but the result is just as charming. I did this my first year before I bought the cutter, and honestly, the slightly imperfect skulls looked even more authentic—like a haunted house made them.
One maintenance tip: after using your cookie cutter on cheese, wash it immediately with hot soapy water. Cheese residue can get stuck in the small crevices of the skull shape and harden, making it harder to use next time. A small brush or old toothbrush helps clean out the eye sockets.
Preparation Method
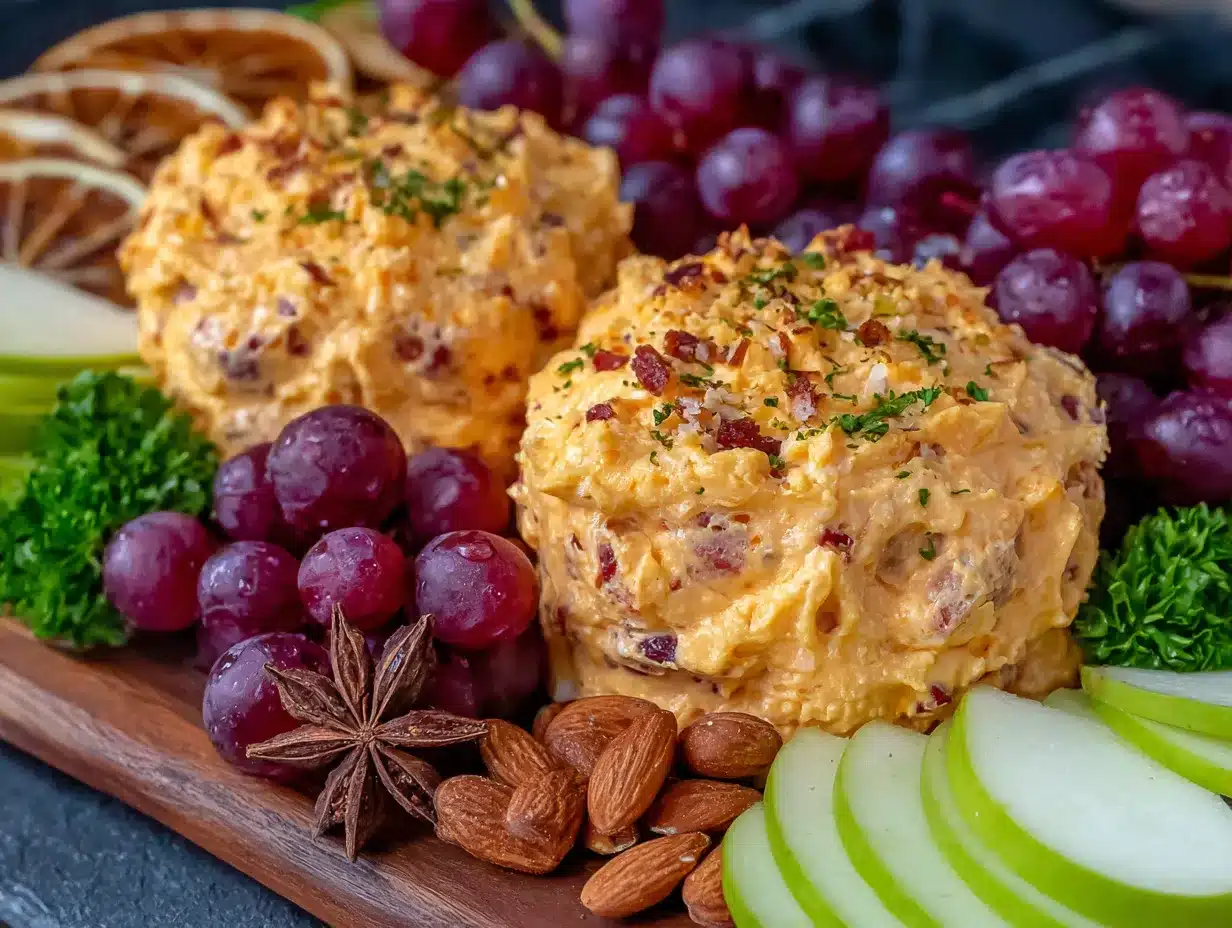
Alright, let’s get to the fun part. Making these spooky cheddar grape skulls is almost embarrassingly simple, but I’ll walk you through every step so you don’t run into any surprises. The whole process takes about 15 minutes, maybe 20 if you’re being extra careful with the skull shapes.
- Start with cold cheese. Take your block of sharp cheddar and pop it in the fridge for at least 30 minutes before you start. Cold cheese cuts much more cleanly than room-temperature cheese. I learned this the hard way when my first batch turned into a crumbly mess because the cheese was too soft. Cold cheese gives you crisp, clean skull edges.
- Slice the cheese block. Using your sharp knife, cut the cheese block into slabs that are about 1/4 inch (6 mm) thick. You want them thin enough to look like a cracker topping but thick enough that the skull shape holds together. If your slices are too thin, the skulls will break when you try to lift them. Too thick, and they look clumsy on the board. Aim for that quarter-inch sweet spot.
- Press the cookie cutter. Take your skull-shaped cookie cutter and press it firmly into the cheese slab. Push straight down without twisting—twisting can distort the shape. You should feel the cutter go all the way through the cheese to the cutting board. Lift the cutter straight up, and gently push the cheese skull out with your finger or a small skewer.
- Repeat with remaining cheese. Continue cutting skulls from each slab, placing them as close together as possible to minimize waste. You’ll get about 4 to 6 skulls per slab depending on the size of your cutter and cheese block. An 8-ounce block should yield roughly 20 to 24 skulls total. Don’t worry if the edges aren’t perfect—the skull shape is forgiving.
- Prepare the grapes. While you’re cutting cheese, rinse your grapes and pat them completely dry with paper towels. Wet grapes will make the cheese slippery and won’t stay in place. Once dry, cut each grape in half lengthwise. You want two oval halves that look like little brains when placed on the skull.
- Assemble the skulls. Place a cheese skull on your work surface. Take a grape half and position it on top of the skull, cut side down. The rounded top of the grape should sit at the top of the skull, covering the top half. You can trim the grape slightly with a paring knife if it’s too large, but usually a standard grape half fits perfectly.
- Press gently to secure. Give the grape a gentle press so it adheres to the cheese. The natural moisture from the grape will help it stick. If the grape won’t stay put, you can use a tiny dab of cream cheese or goat cheese as “glue,” but I’ve rarely needed to.
- Arrange on your board. Place the assembled skulls on your serving platter. I like to arrange them in clusters of three or four, with the grape “brains” facing up so everyone can see the detail. Leave space around them for crackers, additional grapes, and any other charcuterie items you’re serving.
- Add finishing touches. Scatter a few extra grape halves around the board for color contrast. Tuck in some rosemary sprigs or thyme for that autumnal vibe. If you’re feeling extra spooky, a few edible eyeballs or candy spiders nearby add to the Halloween theme without overwhelming the cheese.
And that’s it. Seriously. Nine steps and you’re done. The hardest part is probably pressing the cookie cutter evenly, but even imperfect skulls look cute. I’ve made these with my niece who’s seven, and she managed just fine with a little help.
One thing I want to mention: you’ll have cheese scraps left over from cutting the skulls. Don’t throw them away! Save them in a bag in the fridge and use them for mac and cheese, omelets, or just snacking. Waste not, want not.
Cooking Tips & Techniques
I’ve made these spooky cheddar grape skulls probably a dozen times now, and I’ve picked up a few tricks along the way. Let me share what I’ve learned so you don’t make the same mistakes I did.
Keep everything cold. This is the number one tip I can give you. Cold cheese cuts cleanly. Cold grapes stay firm. If your kitchen is warm or you’re working slowly, pop the cheese back in the fridge for a few minutes between cutting slabs. I once tried making these on a hot October afternoon with the oven going for another dish, and the cheese got so soft that the skulls looked more like blobs. Not ideal for Halloween.
Use a gentle sawing motion. When pressing the cookie cutter, don’t just smash it straight down. Use a slight back-and-forth sawing motion as you press. This helps the cutter slice through the cheese cleanly rather than squishing it. Think of it like cutting a steak—gentle pressure with movement works better than brute force.
Match grape size to skull size. Not all grapes are created equal. If you have large grapes, cut them into quarters instead of halves so they fit proportionally on the skull. If your grapes are tiny, you can leave them whole and just press them gently into the cheese. The visual ratio matters more than you’d think.
Don’t overthink the presentation. I spent my first year arranging these in perfect rows like a soldier’s formation. They looked stiff and unnatural. Now I cluster them in little groups, some facing different directions, with a few “fallen” skulls lying on their sides. It looks more organic and honestly more Halloween-y that way.
Make extras. These disappear fast. I always make at least 30 skulls for a party of 10 people, and they’re usually gone within the first hour. People eat two or three before they even realize what they’re eating. They’re that addictive.
Timing is everything. You can cut the cheese skulls up to 24 hours in advance and store them in an airtight container in the fridge. But don’t add the grapes until right before serving. Grapes release moisture over time, and if they sit on the cheese too long, the cheese gets soggy and the grapes slide off. Assemble them no more than an hour before you plan to serve.
Variations & Adaptations
One of the best things about this recipe is how easy it is to adapt. Here are some variations I’ve tried and loved:
Cheese swaps. Sharp cheddar is classic, but you can use any firm cheese that holds its shape. Gouda gives a smoky, buttery flavor that pairs beautifully with grapes. Colby Jack is milder and kid-friendly. For a more sophisticated board, try aged manchego or even a firm goat cheese log. Just make sure the cheese is firm enough to hold the skull shape—soft cheeses like brie won’t work.
Fruit variations. Grapes are traditional, but you can swap in other small fruits. Dried cranberries or dried cherries add a tart contrast to the cheese. Small cubes of apple or pear work too, though they brown quickly so assemble them last. For a truly spooky look, use blackberries—they look like tiny dark brains sitting on the skulls.
Savory toppings. Instead of fruit, try topping your cheese skulls with a small piece of roasted red pepper, a caper, or even a sliver of pickled jalapeño for a spicy kick. The salty-savory combination is unexpected but delicious.
Dietary adaptations. For a gluten-free option, serve with gluten-free crackers or simply enjoy the cheese and grapes on their own. For a lower-sodium version, use a reduced-sodium cheddar. For a dairy-free version, use a firm plant-based cheese alternative—just check that it cuts cleanly without crumbling.
Different cutters. If you can’t find a skull cutter, use any Halloween shape. Pumpkins, ghosts, bats, and cats all work beautifully. I made a batch with pumpkin-shaped cutters last year and called them “cheddar pumpkins with grape vines.” They were a hit.
My personal favorite variation? I once made these with a smoked gouda and topped them with small slices of dried fig. The smoky-sweet combination was incredible, and the dark figs looked like little brains. I served them at a Halloween party and someone asked if I catered. I didn’t, but I pretended I did.
Serving & Storage Suggestions
These spooky cheddar grape skulls are best served at room temperature. Cheese has more flavor when it’s not straight out of the fridge, so let the assembled board sit out for about 15 minutes before serving. That said, don’t leave them out for more than two hours total—food safety first, especially with the grapes.
For presentation, I love arranging these on a dark slate board or a black platter. The contrast between the orange cheese, purple grapes, and dark surface is striking. If you’re building a full Halloween charcuterie board, arrange the skulls in a cluster near the center, surrounded by crackers, other cheeses, and maybe some prosciutto or salami rolled into little roses. Add a few candy pumpkins or edible eyeballs for extra spooky flair.
These pair beautifully with a variety of beverages. For adults, a crisp Sauvignon Blanc or a dry rosé complements the sharp cheddar perfectly. For kids, apple cider or sparkling grape juice is a festive choice. And honestly, they’re great with whatever you’re already drinking at your Halloween party.
Storage. If you have leftovers (unlikely, but possible), store the assembled skulls in an airtight container in the fridge for up to 24 hours. The grapes might release some moisture, so pat them dry before serving again. For longer storage, keep the cheese skulls and grapes separate. The cheese skulls will keep for up to 5 days in the fridge, and the grapes for about a week.
Reheating. You don’t need to reheat these—they’re served cold or at room temperature. But if you want to get fancy, you can pop the cheese skulls under the broiler for 30 seconds to get them slightly melty. Just watch them carefully because cheese burns fast. I tried this once and ended up with melted skulls that looked more like zombie brains. Actually, that was kind of perfect for Halloween.
One thing I’ve noticed: the flavors actually get better after a few hours in the fridge. The grape juice seeps into the cheese just slightly, creating a sweet-savory combo that’s even more delicious. So if you can make these a few hours ahead, go for it.
Nutritional Information & Benefits
Here’s the rough nutritional breakdown for one spooky cheddar grape skull (based on an average-sized skull with one grape half):
- Calories: 45-55
- Protein: 3-4 grams
- Fat: 3-4 grams
- Carbohydrates: 2-3 grams
- Fiber: 0 grams
- Sugar: 2 grams
- Sodium: 70-90 mg
These numbers are estimates and will vary based on the specific cheese and grapes you use. But overall, these are a relatively light snack—perfect for grazing at a party without overdoing it.
From a health perspective, sharp cheddar cheese is a good source of calcium and protein. It also contains vitamin A and vitamin B12. Grapes are packed with antioxidants, particularly resveratrol, which is great for heart health. They also provide vitamin C and vitamin K. So while these are definitely a treat, they’re not empty calories.
If you’re watching your sodium intake, opt for a reduced-sodium cheddar. If you’re lactose intolerant, look for aged cheddar, which naturally has less lactose. And if you’re counting carbs, these fit nicely into a low-carb or keto diet—just skip the crackers.
I’m not a nutritionist, but I do think about balance. These spooky cheddar grape skulls are a way to enjoy Halloween treats without going overboard on candy. They feel indulgent but are actually pretty reasonable. Plus, the protein from the cheese helps keep you full, so you’re less likely to eat an entire bag of candy corn later.
Conclusion
So there you have it—the spooky cheddar grape skulls that started with a casual visit to a friend’s house and turned into my go-to Halloween snack. They’re simple, they’re fun, and they honestly taste amazing. The combination of sharp cheddar and sweet grapes is a classic for a reason, and the skull shape just makes everything better.
I love this recipe because it proves you don’t need to spend hours in the kitchen to make something memorable. A cookie cutter, a block of cheese, and a handful of grapes—that’s all it takes to create something that stops people in their tracks. It’s the kind of recipe that makes you look like a Halloween hero without any of the stress.
I’d love to hear how yours turn out. Did you use a different cheese? Try a different fruit? Did the skulls come out perfectly or did they look a little wonky? (Wonky is good, by the way.) Drop a comment below and share your version. And if you’re looking for more easy Halloween ideas, check out my Halloween charcuterie board ideas for more festive inspiration.
Go make some skulls, my friend. Your Halloween board is about to get a whole lot spookier.
Frequently Asked Questions
Can I make these spooky cheddar grape skulls ahead of time?
Yes! You can cut the cheese skulls up to 24 hours in advance and store them in an airtight container in the fridge. Just don’t add the grapes until about an hour before serving to keep them fresh and prevent the cheese from getting soggy.
What if I don’t have a skull-shaped cookie cutter?
No problem! You can use any small Halloween-shaped cutter—pumpkins, ghosts, bats—or even cut the cheese into small squares and top them with grape halves. The concept works the same way. You can also carve skull shapes freehand with a paring knife if you’re feeling artistic.
Can I use other types of cheese?
Absolutely. Any firm cheese that holds its shape when cut works well. Gouda, Colby Jack, manchego, or even a firm goat cheese are all great options. Just avoid soft cheeses like brie or camembert—they won’t hold the skull shape.
How do I keep the grapes from falling off the cheese?
Pat the grapes completely dry before cutting them—moisture helps them stick. Press the grape half gently onto the cheese skull. If they still won’t stay, use a tiny dab of cream cheese or goat cheese as “glue” between the grape and the cheddar.
How many skulls does one block of cheese make?
An 8-ounce block of sharp cheddar will yield roughly 20 to 24 skulls, depending on the size of your cookie cutter and how close you place the cuts. Always buy a little extra cheese to account for waste around the edges—you can save the scraps for another recipe.
Pin This Recipe!
Best Easy Spooky Cheddar Grape Skulls for Halloween

These spooky cheddar grape skulls are a quick and easy Halloween snack made with sharp cheddar cheese and red grapes, shaped into adorable skulls using a cookie cutter. Perfect for parties, they combine sweet and savory flavors in a fun, festive presentation.
- Prep Time: 15 minutes
- Cook Time: 0 minutes
- Total Time: 15 minutes
- Yield: 4 servings 1x
- Category: Appetizer
- Cuisine: American
Ingredients
- 8 ounces sharp cheddar cheese block (about 226 grams)
- 1 cup red seedless grapes (about 150 grams)
- Skull-shaped cookie cutter (about 1.5 inches / 4 cm)
- Crackers (optional, for serving)
- Fresh rosemary or thyme sprigs (optional, for garnish)
- Honey mustard or balsamic glaze (optional, for dipping)
Instructions
- Start with cold cheese. Place the cheddar block in the fridge for at least 30 minutes before cutting.
- Slice the cheese block into slabs about 1/4 inch (6 mm) thick.
- Press the skull-shaped cookie cutter firmly into the cheese slab without twisting. Lift the cutter and gently push out the cheese skull.
- Repeat with remaining cheese slabs, placing cuts close together to minimize waste. An 8-ounce block yields about 20 to 24 skulls.
- Rinse the grapes and pat them completely dry with paper towels. Cut each grape in half lengthwise.
- Place a cheese skull on your work surface. Position a grape half on top, cut side down, covering the top half of the skull.
- Press the grape gently to secure it to the cheese. If needed, use a tiny dab of cream cheese or goat cheese as ‘glue’.
- Arrange the assembled skulls on a serving platter in clusters. Leave space for crackers and other items.
- Scatter extra grape halves around the board and garnish with rosemary or thyme sprigs if desired.
Notes
Keep cheese cold for clean cuts. Assemble no more than 1 hour before serving to prevent soggy cheese. Cheese skulls can be cut up to 24 hours ahead and stored in an airtight container in the fridge. Leftover cheese scraps can be saved for mac and cheese or omelets.
Nutrition
- Serving Size: 1 skull with 1 grape
- Calories: 50
- Sugar: 2
- Sodium: 80
- Fat: 3.5
- Saturated Fat: 2
- Carbohydrates: 2.5
- Protein: 3.5
Keywords: Halloween, cheese skulls, cheddar grapes, spooky snack, easy appetizer, party food


