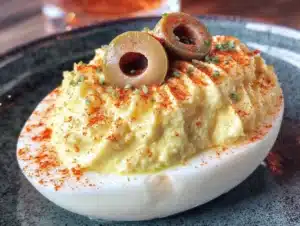
There used to be a tiny, dimly lit bar on the corner of Elm and 3rd called The Crow’s Nest. It was the kind of place with sticky floors, a jukebox that only played Tom Waits, and the best damn Halloween party in the city. Every October, they’d transform the space into a haunted parlor, and the owner, a woman named Mavis with a shock of purple hair, would put out a spread of snacks that were equal parts creepy and delicious. When the bar closed suddenly two years ago—rent hike, the classic story—I mourned the loss of those nights. But what I really mourned were her deviled eggs. Specifically, the ones with the little olive spiders crawling across the top. After nine tries—nine, you guys, including one batch that looked more like a science experiment than a snack—I finally cracked the code. This is that recipe.
Honestly, I didn’t think I’d ever get it right. The first batch? The spiders looked like sad, lumpy beetles. The second? The filling was so runny, the olives just slid right off into a sad little pile. But I was determined. I mean, how hard could it be to make a deviled egg look like a spider? Harder than you’d think, let me tell you. But now, I’ve got it down to a science, and I’m so excited to share it with you. Maybe you’ve been there—chasing the ghost of a recipe from a place that no longer exists. If so, you know exactly what I mean.
The secret, I discovered, is all in the texture of the yolk mixture and the way you slice the olives. It’s not just about making a deviled egg; it’s about building a tiny, edible creature that sits on top of a creamy, tangy bite. And the best part? It’s genuinely fun. The power went out halfway through my fourth attempt, and I finished making them by candlelight, which honestly made the whole thing feel even more authentically spooky. That’s the night I knew I had to share this with the world. This recipe stayed with me because it’s not just food—it’s a memory, a little piece of that magical, sticky-floored bar that I can bring back anytime I want.
Why You’ll Love This Recipe
These Cozy Spooky Deviled Eggs with Creepy Olive Spiders aren’t just a Halloween novelty. They’ve been tested and tweaked in my own kitchen until they were absolutely perfect. Here’s why they’re a must-make for your next spooky gathering:
- Quick & Easy: Comes together in under 30 minutes, making them perfect for last-minute party prep or a fun afternoon activity with the kids.
- Simple Ingredients: You likely have everything in your fridge and pantry right now. No fancy grocery trips for obscure ingredients.
- Perfect for Halloween: These are the star of any spooky spread, from cozy movie nights to full-blown costume parties.
- Crowd-Pleaser: They disappear fast. Kids love the creepy spiders, and adults appreciate the classic, perfected flavor of a great deviled egg.
- Unbelievably Delicious: The creamy, tangy filling with a hint of mustard and paprika is the perfect canvas for the briny, salty pop of the olive spiders. It’s next-level comfort food.
What makes this recipe different from the rest is the technique. It’s not just about slapping an olive on top. It’s about creating a stable, creamy filling that acts as the perfect “web” for your spider to sit on. The olive spiders themselves are carefully constructed to look like they are crawling, not just sitting there. This is the best version of the spooky deviled egg, and once you make them, you’ll see why.
This recipe isn’t just good—it’s the kind that makes you close your eyes after the first bite. It’s comfort food reimagined for a spooky night in. It’s the perfect way to impress your guests without any stress, turning a simple, classic appetizer into something truly memorable and fun.
What Ingredients You Will Need
This recipe uses simple, wholesome ingredients to deliver bold flavor and satisfying texture without the fuss. Most of these are pantry staples, making this an easy recipe to whip up on a whim.
For the Deviled Eggs
- 6 large eggs (use older eggs for easier peeling)
- 3 tablespoons mayonnaise (I prefer Hellmann’s or Duke’s for a tangy, creamy base)
- 1 teaspoon yellow mustard (adds a classic tang and beautiful color)
- 1 teaspoon white vinegar (or apple cider vinegar for a milder acidity)
- ¼ teaspoon salt
- ⅛ teaspoon black pepper
- ¼ teaspoon paprika (plus more for garnish; smoked paprika adds a lovely depth)
For the Creepy Olive Spiders
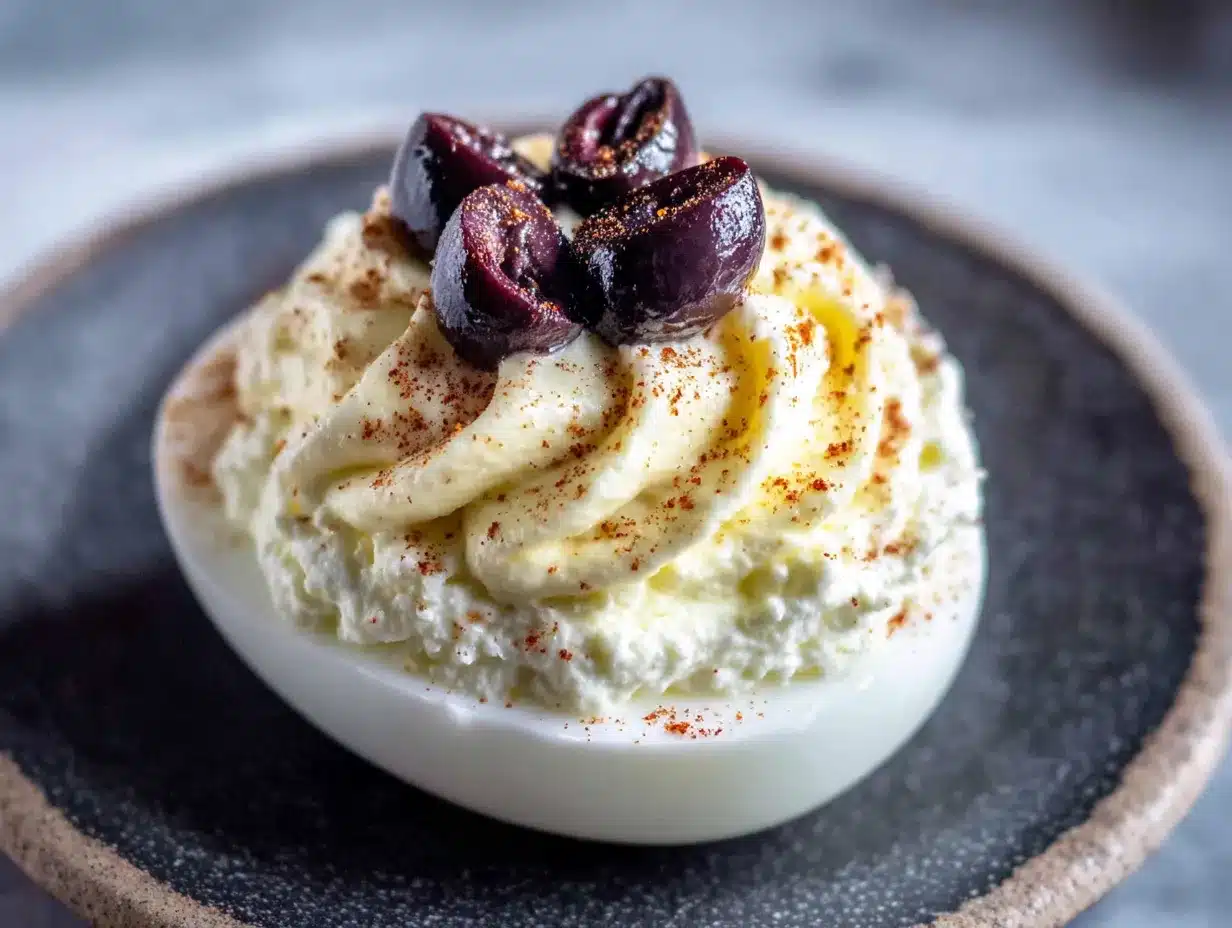
- 12 pitted black olives (canned, whole olives work best)
- 24 small pieces of chive or thin green onion strips (for the spider legs)
Ingredient Selection Tips: For the best texture, use large eggs that have been in your fridge for about a week. Fresh eggs are notoriously hard to peel. For the olives, look for large, firm black olives in a can. The pitted ones are essential, as you’ll need to slice them in half lengthwise. I recommend Lindsay or Pearls brand for consistent size and texture. For the spider legs, fresh chives are ideal, but you can also use very thin strips of green onion or even thin, short pieces of dried spaghetti for a more “crunchy” spider leg.
Substitution Guidance: If you need a dairy-free option, use a vegan mayonnaise. For a richer filling, you can swap one tablespoon of mayonnaise for one tablespoon of full-fat sour cream or Greek yogurt. If you don’t have yellow mustard, Dijon mustard works, but it will have a slightly sharper, less classic flavor. You can also skip the vinegar if you don’t have it, but it really does help brighten the flavors.
Equipment Needed
You don’t need any fancy gadgets for this recipe, which is part of its charm. Here’s what you’ll need:
- A medium saucepan: For boiling the eggs.
- A sharp knife and cutting board: For halving the eggs and slicing the olives.
- A small bowl: For mashing the yolks.
- A fork: For mashing the yolks to a perfect, lump-free consistency.
- A piping bag or a zip-top bag: For piping the filling neatly into the egg whites. A zip-top bag with a corner snipped off works perfectly and is much easier to clean.
- A small paring knife: For making precise cuts on the olives.
If you don’t have a piping bag, don’t worry. You can simply use a small spoon to carefully fill the egg whites. It won’t look as polished, but it will taste just as good. I’ve done it both ways, and honestly, the spoon method has a charmingly rustic feel that works for a cozy Halloween party.
Preparation Method
Let’s get spooky. Follow these steps carefully, and you’ll have a platter of the cutest, creepiest deviled eggs you’ve ever seen.
- Boil the eggs (10 minutes): Place your 6 large eggs in a single layer in a medium saucepan. Cover them with cold water by about an inch. Bring the water to a full, rolling boil over high heat. Once boiling, cover the pot, turn off the heat, and let the eggs sit in the hot water for exactly 10 minutes. This is the perfect timing for fully hard-boiled yolks that are still bright yellow.
- Ice bath (5 minutes): While the eggs are cooking, prepare a large bowl of ice water. After the 10 minutes are up, use a slotted spoon to transfer the eggs immediately to the ice bath. Let them sit for at least 5 minutes. This stops the cooking process and makes them much easier to peel. Pro tip: Gently crack the eggs on the counter before putting them in the ice bath—the water will seep under the shell and make peeling a breeze.
- Peel and halve the eggs (5 minutes): Gently tap the eggs on the counter to crack the shell all over. Start peeling from the wider end, where the air pocket is. Rinse the peeled eggs under cool water to remove any tiny shell fragments. Pat them dry with a paper towel. Using a sharp knife, slice each egg in half lengthwise. Carefully pop out the yolks into a small bowl. Place the 12 egg white halves on a serving platter, cut-side up.
- Make the filling (5 minutes): Add the 3 tablespoons of mayonnaise, 1 teaspoon of yellow mustard, 1 teaspoon of white vinegar, ¼ teaspoon of salt, ⅛ teaspoon of black pepper, and ¼ teaspoon of paprika to the bowl with the yolks. Use a fork to mash everything together until it is completely smooth and creamy. There should be no lumps. Taste it and adjust the seasoning if needed. This is the moment where you can add a little more mustard or a pinch more salt—trust your taste buds!
- Pipe the filling (5 minutes): Spoon the yolk mixture into a piping bag or a sturdy zip-top bag. If using a zip-top bag, snip off a small corner (about ¼ inch wide). Hold the bag over one of the egg white halves and gently squeeze to pipe the filling into the cavity, letting it mound up slightly. Repeat with all 12 egg white halves. Don’t worry if it’s not perfect—the spiders will cover any imperfections!
- Create the olive spiders (10 minutes): This is the fun part. Take your 12 pitted black olives. Using a sharp paring knife, slice each olive in half lengthwise. You will have 24 olive halves. One half will be the spider’s body. For the other half, carefully cut it lengthwise into very thin strips—these will be the spider’s legs. You should get about 4-6 thin strips from each half-olive. Take your time here; precision makes the spiders look amazing.
- Assemble the spiders (5 minutes): To assemble one spider, take one olive half (the body) and place it on top of the piped filling on one egg. Gently press it down so it sticks. Then, take 4 of the thin olive strips and carefully insert them into the filling on either side of the olive body, so they look like legs crawling out. Use two strips per side. For a more dramatic look, you can also use small pieces of chive for the legs. Repeat for all 12 eggs.
- Garnish and serve: Lightly dust the entire platter with a pinch of extra paprika for a final pop of color. Serve immediately, or refrigerate for up to 2 hours before serving.
Cooking Tips & Techniques
After nine tries, I’ve learned a thing or two about what makes these perfect. Here are my hard-won secrets:
- The perfect hard-boiled egg: The biggest mistake is overcooking. That green ring around the yolk? That’s from cooking the eggs too long or at too high a temperature. The “steam” method (boil, cover, turn off heat, rest for 10 minutes) is foolproof for bright, creamy yolks.
- Peeling without a fight: I cannot stress this enough: use older eggs. And the ice bath is non-negotiable. One time, I was in a hurry and skipped the ice bath. I spent 15 minutes picking tiny bits of shell off the eggs. It was a nightmare. Don’t be like me.
- Getting the filling smooth: A fork works perfectly, but if you want an ultra-smooth, silky filling, you can push the yolks through a fine-mesh sieve before mixing. It’s an extra step, but it makes a difference if you’re aiming for a really polished look.
- Piping like a pro: If you don’t have a piping tip, just snipping the corner of a bag is fine. But make sure the hole isn’t too big, or the filling will come out in a big messy blob. Start small—you can always cut a little more off if needed.
- Olive spider assembly: The key to the spiders looking like they are crawling is to insert the leg strips into the filling, not just lay them on top. This gives them a 3D, creeping effect. Also, try to make the legs slightly uneven in length—it looks more natural and creepy.
Variations & Adaptations
Don’t be afraid to make this recipe your own. Here are a few ways to switch it up:
- Spicy Spider: Add a pinch of cayenne pepper or a dash of hot sauce to the yolk mixture. The heat pairs beautifully with the briny olives. I tried this on a whim one night and now it’s my go-to version for adult parties.
- Herby Web: Instead of paprika, garnish the finished eggs with a sprinkle of finely chopped fresh dill or chives. It adds a bright, fresh flavor that cuts through the richness of the mayo and yolks.
- Bacon Spider: For an extra indulgent version, crumble a little bit of crispy bacon on top of the filling before adding the olive spider. The smoky, salty crunch is incredible. Just don’t tell the vegetarians.
- Avocado Spider: For a lighter, greener filling, mash one ripe avocado with the yolks instead of using all the mayonnaise. You’ll need to adjust the seasoning, but it creates a creamy, vibrant filling that’s a little healthier.
- Ghostly Eggs: For a non-spider version, simply omit the olive legs and use the olive half as a ghostly body. You can even use a tiny dot of sour cream for a “ghost eye.” It’s a fun, less creepy variation for younger kids.
Serving & Storage Suggestions
These Cozy Spooky Deviled Eggs are best served chilled, straight from the fridge. The cold, creamy filling is a perfect contrast to the salty olive spiders. Arrange them on a dark platter or a slate board for a truly spooky presentation. A little dry ice around the base of the platter (if you’re feeling fancy) creates a hauntingly cool fog effect.
They pair wonderfully with other Halloween treats like a warm bowl of chili, a batch of spider web dip with crunchy tortilla chips, or alongside a glass of crisp, dry hard cider for the adults. For the kids, serve them with a side of orange juice or apple cider.
Storage: Store any leftover deviled eggs in an airtight container in the refrigerator for up to 2 days. The flavor actually gets a little better as the filling chills and the flavors meld. However, the olive spiders might soften slightly over time, so it’s best to assemble them no more than a few hours before serving.
Reheating? Absolutely not. These are served cold. Don’t even think about it.
Nutritional Information & Benefits
While these are a treat, they do offer some surprising nutritional benefits. Here’s a rough estimate per deviled egg:
- Calories: ~70
- Fat: ~5g
- Protein: ~5g
- Carbohydrates: ~1g
Health Benefits: Eggs are a fantastic source of high-quality protein and contain essential nutrients like choline, which is great for brain health. Olives are a good source of healthy monounsaturated fats and antioxidants. This recipe is naturally low-carb and gluten-free, making it a great option for those following a keto or paleo lifestyle. If you’re watching your cholesterol, you can use two egg whites per yolk to reduce the fat and cholesterol content while keeping the protein high.
Dietary Considerations: This recipe is naturally gluten-free and low-carb. To make it dairy-free, simply use a vegan mayonnaise. It contains eggs and olives, so it’s not suitable for those with allergies to those ingredients. As always, I believe in balance—these are a fun, festive snack, and part of a healthy lifestyle is enjoying the things you love in moderation.
Conclusion
Honestly, I still think about Mavis and The Crow’s Nest every time I make these. But now, instead of feeling sad that it’s gone, I feel lucky to have captured a little piece of its magic. This recipe is more than just a spooky snack—it’s a way to create a new memory, to bring a little bit of that cozy, candlelit Halloween magic into your own home.
I truly hope you give these Cozy Spooky Deviled Eggs with Creepy Olive Spiders a try. Don’t be afraid to get creative with the spiders—make them big, make them small, make them look like they’re having a little party on top of the eggs. The best part is making them your own. And when you do, I’d love to hear about it! Drop a comment below and tell me how your spiders turned out. Did you add a secret ingredient? Did your kids freak out (in a good way)? Share your pictures and tag me on Pinterest—I can’t wait to see your creepy creations. Happy haunting, and happy eating!
Frequently Asked Questions
Can I make these deviled eggs a day ahead?
You can prepare the hard-boiled eggs and the yolk filling up to 24 hours in advance. Store the peeled egg whites and the filling in separate airtight containers in the fridge. Assemble the spiders on the eggs just before serving for the best presentation.
My olive spiders keep falling over. What am I doing wrong?
This usually happens if the filling isn’t thick enough or if the olives are too large. Make sure your yolk mixture is very smooth and thick—if it’s too runny, add a little more mayonnaise or another yolk to stiffen it up. Also, press the olive body firmly into the filling so it has a stable base.
Can I use a different type of olive?
You can, but the look will change. Large, pitted black olives are the classic choice because they look the most like a spider’s body. Manzanilla olives (green, stuffed with pimento) can work, but they are smaller and might look more like little bugs. Kalamata olives are too soft and will fall apart.
How do I get the eggs to peel perfectly every time?
The secret is using older eggs (at least a week old) and shocking them in an ice bath immediately after boiling. Another tip is to add a teaspoon of baking soda to the water when boiling the eggs—it helps loosen the shell. I do this every time now and haven’t had a peeling disaster since.
Can I make a vegan version of this recipe?
Yes! You can use a vegan egg substitute to make hard-boiled “eggs” (there are some great tofu-based recipes out there), or you can simply make a vegan filling using silken tofu, black salt (for the eggy flavor), and vegan mayonnaise. The olive spiders are naturally vegan, so the rest of the recipe is easy to adapt.
Pin This Recipe!
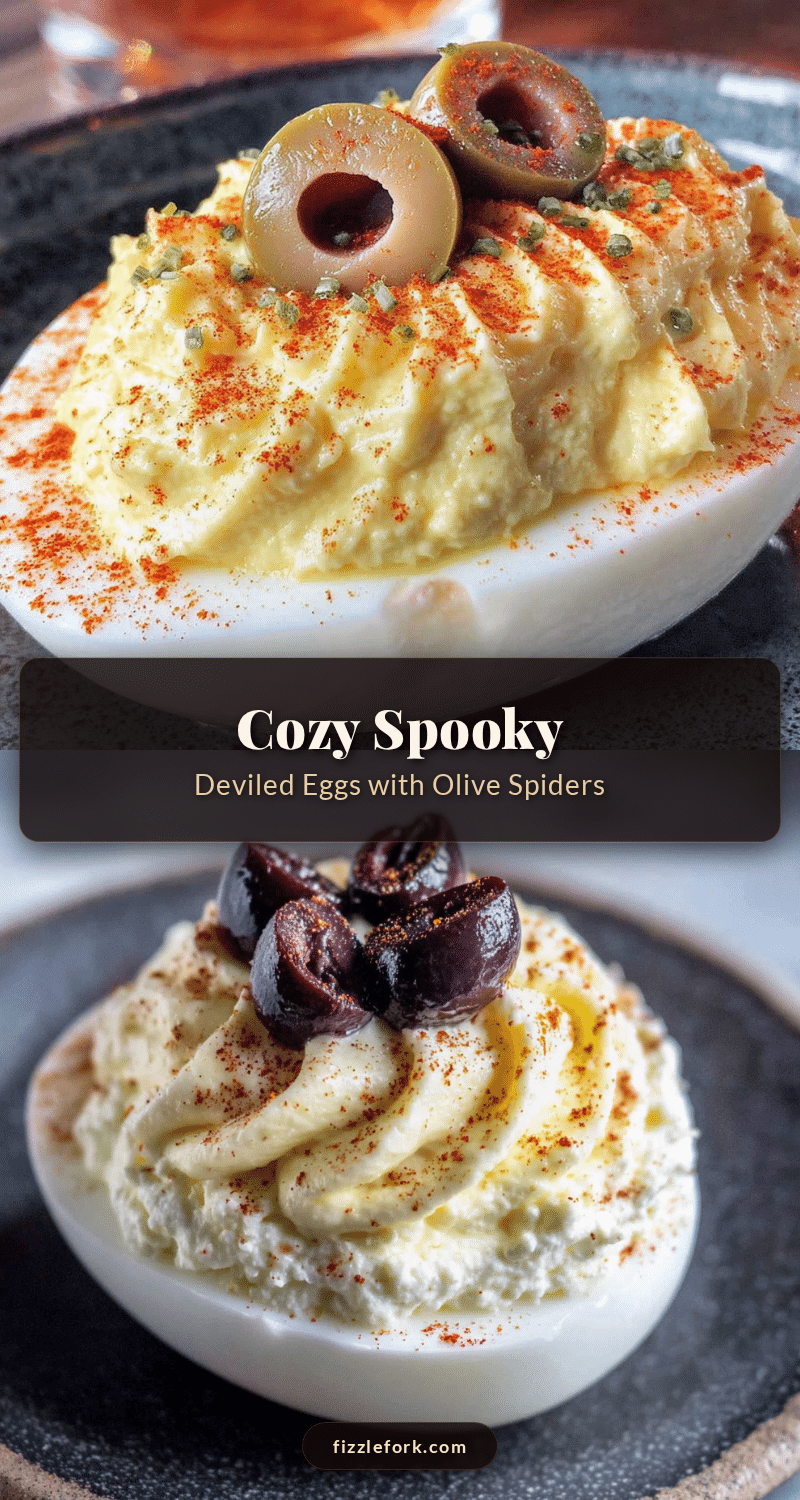
16 Cozy Spooky Deviled Eggs with Creepy Olive Spiders
These spooky deviled eggs feature creamy, tangy filling topped with creepy olive spiders. Perfect for Halloween parties, they’re quick, easy, and a guaranteed crowd-pleaser.
- Prep Time: 15 minutes
- Cook Time: 10 minutes
- Total Time: 25 minutes
- Yield: 12 deviled eggs (6 servings of 2 eggs each) 1x
- Category: Appetizer
- Cuisine: American
Ingredients
- 6 large eggs (use older eggs for easier peeling)
- 3 tablespoons mayonnaise (Hellmann’s or Duke’s preferred)
- 1 teaspoon yellow mustard
- 1 teaspoon white vinegar (or apple cider vinegar)
- ¼ teaspoon salt
- ⅛ teaspoon black pepper
- ¼ teaspoon paprika (plus more for garnish; smoked paprika adds depth)
- 12 pitted black olives (canned, whole olives work best)
- 24 small pieces of chive or thin green onion strips (for spider legs)
Instructions
- Boil the eggs: Place eggs in a single layer in a medium saucepan. Cover with cold water by about an inch. Bring to a full rolling boil over high heat. Once boiling, cover the pot, turn off the heat, and let sit for exactly 10 minutes.
- Ice bath: While eggs cook, prepare a large bowl of ice water. After 10 minutes, transfer eggs to ice bath using a slotted spoon. Let sit for at least 5 minutes. (Pro tip: Gently crack eggs on counter before ice bath for easier peeling.)
- Peel and halve eggs: Gently tap eggs to crack shell all over. Peel starting from the wider end. Rinse under cool water to remove shell fragments. Pat dry. Slice each egg in half lengthwise. Pop out yolks into a small bowl. Place 12 egg white halves on a serving platter, cut-side up.
- Make the filling: Add mayonnaise, yellow mustard, white vinegar, salt, black pepper, and paprika to the bowl with yolks. Mash with a fork until completely smooth and creamy. Taste and adjust seasoning if needed.
- Pipe the filling: Spoon yolk mixture into a piping bag or sturdy zip-top bag. If using zip-top, snip off a small corner (about ¼ inch wide). Pipe filling into each egg white cavity, letting it mound slightly. Repeat for all 12 halves.
- Create the olive spiders: Using a sharp paring knife, slice each olive in half lengthwise to get 24 halves. One half is the spider’s body. For the other half, carefully cut it lengthwise into very thin strips (about 4-6 strips per half-olive) for the legs.
- Assemble the spiders: Place one olive half (body) on top of the piped filling on each egg. Gently press down. Insert 4 thin olive strips into the filling on either side of the body (2 per side) to look like legs crawling out. Repeat for all 12 eggs.
- Garnish and serve: Lightly dust the platter with extra paprika. Serve immediately or refrigerate for up to 2 hours before serving.
Notes
Use older eggs for easier peeling. The ice bath is essential for perfect peeling. For a smoother filling, push yolks through a fine-mesh sieve before mixing. Insert olive leg strips into the filling for a 3D crawling effect. Store leftovers in an airtight container in the fridge for up to 2 days. Do not reheat.
Nutrition
- Serving Size: 2 deviled eggs
- Calories: 140
- Sugar: 1
- Sodium: 350
- Fat: 10
- Saturated Fat: 2.5
- Carbohydrates: 2
- Protein: 10
Keywords: deviled eggs, Halloween, spooky, olive spiders, appetizer, party food, creepy, easy