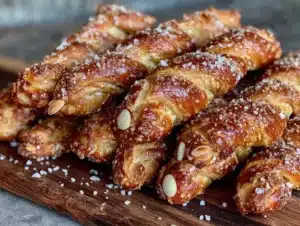
I was supposed to be making classic soft pretzels. You know, the buttery, salty kind you get from a cart on a street corner. I had the dough rising, the baking soda bath ready, and I was feeling pretty good about myself. Then my four-year-old nephew, Leo, came barreling into the kitchen, demanding to know why I wasn’t making “scary snacks” for Halloween. I looked at the smooth, round dough balls I had just formed and had a split-second vision of long, twisted fingers. I grabbed the almond slivers I had stashed for a salad, and before I could talk myself out of it, I was pressing them into the dough to look like jagged fingernails. Honestly, I thought I had ruined the whole batch. What came out of the oven was nothing like the plan—and so, so much better. These cozy witch finger pretzels are now the only thing I make for Halloween.
Maybe you’ve been there. You have a clear idea of what you’re making, and then life (or a very opinionated toddler) throws a wrench in the works. The dough felt a little too sticky, the kitchen was a floury mess, and I was already ten minutes behind schedule. But that happy accident—the one born from a distracted moment and a handful of almonds—turned into our family’s most requested fall treat. They are creepy, but in a cute, cozy way. They are the perfect snack for a night of scary movies and hot apple cider. Let me tell you, the look on my sister’s face when she saw a platter of these ghoulish fingers was absolutely worth the mess.
Why You’ll Love This Recipe
These aren’t just another Halloween treat. They are a proven crowd-pleaser that brings together the warmth of homemade bread with the spooky fun of the holiday. I’ve tested this recipe more times than I can count, tweaking the dough for the perfect chew and making sure the “fingers” hold their shape. Here is why this recipe is a keeper:
- Quick & Easy: From start to finish, these come together in under an hour. The dough requires no rising time, making them perfect for a last-minute Halloween party or a fun after-school project.
- Simple Ingredients: You likely have everything in your pantry right now. No fancy extracts or hard-to-find candies. Just flour, butter, yeast, and a few pantry staples.
- Perfect for Halloween: They are spooky enough to impress, but not so scary that the kids won’t eat them. Great for class parties, potlucks, or a cozy night in.
- Crowd-Pleaser: I’ve made these for kids and adults alike, and they always disappear first. There is something universally appealing about a salty, buttery pretzel shaped like a witch finger.
- Unbelievably Delicious: The texture is spot-on—chewy on the inside with a slightly crisp, salted exterior. The almond “nail” adds a lovely nutty crunch that contrasts perfectly with the soft dough.
This recipe is different because it skips the complicated shaping techniques. We use a simple baking soda bath for that authentic pretzel flavor without the fuss of lye. It is comfort food with a spooky twist—the kind of snack that makes you close your eyes after the first bite. Perfect for turning a simple baking session into a memorable Halloween tradition.
What Ingredients You Will Need
This recipe uses simple, wholesome ingredients to deliver that classic pretzel flavor and satisfying texture. Most are pantry staples, making this an easy recipe to whip up on a whim.
- Warm Water (1 ½ cups / 360 ml): The water needs to be warm to the touch (around 110°F/43°C) to activate the yeast. Too hot and you’ll kill it; too cold and it won’t bloom.
- Active Dry Yeast (2 ¼ teaspoons / 1 packet): I recommend using a trusted brand like Fleischmann’s or Red Star for consistent results. This gives the pretzels their signature chew.
- Brown Sugar (2 tablespoons): A little sweetness in the dough helps the yeast activate and adds a subtle depth of flavor. You can use honey or maple syrup in a pinch.
- All-Purpose Flour (4 cups / 480 grams): Standard all-purpose flour works perfectly here. It provides the right structure for a chewy pretzel. For a whole wheat version, substitute up to 1 cup with whole wheat flour.
- Unsalted Butter (4 tablespoons, melted): Adds richness and tenderness to the dough. I prefer unsalted so I can control the salt level.
- Salt (1 teaspoon): For seasoning the dough.
- Baking Soda (½ cup / 120 grams for the bath): This is the secret to that dark, shiny, and unmistakably pretzel-like crust. Don’t skip this step!
- Water (10 cups / 2.4 liters for the bath): For the boiling solution.
- Coarse Sea Salt or Pretzel Salt (for sprinkling): The final touch of salty crunch.
- Whole Almonds or Sliced Almonds (for the fingernails): I prefer whole almonds for a more realistic look, but slivered almonds work great too. You can also use a dab of green food coloring mixed into the dough for a truly witchy nail!
Equipment Needed
You don’t need any fancy gadgets for this recipe, which is one of the reasons I love it. Here is what you’ll need:
- Large Mixing Bowl: For mixing and kneading the dough.
- Wooden Spoon or Dough Hook: For combining ingredients.
- Measuring Cups and Spoons: For accuracy.
- Large Pot (at least 5 quarts): For the baking soda bath. A stainless steel or enameled pot is best, as baking soda can discolor aluminum.
- Slotted Spoon or Spider Strainer: For carefully removing the pretzels from the boiling water.
- Baking Sheet (2): Lined with parchment paper or a silicone baking mat.
- Pastry Brush: For the egg wash (optional, but recommended for shine).
- Sharp Knife or Bench Scraper: For cutting the dough.
If you don’t have a stand mixer, don’t worry. This dough is easy to knead by hand for about 5-7 minutes until it becomes smooth and elastic. A silicone baking mat is a lifesaver here, as it prevents the pretzels from sticking without extra grease.
Preparation Method
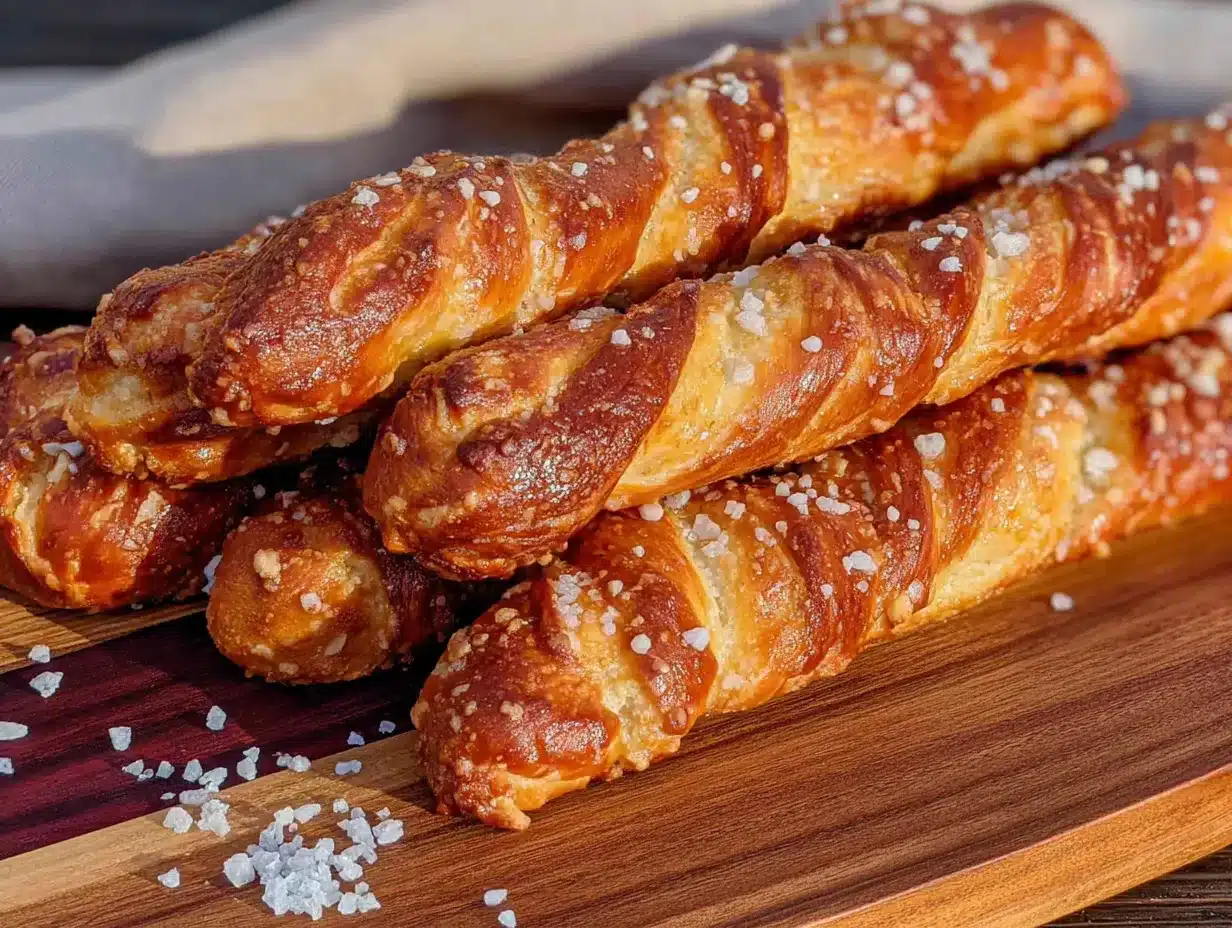
Let’s get baking! Follow these steps for perfectly spooky witch finger pretzels.
- Activate the Yeast (5 minutes): In your large mixing bowl, combine the warm water, brown sugar, and active dry yeast. Give it a gentle stir and let it sit for 5-10 minutes until it becomes foamy. This means your yeast is alive and happy. If it doesn’t foam, your water might have been too hot or too cold, so start over.
- Make the Dough (5 minutes): Add the melted butter, salt, and 2 cups of flour to the yeast mixture. Stir until combined. Gradually add the remaining 2 cups of flour, ½ cup at a time, until a shaggy dough forms. Turn the dough out onto a lightly floured surface.
- Knead the Dough (5-7 minutes): Knead the dough for about 5-7 minutes until it is smooth, elastic, and springs back when you poke it. If it is too sticky, add a tablespoon of flour at a time. It should feel soft and slightly tacky, but not sticky.
- Shape the Fingers (10 minutes): Preheat your oven to 425°F (220°C). Divide the dough into 12-16 equal pieces. Take one piece and roll it into a long rope about 6-8 inches long. It should be thicker at the top (the wrist) and taper to a point at the bottom (the fingertip).
- Add the Knuckles (5 minutes): Using the back of a butter knife or a bench scraper, gently press 2-3 lines across the top half of the finger to create knuckle indentations. Don’t press too hard—you just want a visual line, not a cut through the dough.
- Attach the Fingernails (5 minutes): Press a whole or slivered almond firmly into the tip of each finger. Make sure it is well-embedded so it doesn’t fall off during boiling.
- The Baking Soda Bath (10 minutes): Bring the 10 cups of water and ½ cup of baking soda to a rolling boil in your large pot. Carefully drop 2-3 shaped pretzels into the boiling water. Boil for 20-30 seconds per side. Use your slotted spoon to flip them gently. This step is crucial for that chewy, golden-brown crust!
- Transfer and Egg Wash (5 minutes): Use the slotted spoon to remove the pretzels from the water, letting the excess drip off. Place them on your prepared baking sheets. If you want a glossy, deep brown finish, whisk one egg with a tablespoon of water and brush it over each pretzel.
- Sprinkle and Bake (12-15 minutes): Immediately sprinkle the pretzels with coarse sea salt. Bake for 12-15 minutes, or until they are a deep golden brown. The kitchen will smell incredible—like a cozy bakery on a crisp fall day.
- Cool and Serve (5 minutes): Let the pretzels cool on the baking sheet for 5 minutes before transferring them to a wire rack. They are best enjoyed warm, but they are still delicious at room temperature.
Cooking Tips & Techniques
I’ve made my fair share of mistakes with pretzel recipes, so let me save you some trouble. Here are my top tips for success:
Don’t over-boil the pretzels. I once got distracted and left them in the baking soda bath for a full minute. The result was a pretzel that tasted like a salt lick and had a weird, metallic flavor. Stick to 20-30 seconds per side. That is all they need.
Keep the dough covered. While you are shaping the fingers, keep the rest of the dough covered with a damp kitchen towel or plastic wrap. It dries out fast, and dry dough is hard to shape and cracks in the oven.
Use a light touch with the knuckles. If you press too hard, the pretzel will split in half while boiling. You just want a gentle impression. Think of it like drawing a line on a balloon—firm but gentle.
Multitask like a pro. While your first batch of pretzels is boiling, have your second baking sheet ready and shaped. This keeps the workflow moving and prevents the dough from sitting too long.
For consistency, weigh your flour. I know, it sounds fussy, but using a kitchen scale for the flour (480 grams) ensures you get the perfect dough texture every time. Too much flour makes them dense, and too little makes them flat.
Variations & Adaptations
This recipe is incredibly versatile. Here are a few ways to make it your own:
- Cheesy Witch Fingers: Before shaping, mix ½ cup of shredded cheddar cheese into the dough. The cheese melts during baking, creating a savory, gooey center. It’s a hit with adults and kids who love cheesy bread.
- Spicy Bloody Fingers: Add 1 teaspoon of cayenne pepper or red pepper flakes to the flour mixture. After baking, drizzle with a little sriracha or hot honey for a sweet-and-spicy kick that looks like blood.
- Sweet Cinnamon Sugar Fingers: Skip the salt and the baking soda bath. After shaping and baking (without the bath), brush the warm pretzels with melted butter and roll them in a mixture of cinnamon and sugar. They taste like churros! Use a raisin or dried cranberry for the fingernail instead of an almond.
- Gluten-Free Option: You can substitute the all-purpose flour with a 1:1 gluten-free baking flour blend. The texture will be slightly more cake-like, but they still taste amazing. Just be gentle when boiling them, as they are more fragile.
Serving & Storage Suggestions
These witch finger pretzels are best served warm, right out of the oven. The contrast between the soft, chewy dough and the crunchy almond nail is unbeatable. Arrange them on a wooden board or a dark platter for a truly spooky presentation. I like to place a small bowl of warm cheese sauce or spicy mustard in the center for dipping.
They pair perfectly with a mug of hot apple cider, a pumpkin spice latte, or a glass of cold milk. For a Halloween party spread, serve them alongside a batch of creamy pumpkin soup or a plate of mummy hot dogs for a full savory snack table.
Storage: Store any leftovers in an airtight container at room temperature for up to 2 days. They will lose their crispness, but they are still tasty. To reheat, pop them in a 300°F (150°C) oven for 5-7 minutes, or in an air fryer at 350°F (175°C) for 3-4 minutes. Do not microwave them—they will turn into rubbery, sad little fingers.
Freezing: You can freeze the unbaked, shaped pretzels on a baking sheet until solid, then transfer them to a freezer bag. When you are ready to bake, boil them straight from frozen (add 10 seconds to the boil time) and bake as directed. The flavor actually develops nicely over a few days in the freezer!
Nutritional Information & Benefits
While these are a treat, they do offer a few nutritional perks. Here is an estimated breakdown per pretzel (based on 16 servings):
| Nutrient | Amount |
|---|---|
| Calories | 185 |
| Fat | 5g |
| Carbohydrates | 30g |
| Protein | 5g |
| Fiber | 1g |
| Sugar | 3g |
| Sodium | 480mg |
Pin This Recipe!
Cozy Witch Finger Pretzels: Easy Halloween Snack
These spooky yet cozy witch finger pretzels are a fun and easy Halloween snack made from a simple no-rise dough, shaped like ghoulish fingers with almond fingernails. Perfect for parties or a cozy night in, they deliver a chewy, salty pretzel experience with a delightful nutty crunch.
- Prep Time: 20 minutes
- Cook Time: 15 minutes
- Total Time: 35 minutes
- Yield: 16 servings 1x
- Category: Snack
- Cuisine: American
Ingredients
- 1 ½ cups (360 ml) warm water (around 110°F/43°C)
- 2 ¼ teaspoons (1 packet) active dry yeast
- 2 tablespoons brown sugar
- 4 cups (480 grams) all-purpose flour
- 4 tablespoons unsalted butter, melted
- 1 teaspoon salt
- ½ cup (120 grams) baking soda (for the bath)
- 10 cups (2.4 liters) water (for the bath)
- Coarse sea salt or pretzel salt (for sprinkling)
- Whole almonds or sliced almonds (for the fingernails)
Instructions
- Activate the Yeast: In a large mixing bowl, combine the warm water, brown sugar, and active dry yeast. Stir gently and let sit for 5-10 minutes until foamy.
- Make the Dough: Add the melted butter, salt, and 2 cups of flour to the yeast mixture. Stir until combined. Gradually add the remaining 2 cups of flour, ½ cup at a time, until a shaggy dough forms. Turn out onto a lightly floured surface.
- Knead the Dough: Knead for 5-7 minutes until smooth, elastic, and springs back when poked. If too sticky, add a tablespoon of flour at a time.
- Shape the Fingers: Preheat oven to 425°F (220°C). Divide dough into 12-16 equal pieces. Roll each piece into a long rope about 6-8 inches long, thicker at the top (wrist) and tapering to a point at the bottom (fingertip).
- Add the Knuckles: Using the back of a butter knife or bench scraper, gently press 2-3 lines across the top half of each finger to create knuckle indentations.
- Attach the Fingernails: Press a whole or slivered almond firmly into the tip of each finger.
- The Baking Soda Bath: Bring 10 cups of water and ½ cup of baking soda to a rolling boil in a large pot. Carefully drop 2-3 shaped pretzels into the boiling water. Boil for 20-30 seconds per side. Use a slotted spoon to flip them gently.
- Transfer and Egg Wash: Use the slotted spoon to remove pretzels, letting excess drip off. Place on prepared baking sheets. Optionally, whisk one egg with a tablespoon of water and brush over each pretzel for a glossy finish.
- Sprinkle and Bake: Immediately sprinkle with coarse sea salt. Bake for 12-15 minutes until deep golden brown.
- Cool and Serve: Let cool on the baking sheet for 5 minutes before transferring to a wire rack. Best enjoyed warm.
Notes
Don’t over-boil the pretzels; 20-30 seconds per side is enough. Keep the dough covered while shaping to prevent drying. Use a light touch when making knuckle indentations to avoid splitting. For best results, weigh the flour (480 grams).
Nutrition
- Serving Size: 1 pretzel
- Calories: 185
- Sugar: 3
- Sodium: 480
- Fat: 5
- Saturated Fat: 2
- Carbohydrates: 30
- Fiber: 1
- Protein: 5
Keywords: Halloween pretzels, witch finger pretzels, easy Halloween snack, soft pretzels, spooky snacks, homemade pretzels