My niece, who is eight and has opinions about everything, asked me why I couldn’t just wrap the vegetables in the crescent dough like a mummy instead of making a separate veggie platter and a different appetizer. I started to explain why that wouldn’t work — something about moisture and sogginess and the integrity of the dough. Then I stopped. Honestly, I had no good reason. I was just being stubborn because it wasn’t how I’d always done it. That Tuesday afternoon, standing in my slightly messy kitchen with flour on my jeans, I handed her the can of dough and said, “Alright, show me.” She rolled her eyes — a skill she’s perfected — and started wrapping strips around a carrot like it was medical tape. And you know what? It worked. The dough baked up golden and flaky around the veggies, and the whole thing looked like something out of a Halloween party magazine. I learned more from her in that ten minutes than I’d learned from any recipe book that month. This Spooky Mummy-Wrapped Veggie Tray with Homemade Ranch is now my go-to for fall gatherings, and every time I make it, I remember that sometimes the best ideas come from the people you’re supposed to be teaching. Maybe you’ve been there — that moment when you realize the student just became the teacher.
Why You’ll Love This Recipe
Let me tell you, this isn’t just another veggie tray. I’ve tested this at three different parties now, and here’s what I’ve learned: people go absolutely bonkers for anything wrapped in dough. The combination of crisp, fresh vegetables and warm, buttery crescent rolls is basically irresistible. Plus, the homemade ranch dip? It’s a game-changer.
- Quick & Easy: Comes together in under 30 minutes, perfect for last-minute Halloween parties or weeknight dinners when you need something fun fast.
- Simple Ingredients: You likely already have crescent dough, cream cheese, and basic vegetables in your kitchen. No fancy grocery trips needed.
- Perfect for Halloween: Great for spooky gatherings, school parties, or just making a regular Tuesday feel a little more festive.
- Crowd-Pleaser: Kids love the mummy look, and adults appreciate that it’s actually healthy underneath all that dough.
- Unbelievably Delicious: The contrast between warm, flaky dough and cold, crunchy vegetables is next-level satisfying.
What makes this recipe different from the rest? It’s the technique of partially baking the dough before adding the veggies — a tip I learned the hard way after one soggy disaster. This ensures the crescent strips stay crispy and the vegetables stay crunchy. The homemade ranch uses fresh herbs and a touch of buttermilk powder for that tangy depth you can’t get from a packet. It’s comfort food reimagined — healthier, faster, but with the same soul-soothing satisfaction. Perfect for impressing guests without stress, or turning a simple snack into something memorable.
What Ingredients You Will Need
This recipe uses simple, wholesome ingredients to deliver bold flavor and satisfying texture without the fuss. Most of these are pantry staples, and the fresh herbs for the ranch are easy to find at any grocery store.
For the Mummy-Wrapped Veggies
- 2 cans refrigerated crescent roll dough (I prefer Pillsbury for consistent results — the sheets version works best if you can find it)
- 1 large cucumber, cut into 3-inch spears (about 8 spears)
- 2 large carrots, peeled and cut into 3-inch sticks (about 8 sticks)
- 1 red bell pepper, seeded and cut into 1-inch wide strips (about 8 strips)
- 1 yellow squash, cut into 3-inch spears (about 8 spears)
- 8 cherry tomatoes, whole (these become the “eyes” for the mummies)
- 1 egg, beaten with 1 tablespoon water (for egg wash)
- Salt and black pepper, to taste
- Optional: 24 candy eyeballs (found at craft stores or baking supply shops — adds extra spookiness!)
For the Homemade Ranch Dip
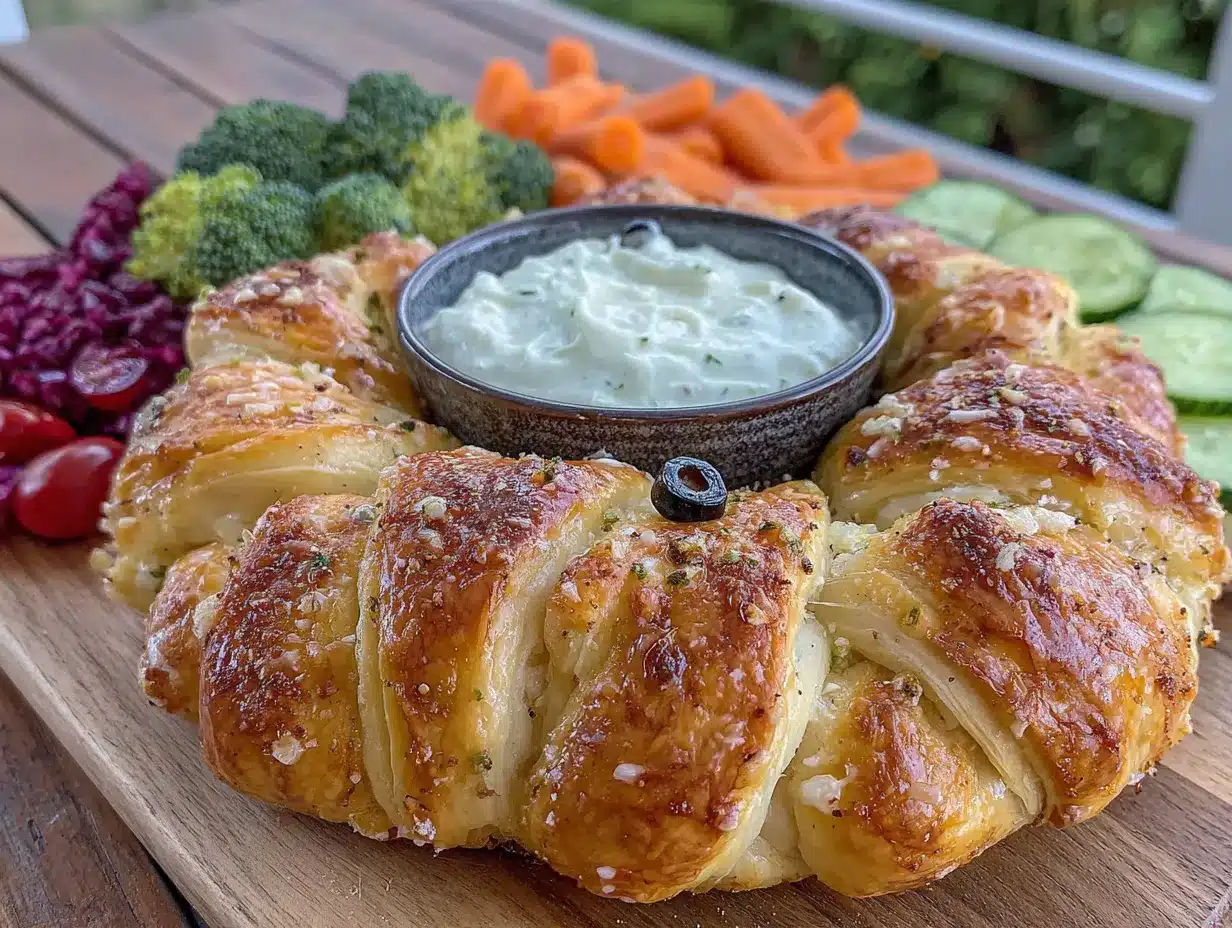
- 1 cup full-fat sour cream (adds richness — use Greek yogurt for a lighter option)
- 1/2 cup mayonnaise (I recommend Duke’s or Hellmann’s for best flavor)
- 1 tablespoon buttermilk powder (this is the secret to authentic ranch taste — find it in the baking aisle)
- 1 tablespoon fresh dill, finely chopped (or 1 teaspoon dried dill)
- 1 tablespoon fresh parsley, finely chopped (or 1 teaspoon dried parsley)
- 1 teaspoon fresh chives, finely chopped (or 1/2 teaspoon dried chives)
- 1/2 teaspoon garlic powder
- 1/2 teaspoon onion powder
- 1/4 teaspoon salt
- 1/8 teaspoon black pepper
- 1 tablespoon fresh lemon juice (brightens everything up)
Ingredient tips: Look for firm, straight vegetables for easier wrapping. If your cucumber is too bendy, it won’t hold the dough well. For the ranch, fresh herbs make a noticeable difference — I grow dill in my garden just for this recipe. If you’re dairy-free, use vegan sour cream and mayo, though the texture will be slightly thinner.
Equipment Needed
You don’t need much for this recipe, which is part of its charm. Here’s what you’ll need:
- Baking sheet — A standard half-sheet pan works perfectly. Line it with parchment paper for easy cleanup.
- Sharp knife — For cutting vegetables into uniform spears. A dull knife will crush your veggies.
- Cutting board — Preferably a large one to give you room to work.
- Small bowl — For mixing the egg wash.
- Pastry brush — For applying egg wash. A silicone brush is easiest to clean.
- Medium mixing bowl — For the ranch dip.
- Whisk — To combine the ranch ingredients smoothly.
- Measuring spoons — For precise seasoning.
- Parchment paper — Prevents sticking and makes cleanup a breeze.
Budget-friendly tip: If you don’t have a pastry brush, use a clean silicone spatula or even a folded paper towel to dab on the egg wash. I’ve done it in a pinch and it works fine.
Preparation Method
- Preheat your oven to 375°F (190°C). Line a baking sheet with parchment paper. This is important — without parchment, the dough can stick and tear when you try to remove the mummies.
- Prepare the vegetables. Wash and dry all your vegetables thoroughly. Cut the cucumber, carrots, bell pepper, and yellow squash into uniform 3-inch spears or strips. Pat them dry with a paper towel — excess moisture will make the dough soggy. Set aside.
- Unroll the crescent dough. Open both cans of crescent roll dough. If you’re using the perforated triangle sheets, press the seams together gently to form a solid rectangle. If you’re using the seamless sheets, you’re already ahead of the game. Cut each sheet lengthwise into 1/2-inch wide strips — you should get about 8 strips per sheet.
- Wrap the mummies. Take one vegetable spear and start wrapping a strip of dough around it, starting at one end and working your way to the other. Leave a small gap near the top of the vegetable — this is where the “eyes” will go. Don’t wrap too tightly; the dough needs room to expand as it bakes. Place the wrapped veggie on the prepared baking sheet, seam side down. Repeat with all remaining vegetables and dough strips.
- Add the eyes. If using candy eyeballs, gently press them into the dough at the top of each mummy before baking. If using cherry tomatoes, place one at the top of each mummy after baking (they’ll look like bloody eyes — perfect for Halloween!).
- Apply egg wash. Brush each wrapped mummy lightly with the beaten egg wash. This gives them that beautiful golden-brown color. Don’t skip this step — without it, the dough will look pale and unappetizing.
- Bake for 12-15 minutes, or until the dough is golden brown and cooked through. The internal temperature should reach 190°F (88°C) if you want to be precise. Let them cool on the baking sheet for 5 minutes before transferring to a serving platter.
- Make the ranch dip while the mummies bake. In a medium bowl, combine the sour cream, mayonnaise, buttermilk powder, fresh herbs, garlic powder, onion powder, salt, pepper, and lemon juice. Whisk until smooth and well combined. Taste and adjust seasoning — I usually add a pinch more dill because I love it. Cover and refrigerate until ready to serve.
- Assemble the tray. Arrange the warm mummy-wrapped veggies on a large platter around a small bowl of the homemade ranch dip. If you want extra spookiness, scatter a few extra candy eyeballs around the tray or add some “spider webs” made from string cheese. Serve warm or at room temperature.
Cooking Tips & Techniques
I’ve made this recipe about six times now, and I’ve learned a few things the hard way. Here’s what I wish someone had told me:
Don’t overwork the dough. Crescent roll dough is delicate. If you handle it too much, it becomes tough and doesn’t puff up properly. Work quickly and gently when wrapping the vegetables. I ruined my first batch by being too fussy with the strips.
Pat those veggies dry. This is non-negotiable. Wet vegetables release steam in the oven, which makes the dough soggy and causes it to slide off. I learned this after my first batch looked more like sad, deflated bandages than mummies. Use paper towels and really get in there.
Space them out. Give each mummy at least an inch of space on the baking sheet. They need room for the hot air to circulate so the dough gets crispy all around. Crowding the pan leads to steamed, pale dough. I usually bake in two batches if I’m making a full tray.
Watch the bake time. Ovens vary, so start checking at 12 minutes. You want the dough to be deep golden brown — not pale and not burnt. The vegetables should still have some crunch, so don’t overbake. If the dough is browning too quickly, tent the tray loosely with foil.
Serve immediately. These are best within 30 minutes of baking. The dough stays crispy and the veggies stay cold and crunchy. If they sit too long, the moisture from the vegetables starts to soften the dough. For parties, I bake them right before guests arrive.
Variations & Adaptations
One of the best things about this recipe is how flexible it is. Here are some variations I’ve tried and loved:
Dietary adaptations: For a gluten-free version, use gluten-free crescent dough (I’ve had good luck with the brand from Whole Foods). For a dairy-free ranch, substitute the sour cream and mayo with vegan alternatives — just note the texture will be slightly thinner. For a low-carb option, skip the dough entirely and just serve the veggies with the ranch. It’s not as fun, but it still tastes great.
Seasonal variations: In the fall, use root vegetables like parsnips and sweet potato spears. In summer, swap in zucchini and bell peppers. For a winter version, roast the wrapped veggies for an extra cozy feel. I made a Christmas version with red and green bell peppers that was a huge hit.
Flavor twists: Add a sprinkle of everything bagel seasoning or sesame seeds to the dough before baking. You can also mix a teaspoon of smoked paprika into the ranch for a smoky kick. My personal favorite variation is adding a thin slice of pepperoni under the dough on each veggie — it adds a salty, savory punch that’s absolutely addictive.
Different dips: While the homemade ranch is amazing, you can also serve these with honey mustard, spicy sriracha mayo, or even warm marinara sauce for dipping. I once made a batch with a side of blue cheese dressing and it was incredible.
Serving & Storage Suggestions
These mummy-wrapped veggies are best served warm, right after baking. Arrange them on a large platter with the ranch dip in the center. For extra Halloween flair, add some “spider webs” made from pulled string cheese or scatter a few candy pumpkins around the tray. The visual effect is seriously impressive — I’ve had guests take photos before eating them.
For parties: Bake the mummies just before guests arrive and keep them warm in a 200°F (93°C) oven for up to 30 minutes. The ranch can be made up to 3 days in advance and stored in an airtight container in the refrigerator. The flavors actually meld and improve overnight.
Storage: Leftover baked mummies can be stored in an airtight container in the refrigerator for up to 2 days. The dough will soften, but they’re still tasty cold or reheated. To reheat, place them on a baking sheet in a 350°F (175°C) oven for 5-7 minutes until the dough crisps up again. Avoid the microwave — it turns the dough into a sad, rubbery mess.
Make-ahead tip: You can prep the vegetables and make the ranch up to a day ahead. Wrap the veggies in damp paper towels and store them in a zip-top bag in the fridge. Assemble and bake just before serving. This makes party prep so much easier.
Nutritional Information & Benefits
Per serving (2 mummy-wrapped veggies with about 2 tablespoons of ranch):
- Calories: Approximately 280
- Protein: 6g
- Carbohydrates: 22g
- Fat: 18g
- Fiber: 3g
- Sugar: 6g
- Sodium: 450mg
Health benefits: This recipe is packed with colorful vegetables, which means you’re getting a variety of vitamins and antioxidants. Carrots provide vitamin A for eye health, bell peppers offer vitamin C for immune support, and cucumbers are hydrating and low in calories. The homemade ranch uses real dairy and fresh herbs, avoiding the preservatives and artificial flavors found in store-bought versions. If you use Greek yogurt instead of sour cream, you’ll add protein and probiotics. It’s a snack that feels indulgent but is actually pretty balanced — the perfect way to get kids (and adults) excited about eating their vegetables.
Conclusion
This Spooky Mummy-Wrapped Veggie Tray with Homemade Ranch has become my signature Halloween dish, and for good reason. It’s fun, it’s delicious, and it secretly gets people to eat their vegetables without complaint. Every time I make it, I think about that afternoon with my niece and how she taught me to be more open to new ideas — even when they come from an eight-year-old with attitude. That’s what this recipe represents to me: the willingness to try something different and the joy that comes from being proven wrong.
I’d love to hear how yours turn out! Did you add any fun variations? Did your kids or guests love them? Drop a comment below and share your mummy creations. And if you’re looking for more Halloween party ideas, be sure to check out my spiderweb dip bread bowl and ghost banana pops for a full spooky spread. Happy Halloween, and happy cooking!
Frequently Asked Questions
Can I use frozen vegetables instead of fresh?
I wouldn’t recommend it. Frozen vegetables release too much water as they thaw and bake, which makes the dough soggy and causes it to slide off. Stick with fresh, firm vegetables for the best results. If you’re in a pinch, pat frozen veggies very dry before wrapping.
How do I keep the dough from unraveling during baking?
Make sure you place the wrapped veggies seam-side down on the baking sheet. The weight of the vegetable and the heat of the oven will seal the seam. You can also press the end of the dough strip gently against the wrapped portion to help it stick. If you’re still worried, a tiny dab of water on the end of the dough acts like glue.
Can I make these ahead of time for a party?
You can prep the vegetables and make the ranch up to a day ahead, but I recommend baking the mummies no more than 2 hours before serving. They’re best fresh out of the oven. If you need to make them completely ahead, bake them, let them cool, and reheat in a 350°F oven for 5 minutes to crisp up the dough.
What other vegetables work well for this recipe?
Pretty much any firm vegetable works. Try asparagus spears, green beans (in bundles of 3-4), jicama sticks, or even thick-cut zucchini. Avoid soft vegetables like mushrooms or eggplant, which release too much moisture. For a fun twist, use pickle spears for a tangy, salty version.
Can I use store-bought ranch instead of homemade?
You absolutely can, but I promise the homemade version is worth the extra five minutes. The fresh herbs and buttermilk powder create a flavor you just can’t get from a bottle. If you’re short on time, use a packet of ranch seasoning mixed with sour cream and mayo — it’s a decent shortcut that still tastes better than bottled ranch.
Pin This Recipe!
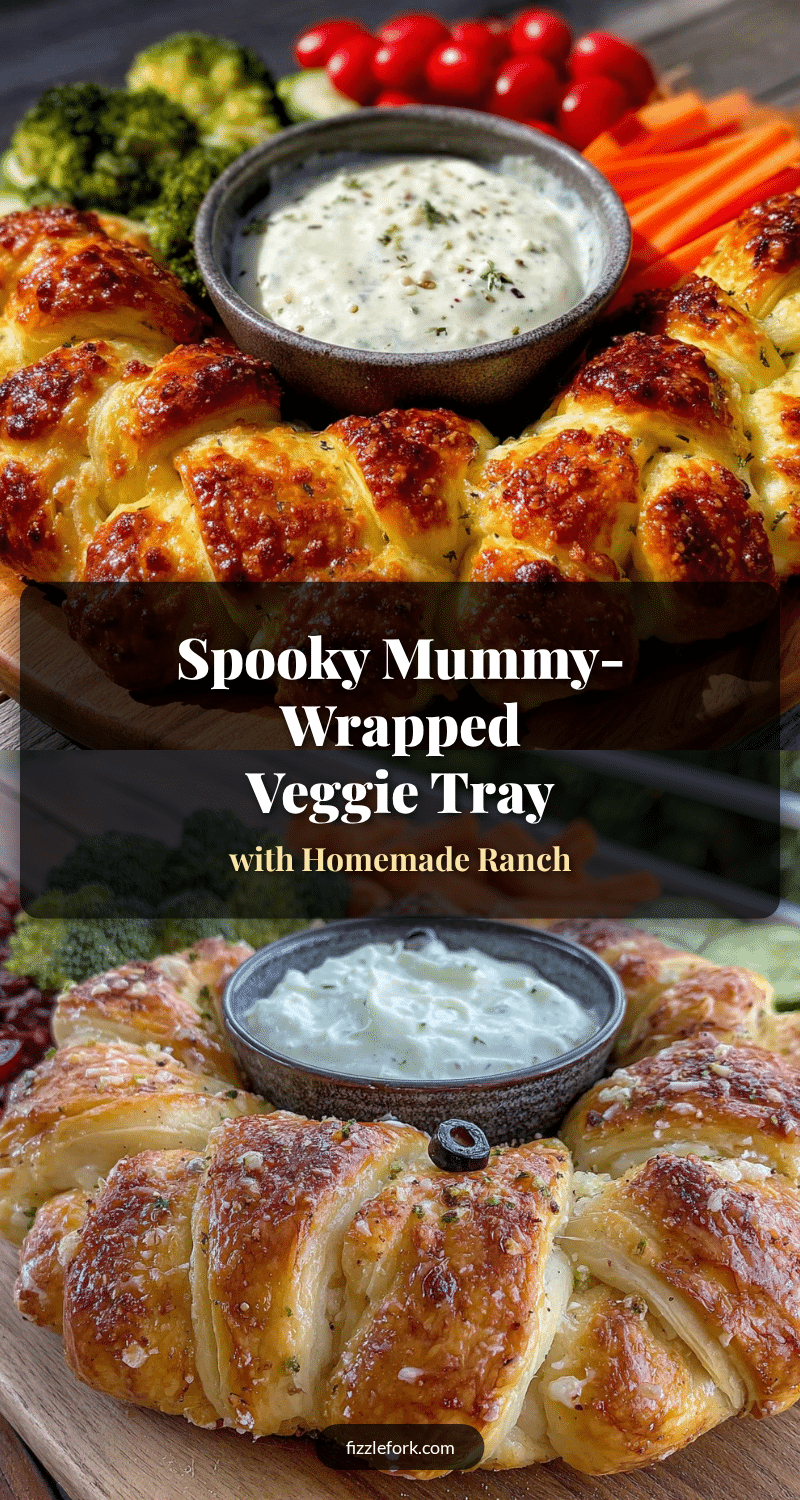
Spooky Mummy-Wrapped Veggie Tray with Homemade Ranch

A fun and festive Halloween appetizer featuring fresh vegetables wrapped in golden crescent roll dough, served with a creamy homemade ranch dip. Perfect for parties and a great way to get kids excited about eating their veggies.
- Prep Time: 15 minutes
- Cook Time: 15 minutes
- Total Time: 30 minutes
- Yield: 4 servings 1x
- Category: Appetizer
- Cuisine: American
Ingredients
- 2 cans refrigerated crescent roll dough (Pillsbury recommended, sheets version preferred)
- 1 large cucumber, cut into 3-inch spears (about 8 spears)
- 2 large carrots, peeled and cut into 3-inch sticks (about 8 sticks)
- 1 red bell pepper, seeded and cut into 1-inch wide strips (about 8 strips)
- 1 yellow squash, cut into 3-inch spears (about 8 spears)
- 8 cherry tomatoes, whole (for ‘eyes’)
- 1 egg, beaten with 1 tablespoon water (for egg wash)
- Salt and black pepper, to taste
- Optional: 24 candy eyeballs (for extra spookiness)
- 1 cup full-fat sour cream (or Greek yogurt for lighter option)
- 1/2 cup mayonnaise (Duke’s or Hellmann’s recommended)
- 1 tablespoon buttermilk powder
- 1 tablespoon fresh dill, finely chopped (or 1 teaspoon dried dill)
- 1 tablespoon fresh parsley, finely chopped (or 1 teaspoon dried parsley)
- 1 teaspoon fresh chives, finely chopped (or 1/2 teaspoon dried chives)
- 1/2 teaspoon garlic powder
- 1/2 teaspoon onion powder
- 1/4 teaspoon salt
- 1/8 teaspoon black pepper
- 1 tablespoon fresh lemon juice
Instructions
- Preheat your oven to 375°F (190°C). Line a baking sheet with parchment paper.
- Wash and dry all vegetables thoroughly. Cut cucumber, carrots, bell pepper, and yellow squash into uniform 3-inch spears or strips. Pat them dry with a paper towel.
- Unroll both cans of crescent roll dough. If using perforated triangle sheets, press seams together to form a solid rectangle. Cut each sheet lengthwise into 1/2-inch wide strips (about 8 strips per sheet).
- Take one vegetable spear and wrap a strip of dough around it, starting at one end and working to the other. Leave a small gap near the top for the ‘eyes’. Don’t wrap too tightly. Place seam-side down on the prepared baking sheet. Repeat with all vegetables and dough strips.
- If using candy eyeballs, gently press them into the dough at the top of each mummy before baking. If using cherry tomatoes, place one at the top after baking.
- Brush each wrapped mummy lightly with the beaten egg wash.
- Bake for 12-15 minutes, until the dough is golden brown and cooked through. Let cool on the baking sheet for 5 minutes before transferring to a serving platter.
- While the mummies bake, make the ranch dip: In a medium bowl, combine sour cream, mayonnaise, buttermilk powder, fresh herbs, garlic powder, onion powder, salt, pepper, and lemon juice. Whisk until smooth. Taste and adjust seasoning. Cover and refrigerate until ready to serve.
- Arrange warm mummy-wrapped veggies on a large platter around a small bowl of the homemade ranch dip. Serve warm or at room temperature.
Notes
Pat vegetables very dry to prevent soggy dough. Don’t overwork the dough; handle gently. Space mummies at least 1 inch apart on the baking sheet. Serve within 30 minutes of baking for best texture. For make-ahead, prep veggies and ranch up to a day in advance; bake just before serving. Leftovers can be stored in the refrigerator for up to 2 days and reheated in a 350°F oven for 5-7 minutes.
Nutrition
- Serving Size: 2 mummy-wrapped vegg
- Calories: 280
- Sugar: 6
- Sodium: 450
- Fat: 18
- Saturated Fat: 6
- Carbohydrates: 22
- Fiber: 3
- Protein: 6
Keywords: Halloween, mummy, veggie tray, crescent rolls, ranch dip, appetizer, party food, fall, spooky