The woman at the community garden plot next to mine watched me staring at a pile of wilting herbs on my cutting board. I was trying to salvage what was left of my overgrown sage and thyme plants before the first frost hit. She didn’t say anything at first, just kept pulling carrots from the soil with this quiet, steady rhythm. Then she wiped her hands on her apron and said, “You’re overthinking it. Chop them all, add some bread, and let the oven do the work.” She was a retired school teacher named Margaret who had been gardening that plot for thirty years. I told her I was trying to figure out a stuffing recipe that my gluten-free cousin could actually eat. Margaret just laughed and said, “Honey, the best stuffing I ever made was an accident. I ran out of fresh bread and used whatever was in the freezer.” That conversation turned into this recipe—one that actually works on a busy Tuesday night when you’re tired and hungry and need something that feels like a hug on a plate. Honestly, I’ve made this more times than I can count, and it never fails to deliver that warm, herby comfort without the gluten drama.
Let me tell you, this easy gluten-free herb stuffing has become my secret weapon for weeknight dinners. You know that feeling when you want something substantial but don’t have an hour to spend in the kitchen? That’s exactly why this recipe exists. It’s ready in 30 minutes flat, uses ingredients you probably already have, and tastes like you spent way more effort than you actually did. I mean, who knew that day-old gluten-free bread could transform into something this good with just a little butter, broth, and a handful of fresh herbs?
Why You’ll Love This Recipe
This isn’t just another gluten-free stuffing recipe that leaves you disappointed. I’ve tested this version about a dozen times—sometimes on purpose, sometimes because I forgot to set a timer—and it consistently delivers the kind of texture and flavor that makes people ask for seconds without even realizing it’s gluten-free.
- Quick & Easy: From start to table in 30 minutes flat. Perfect for those nights when you walk in the door at 6 PM and need dinner by 6:30.
- Simple Ingredients: No fancy grocery trips required. You probably have gluten-free bread in your freezer right now, and fresh herbs are easy to grab or grow.
- Perfect for Weeknights: This works as a side dish for roasted chicken, pork chops, or even a quick rotisserie chicken from the store. It’s also hearty enough to eat as a main dish with a simple salad.
- Crowd-Pleaser: I’ve served this to people who “don’t like gluten-free food” and watched them go back for thirds. Nobody guesses it’s gluten-free unless I tell them.
- Unbelievably Delicious: The edges get crispy and golden, the inside stays tender and moist, and the herb flavor is perfectly balanced. It’s comfort food that actually works.
What makes this recipe different from every other gluten-free stuffing out there? It’s the technique. Most gluten-free stuffing recipes turn into a sad, soggy mess because gluten-free bread absorbs liquid differently than regular bread. I figured out that toasting the bread cubes first changes everything. It gives them structure so they don’t dissolve into mush. Plus, using a mix of chicken broth and a tiny bit of butter creates that rich, savory flavor without needing any weird ingredients or complicated steps.
This recipe isn’t just good—it’s the kind that makes you close your eyes after the first bite. It’s comfort food reimagined: faster, gluten-free, but with the same soul-soothing satisfaction you expect from traditional stuffing. Perfect for impressing guests without stress, or turning a simple weeknight meal into something memorable.
What Ingredients You Will Need
This recipe uses simple, pantry-friendly ingredients that come together to create something genuinely delicious. Here’s what you’ll need and why each ingredient matters.
For the Stuffing Base
- 6 cups gluten-free bread, cubed (about half a loaf, day-old works best—I prefer Schär or Canyon Bakehouse for consistent texture)
- 4 tablespoons unsalted butter (adds richness and helps the edges crisp up beautifully)
- 1 medium yellow onion, diced (about 1 cup, provides savory depth)
- 2 celery stalks, diced (about 1 cup, gives that classic stuffing crunch and flavor)
- 3 cloves garlic, minced (adds aromatic warmth)
- 1½ cups low-sodium chicken broth (vegetable broth works too—use homemade if you have it, but boxed is fine)
- 1 large egg, lightly beaten (helps bind everything together without making it heavy)
For the Herb Blend
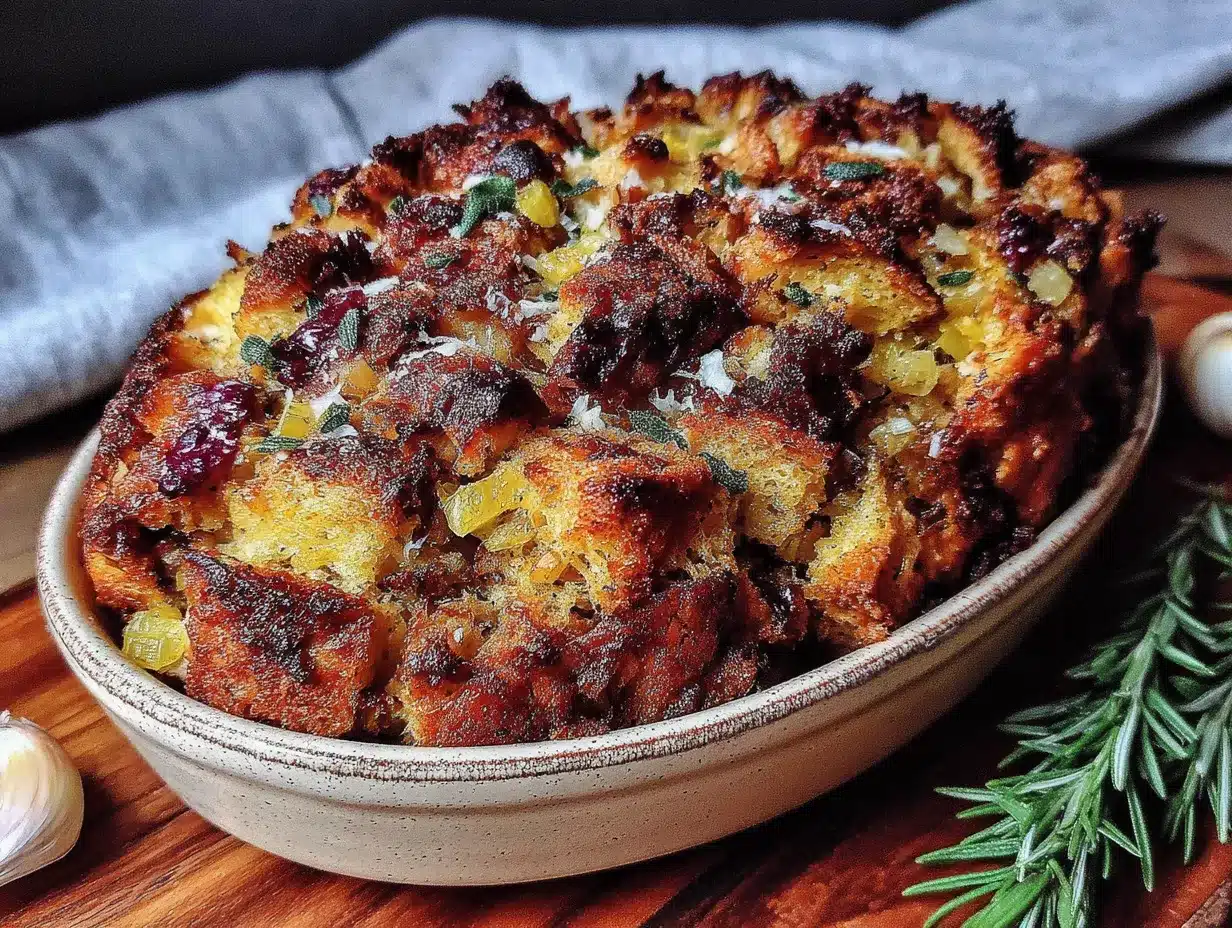
- 2 tablespoons fresh sage, chopped (the star herb here—earthy and slightly peppery)
- 1 tablespoon fresh thyme leaves (adds subtle lemon-herb notes)
- 1 tablespoon fresh rosemary, finely chopped (piney and aromatic, use sparingly so it doesn’t overpower)
- 2 tablespoons fresh parsley, chopped (brightens everything up at the end)
- 1 teaspoon dried poultry seasoning (optional, but it rounds out the flavor beautifully)
- ½ teaspoon salt (adjust to taste)
- ¼ teaspoon black pepper (freshly ground is best)
Ingredient Tips: If you can’t find fresh herbs, use dried herbs at half the amount—1 tablespoon dried sage instead of 2 tablespoons fresh. For the bread, any sturdy gluten-free bread works, but avoid the super soft sandwich slices. Look for something with some structure, like a rustic loaf or artisan-style bread. I’ve tried this with Against the Grain brand and it turned out great too.
Substitution Guidance: Use dairy-free butter and vegetable broth for a vegan version. Swap the egg with a flax egg (1 tablespoon ground flaxseed mixed with 3 tablespoons water, let sit for 5 minutes) if needed. For a lower-sodium option, use no-salt-added broth and adjust seasoning at the end.
Equipment Needed
You don’t need anything fancy for this recipe, which is exactly how I like it on a busy weeknight. Here’s what you’ll need:
- Baking sheet (for toasting the bread cubes—a rimmed sheet works best to prevent spills)
- Large skillet or sauté pan (12-inch is ideal, but 10-inch works too)
- Large mixing bowl (for combining everything)
- 9×13-inch baking dish (or any 2-3 quart casserole dish)
- Chef’s knife and cutting board
- Measuring cups and spoons
- Wooden spoon or spatula
If you don’t have a baking sheet, you can toast the bread cubes directly in the skillet over medium heat, tossing frequently until golden. It takes a few extra minutes but works in a pinch. I’ve also used a cast-iron skillet for the whole process—toast the bread, cook the vegetables, then mix and bake right in the same pan. Less cleanup, which is always a win on a weeknight.
For the baking dish, a 9×13-inch glass or ceramic dish works beautifully. Metal pans work too, just reduce the baking time by 5 minutes since they conduct heat faster. And honestly, if you’re really short on time, you can skip the baking step entirely and just serve it straight from the skillet after mixing—it’s still delicious, just softer with less crispy edges.
Preparation Method
Let’s walk through this step by step. I’ve included time estimates and sensory cues so you know exactly what to look for at each stage. Trust me, once you make this once, you’ll have it memorized.
Step 1: Toast the Bread Cubes (10 minutes)
Preheat your oven to 375°F (190°C). Spread the gluten-free bread cubes in a single layer on a rimmed baking sheet. Bake for 8-10 minutes, stirring halfway through, until the cubes are lightly golden and dry to the touch. They should feel firm and make a hollow sound when you tap them. Don’t let them get too dark—they’ll continue cooking later. This step is non-negotiable for gluten-free bread because it prevents that dreaded mushy texture.
Step 2: Sauté the Vegetables (5-7 minutes)
While the bread toasts, melt the butter in a large skillet over medium heat. Add the diced onion and celery, and cook for 4-5 minutes until softened and translucent. The onions should look glassy and the celery should be tender but not mushy. Add the minced garlic and cook for another 30 seconds until fragrant—you’ll smell it immediately. Remove from heat and set aside.
Step 3: Combine the Wet Ingredients (2 minutes)
In a small bowl or measuring cup, whisk together the chicken broth and beaten egg until smooth. This mixture is what will bind your stuffing together. Don’t skip the egg—it’s what gives the stuffing structure without needing gluten. If you’re making this vegan, the flax egg works here too, just whisk it into the broth separately first.
Step 4: Mix Everything Together (3 minutes)
In a large mixing bowl, combine the toasted bread cubes, sautéed vegetables, fresh sage, thyme, rosemary, poultry seasoning (if using), salt, and pepper. Toss gently with your hands or a large spoon to distribute everything evenly. Pour the broth-egg mixture over the top and toss again until all the bread cubes are evenly moistened. You should see no dry spots, but the mixture shouldn’t be swimming in liquid either—it should look like a cohesive, slightly wet pile of bread.
Step 5: Bake to Perfection (15-18 minutes)
Transfer the mixture to a greased 9×13-inch baking dish and spread it into an even layer. Bake at 375°F (190°C) for 15-18 minutes, until the top is golden brown and crispy. The edges should look slightly darker and crusty, and you’ll hear a slight sizzle when you pull it out of the oven. Let it rest for 5 minutes before serving—this allows the steam to redistribute and the texture to set properly.
Pro Tip: For extra crispy edges, spread the stuffing in a thinner layer. For softer, more traditional stuffing, pile it a bit thicker and cover with foil for the first 10 minutes of baking, then uncover for the last 5-8 minutes.
Cooking Tips & Techniques
After making this recipe more times than I can count, I’ve learned a few things the hard way. Here are the tips that actually make a difference.
Don’t Skip Toasting the Bread. I learned this lesson when I was in a hurry and threw untoasted bread cubes straight into the pan. The result was a sad, gluey mess that reminded me of wet cardboard. Gluten-free bread is more porous than regular bread, so it absorbs liquid faster. Toasting creates a barrier that helps the cubes hold their shape. Trust me on this one.
Watch Your Liquid Ratios. Different gluten-free breads absorb liquid differently. If your bread cubes seem dry after adding the broth mixture, add an extra 2-3 tablespoons of broth. If they look soupy, add a handful more toasted bread cubes. You’re looking for bread that’s moist but not drowning—think of it like a damp sponge rather than a wet rag.
Use Fresh Herbs When You Can. I know it’s tempting to reach for the dried herbs in the back of your cabinet, but fresh herbs make a huge difference here. The sage and thyme release their oils differently when fresh, and you get this bright, aromatic flavor that dried herbs just can’t replicate. That said, if all you have is dried, use half the amount and add them to the sauté pan with the onions to wake up their flavor.
Make It Ahead. Here’s a weeknight lifesaver: you can prep everything up to step 4 the night before. Toast the bread, chop the vegetables, and mix the dry ingredients. Store the bread cubes in a ziplock bag and the vegetable-herb mixture in the fridge. When you get home, just combine with the broth-egg mixture and bake. Dinner in 20 minutes flat.
Don’t Overmix. Once you add the liquid, handle the mixture gently. Overmixing can break down the bread cubes and turn your stuffing into paste. Just fold until everything is evenly moistened, then stop. Your future self will thank you.
Variations & Adaptations
This recipe is incredibly forgiving, which is exactly what you want on a busy weeknight. Here are some ways to make it your own.
Vegan Version
Swap the butter for olive oil or vegan butter, use vegetable broth instead of chicken broth, and replace the egg with a flax egg. The texture will be slightly less firm, but it’s still delicious. I’ve made this for vegan friends and they always ask for the recipe.
Add Some Protein
Turn this into a main dish by adding 1 cup of cooked and crumbled sausage, shredded rotisserie chicken, or sautéed mushrooms. Add the protein when you mix the bread cubes and vegetables. It transforms the stuffing into a complete meal that’s perfect for those nights when you don’t have energy for anything else.
Seasonal Twists
In the fall, add ½ cup of dried cranberries and ¼ cup of chopped pecans for a sweet and savory version. In the spring, swap the sage and rosemary for fresh dill and chives, and add a handful of chopped asparagus. In summer, throw in some fresh corn kernels and zucchini. The base recipe is so flexible that you can adapt it to whatever produce you have on hand.
Spicy Kick
Add ½ teaspoon of red pepper flakes or a diced jalapeño (seeds removed) to the sauté pan with the onions. It gives the stuffing a subtle warmth that pairs beautifully with the herbs. I tried this on a whim one night and now it’s my go-to version when I want something with a little edge.
Dairy-Free Option
Use olive oil or avocado oil instead of butter. The flavor changes slightly, but you still get that lovely richness from the oil. I actually prefer the olive oil version with fresh rosemary—it feels more Mediterranean somehow.
Serving & Storage Suggestions
This stuffing is best served warm, right out of the oven when the edges are still crispy and the herbs are at their most fragrant. Spoon it onto plates alongside roasted chicken, pork chops, or a simple green salad. It’s also fantastic as a side dish for holiday meals—nobody will guess it’s gluten-free.
Storage: Leftover stuffing keeps well in an airtight container in the refrigerator for up to 4 days. The texture softens slightly as it sits, but the flavor actually deepens. I often make a double batch on Sunday and use it for quick lunches throughout the week.
Reheating: For best results, reheat in a 350°F (175°C) oven for 10-15 minutes to restore some of the crispy edges. In a pinch, the microwave works too—just heat in 30-second intervals and expect a softer texture. If you’re reheating a large portion, add a splash of broth before reheating to prevent it from drying out.
Freezing: You can freeze the unbaked stuffing mixture for up to 3 months. Assemble everything in a freezer-safe dish, cover tightly with foil, and freeze. To bake, thaw overnight in the refrigerator, then bake as directed, adding 5-10 minutes to the cooking time. I’ve done this for holiday prep and it works beautifully.
Flavor Development: Here’s something interesting—this stuffing actually tastes better the next day. The herbs have time to meld with the bread, and the flavors become more rounded and cohesive. So if you have leftovers, consider yourself lucky. I always make extra on purpose just for next-day lunches.
Nutritional Information & Benefits
Per serving (about 1 cup), this gluten-free herb stuffing provides approximately:
- Calories: 220
- Protein: 6g
- Carbohydrates: 28g
- Fiber: 4g
- Fat: 10g
- Sodium: 480mg
This recipe is naturally gluten-free, making it safe for those with celiac disease or gluten sensitivity. The fresh herbs provide antioxidants and anti-inflammatory compounds—sage has been studied for its cognitive benefits, and thyme is rich in vitamin C and vitamin A. Celery adds fiber and hydration, while the onions provide prebiotics that support gut health.
For those watching their sodium, use no-salt-added broth and reduce the added salt to ¼ teaspoon. You can also use olive oil instead of butter to reduce saturated fat. This stuffing fits well into a balanced diet and can be part of a heart-healthy meal when paired with lean protein and vegetables.
I personally love that this recipe lets me enjoy a classic comfort food without the bloating and discomfort that often comes with gluten. It’s one of those dishes that proves gluten-free eating doesn’t mean sacrificing flavor or satisfaction.
Frequently Asked Questions
Can I use any gluten-free bread for this recipe?
Yes, but avoid super soft sandwich bread. Look for sturdy, artisan-style gluten-free bread. I’ve had the best results with Schär, Canyon Bakehouse, and Against the Grain brands. Day-old bread works even better because it’s already slightly dried out.
Can I make this stuffing ahead of time for a holiday meal?
Absolutely! Assemble the stuffing up to the point of baking, cover it, and refrigerate for up to 24 hours. When you’re ready to bake, add 5-10 minutes to the cooking time since you’re starting from cold. This is my go-to strategy for Thanksgiving.
Can I use dried herbs instead of fresh?
Yes, but use half the amount. Replace 2 tablespoons fresh sage with 1 tablespoon dried sage, and 1 tablespoon fresh thyme with 1½ teaspoons dried thyme. Add dried herbs to the sauté pan with the onions to help rehydrate and release their flavor.
Why did my stuffing turn out soggy?
This usually happens for one of two reasons: the bread wasn’t toasted enough, or too much liquid was added. Next time, toast the bread until it’s completely dry and golden, and start with 1¼ cups of broth instead of 1½ cups. You can always add more if needed.
Can I freeze this stuffing?
Yes! Freeze the unbaked mixture for up to 3 months. Thaw overnight in the refrigerator, then bake as directed. You can also freeze baked leftovers—just reheat in the oven to restore some crispiness.
Conclusion
This easy gluten-free herb stuffing has become a staple in my kitchen, and I honestly think it will become one in yours too. It’s proof that you don’t need complicated techniques or hard-to-find ingredients to create something genuinely delicious. Whether you’re cooking for someone with celiac disease, trying to eat less gluten, or just looking for a quick and satisfying side dish, this recipe delivers every single time.
I love that this recipe honors Margaret’s wisdom—the idea that the best cooking often comes from working with what you have and not overthinking it. She taught me that day in the garden that food doesn’t need to be complicated to be good. It just needs to be made with care and shared with people you love.
So go ahead and make this your own. Add your favorite herbs, throw in some extra vegetables, or keep it classic. However you make it, I hope it brings you the same comfort it’s brought me. And if you try it, I’d love to hear how it turned out. Drop a comment below or tag me in your photos—I’m genuinely excited to see your creations!
Pin This Recipe!
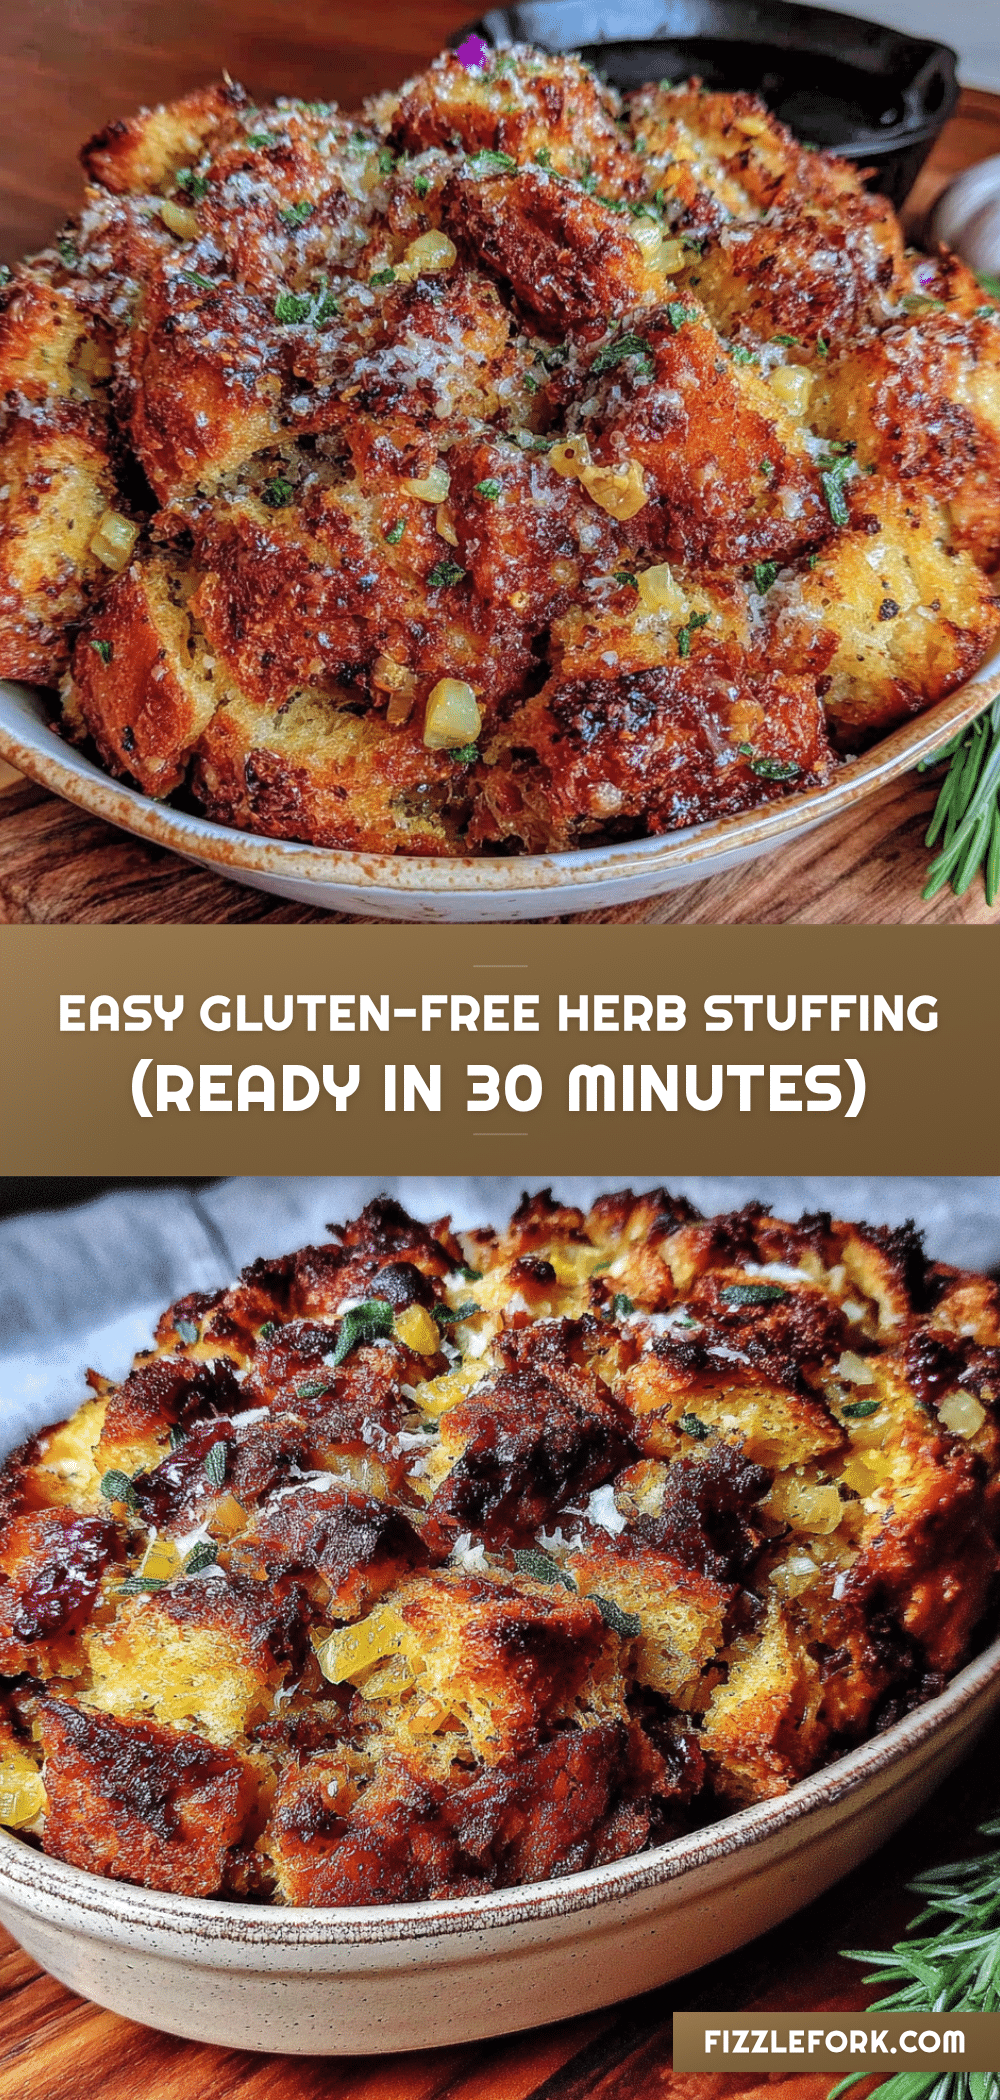
Easy Gluten-Free Herb Stuffing Ready in 30 Minutes

This easy gluten-free herb stuffing is ready in 30 minutes flat, uses simple ingredients, and delivers warm, herby comfort without the gluten drama. Perfect for weeknight dinners or holiday meals.
- Prep Time: 10 minutes
- Cook Time: 20 minutes
- Total Time: 30 minutes
- Yield: 6 servings 1x
- Category: Side Dish
- Cuisine: American
Ingredients
- 6 cups gluten-free bread, cubed (about half a loaf, day-old works best)
- 4 tablespoons unsalted butter
- 1 medium yellow onion, diced (about 1 cup)
- 2 celery stalks, diced (about 1 cup)
- 3 cloves garlic, minced
- 1½ cups low-sodium chicken broth (vegetable broth works too)
- 1 large egg, lightly beaten
- 2 tablespoons fresh sage, chopped
- 1 tablespoon fresh thyme leaves
- 1 tablespoon fresh rosemary, finely chopped
- 2 tablespoons fresh parsley, chopped
- 1 teaspoon dried poultry seasoning (optional)
- ½ teaspoon salt
- ¼ teaspoon black pepper
Instructions
- Preheat your oven to 375°F (190°C). Spread the gluten-free bread cubes in a single layer on a rimmed baking sheet. Bake for 8-10 minutes, stirring halfway through, until the cubes are lightly golden and dry to the touch.
- While the bread toasts, melt the butter in a large skillet over medium heat. Add the diced onion and celery, and cook for 4-5 minutes until softened and translucent. Add the minced garlic and cook for another 30 seconds until fragrant. Remove from heat.
- In a small bowl or measuring cup, whisk together the chicken broth and beaten egg until smooth.
- In a large mixing bowl, combine the toasted bread cubes, sautéed vegetables, fresh sage, thyme, rosemary, poultry seasoning (if using), salt, and pepper. Toss gently to distribute evenly. Pour the broth-egg mixture over the top and toss again until all the bread cubes are evenly moistened.
- Transfer the mixture to a greased 9×13-inch baking dish and spread into an even layer. Bake at 375°F (190°C) for 15-18 minutes, until the top is golden brown and crispy. Let it rest for 5 minutes before serving.
Notes
Toast the bread cubes first to prevent mushiness. For extra crispy edges, spread stuffing in a thinner layer. For softer stuffing, cover with foil for first 10 minutes of baking. Can be prepped ahead up to step 4 and refrigerated for 24 hours. Leftovers keep for 4 days in the refrigerator or freeze unbaked for up to 3 months.
Nutrition
- Serving Size: 1 cup
- Calories: 220
- Sugar: 3
- Sodium: 480
- Fat: 10
- Saturated Fat: 5
- Carbohydrates: 28
- Fiber: 4
- Protein: 6
Keywords: gluten-free stuffing, herb stuffing, easy stuffing, weeknight dinner, gluten-free side dish, Thanksgiving stuffing