It was 11:47 PM on a random Thursday in March, and I had a very specific craving for that chewy, salty-sweet jerky you can only get from a gas station that also sells fishing lures. The problem? I didn’t have a dehydrator, and I definitely didn’t have the patience to wait until morning. But I had a freezer full of venison from my buddy Carl’s hunting trip last fall, a bottle of soy sauce that was dangerously close to its expiration date, and this wild idea that maybe, just maybe, my oven could do the trick at its lowest setting. Honestly, I was skeptical. I mean, oven jerky? That sounded like a recipe for disaster, or at the very least, a house that smells weird for three days. But that late-night impulse, that “what the heck, let’s see what happens” energy, is exactly how this Homemade Teriyaki Venison Jerky was born.
I remember standing there, slicing the partially frozen venison as thin as I could get it with my dullest knife—the one I keep meaning to sharpen but never do. The kitchen was silent except for the hum of the oven preheating and my stomach growling. I mixed together a quick marinade with what I had: soy sauce, brown sugar, garlic powder, and a splash of that leftover teriyaki sauce from the takeout we had two nights ago. It felt a little reckless, a little unhinged, but also deeply satisfying. I wasn’t following a recipe; I was just following a feeling. And when I pulled that first tray out two and a half hours later, the smell hit me—smoky, sweet, and deeply savory. That first bite was a revelation. It was chewy, but not tough. Sweet, but not cloying. And it had that unmistakable umami punch that only homemade jerky can deliver. I knew right then I had stumbled onto something special, and I’ve been perfecting it ever since.
Maybe you’ve been there—staring into your freezer at a pile of wild game, wondering what the heck to do with it all. Or maybe you just love the idea of making your own snacks, controlling the ingredients, and getting that perfect texture without paying an arm and a leg for store-bought stuff. Either way, this recipe is for you. It’s the kind of thing that turns a mundane Thursday night into a little adventure, and it’s the reason I’ll never go back to gas station jerky again. Let me show you how to make it.
Why You’ll Love This Homemade Teriyaki Venison Jerky
Let me tell you, after countless batches and a few spectacular failures (we don’t talk about the “shoe leather incident” of 2021), I can confidently say this is the best version of homemade jerky you’ll find. Here’s why this recipe stands out from the rest:
- Quick & Easy: From start to finish, this recipe takes about 3 hours, with only 15 minutes of active prep time. The oven does all the heavy lifting, so you can go about your day while it works its magic.
- Simple Ingredients: No weird preservatives, no fancy equipment, and no trips to a specialty store. You probably have most of these ingredients in your pantry right now.
- Perfect for Hunting Season: If you’re a hunter or live with one, you know the struggle of using up all that venison. This recipe is a game-changer for processing your harvest into something everyone will fight over.
- Crowd-Pleaser: I’ve brought this to game nights, road trips, and even work potlucks. It disappears faster than anything else on the table. Kids love it, adults love it, even people who “don’t like venison” can’t stop eating it.
- Unbelievably Delicious: The teriyaki marinade is perfectly balanced—sweet from the brown sugar, salty from the soy sauce, with a hint of garlic and ginger. It complements the rich, lean flavor of venison without overpowering it.
What makes this recipe different is the technique. I’ve tested every method—marinating for 4 hours, 8 hours, overnight. I’ve tried different oven temperatures, different slicing thicknesses, and even different rack positions. The result is a foolproof method that gives you consistently perfect jerky every single time. No more guessing, no more wasted meat, just pure, delicious snacking.
This isn’t just another jerky recipe. It’s the kind that makes you close your eyes after the first bite. It’s comfort food in snack form—the perfect balance of chewy and tender, sweet and savory. It’s the kind of thing that turns a simple afternoon snack into a moment of pure satisfaction. And honestly? It’s the recipe that made me fall in love with making my own snacks from scratch.
What Ingredients You Will Need
This recipe uses simple, pantry-friendly ingredients to create a teriyaki marinade that transforms lean venison into something truly special. The magic is in the balance of flavors, and each ingredient plays a crucial role in achieving that perfect jerky texture and taste.
- Venison (2 pounds, sliced thin) – Use a lean cut like top round, bottom round, or sirloin tip. Partially freezing the meat for 1-2 hours makes it much easier to slice thinly and evenly. I prefer using meat from a young deer for the most tender results, but any venison will work beautifully.
- Soy Sauce (1/2 cup) – This is the backbone of your marinade. I recommend using low-sodium soy sauce to control the salt level, but regular works fine too. For a gluten-free option, use tamari or coconut aminos. I’ve tried all three, and honestly, tamari gives the richest flavor.
- Brown Sugar (1/4 cup, packed) – Adds sweetness and helps with that beautiful caramelized exterior. Dark brown sugar gives a deeper molasses flavor, while light brown sugar is more subtle. Both work great, so use what you have.
- Teriyaki Sauce (1/4 cup) – Use your favorite store-bought brand or a homemade version. I personally love using Kikkoman’s teriyaki sauce for its consistent flavor and thickness. It adds an extra layer of complexity to the marinade.
- Rice Vinegar (2 tablespoons) – Adds a gentle acidity that balances the sweetness and helps tenderize the meat. If you don’t have rice vinegar, apple cider vinegar works as a substitute, though the flavor will be slightly different.
- Honey (2 tablespoons) – This gives the jerky a beautiful shine and a subtle floral sweetness. It also helps with the texture, creating that slightly tacky surface that makes homemade jerky so satisfying.
- Garlic (4 cloves, minced) – Fresh garlic is non-negotiable here. The flavor is so much brighter and more aromatic than garlic powder. I mince mine by hand, but a garlic press works in a pinch.
- Fresh Ginger (1 tablespoon, grated) – Another fresh ingredient that makes a huge difference. The warmth and zing of fresh ginger cut through the richness of the venison perfectly. Use a microplane for the best texture.
- Black Pepper (1 teaspoon, freshly ground) – Adds a gentle heat and earthiness. Freshly ground pepper is always better, but pre-ground works if that’s what you have.
- Red Pepper Flakes (1/2 teaspoon, optional) – For a little kick. I add these when I’m making a batch for myself, but leave them out when I’m sharing with people who prefer milder flavors.
- Toasted Sesame Oil (1 teaspoon) – Just a touch adds that unmistakable nutty aroma that makes teriyaki dishes so recognizable. Don’t skip this one—it really ties the whole flavor profile together.
A quick note on the venison: I’ve used everything from backstrap to shoulder for this recipe. The key is slicing against the grain for a more tender bite, or with the grain for a chewier, more traditional jerky texture. I personally prefer slicing against the grain for a more tender result, especially if I’m using a tougher cut. And if you’re not a hunter, you can absolutely substitute beef—flank steak or top round work beautifully.
Equipment Needed
You don’t need a lot of fancy equipment to make this Homemade Teriyaki Venison Jerky, which is one of the things I love about it. Here’s what you’ll need:
- Sharp Knife or Meat Slicer – A sharp chef’s knife or a meat slicer will make the job much easier. I use my trusty 8-inch chef’s knife, but if you have a mandoline with a thick slicing attachment, that works great too. Just be careful—those things can be dangerous!
- Cutting Board – A large, sturdy cutting board is essential. I prefer wood or bamboo because they’re gentler on your knives, but plastic works fine too.
- Mixing Bowls – You’ll need one medium bowl for the marinade and a large bowl or a zip-top bag for marinating the meat. I prefer a glass bowl for mixing because it doesn’t absorb odors.
- Baking Sheets – Two rimmed baking sheets are ideal. Line them with aluminum foil for easy cleanup, and place a wire rack on top for airflow. If you don’t have wire racks, you can place the meat directly on the foil, but you’ll need to flip it halfway through.
- Wire Cooling Racks – These are crucial for proper air circulation. The racks allow the heat to reach all sides of the meat evenly, resulting in more consistent drying. I use standard 13×9-inch cooling racks that fit perfectly on my baking sheets.
- Oven – Your regular oven set to its lowest temperature (usually around 170°F or 175°F) works perfectly. Some ovens have a “dehydrate” setting, which is ideal, but not necessary.
- Paper Towels – For patting the meat dry before marinating and for blotting excess marinade before baking.
- Tongs – For handling the meat strips. They keep your hands clean and make flipping easier.
If you’re a serious jerky maker, you might want to invest in a dedicated dehydrator. I use a Nesco Snackmaster Pro when I’m making large batches, and it cuts the drying time down to about 2 hours. But honestly, your oven works just as well for smaller batches. The key is finding what works for you and your kitchen setup.
Preparation Method
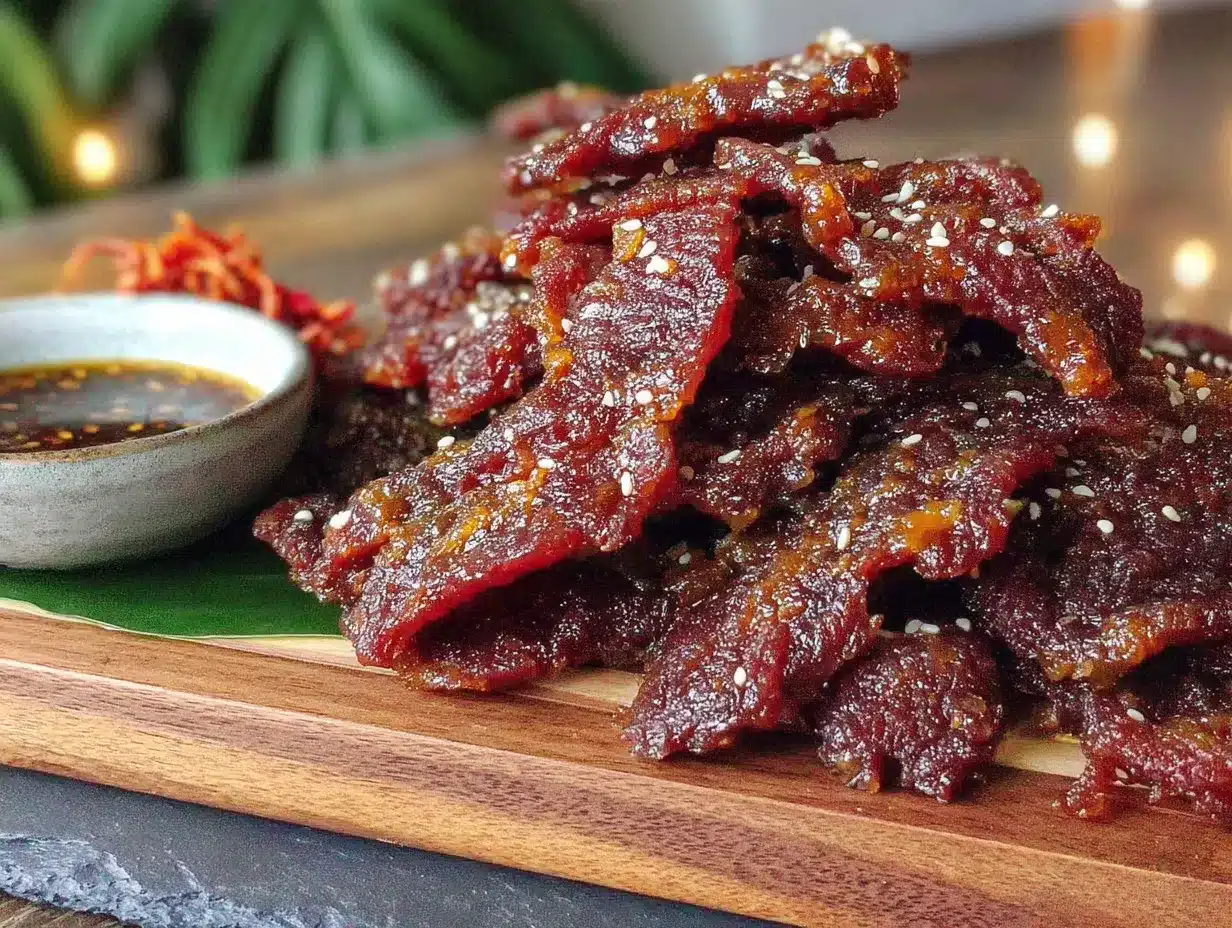
Alright, let’s get to the good part. Follow these steps carefully, and you’ll have the best Homemade Teriyaki Venison Jerky you’ve ever tasted. I’ve tested this method dozens of times, so trust the process.
- Prepare the Venison (15 minutes): Start by placing your 2 pounds of venison in the freezer for 1-2 hours. You want it to be firm but not completely frozen—think of the texture of a cold stick of butter. This makes slicing much easier and more consistent. Once it’s firm, use your sharp knife to slice the meat into even strips about 1/4-inch thick. Aim for strips that are about 1-2 inches wide and 4-6 inches long. Remember, slice against the grain for tender jerky, or with the grain for a chewier texture. I usually go against the grain for a more pleasant bite.
- Make the Marinade (5 minutes): In a medium bowl, whisk together the soy sauce, brown sugar, teriyaki sauce, rice vinegar, honey, minced garlic, grated ginger, black pepper, red pepper flakes (if using), and toasted sesame oil. Give it a taste—it should be sweet, salty, and slightly tangy. If it’s too salty for your liking, add a splash more honey or rice vinegar to balance it out. This is your marinade, so adjust it to your taste.
- Marinate the Meat (4-8 hours): Place the venison strips in a large zip-top bag or a glass dish. Pour the marinade over the meat, making sure every strip is coated. Seal the bag, removing as much air as possible, and massage the marinade into the meat. Place it in the refrigerator for at least 4 hours, but 8 hours is ideal for maximum flavor. I usually start this in the morning and let it go all day while I’m at work. Don’t go longer than 12 hours, or the meat can become too salty and the texture can get mushy.
- Preheat and Prepare (10 minutes): When you’re ready to cook, preheat your oven to 170°F (or the lowest setting it has). While it’s heating, line two baking sheets with aluminum foil and place wire cooling racks on top. Remove the venison from the marinade and pat each strip dry with paper towels. This step is important—too much moisture on the surface will steam the meat instead of drying it, giving you a different texture.
- Arrange the Strips (5 minutes): Lay the venison strips in a single layer on the wire racks. Make sure they’re not touching or overlapping—you want good air circulation around each piece. If you have more meat than will fit, it’s better to do two batches than to crowd the trays. Trust me on this one.
- Bake the Jerky (2-3 hours): Place the baking sheets in the preheated oven. Prop the oven door open slightly with a wooden spoon or a rolled-up kitchen towel to allow moisture to escape. This is crucial for proper drying. Bake for 2-3 hours, depending on the thickness of your strips and how chewy you like your jerky. Start checking at the 2-hour mark. The jerky is done when it’s dry to the touch, bends without breaking, and has a slightly darkened appearance. If it cracks when you bend it, it’s overdone. If it feels moist or spongy, it needs more time.
- Cool and Store (30 minutes): Remove the jerky from the oven and let it cool completely on the wire racks. This allows it to finish drying and develop its final texture. Once cool, transfer the jerky to an airtight container. I like to use glass jars or vacuum-sealed bags for long-term storage. Let it rest for 24 hours before eating if you can resist—the flavors meld and deepen overnight, and the texture becomes even better.
A quick tip: If you notice some pieces are done before others (which happens with uneven slicing), just remove them from the oven and let the others continue baking. Every piece is its own little project, and that’s okay.
Cooking Tips & Techniques
Over the years, I’ve learned a few things the hard way. Here are my best tips for making perfect Homemade Teriyaki Venison Jerky every time:
Don’t skip the partial freezing step. I know it adds time, but it makes such a difference in how evenly you can slice the meat. The first time I made jerky, I tried slicing completely thawed venison, and it was a mess—uneven strips, torn edges, and inconsistent drying. Partially freezing the meat gives you clean, uniform slices that dry at the same rate.
Pat the meat dry before baking. This was a game-changer for me. After marinating, the meat is dripping with liquid. If you put it directly on the racks, it will steam instead of dry, and you’ll end up with a texture closer to boiled meat than jerky. A quick pat with paper towels removes excess moisture and ensures proper drying.
Use the oven door trick. Propping the oven door open with a wooden spoon is essential for allowing moisture to escape. If you close the door completely, the humidity inside the oven will prevent the jerky from drying properly. I’ve forgotten to do this more times than I’d like to admit, and the results were always disappointing—soft, chewy jerky instead of that perfect dry texture.
Check for doneness by feel, not time. Ovens vary, and so does the thickness of your slices. The best way to test jerky is to take a piece out, let it cool for a minute, and then bend it. It should bend and crack slightly on the surface, but not break in half. If it’s still pliable and doesn’t crack, give it more time. If it snaps, you’ve gone too far.
Let it rest. I know it’s tempting to dive right in, but letting the jerky rest for 24 hours in an airtight container makes a huge difference. The moisture redistributes evenly, and the flavors become more pronounced. Plus, the texture softens just a touch, making it more pleasant to eat. I always make a batch on Saturday so it’s ready for snacking on Sunday.
Variations & Adaptations
One of the best things about this recipe is how adaptable it is. Here are some of my favorite variations:
Spicy Teriyaki Jerky: Add 1-2 tablespoons of sriracha or gochujang to the marinade for a spicy kick. I love this version when I’m craving something with heat. The spice pairs beautifully with the sweet teriyaki base. Just be careful not to overdo it—you can always add more heat, but you can’t take it away.
Smoky Teriyaki Jerky: Add 1 teaspoon of liquid smoke to the marinade for that campfire flavor without actually firing up the smoker. This is my go-to when I’m making jerky in the winter and can’t get the grill out. The smokiness adds a whole new dimension to the flavor profile.
Honey Garlic Teriyaki Jerky: Increase the honey to 1/4 cup and add an extra 2 cloves of garlic. This version is sweeter and more aromatic, with a sticky-sweet exterior that’s absolutely addictive. It’s my kids’ favorite variation, and it’s the one I make most often for parties.
Low-Sodium Version: Use low-sodium soy sauce and reduce the salt in the marinade. You can also substitute coconut aminos for a completely soy-free option. The flavor will be milder, but still delicious. I’ve made this for friends with dietary restrictions, and it’s always a hit.
Beef Jerky Substitute: If you don’t have venison, flank steak, top round, or sirloin tip work beautifully. Just trim any excess fat, as fat can cause the jerky to spoil faster. The cooking time may vary slightly, so start checking at the 2-hour mark.
Serving & Storage Suggestions
This Homemade Teriyaki Venison Jerky is incredibly versatile. Here’s how to serve and store it for the best experience:
Serving Temperature: Jerky is best enjoyed at room temperature. I like to let it sit out for about 10 minutes before serving, as it softens slightly and becomes more flavorful. It’s perfect for snacking straight from the jar, but it also makes a great addition to cheese boards, trail mix, or charcuterie platters.
Pairing Ideas: This jerky pairs beautifully with sharp cheddar cheese, dried apricots, and a cold IPA. I also love crumbling it over salads for a protein boost, or chopping it up and adding it to fried rice for a savory twist. It’s even great in soups—just rehydrate it in broth for a few minutes before adding.
Storage Instructions: Store your jerky in an airtight container at room temperature for up to 2 weeks. For longer storage, keep it in the refrigerator for up to 3 months, or in the freezer for up to 6 months. I like to vacuum-seal it in small bags for easy grab-and-go snacking. Just make sure it’s completely cool before sealing to prevent condensation.
Reheating Tips: Jerky doesn’t need reheating, but if you prefer it warm, pop it in a 300°F oven for 5 minutes. This will soften it slightly and make it more pliable. Don’t microwave it, though—it can become tough and rubbery.
Flavor Development: The flavors in jerky continue to develop over time. I’ve found that jerky stored for a week actually tastes better than fresh jerky, as the flavors meld and deepen. So don’t be afraid to make a big batch and enjoy it over time. Just make sure it’s stored properly to maintain its quality.
Nutritional Information & Benefits
This Homemade Teriyaki Venison Jerky is not only delicious but also packed with nutritional benefits. Here’s a breakdown:
| Nutrient | Per Serving (2 oz) |
|---|---|
| Calories | 150 |
| Protein | 22g |
| Fat | 3g |
| Carbohydrates | 8g |
| Sugar | 6g |
| Sodium | 450mg |
| Iron | 15% DV |
| Zinc | 20% DV |
| Vitamin B12 | 25% DV |
Venison is one of the leanest red meats available, making this jerky an excellent high-protein, low-fat snack. It’s rich in iron, which supports healthy blood cells, and zinc, which boosts immune function. The teriyaki marinade adds a small amount of sugar, but it’s still a much healthier alternative to most store-bought snacks.
This recipe is naturally gluten-free if you use tamari instead of soy sauce, and it’s also dairy-free and paleo-friendly. Just be mindful of the sodium content if you’re watching your salt intake. I’ve found that using low-sodium soy sauce and reducing the added salt keeps the flavor balanced without overdoing it.
Conclusion
This Homemade Teriyaki Venison Jerky is more than just a snack—it’s a testament to what happens when you trust your instincts and experiment in the kitchen. It’s the recipe that turned a late-night craving into a beloved tradition, and it’s the one I keep coming back to time and time again. Whether you’re a seasoned hunter looking for new ways to use your harvest, or just someone who loves a good, healthy snack, this recipe is for you.
I encourage you to make this your own. Adjust the sweetness, add more heat, or experiment with different cuts of meat. The beauty of homemade jerky is that it’s completely customizable. And when you take that first bite of your own creation, you’ll know exactly why I fell in love with this recipe.
If you try this recipe, I’d love to hear about it! Leave a comment below and let me know how it turned out. Did you add any twists? What did you serve it with? Share your creations and tag me on social media—I can’t wait to see what you come up with. Happy snacking!
Frequently Asked Questions
Can I use a dehydrator instead of an oven?
Absolutely! A dehydrator works perfectly for this recipe. Set it to 160°F and dry for 4-6 hours, checking periodically for doneness. The dehydrator will give you more consistent results and uses less energy, but the oven method is just as effective.
How do I know when the jerky is done?
The best test is the bend test. Take a piece of jerky and let it cool for a minute. Bend it gently—it should flex and show small cracks on the surface without breaking. If it snaps in half, it’s overdone. If it feels spongy or moist, it needs more time in the oven.
Can I make this recipe with beef instead of venison?
Yes, absolutely! Flank steak, top round, or sirloin tip are excellent substitutes. The cooking time may be slightly different, so start checking at the 2-hour mark. Beef jerky tends to be a bit more tender than venison jerky, but the flavor is just as delicious.
How long does homemade jerky last?
Stored properly in an airtight container, homemade jerky lasts up to 2 weeks at room temperature, 3 months in the refrigerator, and 6 months in the freezer. For the best quality, I recommend eating it within the first month. Just make sure it’s completely cool before storing to prevent mold.
Can I reduce the sodium in this recipe?
Yes, you can easily reduce the sodium by using low-sodium soy sauce and cutting back on the added salt. You can also substitute coconut aminos for a completely soy-free, lower-sodium option. The flavor will be milder, but still delicious. Just be aware that reducing the salt may affect the jerky’s ability to preserve, so store it in the refrigerator for longer shelf life.
Pin This Recipe!
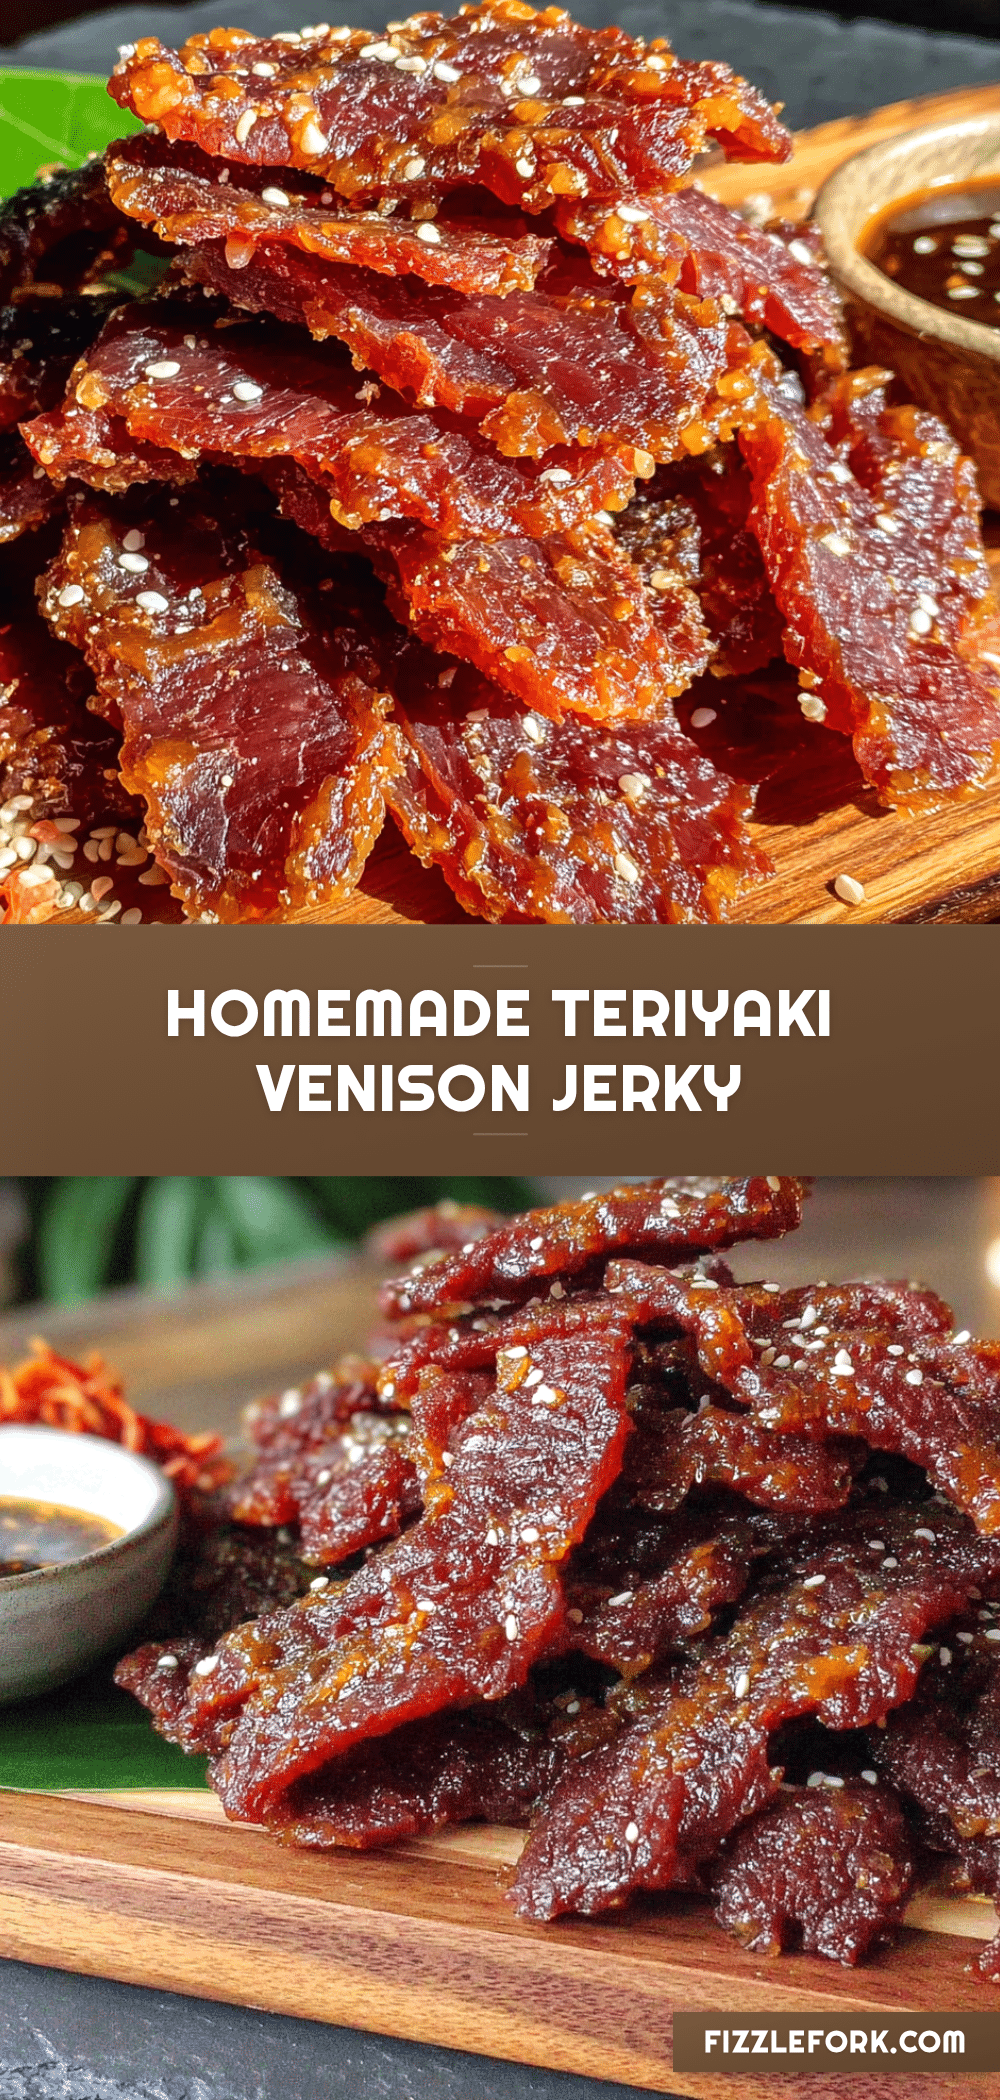
Easy Homemade Teriyaki Venison Jerky Recipe
This Homemade Teriyaki Venison Jerky is a chewy, salty-sweet snack made with simple ingredients and your oven. Perfect for using up venison from hunting season, it’s a crowd-pleaser that’s quick to prepare and unbelievably delicious.
- Prep Time: 15 minutes
- Cook Time: 2-3 hours
- Total Time: 3 hours 15 minutes (plus 4-8 hours marinating)
- Yield: 4 servings 1x
- Category: Snack
- Cuisine: American
Ingredients
- 2 pounds venison, sliced thin (top round, bottom round, or sirloin tip)
- 1/2 cup soy sauce (low-sodium recommended)
- 1/4 cup brown sugar, packed
- 1/4 cup teriyaki sauce
- 2 tablespoons rice vinegar
- 2 tablespoons honey
- 4 cloves garlic, minced
- 1 tablespoon fresh ginger, grated
- 1 teaspoon black pepper, freshly ground
- 1/2 teaspoon red pepper flakes (optional)
- 1 teaspoon toasted sesame oil
Instructions
- Prepare the Venison: Place 2 pounds of venison in the freezer for 1-2 hours until firm but not frozen. Slice into even strips about 1/4-inch thick, 1-2 inches wide, and 4-6 inches long. Slice against the grain for tender jerky or with the grain for chewier texture.
- Make the Marinade: In a medium bowl, whisk together soy sauce, brown sugar, teriyaki sauce, rice vinegar, honey, minced garlic, grated ginger, black pepper, red pepper flakes (if using), and toasted sesame oil. Adjust sweetness or saltiness to taste.
- Marinate the Meat: Place venison strips in a large zip-top bag or glass dish. Pour marinade over meat, ensuring all strips are coated. Seal bag, remove air, and massage marinade into meat. Refrigerate for 4-8 hours (do not exceed 12 hours).
- Preheat and Prepare: Preheat oven to 170°F (or lowest setting). Line two baking sheets with aluminum foil and place wire cooling racks on top. Remove venison from marinade and pat each strip dry with paper towels.
- Arrange the Strips: Lay venison strips in a single layer on wire racks, ensuring they do not touch or overlap. Work in batches if necessary.
- Bake the Jerky: Place baking sheets in oven. Prop oven door open slightly with a wooden spoon or rolled kitchen towel to allow moisture to escape. Bake for 2-3 hours, checking at the 2-hour mark. Jerky is done when dry to the touch, bends without breaking, and has a slightly darkened appearance.
- Cool and Store: Remove jerky from oven and let cool completely on wire racks. Transfer to an airtight container (glass jars or vacuum-sealed bags). Let rest for 24 hours before eating for best flavor and texture.
Notes
Partially freezing the venison makes slicing easier. Patting the meat dry before baking prevents steaming. Propping the oven door open is essential for moisture escape. Let jerky rest 24 hours for best flavor. Store in airtight container at room temperature up to 2 weeks, refrigerator up to 3 months, or freezer up to 6 months.
Nutrition
- Serving Size: 2 oz
- Calories: 150
- Sugar: 6
- Sodium: 450
- Fat: 3
- Saturated Fat: 1
- Carbohydrates: 8
- Protein: 22
Keywords: venison jerky, teriyaki jerky, homemade jerky, deer jerky, oven jerky, easy jerky recipe