I was standing in the checkout line at the hardware store last Tuesday—don’t ask, it was one of those days—when the woman ahead of me turned around and I caught a whiff of something so specific it stopped me cold. Vanilla. Butter. And that unmistakable sugary sweetness that only comes from a pot of fudge bubbling away on the stove. Suddenly I was eight years old, standing on a step stool in my Aunt Lorraine’s tiny kitchen, watching her stir a pot of what she called “company fudge” because it was too good for just any old Tuesday. She passed away five years ago, and I haven’t thought about that kitchen in ages. But there I was, clutching a bag of lightbulbs, trying not to get misty-eyed in aisle three. I mean, honestly—who gets emotional over fudge in a hardware store? Me, apparently.
That night I called my cousin, and we pieced together the recipe from memory. She remembered the marshmallow creme. I remembered the three ingredients. We both remembered the way Aunt Lorraine would tap the spoon twice on the pot’s edge before setting it down—a little habit she had. I burned my first batch (got distracted by a kid asking for a snack, you know how it goes), but the second one? That was it. That was the fudge. The kind that makes you close your eyes on the first bite, not because you’re being dramatic, but because the taste just hits you somewhere deep.
This old-fashioned fantasy fudge is the real deal. Three ingredients. No candy thermometer. No fuss. Just the kind of creamy, melt-in-your-mouth fudge that used to show up on every holiday platter and bake sale table back when things were simpler. Maybe you’ve been there—standing in your own kitchen, trying to chase down a taste from childhood that you can’t quite describe but you’d know the second it hit your tongue. This is that taste. And I’m going to show you exactly how to make it.
Why You’ll Love This Recipe
Let me tell you something I’ve learned after making this fudge more times than I can count—there’s a reason this particular recipe has been passed down through families for decades. It’s not fancy. It’s not complicated. It just works. Every single time.
- Three Simple Ingredients: Marshmallow creme, chocolate chips, and evaporated milk. That’s it. No corn syrup, no fancy chocolate bars, no special equipment you have to hunt down. You can literally buy everything at the same grocery store on the same trip.
- No Candy Thermometer Needed: This is huge, honestly. Old-fashioned fudge recipes usually require you to babysit a pot of sugar syrup until it hits the “soft ball stage,” which is basically a fancy way of saying “please don’t mess this up.” This version skips all that stress. You just melt, stir, and pour.
- Perfect for Busy Families: From start to finish, you’re looking at about 15 minutes of active work. The hardest part is waiting for it to set in the fridge. And let’s face it—when you’re feeding a family on a budget, you don’t have time for recipes that take all afternoon.
- Crowd-Pleasing Results: I’ve brought this fudge to school events, church potlucks, and family gatherings, and it disappears faster than almost anything else on the table. Kids love it. Adults love it. Even my picky eater nephew—the one who survives on air and chicken nuggets—asked for seconds.
- Budget-Friendly: A batch of this fudge costs about the same as a fancy coffee drink, but it serves a crowd. When you’re feeding a family on a sensible budget, that kind of math matters.
What makes this recipe different from all the other fudge recipes out there? It’s the marshmallow creme. That’s the secret. It gives the fudge that silky, smooth texture that you usually only get from stirring and stirring and hoping you don’t mess up the sugar crystals. The marshmallow creme does the work for you. It’s honestly kind of genius when you think about it.
This isn’t just good fudge. It’s the kind of fudge that makes people ask for the recipe. The kind that shows up in your Christmas gift tins year after year. The kind that, once you make it once, becomes your go-to for every occasion.
What Ingredients You Will Need
This recipe uses simple, everyday ingredients to deliver that classic fudge texture and flavor that everyone remembers. The beauty of this old-fashioned fantasy fudge is that you don’t need anything unusual—just three pantry-friendly staples that come together like magic.
- 3 cups (18 oz) semi-sweet chocolate chips – I recommend Ghirardelli or Nestle Toll House for the best melt and flavor. The quality of your chocolate chips really does matter here. Cheap store-brand chips sometimes have a waxy texture that doesn’t melt as smoothly. Look for chocolate chips that list cocoa butter in the ingredients, not palm oil.
- 1 (7 oz) jar marshmallow creme – This is the star of the show. Marshmallow creme (also called marshmallow fluff) gives the fudge its signature creamy texture. I use Kraft Jet-Puffed, but any brand works. Don’t substitute with regular marshmallows—the texture won’t be the same. The creme has a different moisture content and stabilizer system that makes the fudge set up perfectly.
- 1 (12 oz) can evaporated milk – Not sweetened condensed milk! They look similar on the shelf, but they are not interchangeable. Evaporated milk is just milk with about 60% of the water removed. It adds richness without extra sweetness. Sweetened condensed milk would make your fudge way too sweet and change the texture completely. I’ve made that mistake, and it was not pretty.
- Optional: 1 teaspoon vanilla extract – While not technically one of the three main ingredients, a splash of vanilla enhances the chocolate flavor and adds that classic fudge taste. Use pure vanilla extract if you have it, not imitation vanilla. The difference is subtle but noticeable.
- Optional: Pinch of salt – A tiny pinch of flaky sea salt or kosher salt balances the sweetness and makes the chocolate flavor pop. Don’t skip this if you have it on hand. Salt is a flavor enhancer, not just a seasoning.
Ingredient Tips from My Kitchen: I’ve made this fudge with different chocolate chips over the years, and here’s what I’ve learned. Milk chocolate chips make a sweeter, lighter fudge that kids tend to prefer. Dark chocolate chips (60% cacao or higher) give a more sophisticated, less sweet fudge that adults often love. You can even mix half semi-sweet and half milk chocolate for a middle ground. Just keep the total amount at 3 cups.
For the marshmallow creme, here’s a pro tip I wish someone had told me years ago: spray your measuring cup or spoon with a little non-stick cooking spray before scooping the marshmallow creme. It slides right off instead of sticking to everything. You’re welcome.
If you’re dairy-free, evaporated milk does have a dairy-free alternative—canned coconut milk (not coconut cream) works in a pinch, though the flavor will be slightly different. I’ve tested it, and it’s good, just not quite the same as the original.
Equipment Needed
You don’t need a fancy kitchen to make this fudge. In fact, you probably already own everything on this list.
- Medium saucepan – A 2 to 3-quart saucepan works perfectly. Avoid using a pot that’s too large, or the mixture will spread too thin and cook unevenly. I use my old Revere Ware pot that I got at a thrift store for five bucks.
- Wooden spoon or silicone spatula – You need something that can handle stirring a thick, heavy mixture without scratching your pan. A wooden spoon is traditional and works great. Silicone spatulas are also excellent because they scrape the sides and corners of the pan as you stir.
- 8×8-inch baking pan – This is the standard size for a batch of fudge. If you don’t have one, a 9×9-inch pan works too—your fudge pieces will just be a little thinner. Line it with parchment paper or aluminum foil for easy removal.
- Parchment paper or aluminum foil – Lining your pan makes lifting the fudge out a breeze. Leave some overhang on two opposite sides so you can pull the whole block out like a little fudge raft.
- Measuring cups and spoons – You’ll need a liquid measuring cup for the evaporated milk and dry measuring cups for the chocolate chips. A standard set of measuring spoons for the vanilla and salt.
- Sharp knife – For cutting the fudge into pieces once it’s set. A chef’s knife works well, but a long serrated knife also does the job. Run the knife under hot water before cutting for cleaner slices.
Budget-Friendly Alternative: If you don’t have an 8×8 pan, a loaf pan works in a pinch—you’ll just get thicker fudge pieces. And if you don’t have parchment paper, you can grease the pan thoroughly with butter. Just be sure to get into the corners.
Preparation Method
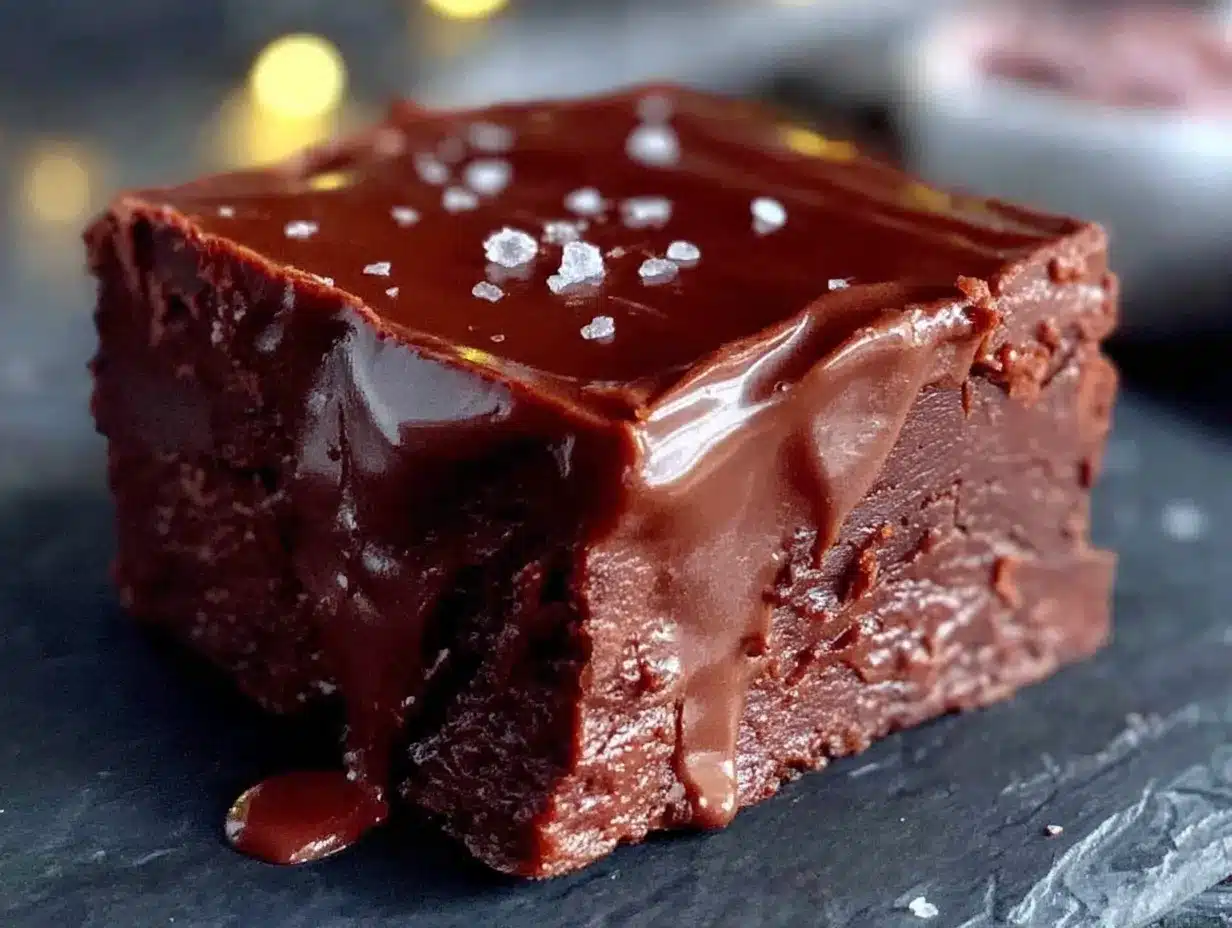
Now for the fun part. This is where the magic happens. Take your time, follow these steps, and you’ll have perfect fudge every single time.
- Prepare your pan first. Line an 8×8-inch baking pan with parchment paper or aluminum foil, leaving about 2 inches of overhang on two opposite sides. This little step makes all the difference when it’s time to lift the fudge out. Set the pan aside.
- Combine the chocolate chips and marshmallow creme. In a large heat-safe bowl, add the semi-sweet chocolate chips and the entire jar of marshmallow creme. Don’t worry about getting every last bit out of the jar—a little residue is fine. Set this bowl aside for now.
- Heat the evaporated milk. Pour the evaporated milk into your medium saucepan. Place it over medium heat and bring it to a gentle boil. You’ll see small bubbles forming around the edges, then the whole surface will start to shimmer. This usually takes about 3-4 minutes. Stir occasionally to prevent scorching on the bottom.
- Watch carefully. Once the evaporated milk reaches a full, rolling boil, let it boil for exactly 1 minute. Set a timer. Don’t walk away. I’ve learned this the hard way—boiling it too long can make the fudge grainy, and not boiling it long enough can make it too soft. One minute is the sweet spot.
- Pour the hot milk over the chocolate mixture. Remove the saucepan from the heat and immediately pour the hot evaporated milk over the chocolate chips and marshmallow creme in the bowl. The heat from the milk will start melting everything together.
- Stir until smooth. Using your wooden spoon or silicone spatula, stir the mixture gently but continuously. Start in the center and work your way outward. At first it will look like a lumpy mess—don’t panic. Keep stirring. The chocolate chips will melt, the marshmallow creme will dissolve, and the mixture will transform into a glossy, smooth, dark brown fudge batter. This usually takes about 2-3 minutes of steady stirring.
- Add vanilla and salt. Once the mixture is completely smooth and uniform in color, stir in the vanilla extract and the pinch of salt. Give it a few more stirs to make sure everything is evenly distributed.
- Pour into the prepared pan. Scrape the fudge mixture into your lined pan. Use your spatula to spread it evenly into all four corners. The mixture will be thick and slightly sticky—that’s exactly right. Tap the pan gently on the counter a few times to release any air bubbles and settle the fudge.
- Let it set. Place the pan in the refrigerator and let the fudge set for at least 2 hours, or until firm to the touch. For best results, let it set for 3-4 hours. I know the waiting is the hardest part, but it’s worth it.
- Cut and serve. Once the fudge is completely set, lift it out of the pan using the parchment overhang. Place it on a cutting board. Use a sharp knife to cut it into 1-inch squares. If the fudge is too hard straight from the fridge, let it sit at room temperature for 5-10 minutes before cutting.
Sensory Cues to Watch For: When you’re stirring the hot milk into the chocolate mixture, you should see the chocolate chips start to soften and melt almost immediately. The mixture will go from looking separated and chunky to glossy and smooth. When it’s ready, the fudge batter should flow slowly off your spatula in a thick ribbon. It should look almost like thick chocolate pudding.
Common Issue Alert: If your fudge seems greasy or separated after stirring, it might mean the mixture got too hot. This can happen if the evaporated milk boiled too long or if you used a bowl that wasn’t heat-safe enough. Don’t throw it away—sometimes stirring in a tablespoon of warm milk can help bring it back together.
Cooking Tips & Techniques
After making this fudge more times than I can count (and messing it up plenty along the way), I’ve collected a few tips that’ll save you the same headaches.
Don’t stir too aggressively. I know it’s tempting to beat the mixture into submission, but gentle, steady stirring is actually better. Vigorous stirring can incorporate too much air, which makes the fudge less dense and can create a slightly grainy texture. Think slow and steady, like you’re stirring hot cocoa, not whipping cream.
Use room temperature ingredients. This is one I learned after a particularly frustrating batch. If your chocolate chips or marshmallow creme are cold, they take longer to melt, and the mixture can cool down before everything is fully incorporated. Let your ingredients sit on the counter for about 20 minutes before you start. It makes a real difference.
The one-minute boil is non-negotiable. I cannot stress this enough. I once got distracted by a phone call and let the milk boil for almost two minutes. The fudge turned out grainy and crumbly—still edible, but not the creamy texture you’re after. Set a timer. Stand there and watch it. One minute, no more, no less.
Line your pan properly. I’ve made the mistake of not leaving enough overhang, and let me tell you, trying to pry fudge out of a pan with a butter knife is not a good time. Make sure your parchment or foil extends at least 2 inches above the pan on two sides. You’ll thank yourself later.
Timing tip for busy families: Make this fudge the night before you need it. The active time is only about 15 minutes, and then it sets in the fridge overnight. In the morning, you just cut it and go. This is my favorite strategy for holiday baking or school events when mornings are already chaotic.
Temperature check: If you’re unsure whether your fudge has set properly, give it a gentle poke with your finger. It should feel firm but not rock hard. If it’s still soft, give it another 30 minutes in the fridge. If it’s too hard, let it sit at room temperature for 10 minutes before serving.
Variations & Adaptations
One of the best things about this old-fashioned fantasy fudge recipe is how easy it is to customize. Here are some variations I’ve tried and loved.
Peanut Butter Fantasy Fudge: Stir in 1/2 cup of creamy peanut butter right after you add the vanilla. Swirl it in gently so you get ribbons of peanut butter throughout the fudge. The salty-sweet combination is absolutely addictive. My kids beg for this version every Christmas.
Mint Chocolate Chip Fudge: Add 1/2 teaspoon of peppermint extract along with the vanilla. After pouring the fudge into the pan, sprinkle 1/4 cup of mini chocolate chips on top and press them in gently. The mint adds a refreshing twist that’s perfect for holiday platters.
Nutty Fudge: Fold in 1 cup of chopped walnuts or pecans right before pouring the fudge into the pan. Toast the nuts in a dry skillet for 3-4 minutes first to bring out their flavor. This adds a lovely crunch and makes the fudge feel extra special.
White Chocolate Fantasy Fudge: Swap the semi-sweet chocolate chips for white chocolate chips. The result is a sweeter, creamier fudge that’s beautiful on dessert tables. You can add dried cranberries or chopped pistachios for color and texture.
Dietary Adaptations: For a dairy-free version, use dairy-free chocolate chips and full-fat canned coconut milk instead of evaporated milk. The texture will be slightly different—a bit softer—but still delicious. For a lower-sugar option, use sugar-free chocolate chips. Just note that sugar-free chips don’t melt as smoothly, so you may need to stir a little longer.
Seasonal Twist: In the fall, add 1 teaspoon of pumpkin pie spice along with the vanilla. In the summer, stir in 1/2 cup of crushed peppermint candies for a cool, refreshing treat. Around the holidays, top the fudge with a sprinkle of colored sanding sugar or edible glitter for a festive look.
Serving & Storage Suggestions
This fudge is incredibly versatile when it comes to serving. Here’s how to get the most out of every batch.
Serving Temperature: Fudge is best served at room temperature. If you’ve stored it in the fridge, let it sit out for about 15-20 minutes before serving. This softens it slightly and brings out the full chocolate flavor. Cold fudge is still good, but room temperature fudge is where the magic happens.
Presentation Ideas: Arrange the fudge pieces on a pretty plate or in a decorative tin lined with parchment paper. For gift-giving, stack pieces in a mason jar or small gift box with a ribbon. I like to add a little tag with the recipe name and the date—it makes the gift feel personal.
What to Serve With It: A glass of cold milk is the classic pairing, and for good reason. The milk balances the richness of the fudge perfectly. For adults, a cup of hot coffee or a glass of red wine (like a Zinfandel or Merlot) complements the chocolate beautifully. Fudge also makes a great topping for ice cream sundaes or a sweet addition to a cheese board.
Storage: Store leftover fudge in an airtight container at room temperature for up to 1 week. If your kitchen is warm, store it in the refrigerator instead—it will keep for up to 2 weeks. Layer the pieces between sheets of wax paper or parchment to prevent sticking.
Freezing: Fudge freezes beautifully. Wrap the whole block or individual pieces tightly in plastic wrap, then place them in a freezer-safe bag or container. It will keep for up to 3 months. To thaw, transfer the fudge to the refrigerator overnight, then let it come to room temperature before serving. I always keep a stash in the freezer for unexpected guests or last-minute potluck contributions.
Flavor Development: Here’s something interesting—fudge actually gets better after a day or two. The flavors meld together, and the texture becomes even creamier. So don’t be disappointed if it’s not perfect on day one. Day two fudge is where it’s at.
Nutritional Information & Benefits
Let’s be honest—fudge is a treat, not a health food. But that doesn’t mean it can’t have a place in a balanced diet. Here’s what you need to know.
Estimated Nutritional Values (per 1-inch square, based on 36 pieces):
- Calories: 120
- Total Fat: 7g
- Saturated Fat: 4g
- Cholesterol: 5mg
- Sodium: 20mg
- Total Carbohydrates: 16g
- Dietary Fiber: 1g
- Sugars: 14g
- Protein: 2g
Health Benefits of Key Ingredients: Dark chocolate (which is what semi-sweet chocolate chips are made from) contains antioxidants called flavonoids that can support heart health. It also contains iron, magnesium, and zinc in small amounts. The evaporated milk adds calcium and vitamin D. And while marshmallow creme is mostly sugar, it does make the fudge incredibly satisfying—sometimes a small piece of something truly delicious is better than a larger portion of something mediocre.
Dietary Considerations: This recipe contains dairy and may contain soy (check your chocolate chips). It is not gluten-free unless you verify your specific brands—most chocolate chips are gluten-free, but always check labels. For those watching sugar intake, one small piece is usually enough to satisfy a sweet craving without overdoing it.
My Personal Take: I believe in enjoying treats in moderation. This fudge is rich enough that one or two pieces feel like a real indulgence. I’d rather have one perfect piece of homemade fudge than a whole box of store-bought cookies. Quality over quantity, you know?
Conclusion
This old-fashioned fantasy fudge is more than just a recipe—it’s a little piece of nostalgia that you can recreate in your own kitchen. Three ingredients, fifteen minutes of work, and you’ve got a batch of creamy, chocolatey goodness that tastes like something from your grandmother’s kitchen. Or your aunt’s. Or whoever it was in your life who made the good stuff.
What I love most about this recipe is how forgiving it is. You don’t need to be an experienced baker. You don’t need special equipment. You just need to follow the steps and trust the process. And even if your first batch isn’t perfect—trust me, mine wasn’t either—it will still be delicious. Because fudge made with love always is.
I’d love to hear how your fudge turns out. Did you try one of the variations? Did your family love it? Drop a comment below and let me know. And if you have a favorite fudge memory of your own, share that too. Some of the best recipes come from stories we pass down to each other.
Now go make some fudge. You deserve it.
Frequently Asked Questions
Can I use regular marshmallows instead of marshmallow creme?
I don’t recommend it. Marshmallow creme has a different texture and moisture content than whole marshmallows. Using regular marshmallows will result in a grainy, less creamy fudge. Stick with the marshmallow creme for the best results. If you’re in a pinch, you can melt 10 large marshmallows with 1 tablespoon of corn syrup as a substitute, but it’s not quite the same.
Why did my fudge turn out grainy?
Grainy fudge usually means the mixture got too hot or wasn’t stirred enough. The most common cause is boiling the evaporated milk for too long. Remember—exactly one minute at a full boil. Another cause can be stirring too vigorously, which incorporates air and can affect the sugar crystal formation. Next time, use a gentle hand and watch that timer closely.
Can I make this fudge in the microwave?
Yes, you can! Place the chocolate chips and marshmallow creme in a microwave-safe bowl. Heat the evaporated milk in a separate microwave-safe container for about 2 minutes until it’s hot and steaming. Pour the hot milk over the chocolate mixture and let it sit for 1 minute, then stir until smooth. Microwave in 30-second bursts if needed to fully melt everything. Just be careful not to overheat.
How long does this fudge last?
Stored in an airtight container at room temperature, this fudge will stay fresh for about 1 week. In the refrigerator, it will keep for up to 2 weeks. You can also freeze it for up to 3 months. Just make sure it’s well-wrapped to prevent freezer burn. I like to freeze individual pieces so I can grab one whenever a craving hits.
Can I double this recipe?
Absolutely! To double the recipe, simply multiply all ingredients by two. Use a larger saucepan (at least 4 quarts) and a 9×13-inch baking pan instead of the 8×8. The cooking time for the evaporated milk stays the same—just one minute at a full boil. You may need to stir a little longer to get everything fully incorporated, but otherwise, it works perfectly.
Recipe yield: 36 pieces. Prep time: 5 minutes. Cook time: 10 minutes. Total time: 15 minutes active, plus 2 hours setting time.
Pin This Recipe!
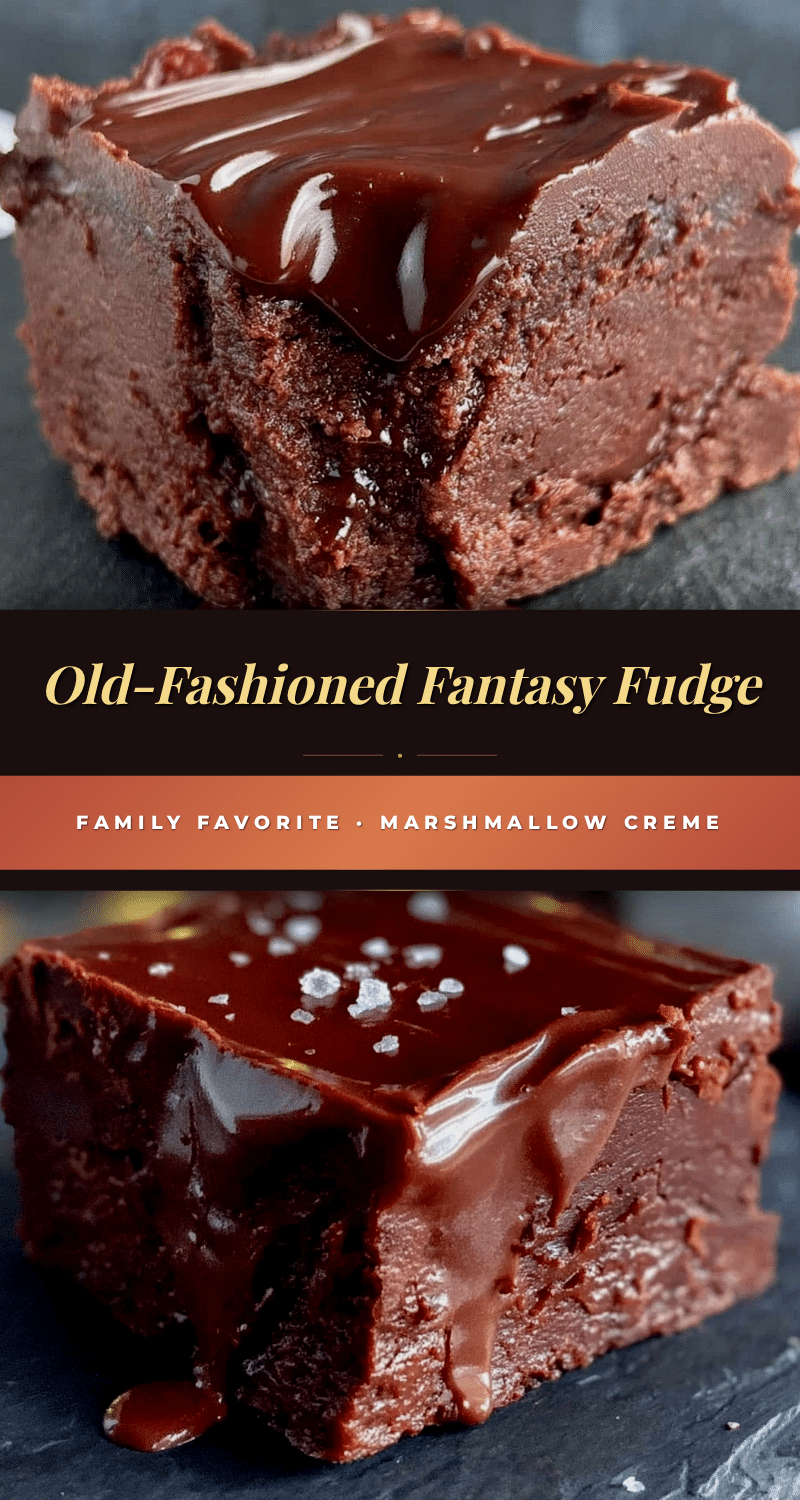
Old-Fashioned Fantasy Fudge: Easy 3-Ingredient Marshmallow Creme Recipe

This old-fashioned fantasy fudge is the real deal. Three ingredients, no candy thermometer, no fuss—just creamy, melt-in-your-mouth fudge that tastes like a childhood memory.
- Prep Time: 5 minutes
- Cook Time: 10 minutes
- Total Time: 15 minutes active, plus 2 hours setting time
- Yield: 36 pieces 1x
- Category: Dessert
- Cuisine: American
Ingredients
- 3 cups (18 oz) semi-sweet chocolate chips
- 1 (7 oz) jar marshmallow creme
- 1 (12 oz) can evaporated milk
- 1 teaspoon vanilla extract (optional)
- Pinch of salt (optional)
Instructions
- Line an 8×8-inch baking pan with parchment paper or aluminum foil, leaving about 2 inches of overhang on two opposite sides. Set aside.
- In a large heat-safe bowl, combine the semi-sweet chocolate chips and the entire jar of marshmallow creme. Set aside.
- Pour the evaporated milk into a medium saucepan. Place over medium heat and bring to a gentle boil, stirring occasionally, about 3-4 minutes.
- Once the evaporated milk reaches a full, rolling boil, let it boil for exactly 1 minute. Set a timer and do not walk away.
- Remove the saucepan from heat and immediately pour the hot evaporated milk over the chocolate chips and marshmallow creme in the bowl.
- Stir gently but continuously with a wooden spoon or silicone spatula until the mixture is completely smooth and glossy, about 2-3 minutes.
- Stir in the vanilla extract and pinch of salt (if using) until evenly distributed.
- Pour the fudge mixture into the prepared pan. Spread evenly into all corners. Tap the pan gently on the counter a few times to release air bubbles.
- Refrigerate for at least 2 hours, or until firm to the touch. For best results, let set for 3-4 hours.
- Once set, lift the fudge out of the pan using the parchment overhang. Place on a cutting board and cut into 1-inch squares with a sharp knife. Let sit at room temperature for 5-10 minutes before cutting if too hard.
Notes
For best results, use room temperature ingredients. The one-minute boil of evaporated milk is critical—do not overboil. Fudge actually improves after a day or two as flavors meld. Store in an airtight container at room temperature for up to 1 week, refrigerate for up to 2 weeks, or freeze for up to 3 months.
Nutrition
- Serving Size: 1 piece (1-inch squa
- Calories: 120
- Sugar: 14
- Sodium: 20
- Fat: 7
- Saturated Fat: 4
- Carbohydrates: 16
- Fiber: 1
- Protein: 2
Keywords: fudge, fantasy fudge, marshmallow creme, chocolate fudge, easy fudge, 3-ingredient fudge, old-fashioned fudge, holiday fudge