My brother swore he hated hot cocoa. For years. The powdered stuff from the packets? Too sweet, he’d say, with a wrinkled nose. The fancy stuff from the café down the street? Overpriced and somehow still disappointing. He was a coffee guy through and through, and he let everyone know it. Then, last December, I was messing around in the kitchen, trying to create a Christmas gift that didn’t involve another burned batch of cookies. I had a vision of layers in a mason jar—chocolate, crushed candy canes, mini marshmallows—something pretty that my kids could help assemble. I made a single jar for myself, a little test batch, honestly not expecting much. I set it on the counter and went to wrangle the toddler out of the flour canister. When I came back ten minutes later, my brother was standing there, a mug in his hand, steam curling around his face. He had that look. The one you get when you’re caught doing something you said you’d never do. “This is… actually good,” he mumbled, not quite meeting my eyes. He was already reaching for the jar to make a second mug. That’s the moment I knew this recipe was different.
It wasn’t just a gift anymore. It was a full-blown conversion story in a jar. The secret, I think, is in the real chocolate. And the crush of the peppermint. You get this deep, rich cocoa that isn’t cloying, with little pockets of mint that hit you just right. It feels like a real treat, not a sugary afterthought. And the best part? My kids, ages four and seven, can practically make the mix themselves. They love layering the ingredients, tapping the jar to level the cocoa powder, and watching the stripes form. It’s a craft project and a recipe all in one. Maybe you’ve been there, trying to find a holiday activity that doesn’t end in a meltdown? This is it. It’s simple, it’s forgiving, and it makes a genuinely fantastic cup of hot chocolate. Honestly, it’s the recipe that made my brother finally admit he was wrong about hot cocoa. And that, my friends, is a Christmas miracle.
Why You’ll Love This Recipe
This isn’t just another hot cocoa mix. This is the one that gets requested year after year, the one that makes people ask for the recipe before they’ve even finished their first mug. I’ve tested this mix more times than I can count, tweaking the ratios of cocoa to sugar to salt until it was absolutely perfect. It’s the kind of recipe that feels both special and totally doable, even on a busy Tuesday night in December.
- Super Simple for Little Hands: This is a true “kid-approved” project. Measuring, pouring, and layering are all great fine motor skills practice. My kids feel a real sense of pride when they hand a finished jar to a grandparent or teacher.
- Made with Real Ingredients: No weird preservatives, no artificial flavors. You control what goes in, which means you can use high-quality cocoa powder and real vanilla. It tastes noticeably better than anything from a box.
- Perfect for Gifting on a Budget: A jar of this mix, tied with a ribbon and a cute tag, is a gift that looks like you spent a ton of time and money. You probably already have most of the ingredients in your pantry. It’s a lifesaver for teacher gifts, neighbor gifts, and hostess presents.
- Customizable for Picky Eaters: Not a fan of peppermint? Leave the candy cane out. Want it extra chocolaty? Add a few more tablespoons of cocoa. This base recipe is a springboard for whatever your family loves.
- Makes the Coziest Cup of Cocoa: The flavor is deep, rich, and perfectly balanced. It’s not too sweet, not too bitter. It’s the kind of hot chocolate that warms you from the inside out on a cold, snowy day.
What makes this recipe truly different is the technique. Instead of just dumping everything in a bowl, we layer the dry ingredients in the jar for visual appeal. But the real magic is in the finishing touch: a pinch of sea salt. It sounds weird, I know, but it cuts the sweetness and makes the chocolate flavor sing. It’s the little detail that turns a good cup of cocoa into a great one. This is the recipe you’ll turn to for snow days, movie nights, and those quiet moments when you just need a warm hug in a mug.
What Ingredients You Will Need
This recipe uses simple, wholesome ingredients to deliver that deep, satisfying chocolate flavor with a refreshing hint of peppermint. Most of these are pantry staples, which is exactly what you want for a last-minute gift or a spontaneous treat. I’ve tested a few different brands and types of each ingredient, and I’ll share what I’ve found works best.
- Granulated Sugar (1 ½ cups / 300g): This provides the base sweetness. I use standard white granulated sugar. It dissolves easily and doesn’t add any off-flavors. You could experiment with coconut sugar, but it will change the color and flavor profile significantly.
- Unsweetened Cocoa Powder (1 cup / 85g): This is the heart of the mix. I strongly recommend using a Dutch-processed cocoa powder like Droste or Valrhona. It has a smoother, less acidic taste than natural cocoa powder, which makes for a richer hot chocolate. I’ve found that natural cocoa can sometimes taste a little harsh in this mix. Trust me on the Dutch-processed for the best results.
- Powdered Sugar (½ cup / 60g): This helps the mix dissolve more smoothly into the milk and adds a touch of extra sweetness. It also helps create that lovely, silky texture we’re after. Don’t skip it!
- Finely Crushed Peppermint Candy Canes (⅓ cup / about 4-5 full-sized candy canes): This is where the peppermint flavor comes from. I’ve tried using peppermint extract, but it can be a little harsh and artificial-tasting. The crushed candy canes provide a more gentle, natural mint flavor and a lovely little crunch when you’re drinking the cocoa. To crush them, place the candy canes in a sealed zip-top bag and gently bash them with a rolling pin. You want a mix of fine dust and small, pea-sized pieces.
- Mini Marshmallows (½ cup / 30g): Because what is hot cocoa without marshmallows? They add a little sweetness and a fluffy texture when they melt on top. I use the standard store-brand mini marshmallows. If you’re gifting this, you can layer them on top for a pretty presentation.
- Fine Sea Salt (½ teaspoon): This is my secret weapon. A tiny pinch of salt in the mix enhances the chocolate flavor and balances the sweetness. It doesn’t make the cocoa taste salty; it just makes it taste more like chocolate. Don’t leave it out!
- Vanilla Powder (optional, ¼ teaspoon): If you have it, a little vanilla powder adds a lovely warmth and depth. You can also use a vanilla bean scraped into the sugar, but that’s a more expensive option. If you don’t have either, don’t worry—the mix is still delicious without it.
Equipment Needed
The beauty of this recipe is that you don’t need any fancy equipment. You probably have everything you need already sitting in your kitchen drawers. Here’s what you’ll need to get started:
- Mason Jars (Pint-sized or Quart-sized): For gifting, wide-mouth pint jars (16 oz) are perfect. They hold enough mix for about 6-8 servings. If you’re making a big batch for your family, quart-sized jars work great. I like using the regular Kerr or Ball brand jars. You can often find them at the grocery store or in bulk at craft stores. Make sure they are clean and completely dry before you start layering.
- Mixing Bowls: You’ll need a medium-sized bowl to whisk together the dry ingredients before layering them. I just use my standard stainless steel nesting bowls.
- Whisk: A good whisk is essential for getting the cocoa powder and sugar completely combined. A balloon whisk works perfectly.
- Funnel (Optional but Helpful): A small canning funnel makes pouring the dry ingredients into the jar a thousand times easier and less messy. It’s a game-changer, especially if you’re making a bunch of jars at once. You can find them for a few dollars at any kitchen supply store.
- Rolling Pin and Zip-Top Bag: For crushing the candy canes. You could also use a food processor, but I find the rolling pin method gives you more control over the texture and is way more satisfying. Plus, it’s a great task for the kids!
- Ribbon and Gift Tags (Optional): For the finishing touch. A simple piece of baker’s twine or a festive ribbon tied around the lid makes the jar look so thoughtful. I always include a small tag with the instructions for how to make the cocoa.
Preparation Method
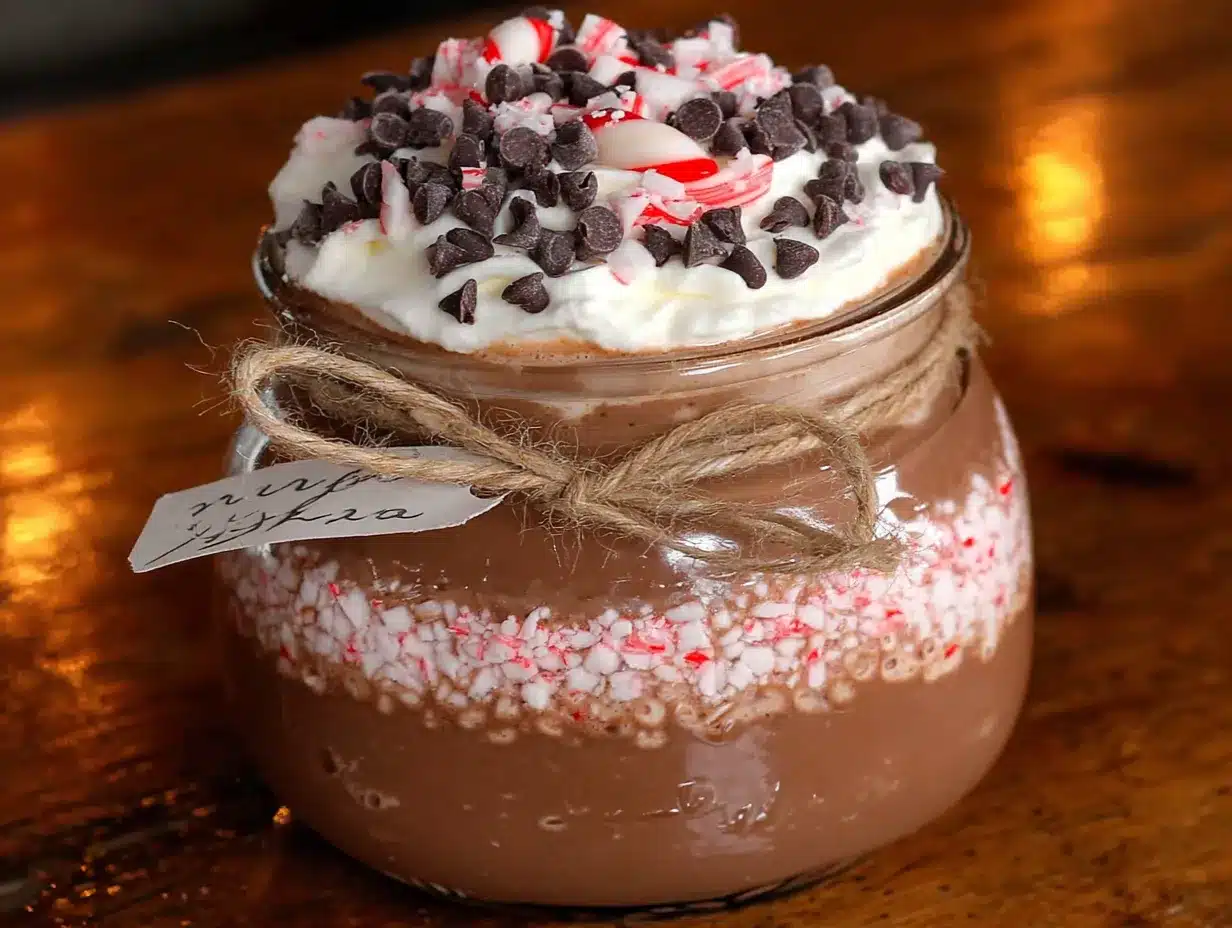
Okay, let’s get to the fun part. This is so simple, you’ll be done in under 15 minutes. I like to do this while the kids are doing a craft or watching a movie. It’s a calm, satisfying project. Here’s how I do it:
- Prepare Your Candy Canes: First things first, we need to crush those candy canes. Unwrap about 4-5 full-sized candy canes and place them in a sturdy zip-top bag. Seal it up, making sure to squeeze out as much air as possible. Now, take your rolling pin and gently bash the candy canes. Start gently! You don’t want to poke a hole in the bag. I usually start by tapping them to break them into large pieces, then I roll the pin back and forth over the bag to create a mix of fine dust and small chunks. You want about ⅓ cup total. Set this aside.
- Combine the Dry Ingredients: In your medium mixing bowl, add the granulated sugar, Dutch-processed cocoa powder, powdered sugar, and fine sea salt. If you’re using the vanilla powder, add that now. Whisk everything together thoroughly. I whisk for a good minute or two, making sure there are no lumps of cocoa powder. This step is important for a smooth final drink.
- Layer Your Jar: Now for the pretty part! Grab your clean, dry mason jar. If you have a funnel, place it in the top of the jar. Start by spooning in about half of the cocoa-sugar mixture. Tap the jar gently on the counter to level it out. Next, add a layer of the crushed candy canes. Then, add the rest of the cocoa-sugar mixture. Tap the jar again to level it. Finally, top it all off with the mini marshmallows. You want a nice, tight layer of marshmallows right at the top.
- Seal and Decorate: Screw the lid on your jar nice and tight. That’s it! You’ve made your mix. Now, for the fun part: decorating. I like to tie a piece of red and white baker’s twine around the neck of the jar. Then I attach a small gift tag that has the instructions written on it. It makes the gift feel so personal and complete.
- How to Make the Cocoa: When you’re ready for a cup, here’s what you do. Heat 1 cup (240 ml) of milk (dairy or non-dairy) in a small saucepan over medium heat. Don’t let it boil! You want it steaming hot. While the milk is heating, spoon about 3-4 tablespoons of the mix into a mug. When the milk is hot, pour about ¼ cup of it into the mug and stir vigorously with a fork or a small whisk until the mix is dissolved into a smooth paste. This is called a “slurry,” and it’s the secret to a lump-free cup of cocoa. Then, pour in the rest of the hot milk and stir. Top with extra marshmallows or a piece of candy cane, if you like.
A quick note: if you’re making this for a jar that will be sitting on a shelf for a while, you might want to put the crushed candy canes in a small separate bag inside the jar. The peppermint can sometimes make the marshmallows a little sticky over time. For immediate gifting or use, layering them is perfectly fine and looks gorgeous.
Cooking Tips & Techniques
I’ve made this mix a lot. Like, a lot a lot. And I’ve learned a few things the hard way so you don’t have to. Here are my best tips for getting it right every time.
Don’t Skip the Salt. I know I said it before, but it’s worth repeating. A tiny pinch of sea salt is not going to make your cocoa taste salty. What it does is it magically enhances the chocolate flavor and cuts through the sweetness. It’s the difference between a flat cup of cocoa and a complex, delicious one. Trust the process.
Grind Your Cocoa. Cocoa powder can be clumpy. Before you measure it out, give it a quick stir in its container or sift it into your mixing bowl. This will help ensure it dissolves smoothly in the milk. There’s nothing worse than biting into a lump of dry cocoa powder in your hot chocolate.
Toast Your Marshmallows (Optional). For a real treat, spoon the mix into your mug, add the hot milk, and stir. Then, top with a few fresh marshmallows and pop the mug under the broiler for 30-60 seconds. Watch it closely! The marshmallows will puff up and get golden brown and toasty. It’s a game-changer.
The Slurry Method is Key. Don’t just dump the dry mix into a full cup of hot milk. You’ll end up with a lumpy mess. Always, always, always make a paste first with a small amount of hot milk. It takes an extra 30 seconds and it guarantees a perfectly smooth, velvety cup of cocoa every single time.
One Mistake I Made. The first time I made this, I used natural cocoa powder and peppermint extract instead of crushed candy canes. The result was a bitter, slightly artificial-tasting drink that my kids politely refused to finish. It was a total flop. That’s when I switched to Dutch-processed cocoa and real candy canes. The difference was night and day. Don’t be like me—learn from my mistake!
Variations & Adaptations
This recipe is a fantastic base for all sorts of fun variations. Once you have the basic method down, you can really make it your own. Here are a few of my family’s favorite twists.
- Spicy Mexican Hot Chocolate: For the adults, add ¼ teaspoon of ground cinnamon and a tiny pinch of cayenne pepper to the dry mix. The warmth of the spices pairs beautifully with the rich chocolate. It’s a cozy, grown-up treat.
- Mint-Free Version: Have a kid who doesn’t like peppermint? (I know, it’s hard to believe!). Simply leave out the crushed candy canes. You can replace them with a layer of mini chocolate chips or butterscotch chips for a different flavor twist. It’s still a delicious, rich hot cocoa.
- Dark Chocolate Lover’s Mix: Use dark cocoa powder (like Black Onyx) and reduce the granulated sugar to 1 ¼ cups. This will give you an intensely chocolatey, less sweet cup of cocoa that is absolutely divine. My husband prefers this version.
- Dairy-Free & Vegan: This mix is naturally dairy-free if you use dairy-free chocolate chips (if adding) and skip the marshmallows, or use vegan marshmallows. When making the cocoa, simply use your favorite non-dairy milk like oat milk, almond milk, or coconut milk. Oat milk gives the creamiest results.
- Cookie Butter Twist: For a truly decadent treat, add a heaping tablespoon of cookie butter (like Biscoff) to the bottom of your mug before adding the hot milk. Stir it in as you make your cocoa. It adds a caramelized, spiced flavor that is absolutely incredible.
Serving & Storage Suggestions
This hot cocoa mix is as versatile as it is delicious. Here’s how to serve it up and keep it fresh.
Serving: The mix is best served hot. For the perfect cup, follow the instructions above using whole milk for the creamiest result. You can also use 2% or a non-dairy milk. Serve it in your favorite cozy mug. For a fun presentation for a party, set up a hot cocoa bar! Place the jar of mix out with bowls of toppings like whipped cream, extra crushed candy canes, chocolate shavings, and caramel sauce. Let everyone customize their own cup.
Storage: Store the mix in a sealed mason jar in a cool, dark place, like your pantry. It will stay fresh for up to 3 months. The sugar and cocoa act as natural preservatives. If you’ve layered the marshmallows and candy canes in the jar, the marshmallows might get a little sticky over time, but they’ll still be perfectly fine to eat. For longer storage, you can keep the jar in the fridge, but let it come to room temperature before scooping to prevent condensation.
Reheating: This mix is really meant to be made fresh, but if you have leftover prepared cocoa, you can store it in the fridge for a day. Reheat it gently on the stovetop or in the microwave, stirring every 30 seconds. The texture might not be quite as perfect as fresh, but it’s still a comforting treat.
Flavor Development: The flavors of the cocoa and peppermint actually meld together beautifully over time. If you can, let the jar sit for a day or two before gifting it. The peppermint flavor will infuse the sugar and cocoa, making the first cup even more delicious.
Nutritional Information & Benefits
Let’s be real: this is a treat. It’s not a health food, and that’s okay. It’s meant to be enjoyed in moderation as a cozy, comforting indulgence. That said, there are a few bright spots in the ingredients.
Estimated Nutritional Values (per serving, using 2% milk):
| Nutrient | Amount |
|---|---|
| Calories | ~280 kcal |
| Total Fat | 5g |
| Saturated Fat | 3g |
| Cholesterol | 15mg |
| Sodium | 180mg |
| Total Carbohydrates | 55g |
| Dietary Fiber | 3g |
| Sugars | 45g |
| Protein | 8g |
Health Benefits: Cocoa powder is actually rich in antioxidants called flavonoids, which can help with heart health and reduce inflammation. The milk provides calcium and vitamin D for strong bones. And honestly? The biggest benefit is the mental one. Taking a few minutes to sit down with a warm, delicious cup of cocoa is a form of self-care. It’s a small ritual that can help you slow down and feel a little bit happier.
Dietary Considerations: This mix is vegetarian. To make it vegan, use a dairy-free milk and vegan marshmallows. It contains dairy (if using milk) and may contain traces of nuts depending on the cocoa powder brand. Always check labels if you have allergies.
Frequently Asked Questions
Can I use a different type of sugar?
You can, but it will change the flavor and texture. Coconut sugar will make it less sweet and give it a more caramel-like flavor. Brown sugar will add a molasses note. I recommend sticking with granulated sugar for the classic taste and best dissolving results.
My cocoa mix looks clumpy. What did I do wrong?
Don’t worry, it’s not ruined! The cocoa powder probably just had some lumps. The easiest fix is to give the jar a good shake before you open it to make your cocoa. You can also sift the dry ingredients before layering them to prevent this in the future.
Can I use this mix for baking?
I wouldn’t recommend it. This mix has a different ratio of sugar to cocoa than what you’d use in a cake or brownie recipe. It also has powdered sugar and salt, which would throw off the chemistry of a baked good. Stick to using it for hot cocoa!
How much mix should I use per cup of milk?
I find that 3 to 4 tablespoons of the mix is the perfect amount for a standard 8-10 oz mug of hot milk. If you like it extra rich, use 4 tablespoons. If you prefer a milder cocoa, start with 3 and add more to taste.
My kids are allergic to peppermint. Can I still make this?
Absolutely! The base cocoa mix is delicious on its own. Simply leave out the crushed candy canes. You can replace them with a layer of mini chocolate chips, butterscotch chips, or even a sprinkle of cinnamon for flavor. It will still be a fantastic gift or treat.
Conclusion
This Kid-Approved DIY Peppermint Hot Cocoa Mix in a Jar is more than just a recipe. It’s a little bit of holiday magic you can hold in your hands. It’s the project that gets the kids involved, the gift that shows you care, and the treat that makes a cold winter day feel a little bit brighter. It’s simple, it’s forgiving, and it’s genuinely delicious. I love how it brings a little bit of that cozy, festive feeling into our home without any stress or fuss.
I really hope you give this a try. Make a jar for yourself, make a few for your neighbors, or set up a little assembly line with your kids on a snowy Saturday. I promise you, the smiles it brings are worth every single second. And if you come up with your own fun variation—like a secret spice blend or a different topping—please, drop a comment below! I’d love to hear how it turned out. Don’t forget to pin this recipe for later and share it with a friend who needs a little extra coziness in their life. Happy sipping, friends!
Pin This Recipe!
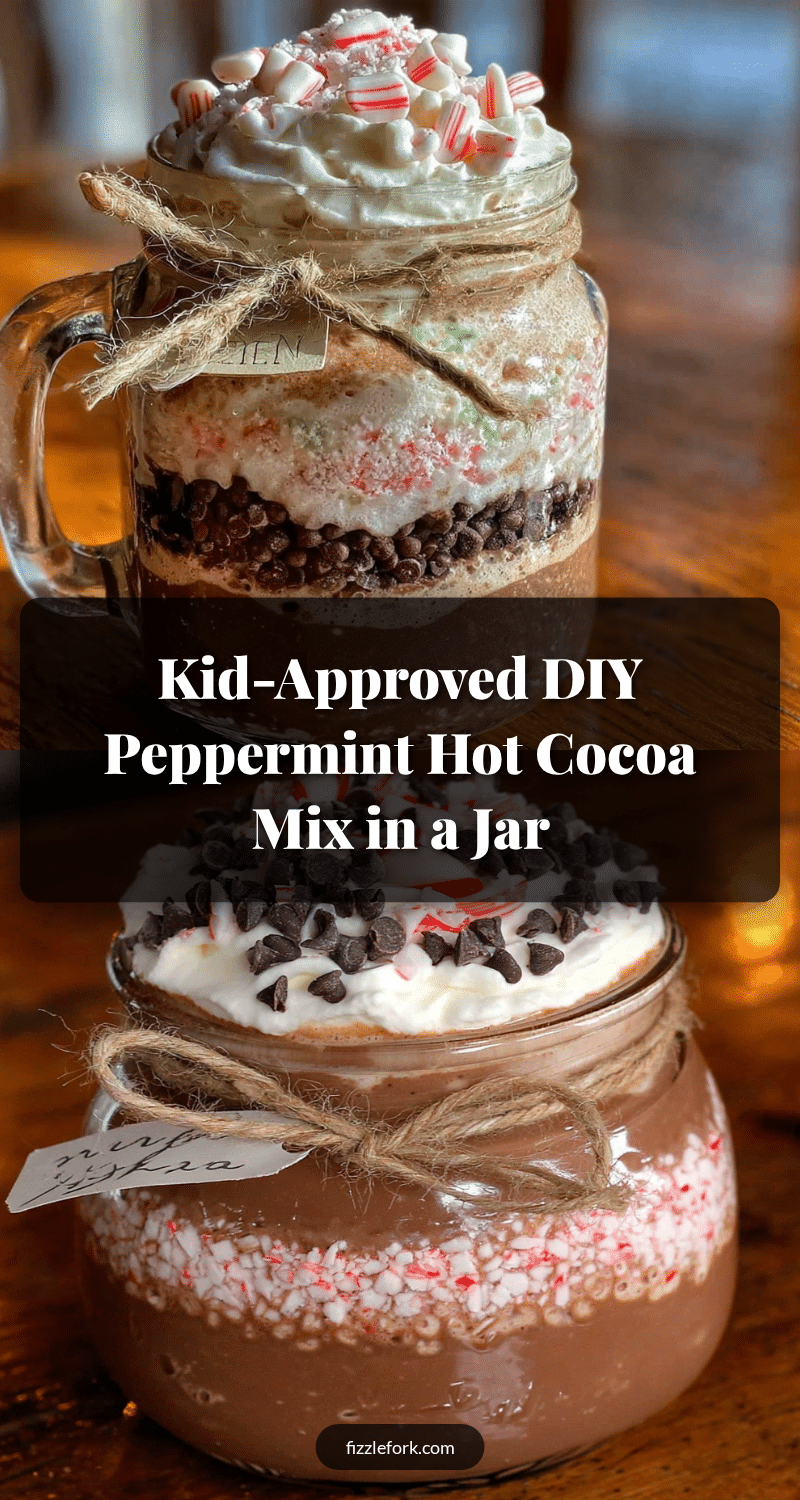
Easy Homemade Peppermint Hot Cocoa Mix
This Kid-Approved DIY Peppermint Hot Cocoa Mix in a Jar is more than just a recipe. It’s a little bit of holiday magic you can hold in your hands. It’s the project that gets the kids involved, the gift that shows you care, and the treat that makes a cold winter day feel a little bit brighter.
- Prep Time: 15 minutes
- Cook Time: 5 minutes
- Total Time: 20 minutes
- Yield: 6-8 servings 1x
- Category: Beverage
- Cuisine: American
Ingredients
- 1 ½ cups (300g) granulated sugar
- 1 cup (85g) unsweetened Dutch-processed cocoa powder
- ½ cup (60g) powdered sugar
- ⅓ cup finely crushed peppermint candy canes (about 4–5 full-sized candy canes)
- ½ cup (30g) mini marshmallows
- ½ teaspoon fine sea salt
- ¼ teaspoon vanilla powder (optional)
Instructions
- Prepare your candy canes: Unwrap about 4-5 full-sized candy canes and place them in a sturdy zip-top bag. Seal it up, squeezing out as much air as possible. Use a rolling pin to gently bash the candy canes until you have a mix of fine dust and small chunks. You want about ⅓ cup total. Set aside.
- Combine the dry ingredients: In a medium mixing bowl, add the granulated sugar, Dutch-processed cocoa powder, powdered sugar, and fine sea salt. If using vanilla powder, add it now. Whisk everything together thoroughly for a good minute or two, making sure there are no lumps of cocoa powder.
- Layer your jar: Grab a clean, dry mason jar (pint-sized or quart-sized). If you have a funnel, place it in the top of the jar. Start by spooning in about half of the cocoa-sugar mixture. Tap the jar gently on the counter to level it out. Next, add a layer of the crushed candy canes. Then, add the rest of the cocoa-sugar mixture. Tap the jar again to level it. Finally, top it all off with the mini marshmallows.
- Seal and decorate: Screw the lid on your jar nice and tight. Tie a piece of red and white baker’s twine around the neck of the jar and attach a small gift tag with instructions for making the cocoa.
- How to make the cocoa: Heat 1 cup (240 ml) of milk (dairy or non-dairy) in a small saucepan over medium heat until steaming hot (do not let it boil). While the milk is heating, spoon about 3-4 tablespoons of the mix into a mug. When the milk is hot, pour about ¼ cup of it into the mug and stir vigorously with a fork or small whisk until the mix is dissolved into a smooth paste. Then, pour in the rest of the hot milk and stir. Top with extra marshmallows or a piece of candy cane, if desired.
Notes
For longer storage, place crushed candy canes in a separate small bag inside the jar to prevent marshmallows from getting sticky. The flavors meld beautifully over time, so letting the jar sit for a day or two before gifting enhances the taste. Always make a paste (slurry) with a small amount of hot milk before adding the rest to avoid lumps.
Nutrition
- Serving Size: 1 cup prepared cocoa
- Calories: 280
- Sugar: 45
- Sodium: 180
- Fat: 5
- Saturated Fat: 3
- Carbohydrates: 55
- Fiber: 3
- Protein: 8
Keywords: hot cocoa mix, peppermint hot cocoa, DIY gift, mason jar gift, Christmas gift, homemade hot chocolate, kid-friendly