It was 11:47 PM on a chilly Tuesday in November, and I was hit with an undeniable craving for green bean casserole. Not the kind you make for Thanksgiving with the cream of mushroom soup and those crispy onions from a can—though I love that version, honestly, it has its place. I didn’t have a can of soup, and I definitely didn’t have those onions. But I had a bag of fresh green beans, a stick of butter, and this crazy idea that had been bouncing around in my head for weeks. What if I browned the butter? What if I made the whole thing from scratch, but kept it simple enough for a Tuesday night? I mean, maybe you’ve been there—staring into the fridge at 11 PM, convinced you can make something magical out of what’s there. That night, I grabbed my biggest skillet and just went for it. The result was so good I actually texted my sister a photo at midnight. She didn’t answer, but I didn’t care. This brown butter version was richer, nuttier, and somehow cozier than the original. And let me tell you, I’ve been making it ever since—for holidays, for potlucks, for regular Tuesday dinners when we need a little extra comfort.
Why You’ll Love This Recipe
This isn’t just another green bean casserole. This is the version that makes people ask for the recipe before they’ve even finished their first helping. I’ve tested this recipe seven times (yes, seven—my family has been very patient) to get the balance just right. Here’s why it works so well for your family table:
- Made from Scratch, Still Easy : No canned soup here, but no complicated French techniques either. The brown butter cream sauce comes together in about 10 minutes with ingredients you probably already have.
- Budget-Friendly Ingredients : Fresh green beans are affordable, and everything else is pantry and fridge staples. This stretches your grocery dollar without feeling like a compromise.
- Picky Eater Approved : My nephew, who once declared he “doesn’t do green things,” ate two helpings. The nutty brown butter and crispy topping win over even the most skeptical kids.
- Make-Ahead Friendly : You can assemble this casserole the night before and bake it when you’re ready. Perfect for busy weeknights or holiday meal prep.
- Leftovers That Reheat Beautifully : This is not a dish that gets sad in the fridge. The flavors actually meld together overnight, and it reheats like a dream.
What makes this recipe different is the brown butter. It adds this deep, almost toasty flavor that transforms the whole dish. It’s comfort food that feels a little special but doesn’t require any extra effort. Honestly, once you try it this way, you might never go back to the canned version.
What Ingredients You Will Need
This recipe uses simple, honest ingredients to create something genuinely special. Most of these are probably in your kitchen right now, which is exactly how I like to cook.
For the Casserole Base
- 1 1/2 pounds fresh green beans, trimmed and cut into 2-inch pieces (look for bright, snappy beans—they should snap when you bend them)
- 4 tablespoons unsalted butter (I prefer Kerrygold for its rich flavor, but any good butter works)
- 8 ounces cremini mushrooms, sliced (baby bellas have the best flavor for this)
- 1 medium yellow onion, finely diced
- 3 cloves garlic, minced
- 1/4 cup all-purpose flour (use a gluten-free blend if needed)
- 2 cups whole milk (2% works too, but whole milk makes it extra creamy)
- 1 cup low-sodium chicken or vegetable broth
- 1/2 teaspoon salt, plus more for the water
- 1/4 teaspoon black pepper
- 1/4 teaspoon nutmeg, freshly grated if possible (trust me on this one)
- 1/2 cup sour cream (adds tang and richness)
For the Topping

- 1 cup crispy fried onions (store-bought is fine, or make your own if you’re feeling ambitious)
- 1/2 cup panko breadcrumbs
- 2 tablespoons melted butter
- 1/4 cup grated Parmesan cheese (optional, but adds a nice salty crunch)
I recommend using fresh green beans for this recipe—frozen ones get too soft during the blanch-and-bake process. Look for beans that are firm and bright green with no brown spots. If you’re substituting, you can use frozen green beans, but skip the blanching step and add them straight to the sauce.
Equipment Needed
You don’t need a fancy kitchen to pull this off. Here’s what you’ll need:
- Large pot for blanching the green beans (any pot works, but you want enough room for the beans to move freely)
- Large skillet or sauté pan (I use my trusty 12-inch cast iron skillet—it’s perfect for browning butter evenly)
- 9×13-inch baking dish (a 3-quart casserole dish works too)
- Colander for draining the beans
- Large bowl filled with ice water (for shocking the beans)
- Wooden spoon or silicone spatula for stirring the sauce
- Measuring cups and spoons
- Chef’s knife and cutting board
If you don’t have a cast iron skillet, any heavy-bottomed pan will do for browning the butter. The key is even heat distribution. And if you don’t have a 9×13 dish, you can use a 10-inch cast iron skillet for a more rustic presentation—just adjust the baking time slightly.
Preparation Method
Let’s make this happen. I’ve broken it down into clear steps so you can follow along without any stress.
Step 1: Blanch the Green Beans
Fill your large pot with water and bring it to a rolling boil. Add a generous pinch of salt—about a tablespoon. While the water heats, fill your large bowl with ice water and set it nearby. Drop the trimmed green beans into the boiling water and let them cook for exactly 3 minutes. You want them tender-crisp, not mushy. Immediately transfer the beans to the ice water bath using a slotted spoon or strainer. This stops the cooking and locks in that bright green color. Let them sit in the ice water for about 2 minutes, then drain well and pat dry with a clean kitchen towel. Set aside.
Step 2: Brown the Butter
In your large skillet, melt the 4 tablespoons of butter over medium heat. Swirl the pan occasionally as the butter melts. First it will foam, then it will start to turn golden, and then you’ll see little brown specks forming at the bottom. This is where the magic happens. Keep a close eye on it—brown butter can go from perfect to burnt in seconds. When it smells nutty and the specks are a deep amber color, remove the pan from heat immediately. Pour the brown butter into a heat-safe bowl to stop the cooking process. Don’t skip this step—the flavor is everything.
Step 3: Sauté the Mushrooms and Onions
Return the skillet to medium heat. Add 2 tablespoons of the brown butter (leave the rest in the bowl for now). Add the sliced mushrooms and let them cook without stirring for 3-4 minutes—this gives them a beautiful golden sear. Stir, then add the diced onion. Cook for another 4-5 minutes until everything is softened and the mushrooms have released their liquid. Add the minced garlic and cook for 30 seconds until fragrant. The kitchen should smell incredible at this point.
Step 4: Make the Cream Sauce
Sprinkle the flour over the mushroom mixture and stir constantly for about 1 minute. This cooks out the raw flour taste. Slowly pour in the milk while whisking continuously to prevent lumps. Then add the broth, salt, pepper, and nutmeg. Bring the sauce to a gentle simmer—it should thicken after about 3-4 minutes. You’re looking for a consistency that coats the back of a spoon. Remove from heat and stir in the remaining brown butter and the sour cream. Taste and adjust seasoning if needed. The sauce should be rich, creamy, and deeply savory.
Step 5: Assemble the Casserole
Preheat your oven to 375°F. Add the blanched green beans to the skillet with the sauce and stir gently to coat everything evenly. Pour the mixture into your greased 9×13 baking dish and spread it into an even layer.
Step 6: Make the Topping and Bake
In a small bowl, combine the crispy fried onions, panko breadcrumbs, melted butter, and Parmesan cheese if using. Sprinkle this mixture evenly over the casserole. Bake for 20-25 minutes until the topping is golden brown and the filling is bubbling around the edges. Let it rest for 5 minutes before serving—this helps the sauce set up a bit.
Cooking Tips & Techniques
I’ve made this casserole enough times to learn a few things the hard way. Here’s what I wish someone had told me:
Watch the butter like a hawk. The first time I tried browning butter, I got distracted by my kids arguing over a toy, and the butter went from golden to acrid in about 30 seconds. Set a timer if you need to. The color should be the color of a copper penny, and the smell should be nutty and warm. If it smells burnt, start over—it’s worth it.
Don’t skip the blanching step. I know it’s an extra pot to wash, but it makes a huge difference. Blanching sets the color and partially cooks the beans so they don’t get mushy in the oven. If you’re really short on time, you can microwave the beans with a splash of water for 2 minutes, but blanching gives better results.
Let the sauce simmer properly. The flour needs time to cook and thicken. If you rush this step, your sauce will be thin and taste like raw flour. Be patient—it’s only a few minutes.
Make it ahead for holidays. Assemble the casserole completely but don’t bake it. Cover and refrigerate for up to 24 hours. When you’re ready, add 10 minutes to the baking time since you’re starting from cold. This is a lifesaver for Thanksgiving or Christmas dinner.
Double the topping. Honestly, the crispy topping is everyone’s favorite part. I always make extra and sprinkle some on halfway through baking for maximum crunch.
Variations & Adaptations
This recipe is flexible, and I’ve tried several variations over the years. Here are some of my favorites:
Make it vegetarian. Use vegetable broth instead of chicken broth, and skip the Parmesan or use a vegetarian alternative. It’s already meat-free, so this is an easy swap.
Add some protein. For a heartier version, stir in 2 cups of shredded rotisserie chicken or cooked bacon crumbles before baking. My husband loves the bacon version—it adds a smoky flavor that pairs beautifully with the brown butter.
Try different mushrooms. Cremini are my go-to, but shiitake or oyster mushrooms add an even more earthy flavor. Once, I used a mix of wild mushrooms I found at the farmers market, and it was absolutely divine.
Go dairy-free. Use plant-based butter, oat milk (unsweetened), and dairy-free sour cream. The sauce will be slightly thinner, but the flavor is still fantastic. I’ve tested this with my sister who’s lactose intolerant, and she gave it two thumbs up.
Spice it up. Add a pinch of red pepper flakes to the sauce for a subtle heat. Or stir in 1 teaspoon of fresh thyme leaves for an herby note that complements the nutty brown butter.
Serving & Storage Suggestions
This casserole is best served warm, straight from the oven. Let it rest for 5 minutes so the sauce sets up, then scoop generous portions onto plates. The topping should be crispy and golden, the beans tender but not mushy, and the sauce creamy and rich.
It pairs beautifully with roasted turkey or chicken, but honestly, it’s hearty enough to be a main dish with a side salad. For holiday meals, I serve it alongside mashed potatoes and cranberry sauce. For a regular weeknight, it’s perfect with a simple roasted chicken and some crusty bread to soak up the extra sauce.
Storage: Leftovers keep well in an airtight container in the refrigerator for up to 4 days. The topping will soften, but the flavor gets even better overnight. To reheat, place individual portions in a 350°F oven for 10 minutes or microwave for 1-2 minutes. If you want to restore some crunch, sprinkle fresh crispy onions on top before reheating.
Freezing: You can freeze the assembled but unbaked casserole for up to 3 months. Thaw overnight in the refrigerator, then bake as directed, adding 10-15 minutes to the cooking time. I’ve done this for holiday prep, and it works beautifully.
Nutritional Information & Benefits
Here’s an approximate nutritional breakdown per serving (based on 8 servings):
- Calories: 285
- Total Fat: 18g
- Saturated Fat: 10g
- Cholesterol: 45mg
- Sodium: 420mg
- Total Carbohydrates: 24g
- Dietary Fiber: 4g
- Sugars: 8g
- Protein: 8g
Green beans are a good source of vitamins A, C, and K, as well as fiber and folate. The mushrooms add B vitamins and selenium, which supports immune health. And while this isn’t a light dish by any means, using fresh ingredients and making the sauce from scratch means you’re avoiding the preservatives and excess sodium found in canned versions.
If you’re watching your intake, you can reduce the butter to 3 tablespoons and use 2% milk without sacrificing too much flavor. The brown butter is still there, just in a smaller amount.
Conclusion
This brown butter green bean casserole has become a staple in my kitchen, and I have a feeling it will become one in yours too. It takes a classic comfort dish and makes it just a little bit better—richer, nuttier, and more satisfying. But it’s still simple enough for a Tuesday night, which is exactly what I was craving at 11:47 PM that November evening.
I love this recipe because it proves that you don’t need fancy techniques or expensive ingredients to make something truly special. You just need good butter, fresh green beans, and a little bit of patience. The brown butter does all the heavy lifting, and the crispy topping makes everyone happy.
I’d love to hear how this turns out for you! Drop a comment below and let me know if your family loved it as much as mine does. Did you try any variations? Did you double the topping like I always do? Share your photos and tag me—I can’t wait to see your versions. Happy cooking, friends!
Frequently Asked Questions
Can I use frozen green beans instead of fresh?
Yes, you can use frozen green beans, but skip the blanching step. Thaw them first and pat them dry, then add them directly to the sauce. They’ll be slightly softer than fresh, but it still works well in a pinch.
How do I know when the brown butter is ready?
Look for two signs: the color should be a deep amber, like the color of a copper penny, and you should smell a nutty, toasty aroma. The butter will foam and then the foam will subside, revealing the brown specks at the bottom. Remove from heat immediately once you see those specks.
Can I make this casserole gluten-free?
Absolutely! Use a gluten-free all-purpose flour blend in the sauce (I’ve had good results with Bob’s Red Mill 1-to-1 Baking Flour). For the topping, use gluten-free panko breadcrumbs and check that your crispy fried onions are certified gluten-free.
Why did my sauce turn out lumpy?
Lumpy sauce usually happens when you add the milk too quickly or don’t whisk constantly. The trick is to pour the milk in a slow, steady stream while whisking vigorously. If you do get lumps, you can use an immersion blender to smooth it out, or strain the sauce through a fine-mesh sieve.
How far ahead can I assemble this casserole?
You can assemble the casserole completely (including the topping) up to 24 hours ahead. Cover it tightly with foil and refrigerate. When you’re ready to bake, add about 10 minutes to the baking time since you’re starting from cold. The topping might not be as crispy, but the flavor will be just as good.
Pin This Recipe!
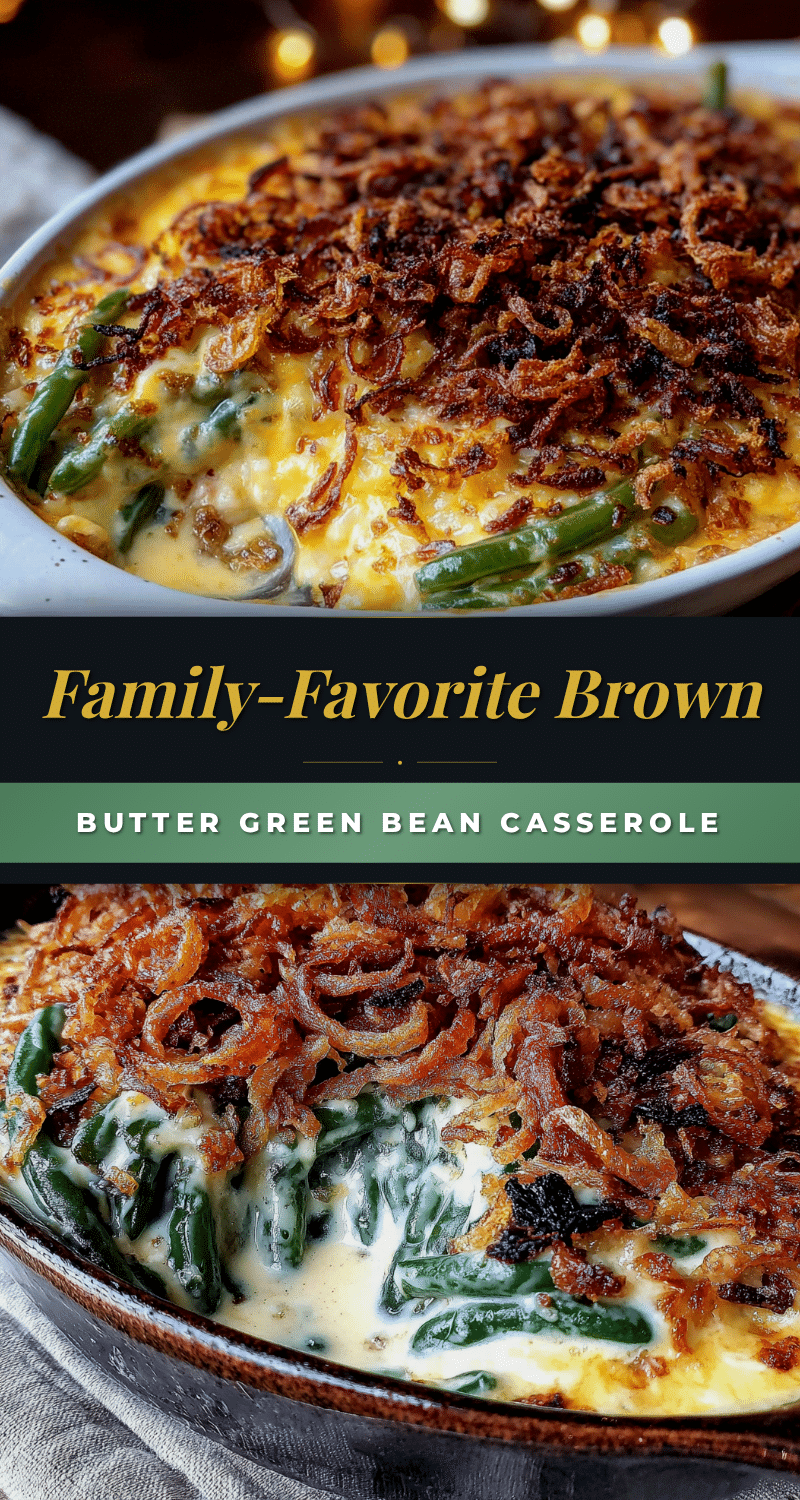
Brown Butter Green Bean Casserole (Best Easy Family Recipe)

This brown butter green bean casserole is a from-scratch twist on the classic, featuring a rich, nutty cream sauce and a crispy topping. It’s simple enough for a Tuesday night yet special enough for holiday feasts.
- Prep Time: 20 minutes
- Cook Time: 30 minutes
- Total Time: 50 minutes
- Yield: 8 servings 1x
- Category: Side Dish
- Cuisine: American
Ingredients
- 1 1/2 pounds fresh green beans, trimmed and cut into 2-inch pieces
- 4 tablespoons unsalted butter
- 8 ounces cremini mushrooms, sliced
- 1 medium yellow onion, finely diced
- 3 cloves garlic, minced
- 1/4 cup all-purpose flour
- 2 cups whole milk
- 1 cup low-sodium chicken or vegetable broth
- 1/2 teaspoon salt, plus more for blanching water
- 1/4 teaspoon black pepper
- 1/4 teaspoon nutmeg, freshly grated if possible
- 1/2 cup sour cream
- 1 cup crispy fried onions
- 1/2 cup panko breadcrumbs
- 2 tablespoons melted butter
- 1/4 cup grated Parmesan cheese (optional)
Instructions
- Blanch the green beans: Bring a large pot of salted water to a boil. Prepare an ice water bath. Add green beans and cook for exactly 3 minutes. Transfer to ice water for 2 minutes, then drain and pat dry.
- Brown the butter: In a large skillet, melt 4 tablespoons butter over medium heat. Swirl occasionally until it foams, turns golden, and develops brown specks with a nutty aroma. Remove from heat immediately and pour into a heat-safe bowl.
- Sauté mushrooms and onions: Return skillet to medium heat. Add 2 tablespoons of the brown butter. Add mushrooms and cook without stirring for 3-4 minutes. Add onion and cook 4-5 minutes until softened. Add garlic and cook 30 seconds.
- Make the cream sauce: Sprinkle flour over the mushroom mixture and stir for 1 minute. Slowly pour in milk while whisking. Add broth, salt, pepper, and nutmeg. Simmer for 3-4 minutes until thickened. Remove from heat and stir in remaining brown butter and sour cream.
- Assemble the casserole: Preheat oven to 375°F. Add blanched green beans to the skillet and stir to coat. Transfer to a greased 9×13-inch baking dish.
- Make topping and bake: Combine crispy fried onions, panko breadcrumbs, melted butter, and Parmesan (if using). Sprinkle over casserole. Bake for 20-25 minutes until golden and bubbly. Let rest 5 minutes before serving.
Notes
Watch the butter carefully when browning—it can go from perfect to burnt in seconds. For make-ahead, assemble completely and refrigerate up to 24 hours; add 10 minutes to baking time. Double the topping for extra crunch. Leftovers keep in the refrigerator for up to 4 days and reheat well.
Nutrition
- Serving Size: 1 serving (1/8 of ca
- Calories: 285
- Sugar: 8
- Sodium: 420
- Fat: 18
- Saturated Fat: 10
- Carbohydrates: 24
- Fiber: 4
- Protein: 8
Keywords: green bean casserole, brown butter, Thanksgiving side dish, easy family recipe, from scratch, comfort food