For a while, I just accepted that homemade birthday cakes rarely matched the moist, joyful magic of those classic bakery funfetti cakes. Sure, I could whip up a simple vanilla cake, but the kind with that perfect crumb and colorful sprinkle bursts baked right into the batter? That had always felt just out of reach. I remember the afternoons spent flipping through countless recipes, scribbling notes, tweaking ingredients, yet somehow ending up with a cake that was either dry or too dense. The bright, playful funfetti cakes with that nostalgic charm seemed like something best left to the pros—or boxed mixes.
There was always that little craving to create a birthday cake that felt special but didn’t require a bakery run or a complicated list of ingredients. Something easy, moist, and truly fun to make from scratch. The kind of cake that doesn’t just sit on the table but invites smiles, laughter, and that familiar, warm feeling of celebration. It wasn’t about flashy decoration or complicated frosting techniques. Just the cake itself, with sprinkles woven through the batter, soft and tender with a crumb that practically melts in your mouth.
What struck me quietly one afternoon was how the right balance of simple ingredients and a straightforward method could create that very thing. The kind of funfetti birthday cake I’d been looking for without the fuss or mystery. Not perfect or fancy, but honestly just right. It’s stuck with me because it’s easy enough to make on a busy weeknight, yet special enough to make any celebration feel a little brighter. And somehow, it’s the one recipe that still makes me smile every time I pull that colorful slice from the pan.
Why You’ll Love This Recipe
After testing this easy moist funfetti birthday cake recipe from scratch a handful of times, I can say it really hits all the right notes. It’s one of those recipes that you come back to again and again because it just works—every single time. Here’s why it’s worth keeping in your baking arsenal:
- Quick & Easy: This funfetti cake comes together in under 45 minutes, perfect for those last-minute birthday celebrations or spontaneous dessert cravings.
- Simple Ingredients: Nothing fancy or hard to find—basic pantry staples like flour, sugar, eggs, and sprinkles bring this cake to life without a special trip to the store.
- Perfect for Celebrations: Whether it’s a birthday, a casual get-together, or just a fun weekend treat, this cake brings a festive vibe to any occasion.
- Crowd-Pleaser: Kids adore the colorful sprinkles, and adults appreciate the moist texture and balanced sweetness. It’s the kind of cake that vanishes quickly.
- Unbelievably Delicious: The texture is soft and tender, with just the right crumb. The sprinkles add fun bursts of color and a subtle crunch without overwhelming the cake.
This isn’t just another funfetti cake recipe you find buried in a box or on a fast-food menu. What makes it stand out is a simple trick I learned from blending the wet ingredients first to create a silky batter, and a thoughtful balance of sugar and butter that keeps the cake moist for days. Plus, mixing in sprinkles carefully ensures they don’t bleed their color, keeping the cake looking bright and inviting.
Honestly, it’s the kind of cake that makes you pause for a moment after the first bite—comfort food dressed up in confetti. And if you want to pair it with something light and refreshing, I’ve found that a sparkling strawberry lemonade punch complements it perfectly, adding a fresh zing to the celebration.
What Ingredients You Will Need
This easy moist funfetti birthday cake recipe uses simple, wholesome ingredients that come together to deliver a soft texture and sweet, playful flavor. Most of these are pantry staples, making it a convenient go-to for casual or special occasions alike.
- All-purpose flour (2 ½ cups / 315 g) – The base of the cake, providing structure. I prefer using a trusted brand like King Arthur for consistent results.
- Baking powder (2 ½ tsp) – The leavening agent that helps the cake rise and stay fluffy.
- Salt (½ tsp) – Balances sweetness and enhances flavor.
- Unsalted butter (1 cup / 227 g, softened) – Adds richness and moisture. Using unsalted allows control over salt levels.
- Granulated sugar (1 ¾ cups / 350 g) – For sweetness and tender crumb.
- Large eggs (4, room temperature) – Bind everything together and help with moisture.
- Pure vanilla extract (1 tbsp) – Gives the cake its warm, inviting flavor.
- Whole milk (1 cup / 240 ml, room temperature) – Moisturizes the batter and contributes to a tender crumb. You can swap for almond or oat milk if needed.
- Rainbow sprinkles (¾ cup / 120 g) – The star of the show! Use sturdy jimmies or nonpareils to prevent color bleeding during baking.
For the frosting, I like pairing this cake with a classic vanilla buttercream or a light cream cheese frosting—both bring out the fun flavors without overpowering the cake itself.
Equipment Needed
- Two 9-inch (23 cm) round cake pans – I recommend non-stick or well-greased pans for easy release. If you don’t have round pans, an 8×8 inch square dish works too, just adjust baking time.
- Mixing bowls – At least two; one for dry ingredients and one for wet.
- Electric mixer or stand mixer – While you can mix by hand, a mixer speeds things up and helps achieve a smooth batter.
- Rubber spatula – For folding in sprinkles gently without overmixing.
- Measuring cups and spoons – Accuracy matters for baking success.
- Cooling racks – Letting the cakes cool completely here prevents frosting mishaps.
If you’re on a budget and don’t have a mixer, a sturdy whisk and some elbow grease will definitely do the trick—just be patient with mixing so the batter stays fluffy.
Preparation Method
- Preheat your oven to 350°F (175°C). Grease and flour your two 9-inch cake pans or line them with parchment paper. This prevents sticking and ensures clean edges. (Time: 10 minutes)
- Whisk together the dry ingredients: In a large bowl, sift or whisk the all-purpose flour, baking powder, and salt until evenly combined. This step helps distribute the leavening agents and salt throughout the flour for a consistent rise.
- Cream the butter and sugar: Using an electric mixer, beat the softened butter and granulated sugar on medium speed until the mixture is light and fluffy—about 3 to 5 minutes. This step is crucial for an airy texture.
- Add the eggs one at a time: Beat each egg into the butter-sugar mixture, making sure it’s fully incorporated before adding the next. This creates a smooth, well-emulsified batter.
- Mix in vanilla extract: Pour in the vanilla and mix briefly to combine.
- Alternate adding dry ingredients and milk: With the mixer on low speed, add the dry ingredients in three parts, alternating with the milk in two parts. Start and end with the flour mixture. Mix just until combined after each addition. Overmixing can make the cake tough, so keep it gentle.
- Fold in the sprinkles: Using a rubber spatula, carefully fold the rainbow sprinkles into the batter. Be gentle to avoid the colors bleeding and to keep the sprinkles intact throughout the cake.
- Divide the batter evenly between the prepared pans: Use a spatula to smooth the top for even baking.
- Bake for 30-35 minutes: Rotate pans halfway through baking for even heat distribution. The cake is done when a toothpick inserted in the center comes out clean or with a few moist crumbs.
- Cool the cakes: Let them rest in the pans for 10 minutes, then turn out onto wire racks to cool completely before frosting.
Pro tip: If your sprinkles start to sink during baking, try tossing them lightly in flour before folding in. That little trick helped me keep the bursts of color perfectly distributed.
Cooking Tips & Techniques
One thing I learned early on is that the temperature of your ingredients matters more than you might think. Using room temperature eggs and milk helps the batter come together smoothly and traps air better for a lighter cake. Cold ingredients tend to clump or slow down the mixing process.
Also, when it comes to mixing the batter, less is more. Overmixing develops gluten and can turn your moist cake into a dense, tough one. I usually mix just until I see no dry streaks left—then stop.
Choosing the right sprinkles matters too. Some cheap sprinkles tend to bleed color into the batter, turning the cake an odd shade of purple or blue. Jimmies or nonpareils are your friends here. I’ve even tried some specialty brands that hold their color better and add fun texture.
When it’s time to bake, don’t open the oven too early. The cake needs time to set and rise properly. I usually wait until about 25 minutes have passed before peeking. Rotating the pans halfway through baking helps with even browning, especially if your oven has hot spots.
Finally, cooling the cake completely before frosting is key. I once tried frosting a warm cake and ended up with a melty mess. Patience pays off here, and it’s easier to get smooth, clean layers.
Variations & Adaptations
There’s room to play with this funfetti cake recipe depending on your preferences or dietary needs:
- Gluten-Free Option: Swap the all-purpose flour with a 1:1 gluten-free baking flour blend. Expect a slightly different crumb, but still delicious.
- Dairy-Free Variation: Use a plant-based milk like almond or oat milk and swap butter for a dairy-free margarine or coconut oil.
- Chocolate Funfetti: Add ½ cup (45 g) of cocoa powder to the dry ingredients and use chocolate sprinkles to switch things up.
- Layer Cake Twist: Try this batter in cupcake liners for colorful mini funfetti cupcakes—perfect for parties or lunchbox treats.
- Personal Favorite: Once, I added a splash of almond extract alongside vanilla for a subtle nutty undertone that surprised everyone in the best way.
For baking methods, if you’re short on oven space, a bundt pan works well too—just increase baking time by 10 to 15 minutes and keep an eye on doneness.
Serving & Storage Suggestions
This easy moist funfetti birthday cake is best served at room temperature, allowing all the flavors and textures to shine. I like frosting it with a simple vanilla buttercream and decorating with a few extra sprinkles on top for that cheerful, festive look.
It pairs wonderfully with a cold glass of milk or, if you want to continue the party vibes, a sparkling strawberry lemonade punch adds a refreshing contrast to the sweet cake.
To store, wrap leftover cake tightly in plastic wrap or keep it in an airtight container. It stays moist in the refrigerator for up to 4 days. For longer storage, freeze the unfrosted layers wrapped well in plastic and foil for up to 3 months. Thaw overnight in the fridge before frosting.
Reheating frosted slices isn’t usually necessary, but if you prefer warm cake, a quick 10-second zap in the microwave does the trick without drying it out.
Interestingly, the flavors mellow and deepen slightly after a day, making it taste even better the next day—if you can wait that long!
Nutritional Information & Benefits
Each slice of this funfetti cake (based on 12 servings) contains approximately:
| Calories | 320 |
|---|---|
| Fat | 15g |
| Saturated Fat | 9g |
| Carbohydrates | 42g |
| Sugars | 28g |
| Protein | 4g |
The cake provides quick energy from carbohydrates and some protein from the eggs and milk. Using unsalted butter and controlling sugar amounts helps keep it balanced. For those watching gluten, the recipe adapts well to gluten-free flours.
From a wellness perspective, this cake offers the simple joy of homemade treats without preservatives or artificial additives often found in store-bought versions. Plus, the sprinkles add a fun visual boost that’s just as much about celebration as nutrition.
Conclusion
This easy moist funfetti birthday cake recipe from scratch has become my quietly trusted way to mark celebrations with a little extra joy. It’s simple enough to make on a whim, reliably delicious, and colorful enough to bring smiles around the table. What I love most is how it invites you to customize it—whether with frosting flavors, mix-ins, or presentation—making it truly your own.
So whether you’re baking for a birthday, a special dessert, or just because, this recipe offers a gentle invite to create something cheerful and satisfying from scratch. And if you ever want a sweet, comforting companion, pairing it with a refreshing homemade sparkling strawberry lemonade punch can brighten the whole experience.
Feel free to share your tweaks or stories in the comments—I’m always curious how others make this funfetti cake their own. Happy baking and celebrating!
FAQs
- Can I use different types of sprinkles? Yes, but it’s best to use sturdy jimmies or nonpareils to prevent color bleeding. Avoid cheap, soft sprinkles that melt easily.
- How do I prevent the cake from drying out? Be sure not to overbake—check doneness at 30 minutes. Also, properly cooling and storing in an airtight container helps retain moisture.
- Can I make this cake gluten-free? Absolutely! Substitute all-purpose flour with a 1:1 gluten-free baking blend.
- What frosting pairs best with this funfetti cake? Classic vanilla buttercream or cream cheese frosting works beautifully, adding sweetness without overpowering the cake.
- Can I make this cake ahead of time? Yes, you can bake the layers a day or two ahead. Wrap tightly and store in the fridge, then frost before serving.
Pin This Recipe!
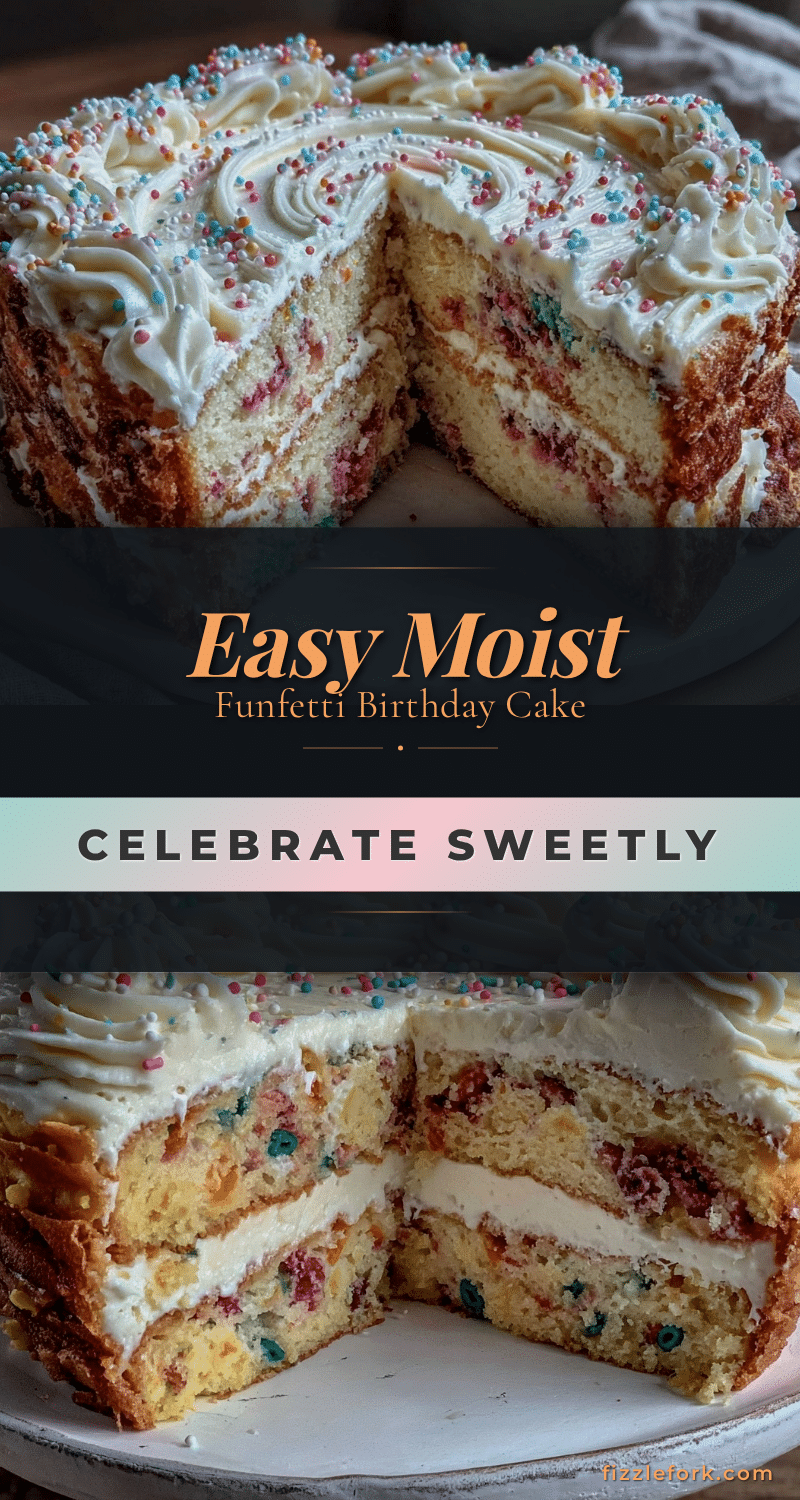
Easy Moist Funfetti Birthday Cake Recipe From Scratch for Perfect Celebrations
A simple, moist funfetti birthday cake made from scratch with colorful sprinkles baked into the batter, perfect for celebrations and easy enough for busy weeknights.
- Prep Time: 15 minutes
- Cook Time: 30-35 minutes
- Total Time: 45-50 minutes
- Yield: 12 servings 1x
- Category: Dessert
- Cuisine: American
Ingredients
- 2 ½ cups (315 g) all-purpose flour
- 2 ½ tsp baking powder
- ½ tsp salt
- 1 cup (227 g) unsalted butter, softened
- 1 ¾ cups (350 g) granulated sugar
- 4 large eggs, room temperature
- 1 tbsp pure vanilla extract
- 1 cup (240 ml) whole milk, room temperature
- ¾ cup (120 g) rainbow sprinkles (sturdy jimmies or nonpareils recommended)
Instructions
- Preheat your oven to 350°F (175°C). Grease and flour two 9-inch cake pans or line them with parchment paper.
- Whisk together the all-purpose flour, baking powder, and salt in a large bowl until evenly combined.
- Using an electric mixer, beat the softened butter and granulated sugar on medium speed until light and fluffy, about 3 to 5 minutes.
- Add the eggs one at a time, beating well after each addition to create a smooth batter.
- Mix in the vanilla extract briefly to combine.
- With the mixer on low speed, alternately add the dry ingredients in three parts and the milk in two parts, starting and ending with the flour mixture. Mix just until combined after each addition.
- Gently fold the rainbow sprinkles into the batter using a rubber spatula to avoid color bleeding.
- Divide the batter evenly between the prepared pans and smooth the tops.
- Bake for 30-35 minutes, rotating pans halfway through. The cake is done when a toothpick inserted in the center comes out clean or with a few moist crumbs.
- Let the cakes cool in the pans for 10 minutes, then turn out onto wire racks to cool completely before frosting.
Notes
Use room temperature eggs and milk for a smoother batter and lighter cake. Avoid overmixing to prevent a dense texture. Use sturdy sprinkles like jimmies or nonpareils to prevent color bleeding. If sprinkles sink, toss them lightly in flour before folding in. Cool cakes completely before frosting to avoid melting.
Nutrition
- Serving Size: 1 slice (1/12 of cak
- Calories: 320
- Sugar: 28
- Fat: 15
- Saturated Fat: 9
- Carbohydrates: 42
- Protein: 4
Keywords: funfetti cake, birthday cake, moist cake, homemade cake, sprinkles cake, easy cake recipe, celebration cake


