Introduction
My friend Jen asked why I couldn’t just stir everything together in the same bowl I’d mixed the cornbread batter in. I started to explain why that wouldn’t work — then stopped. She had a point. I was making my cozy creamy corn casserole from scratch, no boxed mix, and I was being a little precious about the process. I mean, I’d been making this dish for years, always careful to wash the mixing bowl between the wet and dry ingredients like some kind of corn casserole purist. Jen just shrugged and said, “It’s all going to the same place, right?”
Honestly, I wanted to argue. But I didn’t have a good reason. So I dumped the flour right into the bowl with the melted butter and sour cream. And you know what? It worked perfectly. The texture was just as tender, the flavor just as rich. I felt a little silly, standing there with my dish towel, realizing I’d been adding an unnecessary step for years. Maybe you’ve been there — following a rule so long you forget to ask if it even matters.
That night, we ate the casserole straight from the baking dish, still warm, with a little extra black pepper on top. Jen was right. Sometimes the simplest way is the best way. And that’s the version I’ve been making ever since — a truly cozy, creamy corn casserole from scratch that skips the boxed mix and the unnecessary fuss. It’s the recipe that taught me to trust a good question more than a old habit.
This is the kind of dish that feels like a hug in a baking dish. It’s the side dish that disappears first at potlucks, the one you make for Thanksgiving when you want something reliable, and the one you whip up on a random Tuesday just because it’s cold outside. Let me show you how to make it.
Why You’ll Love This Recipe
This isn’t just another corn casserole recipe. This is the one you’ll come back to again and again. Here’s why it works so well:
- No Boxed Mix Needed : You control exactly what goes in. No preservatives, no mystery ingredients, just real butter, cream, and corn.
- Simple Pantry Ingredients : You probably have everything you need already. Flour, cornmeal, eggs, butter, sour cream, and canned or frozen corn.
- Perfect for Any Occasion : It’s fancy enough for holiday dinners but easy enough for a weeknight side dish. It works for potlucks, barbecues, and Sunday suppers.
- Crowd-Pleaser Guaranteed : Kids love the creamy, sweet corn flavor. Adults love the rich, comforting texture. I’ve never seen leftovers of this dish.
- Unbelievably Creamy Texture : The secret is using a combination of creamed corn and sour cream, plus a little heavy cream. It creates this luscious, almost custard-like consistency that’s pure comfort.
What makes this recipe different from all the others? It’s the balance. I’ve tested this dozens of times to get the perfect ratio of corn to batter, the ideal baking time, and the right level of sweetness. It’s not too dense, not too loose — it’s just right. And because you’re making it from scratch, you can adjust it to your taste. Want it sweeter? Add a little more sugar. Prefer it savory? Cut the sugar and add some chopped jalapeño.
This is the kind of dish that makes you close your eyes after the first bite. It’s comfort food reimagined — made with real ingredients, but with the same soul-soothing satisfaction as the boxed version. It’s perfect for impressing guests without stress, or turning a simple weeknight meal into something memorable.
What Ingredients You Will Need
This recipe uses simple, wholesome ingredients to deliver that signature creamy texture and sweet corn flavor. Most of these are pantry staples, which makes this dish perfect for last-minute cravings.
For the Casserole Base:
- 1/2 cup unsalted butter, melted (I prefer Kerrygold for its rich flavor, but any good-quality butter works)
- 1/2 cup granulated sugar (adds sweetness and helps with browning; you can reduce to 1/3 cup if you prefer a less sweet casserole)
- 2 large eggs, room temperature (room temperature eggs incorporate more evenly into the batter)
- 1 cup sour cream, full-fat (this is the key to the creamy texture; Greek yogurt works as a substitute, but the texture will be slightly tangier)
- 1 can (15 oz) cream-style corn (look for a brand that lists corn as the first ingredient, like Del Monte or Green Giant)
- 1 can (15 oz) whole kernel corn, drained (you can use frozen corn, thawed and drained, in a pinch)
- 1/4 cup heavy cream (adds extra richness; half-and-half works too, but the casserole will be slightly less creamy)
For the Dry Ingredients:
- 1/2 cup all-purpose flour (provides structure; for a gluten-free version, use a 1:1 gluten-free flour blend)
- 1/2 cup yellow cornmeal, fine or medium grind (this gives the casserole its cornbread-like texture; I prefer Bob’s Red Mill for consistent results)
- 1 teaspoon baking powder (helps the casserole rise slightly and stay light)
- 1/2 teaspoon salt (enhances the sweetness of the corn; use fine sea salt for best results)
- 1/4 teaspoon black pepper (adds a subtle warmth; optional but recommended)
Ingredient Selection Tips: When choosing canned corn, look for BPA-free cans if possible. For the creamed corn, avoid brands with added sugar or corn syrup if you want to control the sweetness level. If using frozen corn, let it thaw completely and drain off any excess liquid before adding it to the batter — otherwise, your casserole might be too watery.
Substitution Guidance: You can easily make this dairy-free by using vegan butter, dairy-free sour cream, and a plant-based heavy cream alternative. The texture will be slightly different, but still delicious. For a lower-fat version, use light sour cream and reduce the butter to 1/3 cup. Just know the casserole won’t be quite as rich.
Equipment Needed

You don’t need anything fancy for this recipe, which is part of its charm. Here’s what you’ll need:
- A 9×13-inch baking dish (glass or ceramic works best; metal pans can cause the edges to brown too quickly)
- A large mixing bowl (any size will do, but bigger is better for easy stirring)
- A whisk (for combining the wet ingredients smoothly)
- A rubber spatula (for scraping every last bit of batter into the dish)
- Measuring cups and spoons (for accurate measurements)
- Can opener (obviously)
- Parchment paper or non-stick cooking spray (for easy cleanup)
If you don’t have a 9×13 dish, you can use a 10-inch cast iron skillet or a 3-quart casserole dish. Just adjust the baking time slightly — a wider dish will bake faster, while a deeper dish will need a few extra minutes. I’ve used my trusty Pyrex dish for years, and it’s never let me down. If you’re using a metal pan, reduce the oven temperature by 25°F to prevent over-browning.
For the mixing bowl, I recommend a glass or stainless steel bowl over plastic, because the melted butter can be hot enough to warp plastic. And honestly, a good whisk makes all the difference — a balloon whisk incorporates air better than a fork or spoon, giving you a lighter texture.
Preparation Method
Let’s get cooking! This recipe comes together in about 15 minutes of active prep time, then the oven does the rest.
- Preheat your oven to 350°F (175°C). Place the rack in the center position. While the oven heats, grease your 9×13 baking dish with butter or non-stick spray. I like to line the bottom with parchment paper for easy lifting, but it’s not necessary.
- Melt the butter. In a small saucepan over low heat, or in the microwave in 30-second bursts, melt 1/2 cup of unsalted butter. Set it aside to cool slightly while you prepare the other ingredients. You don’t want it hot enough to cook the eggs when you add them.
- Combine the wet ingredients. In your large mixing bowl, whisk together the melted butter and 1/2 cup of granulated sugar until smooth. The sugar should be mostly dissolved. Add the 2 room-temperature eggs and whisk vigorously until the mixture is pale and slightly thickened, about 1 minute. This step is important — it incorporates air and helps the casserole rise.
- Add the creamy elements. Stir in 1 cup of sour cream, the can of cream-style corn, and the drained whole kernel corn. Mix until everything is well combined. Then add 1/4 cup of heavy cream and stir again. The mixture should look pale yellow and smell sweet and buttery.
- Mix the dry ingredients. In a separate small bowl, whisk together 1/2 cup all-purpose flour, 1/2 cup cornmeal, 1 teaspoon baking powder, 1/2 teaspoon salt, and 1/4 teaspoon black pepper. This ensures the baking powder is evenly distributed — nobody wants a pocket of baking powder in their casserole.
- Combine wet and dry. Add the dry ingredients to the wet mixture. Here’s where you can follow Jen’s advice and just use the same bowl — no need to dirty another dish. Stir gently with a rubber spatula until just combined. A few lumps are fine; overmixing will make the casserole tough. The batter should be thick but pourable, like a thick pancake batter.
- Pour and spread. Pour the batter into your prepared baking dish. Use the spatula to spread it evenly to the edges. Give the dish a gentle tap on the counter to release any air bubbles.
- Bake. Place the dish in the preheated oven and bake for 45-55 minutes. The casserole is done when the top is golden brown and a toothpick inserted into the center comes out clean or with just a few moist crumbs. The edges should be pulling away from the sides of the dish slightly.
- Cool and serve. Let the casserole cool in the pan for at least 10 minutes before serving. This allows it to set up properly. If you cut into it too soon, it will be runny. I know it’s hard to wait, but trust me — it’s worth it.
Sensory Cues: During baking, your kitchen will smell like sweet corn and butter — pure comfort. The top should be a deep golden brown, with some darker spots where the corn kernels have caramelized. When you press gently on the center, it should feel firm but springy, like a soft cornbread.
Cooking Tips & Techniques
After making this cozy creamy corn casserole from scratch more times than I can count, I’ve picked up a few tricks that make a real difference.
Don’t overmix the batter. This is the most common mistake. When you combine the wet and dry ingredients, stir just until the flour disappears. Overmixing develops the gluten in the flour, which can make your casserole dense and tough instead of light and tender. I learned this the hard way after making a casserole that could have doubled as a doorstop.
Use room temperature ingredients. Cold eggs and sour cream can cause the melted butter to seize up, creating lumps in your batter. Take them out of the fridge 30 minutes before you start. If you forget, place the eggs in a bowl of warm water for 5 minutes, and microwave the sour cream for 10 seconds to take the chill off.
Watch the baking time carefully. Every oven is different. My ancient oven runs hot, so I start checking at 40 minutes. If the top is browning too quickly but the center isn’t set, tent the dish loosely with foil for the last 10-15 minutes of baking.
Let it rest. I know it’s tempting to dig in right away, but that 10-minute rest is crucial. The casserole continues to cook from residual heat, and the starches set up, giving you that perfect sliceable texture. I once served it straight from the oven and ended up with more of a corn soup than a casserole.
Make it ahead. You can assemble the casserole up to 24 hours in advance and keep it covered in the refrigerator. Add about 10 minutes to the baking time since you’re starting from cold. This is a lifesaver for holiday dinners.
Variations & Adaptations
This recipe is wonderfully flexible. Here are some of my favorite ways to change it up:
Spicy Jalapeño Cheddar Version: Add 1/2 cup of shredded sharp cheddar cheese and 2 tablespoons of finely chopped pickled jalapeños to the batter. Sprinkle another 1/4 cup of cheese on top during the last 10 minutes of baking. The heat from the jalapeños cuts through the richness beautifully. I made this for a Super Bowl party once, and it was gone in 20 minutes.
Herb and Garlic Variation: Sauté 2 cloves of minced garlic in the butter before adding it to the mixture. Then stir in 2 tablespoons of fresh chopped chives or parsley. This version is fantastic alongside roasted chicken or grilled fish. It feels a little more grown-up than the classic version.
Gluten-Free Adaptation: Substitute the all-purpose flour with a high-quality 1:1 gluten-free flour blend (I like King Arthur’s). Make sure your cornmeal is certified gluten-free, as some brands process it in facilities that also handle wheat. The texture will be slightly more crumbly, but still delicious.
Lower-Carb Option: Replace the flour and cornmeal with 1/2 cup of almond flour and 1/4 cup of coconut flour. The texture will be denser and more custard-like, but it’s a great option if you’re watching your carbs. You might need to add an extra egg to help with binding.
Sweet Corn and Bacon: Cook 4 slices of bacon until crispy, crumble them, and stir half into the batter. Sprinkle the remaining bacon on top before baking. The smoky, salty bacon is incredible against the sweet corn. I tried this on a whim one morning when I had leftover bacon, and now it’s my husband’s favorite version.
Serving & Storage Suggestions
This cozy creamy corn casserole from scratch is best served warm, straight from the oven. The texture is at its peak — creamy, tender, and slightly set. I like to scoop it onto plates with a large spoon, letting it mound up in soft, golden spoonfuls.
What to serve with it: This casserole is incredibly versatile. It’s a natural partner for holiday roasts — turkey, ham, or prime rib. But it’s also fantastic alongside simple weeknight meals like grilled chicken, pork chops, or meatloaf. For a vegetarian dinner, pair it with a hearty salad and some black beans. It even works as a brunch side dish, served alongside scrambled eggs and bacon.
Storage: Leftovers keep well in an airtight container in the refrigerator for up to 4 days. The texture will firm up as it cools, but it will soften again when reheated. I actually love cold corn casserole straight from the fridge — it’s like a sweet corn pudding.
Reheating: The best way to reheat is in the oven at 300°F for about 15 minutes, covered with foil to prevent drying out. The microwave works in a pinch — just heat individual portions for 45-60 seconds. The texture won’t be quite as creamy, but it’s still delicious.
Freezing: You can freeze the baked casserole for up to 3 months. Let it cool completely, then wrap it tightly in plastic wrap and foil. Thaw overnight in the refrigerator and reheat in the oven. I’ve also frozen unbaked casseroles — just assemble, cover, and freeze. Bake from frozen, adding about 20 minutes to the cooking time.
Flavor Development: Like many baked dishes, this casserole actually tastes better the next day. The flavors meld together overnight, and the texture becomes even more cohesive. If you can resist eating it all, the leftovers are a real treat.
Nutritional Information & Benefits
Here’s an approximate nutritional breakdown per serving (based on 12 servings):
- Calories: 310
- Fat: 18g
- Saturated Fat: 11g
- Carbohydrates: 36g
- Fiber: 2g
- Sugar: 12g
- Protein: 6g
- Sodium: 340mg
This casserole offers some surprising nutritional benefits. Corn is a good source of fiber, which aids digestion, and contains antioxidants like lutein and zeaxanthin that support eye health. The eggs provide high-quality protein and choline, which is important for brain function. Sour cream and butter add calcium and vitamin A, though they also contribute saturated fat — so this is definitely a treat, not an everyday food.
Dietary Considerations: This recipe contains gluten, dairy, and eggs. For gluten-free and dairy-free adaptations, see the variations section above. If you’re watching your sodium, you can reduce the added salt to 1/4 teaspoon and use low-sodium canned corn.
I personally believe that food like this — made from scratch with real ingredients — has a place in a balanced diet. It’s not about restriction; it’s about enjoying the good stuff in moderation. This casserole is comfort food, plain and simple, and sometimes that’s exactly what we need.
Conclusion
So there you have it — my cozy creamy corn casserole from scratch, no boxed mix required. It’s the recipe that taught me to question my own cooking rules and to trust that sometimes the simplest path is the best one. Every time I make it, I think of Jen standing in my kitchen, challenging my assumptions with a simple question.
This casserole has become a staple in my home. It’s the dish I bring to potlucks when I want to impress without stress. It’s the side I make for Thanksgiving when I want something familiar and reliable. And it’s the comfort food I turn to on cold winter nights when I need a little warmth.
I hope you’ll give it a try. And more than that, I hope you’ll make it your own. Add your favorite mix-ins, adjust the sweetness, experiment with different cheeses. That’s the beauty of cooking from scratch — you’re in control.
When you make this casserole, I’d love to hear about it. Drop a comment below and let me know how it turned out. Did you try a variation? Did your family love it? Share your stories and your photos — there’s nothing I love more than hearing about food bringing people together.
Happy cooking, friends. May your casserole be creamy, your corn be sweet, and your kitchen be full of warmth.
Frequently Asked Questions
Can I use fresh corn instead of canned?
Absolutely! You’ll need about 3 cups of fresh corn kernels (from about 4-5 ears of corn). Cut the kernels off the cob and scrape the cob to get the “milk” — this adds extra creaminess. You may need to add 1-2 tablespoons of milk or cream if the batter seems too thick, as fresh corn has less liquid than canned.
Why is my corn casserole runny?
This usually happens for one of three reasons: it wasn’t baked long enough, too much liquid was added, or it was cut into before it had time to set. Make sure you’re using the full amount of flour and cornmeal, and let the casserole rest for at least 10 minutes after baking. If you’re using frozen corn, thaw and drain it thoroughly first.
Can I make this in a slow cooker?
Yes, you can! Grease the slow cooker insert well, pour in the batter, and cook on low for 3-4 hours or on high for 1.5-2 hours. The texture will be softer and more pudding-like than the oven-baked version. Remove the lid for the last 30 minutes to help the top set.
How do I know when the casserole is done?
The top should be golden brown and slightly cracked around the edges. A toothpick inserted into the center should come out clean or with just a few moist crumbs clinging to it. The edges should be pulling away from the sides of the dish. If the center still jiggles when you shake the pan, it needs more time.
Can I double this recipe?
Definitely! Double all the ingredients and bake in a 9×13 dish for a thicker casserole, or use a 10×15 baking dish. You’ll need to increase the baking time by 10-15 minutes. Check for doneness using the toothpick test rather than relying solely on time.
Pin This Recipe!
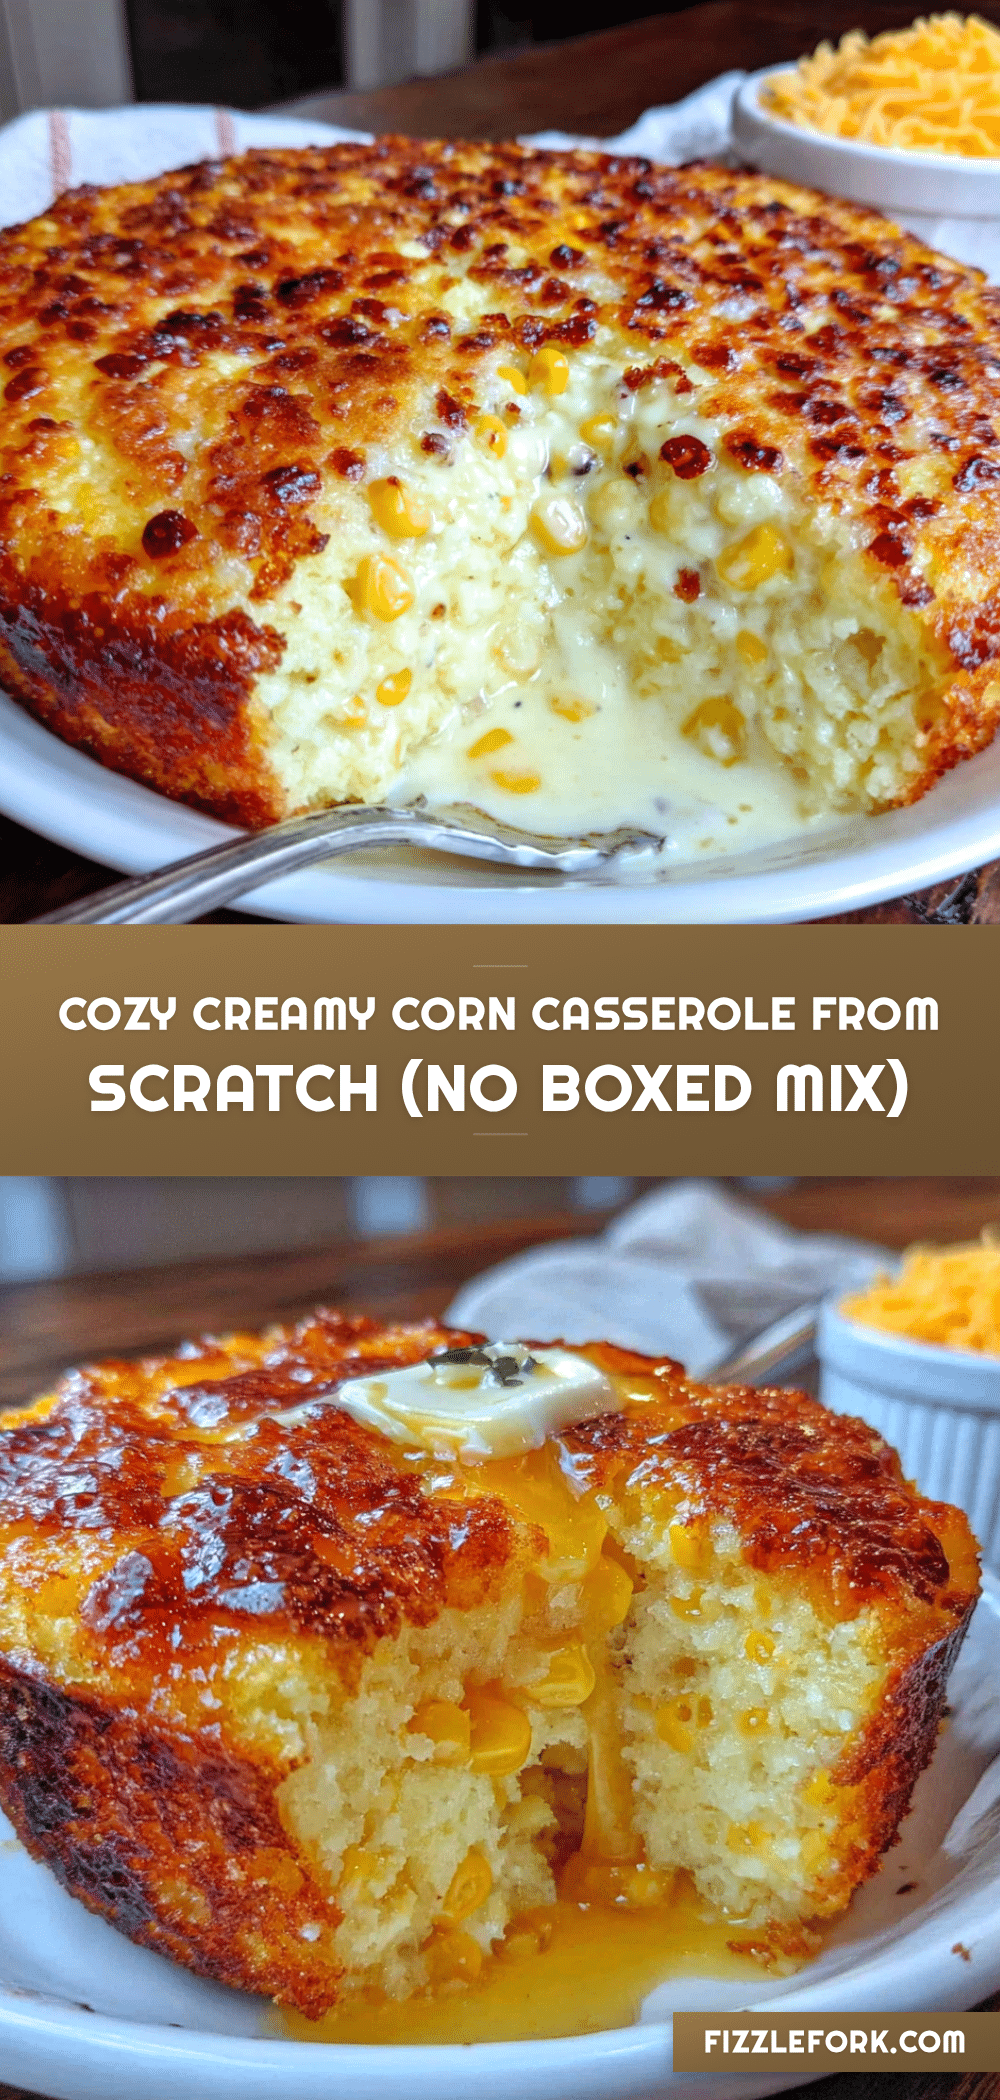
Cozy Creamy Corn Casserole from Scratch – Easy Homemade Recipe

This creamy corn casserole is made entirely from scratch with no boxed mix. It’s a comforting, crowd-pleasing side dish perfect for holidays, potlucks, or any night you need a warm, homemade hug.
- Prep Time: 15 minutes
- Cook Time: 50 minutes
- Total Time: 1 hour 5 minutes
- Yield: 12 servings 1x
- Category: Side Dish
- Cuisine: American
Ingredients
- 1/2 cup unsalted butter, melted
- 1/2 cup granulated sugar
- 2 large eggs, room temperature
- 1 cup sour cream, full-fat
- 1 can (15 oz) cream-style corn
- 1 can (15 oz) whole kernel corn, drained
- 1/4 cup heavy cream
- 1/2 cup all-purpose flour
- 1/2 cup yellow cornmeal, fine or medium grind
- 1 teaspoon baking powder
- 1/2 teaspoon salt
- 1/4 teaspoon black pepper
Instructions
- Preheat your oven to 350°F (175°C). Grease a 9×13-inch baking dish with butter or non-stick spray.
- Melt 1/2 cup unsalted butter in a small saucepan over low heat or in the microwave. Set aside to cool slightly.
- In a large mixing bowl, whisk together the melted butter and 1/2 cup granulated sugar until smooth. Add 2 room-temperature eggs and whisk vigorously until pale and slightly thickened, about 1 minute.
- Stir in 1 cup sour cream, the can of cream-style corn, and the drained whole kernel corn. Mix until well combined. Add 1/4 cup heavy cream and stir again.
- In a separate small bowl, whisk together 1/2 cup all-purpose flour, 1/2 cup cornmeal, 1 teaspoon baking powder, 1/2 teaspoon salt, and 1/4 teaspoon black pepper.
- Add the dry ingredients to the wet mixture. Stir gently with a rubber spatula until just combined. The batter should be thick but pourable.
- Pour the batter into the prepared baking dish. Spread evenly and tap the dish on the counter to release air bubbles.
- Bake for 45-55 minutes, until the top is golden brown and a toothpick inserted into the center comes out clean or with a few moist crumbs.
- Let the casserole cool in the pan for at least 10 minutes before serving.
Notes
Don’t overmix the batter to avoid a dense texture. Use room temperature ingredients for best results. Let the casserole rest for 10 minutes after baking to set properly. For a spicier version, add 1/2 cup shredded cheddar and 2 tablespoons chopped pickled jalapeños. For a gluten-free version, use a 1:1 gluten-free flour blend and certified gluten-free cornmeal.
Nutrition
- Serving Size: 1 serving
- Calories: 310
- Sugar: 12
- Sodium: 340
- Fat: 18
- Saturated Fat: 11
- Carbohydrates: 36
- Fiber: 2
- Protein: 6
Keywords: corn casserole, creamy corn casserole, homemade corn casserole, no box mix, easy side dish, holiday side dish, comfort food