That first burst of tart blueberry against the smooth, creamy tang of chilled cheesecake — the kind that hits you before you even take a bite — still takes me straight to a sweltering July afternoon in my grandmother’s backyard. She had this rickety old picnic table set under an ancient oak tree, and the air was thick with the sound of cicadas and the faint scent of sunscreen mixed with fresh grass. The red strawberries, white cream, and blue blueberries in those no-bake cheesecake cups looked almost too pretty to eat, but somehow, I always ended up with a sticky finger or two. It wasn’t a fancy dessert, honestly — just simple, fresh ingredients layered with care. But the way those colors popped against the rustic tablecloth made every summer celebration feel a little more special.
Years later, I still find myself reaching for this recipe when I want something easy but meaningful, something that tastes like a slow afternoon, even if life’s moving too fast around me. The fresh red white and blue no-bake cheesecake cups aren’t just about patriotic flair; they’re a reminder that some of the best desserts come together without fuss, with that perfect mix of cool sweetness and fresh fruit that somehow manages to soothe and satisfy all at once. They’ve become my go-to for summer gatherings — easy enough to whip up last minute, but with a look and a flavor that always earns a second helping.
It’s funny how a dessert can hold so much of a season’s feeling — a quiet promise that no matter how hectic the week, there’s always a moment to sit down and savor something simple and good. That’s why this recipe stuck with me. It’s not just a treat; it’s a little pause, a colorful celebration in a cup that keeps summer alive a little longer.
Why You’ll Love This Fresh Red White and Blue No-Bake Cheesecake Cups Recipe
After making these cheesecake cups dozens of times over the years, I can say with some confidence that they hit all the right notes for a summer dessert. Here’s why they’ve become a staple in my kitchen:
- Quick & Easy: These cups come together in under 20 minutes, no oven required. Perfect when you want a cool dessert without the wait.
- Simple Ingredients: You don’t need to hunt down specialty products. Cream cheese, fresh berries, and a bit of whipped topping are probably already in your fridge or pantry.
- Perfect for Summer Celebrations: Whether it’s the Fourth of July, a casual barbecue, or just a sunny weekend afternoon, these cups add a festive touch without extra effort.
- Crowd-Pleaser: Kids love the sweet cream and berries, adults appreciate the light, refreshing feel. They’ve consistently been a hit at potlucks and family dinners.
- Unbelievably Delicious: The balance of creamy, tangy cheesecake filling paired with fresh, juicy berries is just the kind of comfort food that makes you close your eyes after the first bite.
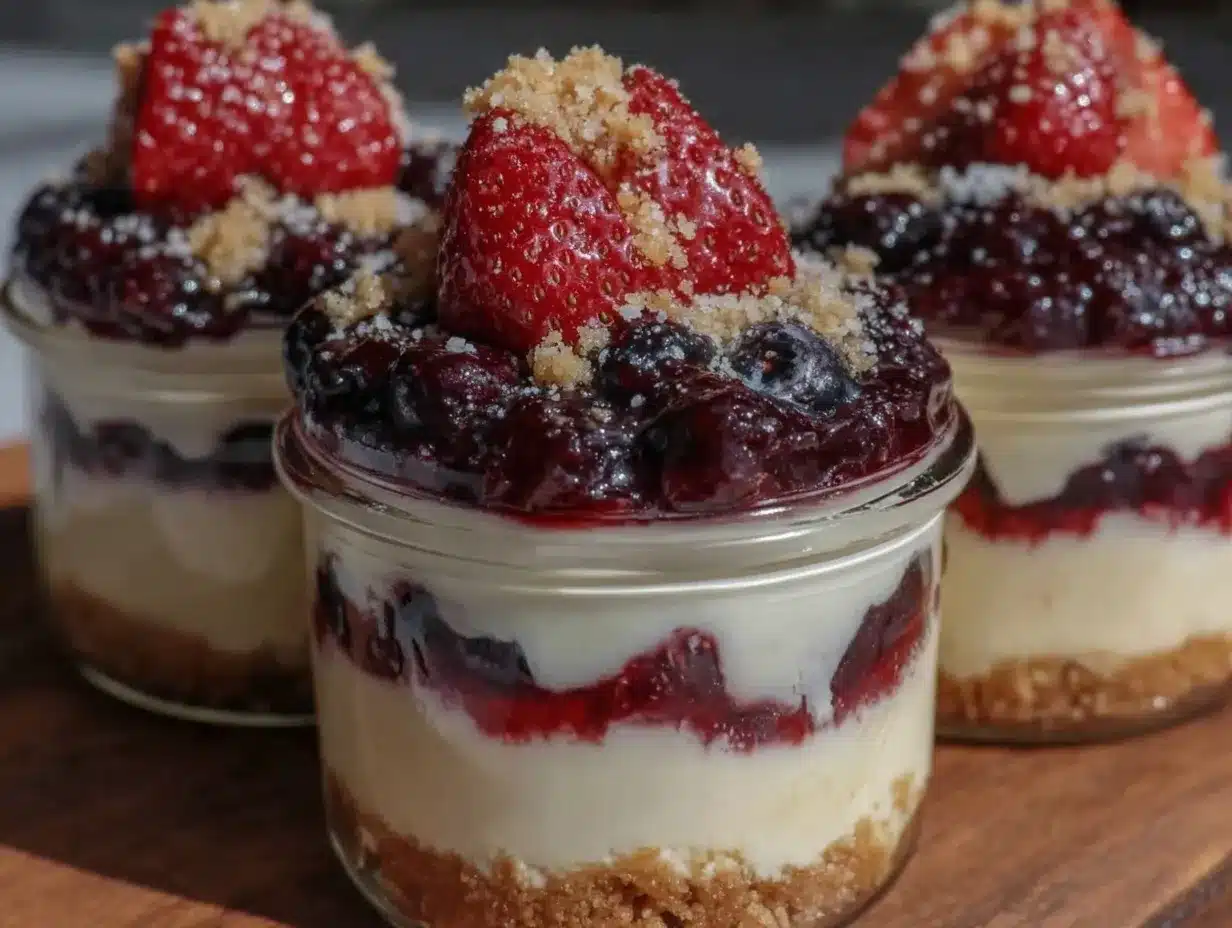
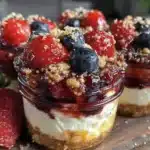
What sets my version apart is the use of a no-bake filling that’s whipped just enough to be fluffy but still maintain that rich cheesecake tang. I also like layering the berries strategically — the blueberries on top for a pop of color and the strawberries sliced thin enough to peek through the layers. It’s a simple touch that makes the cups look as good as they taste.
Honestly, this recipe isn’t just dessert; it’s a little celebration wrapped in red, white, and blue. It’s the kind of dish that turns ordinary summer moments into memories — just like that afternoon under the oak tree.
What Ingredients You Will Need
This recipe uses simple, wholesome ingredients to deliver bold flavor and satisfying texture without the fuss. Most of these are pantry staples or fresh produce that’s easy to find in any season. Here’s what you’ll need:
- Cream Cheese, softened – The creamy base for the cheesecake filling. I prefer Philadelphia brand for its smooth texture.
- Powdered Sugar – Adds just the right amount of sweetness, dissolves easily for smoothness.
- Vanilla Extract – A splash for warmth and depth.
- Heavy Whipping Cream – Whipped to soft peaks to fold into the cream cheese for a light, fluffy texture.
- Fresh Strawberries, sliced – For the red layer and garnish. Choose firm, ripe berries for best flavor.
- Fresh Blueberries – The blue element, fresh and juicy.
- Graham Cracker Crumbs – For a crunchy base or layered texture. Use gluten-free crumbs if needed.
- Lemon Zest (optional) – Adds a subtle brightness that lifts the whole dessert.
If you want to make a dairy-free version, swapping the cream cheese with a plant-based alternative and using coconut cream instead of heavy cream works pretty well — though the texture might be a bit different. For a lower-sugar option, try a natural sweetener like powdered erythritol or stevia blends, but adjust to taste.
Equipment Needed
One of the best things about this recipe is its minimal equipment needs. Here’s what I use:
- Mixing Bowls: A large one for whipping the cream and a medium one for the cream cheese mixture.
- Electric Mixer: Handheld or stand mixer to whip the cream to soft peaks and blend the filling smoothly. It’s possible to whisk by hand, but it takes more elbow grease.
- Spoons or Spatulas: For folding and layering the mixture.
- Serving Cups or Jars: Small clear cups or mason jars work beautifully to showcase the red, white, and blue layers.
- Measuring Cups and Spoons: For precise ingredient amounts.
If you don’t have an electric mixer, a sturdy whisk and a bit of patience will do fine, especially if you chill the cream before whipping. I sometimes use a handheld frother for quick mixing, but it doesn’t replace proper whipping. Mason jars not only make the dessert portable but also are great for storage afterward — just pop on the lid!
Preparation Method
- Prepare the Cream Cheese Mixture (10 minutes): In a medium bowl, beat 8 ounces (225g) of softened cream cheese with 1 cup (120g) powdered sugar and 1 teaspoon vanilla extract until smooth and creamy. Use an electric mixer on medium speed for best results. The mixture should be free of lumps and thick but spreadable.
- Whip the Heavy Cream (5 minutes): In a chilled large bowl, whip 1 cup (240ml) heavy whipping cream until soft peaks form. This means when you lift the whisk, the cream holds a peak but the tip curls over slightly. Avoid overwhipping or it will become grainy.
- Fold Cream Cheese and Whipped Cream (3 minutes): Gently fold the whipped cream into the cream cheese mixture using a spatula. Use a light hand to keep the mixture airy and fluffy. You’ll notice the texture lighten and become more mousse-like.
- Layer the Cups (5 minutes): Start by spooning about 2 tablespoons of graham cracker crumbs into the bottom of each serving cup. Follow with a layer of the cheesecake filling, then a few sliced strawberries, more filling, and finish with blueberries on top. Repeat layers if your cup is tall enough. Garnish each cup with a small strawberry slice and a few blueberries for a festive look.
- Chill and Serve (at least 2 hours): Refrigerate the no-bake cheesecake cups for at least 2 hours before serving. This chilling time lets the flavors meld and the filling firm up just enough to hold its shape. Serve chilled, straight from the fridge.
If you find the filling too soft after chilling, a quick tip is to add a teaspoon of unflavored gelatin dissolved in warm water to the cream cheese mixture before folding in the whipped cream next time. It helps stabilize the texture without changing flavor.
Cooking Tips & Techniques
Making no-bake cheesecake cups sounds straightforward, but a few tricks make all the difference:
- Softening Cream Cheese: Don’t rush this step. Leaving cream cheese out for about an hour before mixing helps it blend smoothly without lumps. If you’re in a hurry, microwave it in 10-second bursts, checking often.
- Whipping Cream to Soft Peaks: Chill your bowl and whisk in the freezer for about 10 minutes before whipping. This helps the cream fluff up faster and hold better.
- Folding Technique: Use a spatula to gently fold whipped cream into the cream cheese mixture. Stirring too vigorously will deflate the mixture and make it dense.
- Berry Prep: Wash berries just before assembly to avoid sogginess. Pat dry with paper towels.
- Layering: For a clean presentation, layer ingredients carefully. Use a small spoon or piping bag for the cheesecake filling to keep edges neat.
One time, I skipped chilling the mixture properly and ended up with a runny dessert that refused to hold shape — lesson learned! Also, using fresh berries instead of frozen really makes a difference in taste and texture here.
Variations & Adaptations
These no-bake cheesecake cups are flexible and fun to tweak:
- Seasonal Fruit Swap: Replace strawberries and blueberries with raspberries and blackberries for a fall-inspired twist.
- Chocolate Crust Variation: Use crushed chocolate graham crackers or Oreo crumbs for a richer base.
- Flavor Boost: Add a tablespoon of lemon juice or a teaspoon of lemon zest to the cream cheese mix for extra brightness.
- Dairy-Free Option: Use vegan cream cheese and coconut whipped cream — just be aware the flavor and texture will be lighter and slightly different.
- Mini Cheesecake Jars: Use small mason jars for portion control and portability, perfect for outdoor parties.
I once swapped in a tangy raspberry coulis between layers for a more intense berry flavor, which impressed my guests at a summer potluck. If you like a bit of crunch, try folding chopped toasted almonds or coconut flakes into the filling.
Serving & Storage Suggestions
Serve these cheesecake cups chilled, ideally straight from the fridge. The coolness balances the creamy richness and fresh fruit perfectly. Presentation-wise, clear glass cups or small mason jars make the red, white, and blue layers pop visually — always a hit on the dessert table.
They pair wonderfully with light summer beverages like iced tea, lemonade, or even a sparkling berry mocktail for a festive touch. For a savory contrast, try serving alongside a simple grilled chicken or refreshing cucumber salad, similar in vibe to dishes like the fresh heirloom tomato and burrata salad.
Store leftover cheesecake cups covered in the refrigerator for up to 3 days. The crust may soften slightly over time but the flavor only improves. If you want to prep in advance, assemble the cups but hold off on adding fresh berries until just before serving to avoid sogginess.
Reheat? Nah, these are best cold. But if necessary, let them sit at room temperature for 10 minutes before eating to soften the filling just a bit.
Nutritional Information & Benefits
Each serving of these no-bake cheesecake cups contains roughly:
| Calories | Fat | Carbs | Protein |
|---|---|---|---|
| 250 | 18g | 20g | 4g |
The recipe offers a good balance between indulgence and freshness thanks to real fruit and a lightened filling. The berries bring antioxidants and vitamin C, while cream cheese provides calcium and protein. Using fresh fruit also reduces the need for extra sugar, making it a slightly healthier summer treat.
For those watching carbs or dairy, the recipe is adaptable with almond flour crusts or coconut-based dairy alternatives. Just be mindful of the texture changes.
Conclusion
Fresh red white and blue no-bake cheesecake cups are the kind of recipe that makes you feel like you’ve captured a little slice of summer in every spoonful. They’re simple, sweet, and just a touch festive — perfect for when you want a dessert that’s as easy to make as it is to love. I’ve always appreciated how this recipe lets you customize flavors and presentation, so you can make it truly your own.
Whether you’re planning a backyard barbecue or just craving a cool treat on a hot afternoon, these cheesecake cups bring that special homemade touch without any stress. And honestly, that’s why I keep coming back to them — they remind me that great food doesn’t have to be complicated to feel like a celebration.
Give it a try and let me know how you like to layer your berries or what twists you’ve added. There’s plenty of room for creativity here, and I can’t wait to hear your take!
FAQs About Fresh Red White and Blue No-Bake Cheesecake Cups
Can I make these cheesecake cups ahead of time?
Yes! You can assemble the cups up to a day in advance, but it’s best to add fresh berries just before serving to keep them from getting soggy.
What can I substitute for graham cracker crumbs?
Crushed digestive biscuits, shortbread cookies, or gluten-free crackers all work well as alternatives for the crust layer.
How long do these cheesecake cups last in the fridge?
Stored covered, they stay fresh for up to 3 days. The crust may soften, but the flavors remain delicious.
Can I freeze the no-bake cheesecake cups?
Freezing is possible, but the texture of the cream and berries might change. If you freeze, thaw in the refrigerator overnight and expect a softer filling.
What’s the best way to whip heavy cream for this recipe?
Use cold cream and chilled bowls. Whip on medium speed until soft peaks form — the cream should hold shape but not be stiff or grainy.
Pin This Recipe!
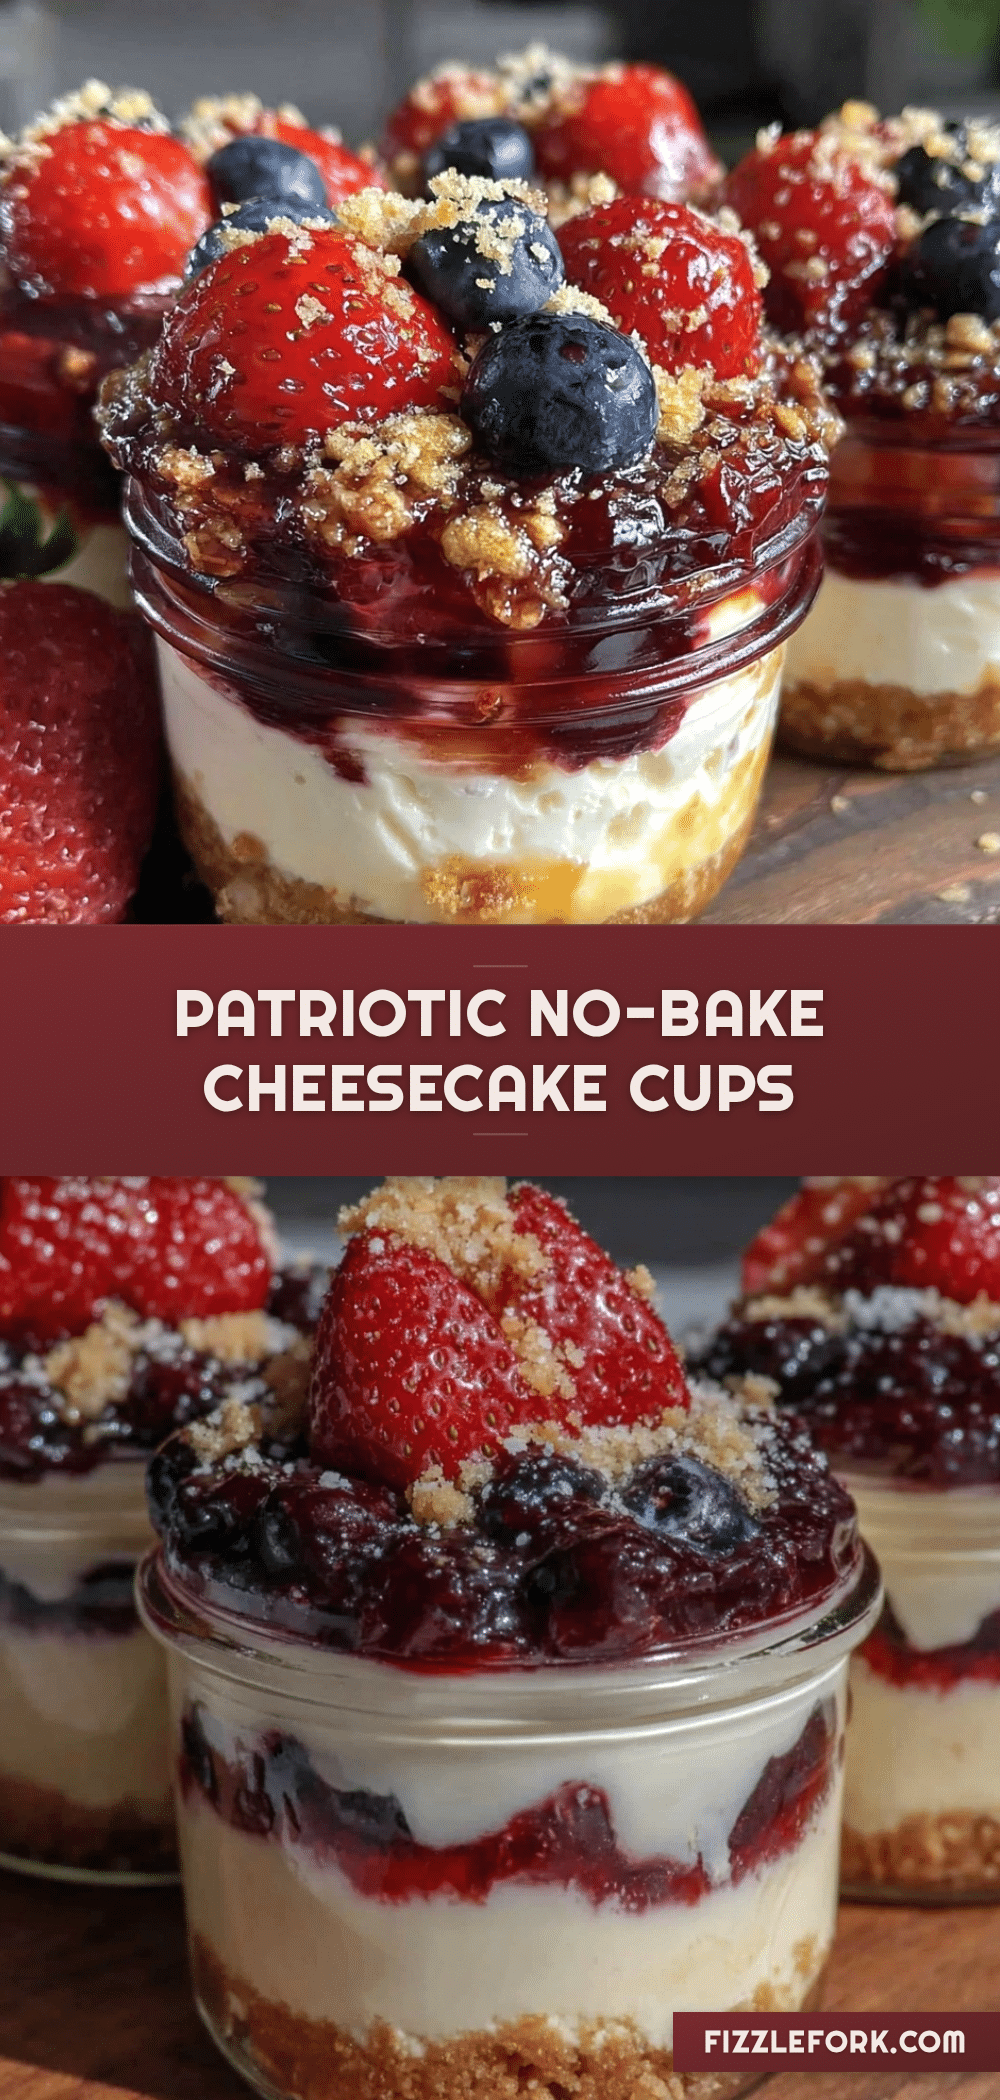
Fresh Red White and Blue No-Bake Cheesecake Cups
A simple, festive no-bake cheesecake dessert layered with fresh strawberries, blueberries, and a creamy cheesecake filling, perfect for summer celebrations.
- Prep Time: 18 minutes
- Cook Time: 0 minutes
- Total Time: 2 hours 18 minutes
- Yield: 6 servings 1x
- Category: Dessert
- Cuisine: American
Ingredients
- 8 ounces (225g) cream cheese, softened
- 1 cup (120g) powdered sugar
- 1 teaspoon vanilla extract
- 1 cup (240ml) heavy whipping cream
- Fresh strawberries, sliced
- Fresh blueberries
- Graham cracker crumbs (gluten-free if needed)
- Lemon zest (optional)
Instructions
- In a medium bowl, beat cream cheese with powdered sugar and vanilla extract until smooth and creamy using an electric mixer on medium speed.
- In a chilled large bowl, whip heavy cream until soft peaks form.
- Gently fold the whipped cream into the cream cheese mixture using a spatula, keeping the mixture airy and fluffy.
- Spoon about 2 tablespoons of graham cracker crumbs into the bottom of each serving cup. Layer with cheesecake filling, sliced strawberries, more filling, and finish with blueberries on top. Garnish with a small strawberry slice and a few blueberries.
- Refrigerate the cheesecake cups for at least 2 hours before serving.
Notes
For a firmer filling, add 1 teaspoon of unflavored gelatin dissolved in warm water to the cream cheese mixture before folding in whipped cream. Use fresh berries and add them just before serving to avoid sogginess. Chill bowls and whisk before whipping cream for best results.
Nutrition
- Serving Size: 1 cheesecake cup
- Calories: 250
- Fat: 18
- Carbohydrates: 20
- Protein: 4
Keywords: no-bake cheesecake, summer dessert, patriotic dessert, red white and blue, cheesecake cups, easy dessert, fresh berries


