“Hey, you gotta try this poke cake for the 4th!” That’s what my neighbor shouted across the fence one steamy July afternoon, holding a tray of something that looked like a celebration on a plate. Honestly, I was skeptical. Poke cake? I pictured some soggy mess, not exactly what I wanted after a long day wrangling kids and the grill. But curiosity got the better of me.
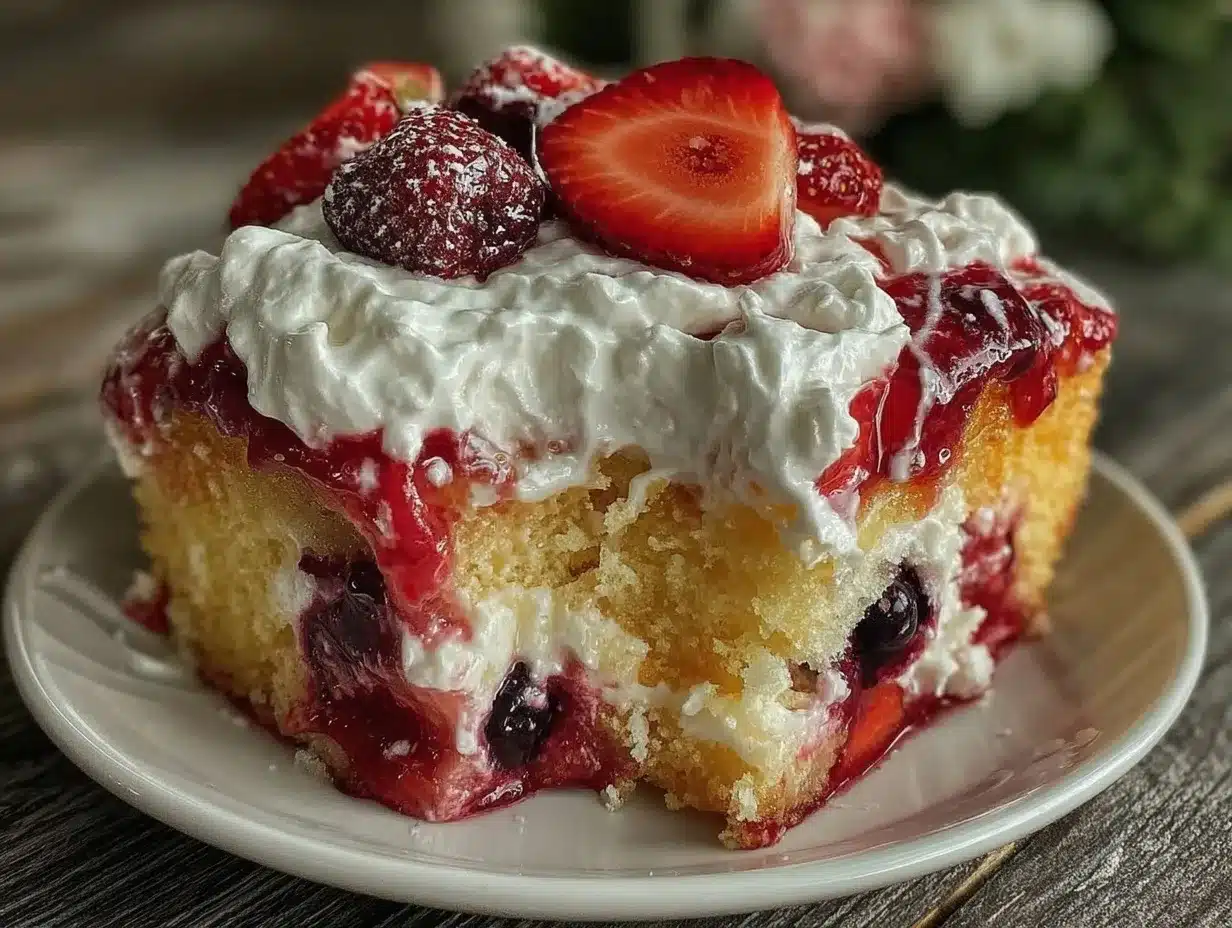
She slid a slice onto my plate, and the bright reds and blues caught my eye first—like fireworks had exploded right there in the cake. The first bite? Moist, sweet, and fresh, with a cloud of whipped cream that wasn’t too sweet or heavy. That day, the Perfect Red White and Blue Poke Cake with Whipped Cream quietly became my go-to dessert for every summer gathering since. Nothing too complicated, but it looks like you’ve spent hours in the kitchen, you know?
There’s something about that creamy, fruity combo that just feels right for warm weather and backyard fun. I still remember that exact moment—kids running around, neighbors chatting, and this cake stealing the show. It’s the kind of recipe that sticks with you because it’s easy, festive, and honestly, downright delicious. You don’t have to wait for a holiday to make this. It’s just the kind of dessert that can turn any ordinary day into a little celebration.
Why You’ll Love This Recipe
This Red White and Blue Poke Cake with Whipped Cream isn’t just another patriotic dessert; it’s one I’ve tested and tweaked over several summers to get just right. Whether you’re hosting a block party or need a quick treat for unexpected guests, it’s a reliable winner. Here’s why it’s a staple in my recipe box:
- Quick & Easy: From start to finish, it comes together in about 45 minutes, which is perfect when you’re juggling everything else at a summer party.
- Simple Ingredients: Most of what you need are pantry staples and fresh berries. No last-minute dashes to specialty stores.
- Perfect for Summer Celebrations: This cake screams sunshine and fun, making it ideal for Independence Day, Memorial Day, or any sunny weekend.
- Crowd-Pleaser: Kids love the bright colors, and adults appreciate the balance of sweetness and fresh fruit.
- Unbelievably Delicious: The poke cake technique lets the strawberry and blueberry jello seep into the cake, making it moist without being soggy. The homemade whipped cream adds a light, fluffy finish that’s not too sweet.
What makes this recipe stand out? It’s the way the flavors layer—fresh berries on top, juicy pockets of jello inside, and that whipped cream that’s whipped just right (not too stiff, never runny). I once swapped out the strawberry jello for raspberry and got rave reviews, so feel free to experiment. It’s comfort food with a fresh twist, and honestly, it’s one of those desserts you’ll want to make over and over (and maybe tweak as you go).
What Ingredients You Will Need
This recipe uses simple, wholesome ingredients to deliver bold flavor and satisfying texture without the fuss. Most of these are pantry staples, with fresh berries bringing the perfect pop of color and taste. Here’s what you’ll gather to make your Perfect Red White and Blue Poke Cake with Whipped Cream:
- Yellow cake mix (15.25 oz box) – I prefer Betty Crocker for consistent results.
- Water – 1 cup (240 ml), for the cake mix.
- Vegetable oil – 1/3 cup (80 ml), adds moisture.
- Eggs – 3 large, room temperature for easy mixing.
- Strawberry gelatin (Jell-O) – 1 package (3 oz), to poke into the cake.
- Boiling water – 1 cup (240 ml), to dissolve the gelatin.
- Fresh strawberries – 1 cup, sliced (in summer, swap in fresh raspberries for a different twist).
- Fresh blueberries – 1 cup, washed and dried.
- Heavy whipping cream – 2 cups (480 ml), for the whipped cream topping.
- Powdered sugar – 1/4 cup (30 g), to sweeten the whipped cream just right.
- Vanilla extract – 1 teaspoon, for a subtle flavor boost in the whipped cream.
For substitutions: Use almond milk instead of water if you want a slightly richer cake, or swap heavy cream with canned coconut milk (chilled) for a dairy-free whipped cream alternative. If fresh berries aren’t in season, frozen berries work fine—just thaw and drain them well to avoid sogginess.
Equipment Needed
- 9×13-inch baking pan: A standard size works perfectly here. Glass or metal pans both bake evenly; I tend to use glass since it’s easier to check the cake’s doneness.
- Mixing bowls: One large for the cake batter and another chilled bowl for whipping cream.
- Electric mixer or stand mixer: Whipping cream by hand is doable but takes quite a workout. An electric mixer gives you that perfect fluffy texture faster.
- Measuring cups and spoons: For accuracy, especially with the powdered sugar and vanilla.
- Toothpick or skewer: For poking holes evenly in the baked cake.
- Spatula or spoon: To spread the whipped cream topping smoothly.
If you don’t have a mixer, a whisk and some elbow grease can save the day, but an electric hand mixer is a worthy kitchen investment for desserts like this. Glass bowls chill whipped cream better, so pop your mixing bowl in the fridge for 15 minutes before whipping if you want it extra fluffy.
Preparation Method
- Preheat your oven: Set it to 350°F (175°C). Prepare your 9×13-inch pan by greasing it lightly with butter or non-stick spray. This makes removing the cake afterward so much easier. (5 minutes prep)
- Mix the cake batter: In a large bowl, combine the yellow cake mix, 1 cup (240 ml) water, 1/3 cup (80 ml) vegetable oil, and 3 large eggs. Beat on medium speed for about 2 minutes until smooth and well blended. The batter should be pourable but thick enough to cover the pan evenly. (5 minutes)
- Bake the cake: Pour the batter into the prepared pan and smooth the top with a spatula. Bake for 30-35 minutes, or until a toothpick inserted in the center comes out clean. Don’t open the oven door too often, or the cake might sink. (30-35 minutes)
- Prepare the gelatin: While the cake bakes, dissolve the strawberry gelatin powder in 1 cup (240 ml) boiling water. Stir until completely dissolved. Let it cool slightly but not set. (10 minutes)
- Poke the cake: When the cake is out of the oven but still warm, use a toothpick or skewer to poke holes evenly all over the surface—about 1-inch (2.5 cm) apart. This is where the gelatin will soak in, making the cake moist and flavorful. (5 minutes)
- Pour the gelatin: Slowly pour the slightly cooled gelatin over the cake, making sure it seeps into the holes. Don’t rush; if you pour too fast, it will pool on top. Let the cake cool to room temperature, then refrigerate for at least 2 hours to set. (2+ hours chilling)
- Whip the cream: Chill your mixing bowl and beaters in the fridge for 15 minutes beforehand for best results. Pour 2 cups (480 ml) heavy whipping cream into the bowl. Add 1/4 cup (30 g) powdered sugar and 1 teaspoon vanilla extract. Beat on medium-high speed until soft peaks form—when you lift the beaters, the cream should hold a gentle point. Don’t overbeat or it will turn grainy. (5-7 minutes)
- Assemble the cake: Once the gelatin is set and the cake is chilled, spread the whipped cream evenly on top using a spatula. Smooth it out or create soft peaks for a rustic look. (5 minutes)
- Add fresh berries: Decorate the top with sliced strawberries and whole blueberries in a red, white, and blue pattern. This not only looks stunning but adds freshness and texture. (5 minutes)
- Serve and enjoy: Keep the cake refrigerated until serving. Every slice will have juicy pockets of strawberry gelatin, light whipped cream, and fresh berries—a perfect bite of summer. (Ready to serve!)
Cooking Tips & Techniques
Getting that perfect poke cake texture is a bit of an art, but once you nail it, it’s hard to go back. Here are some tips I picked up along the way:
- Don’t skip chilling: The gelatin needs time to soak in and firm up. Trust me, cutting into it too early results in a runny mess.
- Use room temperature eggs: This helps the batter mix more evenly, giving you a tender crumb.
- Poke holes evenly: It’s tempting to go crazy with the toothpick, but spacing them about an inch apart works best to absorb the gelatin without the cake falling apart.
- Whip cream just right: Watch carefully—soft peaks mean the cream is fluffy and light. Overwhipping turns it into butter, which is a sad mistake I’ve made more than once.
- Chill your bowl: For whipped cream, a cold bowl and beaters make a big difference in whipping speed and texture.
- Use fresh berries: Frozen berries can be watery. If you must use frozen, thaw and drain them well.
- Multitasking hack: While the cake bakes and chills, whip the cream close to serving time for the freshest texture.
Variations & Adaptations
Want to switch things up? This recipe is surprisingly flexible:
- Dietary swaps: Use gluten-free yellow cake mix and substitute coconut cream for a dairy-free poke cake with whipped topping.
- Flavor twists: Instead of strawberry gelatin, try raspberry or cherry for a slightly different fruity punch.
- Seasonal variations: In fall, swap berries for diced peaches or apples and use a cinnamon-spiced cake mix for a cozy vibe.
- Cooking method: While this is best baked in the oven, you can make cupcakes by dividing the batter into lined muffin tins, adjusting baking time to 18-22 minutes.
- Personal favorite: I once added a layer of cream cheese frosting under the whipped cream for extra tang—it was a hit at a potluck.
Serving & Storage Suggestions
This cake is best served chilled straight from the fridge. The coolness complements the fresh berries and whipped cream so well. I like to slice it into generous squares and serve with a fork and a big smile.
Pair it with a light beverage like iced tea or lemonade to keep the summer vibes going. For a more indulgent touch, a scoop of vanilla ice cream on the side never hurts.
Store leftovers covered tightly in the refrigerator for up to 3 days. The cake’s texture actually improves overnight as the flavors meld, making it even more delicious the next day.
Reheat? This one’s best cold, so skip microwaving. If you want to serve at room temp, pull it out about 15 minutes before eating.
Nutritional Information & Benefits
A slice of this poke cake (about 1/12th of the pan) has roughly 320 calories, with 9 grams of fat, 50 grams of carbs, and 4 grams of protein. The fresh berries add antioxidants and vitamin C, while the whipped cream provides a satisfying richness without overwhelming the palate.
For those mindful of gluten, swapping in gluten-free cake mix makes this dessert accessible. Also, using fresh fruit and homemade whipped cream keeps added sugars lower than many store-bought options.
From a wellness perspective, this cake strikes a nice balance between indulgence and freshness. It satisfies sweet cravings but includes real fruit for a bit of nutritional goodness.
Conclusion
This Perfect Red White and Blue Poke Cake with Whipped Cream has become a staple in my recipe rotation because it’s just so easy to make and impresses every time. It’s one of those recipes that lets you celebrate the day without fussing over complex steps or ingredients.
Feel free to tweak the flavors or presentation to fit your style—maybe add a sprinkle of toasted coconut or swap in your favorite berries. It’s all about making it yours.
Honestly, this cake holds a special place in my summer memories, and I hope it does in yours, too. If you give it a try, I’d love to hear how you make it your own or what parties it stole the spotlight at.
Happy baking, and here’s to sweet moments shared over this festive treat!
FAQs
Can I make this poke cake ahead of time?
Yes! It actually tastes better after chilling overnight, allowing the gelatin to fully soak in and flavors to meld.
What can I use if I don’t have fresh berries?
Frozen berries work well if thawed and drained properly, or you can use canned fruit like pineapple chunks for a different twist.
How do I prevent the whipped cream from separating?
Make sure your cream and mixing bowl are cold, and stop whipping as soon as soft peaks form. Overwhipping causes separation.
Can I use homemade cake instead of box mix?
Absolutely! A simple yellow cake recipe works great; just be sure it’s sturdy enough to hold the gelatin without falling apart.
Is this recipe suitable for kids?
Yes, it’s a family favorite! The bright colors and sweet flavors are very kid-friendly, but be mindful of any food allergies when serving.
For a savory complement to your celebration, try pairing this with crispy air fryer loaded potato skins or for a fun appetizer, the chili nachos from the site also work wonderfully at patriotic gatherings.
Pin This Recipe!

Perfect Red White and Blue Poke Cake Recipe with Easy Whipped Cream Topping

A festive and moist poke cake infused with strawberry gelatin, topped with light whipped cream and fresh berries, perfect for summer celebrations.
- Prep Time: 15 minutes
- Cook Time: 35 minutes
- Total Time: 2 hours 50 minutes
- Yield: 12 servings 1x
- Category: Dessert
- Cuisine: American
Ingredients
- 1 box (15.25 oz) yellow cake mix
- 1 cup water
- 1/3 cup vegetable oil
- 3 large eggs, room temperature
- 1 package (3 oz) strawberry gelatin (Jell-O)
- 1 cup boiling water
- 1 cup fresh strawberries, sliced
- 1 cup fresh blueberries, washed and dried
- 2 cups heavy whipping cream
- 1/4 cup powdered sugar
- 1 teaspoon vanilla extract
Instructions
- Preheat oven to 350°F (175°C). Lightly grease a 9×13-inch baking pan.
- In a large bowl, combine yellow cake mix, 1 cup water, 1/3 cup vegetable oil, and 3 eggs. Beat on medium speed for about 2 minutes until smooth.
- Pour batter into prepared pan and smooth the top. Bake for 30-35 minutes or until a toothpick inserted in the center comes out clean.
- While cake bakes, dissolve strawberry gelatin in 1 cup boiling water. Stir until dissolved and let cool slightly but not set.
- When cake is warm, poke holes about 1 inch apart all over the surface using a toothpick or skewer.
- Slowly pour the cooled gelatin over the cake, allowing it to seep into the holes. Let cake cool to room temperature, then refrigerate for at least 2 hours.
- Chill mixing bowl and beaters for 15 minutes. Beat heavy cream, powdered sugar, and vanilla extract on medium-high speed until soft peaks form.
- Spread whipped cream evenly over the chilled cake.
- Decorate the top with sliced strawberries and whole blueberries in a red, white, and blue pattern.
- Keep refrigerated until serving.
Notes
Chill the cake for at least 2 hours to allow gelatin to set properly. Use room temperature eggs for better batter mixing. Whip cream until soft peaks form to avoid grainy texture. Frozen berries can be used if thawed and drained well. For dairy-free, substitute heavy cream with chilled canned coconut milk and use gluten-free cake mix for gluten-free option.
Nutrition
- Serving Size: 1 slice (1/12th of c
- Calories: 320
- Sugar: 30
- Sodium: 300
- Fat: 9
- Saturated Fat: 5
- Carbohydrates: 50
- Fiber: 2
- Protein: 4
Keywords: poke cake, red white and blue cake, patriotic dessert, summer dessert, whipped cream topping, berry cake, easy poke cake


