“Are you sure this will work?” I asked, eyeing the patchwork of red velvet cake squares laid out on the kitchen counter. My partner just smiled, arms crossed, clearly convinced. Honestly, I was skeptical too—assembling a cake in the shape of a flag felt like a wild idea for someone who usually sticks to simple round cakes. But sometimes, you just roll with that spark of inspiration, especially when you want to impress at a backyard gathering without going full bakery-level stress. The smell of cocoa and vanilla filling the air, the smooth tang of cream cheese frosting ready to be spread—it all started to feel like more than just a dessert. It was a centerpiece, a conversation starter.
That night, after the last crumb was devoured, I realized this red velvet flag cake wasn’t just eye candy; it was the kind of recipe that sticks with you. It’s not often a cake can make you pause mid-bite and think, “Wow, I nailed this.” And that’s why I keep coming back to it, tweaking the cream cheese frosting or perfecting the layering technique. It’s one of those treats that’s as fun to make as it is to eat, and, let’s face it, it looks pretty darn cool on any table. No matter the occasion, this cake brings a subtle joy that’s hard to put into words—just a quiet confidence that you made something truly special.
Why You’ll Love This Recipe
This red velvet flag cake with cream cheese frosting is one of those recipes that fits perfectly into busy lives without sacrificing wow-factor. I’ve tested it multiple times—sometimes in a rush, sometimes leisurely—and it holds up every single time. Here’s why it might just become your go-to:
- Quick & Easy: The cake layers bake in about 25 minutes each, and assembly takes less than an hour, making it manageable even on a hectic afternoon.
- Simple Ingredients: No need for specialty stores—basic pantry staples like cocoa powder, buttermilk, and cream cheese do all the heavy lifting.
- Perfect for Celebrations: Whether it’s a July 4th barbecue, a birthday, or just a weekend treat, this cake’s flag design steals the spotlight.
- Crowd-Pleaser: The balance of moist red velvet cake and tangy cream cheese frosting always gets thumbs up from kids and adults alike.
- Unbelievably Delicious: The cream cheese frosting is whipped to a silky, spreadable consistency that complements the tender crumb perfectly.
What sets this recipe apart is the layering technique. Instead of a simple round cake, the flag design layers cake squares with frosting stripes, creating a stunning, unexpected presentation. I’ve found that using a bit of gel food coloring in the frosting’s stripes adds that crisp white contrast that makes the flag pop. It’s not just a cake; it’s a statement on a plate. Plus, it’s forgiving enough for home bakers who aren’t professional decorators—trust me, if I can do it between dinner prep and laundry, so can you.
What Ingredients You Will Need
This recipe relies on straightforward, wholesome ingredients that come together to create that classic red velvet flavor and that luscious cream cheese frosting. Here’s what you’ll want to gather before you start:
- For the Red Velvet Cake:
- All-purpose flour (2 ½ cups / 315 g) – for the tender cake crumb
- Cocoa powder (2 tablespoons / 15 g), unsweetened – adds subtle chocolate depth
- Baking soda (1 teaspoon) – helps the cake rise
- Salt (½ teaspoon) – balances the sweetness
- Unsalted butter (1 cup / 227 g), softened – richness and moisture
- Granulated sugar (1 ¾ cups / 350 g) – sweetness and structure
- Large eggs (2), room temperature – binding and fluffiness
- Buttermilk (1 cup / 240 ml), room temperature – tenderizes and adds tang
- Vanilla extract (1 teaspoon) – flavor enhancer
- Red food coloring (2 tablespoons), gel recommended – vibrant red color without too much liquid
- White vinegar (1 teaspoon) – reacts with baking soda for lift and tender crumb
- For the Cream Cheese Frosting:
- Cream cheese (16 oz / 450 g), softened – the star of the frosting
- Unsalted butter (½ cup / 113 g), softened – adds creaminess
- Powdered sugar (4 cups / 480 g), sifted – sweetness and smooth texture
- Vanilla extract (1 teaspoon) – flavor depth
- Pinch of salt – balances sweetness
- Optional: a few drops of lemon juice – for brightness
For this cake, I always recommend using a trusted brand of cocoa powder like Hershey’s for that classic flavor. If you can’t find buttermilk, no worries—just add a tablespoon of white vinegar or lemon juice to a cup of milk and let it sit for 5 minutes. And if you prefer a dairy-free version, swap the cream cheese and butter with vegan alternatives, but keep in mind the frosting may be slightly less creamy. For the red food coloring, gel works best because it won’t thin the batter. In warmer months, I’ve played around by adding fresh strawberries to the frosting for a fruity twist, which pairs nicely.
Equipment Needed
- Two 9×13 inch (23×33 cm) rectangular cake pans – these give you the right size layers to create the flag squares.
- Mixing bowls – one large for the batter, one medium for the frosting.
- Electric mixer or stand mixer – essential for getting the cream cheese frosting perfectly smooth and fluffy.
- Spatulas – both rubber and offset for mixing and frosting.
- Measuring cups and spoons – accuracy matters for baking success.
- Cooling racks – for letting the cake layers cool evenly, preventing sogginess.
- A sharp knife or cake leveler – for trimming and cutting the cake squares to fit the flag design.
- Parchment paper – to line your pans and avoid sticking.
If you don’t have two cake pans, you can bake the layers one at a time in the same pan, just add extra cooling time. For frosting, I find using a stand mixer with a paddle attachment makes life easier, but a hand mixer works just fine too. When cutting the cake squares, a serrated knife helps prevent crumbling. I keep a bench scraper handy for smoothing frosting layers—it’s a small tool but a game changer for clean edges. For a budget option, silicone spatulas and parchment paper are affordable and reusable, making cleanup way simpler.
Preparation Method
- Preheat your oven to 350°F (175°C). Line two 9×13 inch pans with parchment paper and lightly grease. This prevents sticking and helps get clean edges.
- Mix Dry Ingredients: In a medium bowl, sift together 2 ½ cups all-purpose flour, 2 tablespoons cocoa powder, 1 teaspoon baking soda, and ½ teaspoon salt. Set aside.
- Cream Butter and Sugar: In a large bowl, beat 1 cup softened unsalted butter with 1 ¾ cups granulated sugar using an electric mixer for about 3-4 minutes until light and fluffy.
- Add Eggs: Beat in 2 large eggs, one at a time, mixing well after each addition. This step helps the batter hold air for a tender crumb.
- Combine Wet Ingredients: In a separate bowl, whisk together 1 cup buttermilk, 1 teaspoon vanilla extract, 2 tablespoons red gel food coloring, and 1 teaspoon white vinegar.
- Alternate Adding Dry and Wet: Gradually add the dry ingredients to the butter mixture in three parts, alternating with the wet ingredients, starting and ending with the dry. Mix just until combined—overmixing can toughen the cake.
- Divide Batter: Evenly pour the batter into the two prepared pans and smooth the tops with a spatula.
- Bake: Place pans in the oven and bake for 25-28 minutes. Test doneness by inserting a toothpick in the center—it should come out clean or with a few moist crumbs.
- Cool: Let cakes cool in the pans for 15 minutes, then transfer to wire racks to cool completely. This prevents the cream cheese frosting from melting on contact.
- Prepare Frosting: While cakes cool, beat together 16 oz softened cream cheese and ½ cup softened butter until smooth and creamy. Gradually add 4 cups powdered sugar and 1 teaspoon vanilla extract, beating until fluffy. Add a pinch of salt and optional lemon juice for balance.
- Assemble Flag Layers: Once cake layers are cooled, trim edges for clean squares if needed. Cut the cake into rectangles and squares to create the flag pattern: red velvet squares for the stripes and a block for the “star” section (you can mark stars with piped dots or mini white chocolate chips).
- Layer Frosting: Spread a thin layer of frosting between the layers and on top. Use the frosting to create the white stripes between the red cake squares, making that classic flag look.
- Chill and Serve: Refrigerate the assembled cake for at least 1 hour before serving to let the frosting set. Slice carefully to reveal the flag pattern inside.
Pro tip: When trimming your cake layers, slice just enough to level the top. Too much trimming wastes cake and makes it less moist. Also, keep your frosting chilled but spreadable—a fridge-cold frosting is harder to work with. If your frosting gets too soft while assembling, pop it back in the fridge for 10 minutes. And don’t skip the vinegar in the batter—that little acid kick is key for that tender crumb and bright red color.
Cooking Tips & Techniques
Making a red velvet flag cake isn’t just about following steps—it’s about those little techniques that make the difference between “meh” and “wow.” Here’s what I’ve learned over the many times I’ve baked this:
- Choosing Your Red Food Coloring: Gel or paste food coloring is a must for vibrant color without altering the batter’s consistency. Liquid colors tend to thin the batter, which can affect texture.
- Mixing Buttermilk Correctly: If you don’t have buttermilk, homemade works fine, but make sure to let it rest for at least 5 minutes after adding vinegar or lemon juice to milk. This acidity activates the baking soda and helps the cake rise properly.
- Temperature Matters: Room temperature ingredients combine more evenly. Take eggs and butter out 30 minutes before baking to avoid lumps.
- Don’t Overmix: When combining wet and dry ingredients, mix just until combined. Overmixing develops gluten and makes the cake dense.
- Cutting Cake Squares: Use a serrated knife to avoid crumbling. Chill the cake slightly before cutting if it’s too soft.
- Frosting Consistency: Beat frosting until creamy but not runny. If it’s too thick, add a teaspoon of milk; if too soft, refrigerate briefly.
- Layering for the Flag Effect: Take your time to arrange the cake pieces and frosting stripes neatly. Use an offset spatula for smooth, clean lines.
- Multitasking: While one layer bakes, prep ingredients or whip the frosting. It saves time and keeps kitchen flow smooth.
- Common Mistake: Skipping cooling time is a recipe for frosting meltdown. Patience here pays off.
I remember the first time I tried to assemble the flag without chilling the cake—it was a sticky mess! Lesson learned. Also, I like to keep a towel handy to wipe frosting off my knife between cuts for cleaner slices. These small touches make a big difference in presentation.
Variations & Adaptations
Want to switch things up or accommodate dietary needs? This red velvet flag cake recipe is flexible and fun to customize:
- Gluten-Free Version: Substitute all-purpose flour with a 1:1 gluten-free baking blend. Make sure it contains xanthan gum for structure. The texture will be slightly different but still delicious.
- Vegan Adaptation: Use vegan butter and cream cheese alternatives, flax eggs (1 tablespoon flaxseed meal + 3 tablespoons water per egg), and plant-based milk with vinegar for buttermilk.
- Flavor Twist: Add a teaspoon of espresso powder to the batter to deepen the chocolate notes without adding coffee flavor. For frosting, swirl in some pureed raspberries for a fruity kick.
- Seasonal Touch: In fall, sprinkle cinnamon and nutmeg into the batter for a cozy vibe. Decorate the flag with edible gold stars for a festive touch.
- Personal Variation: I once made mini flag cupcakes using this batter and frosting, piping the stripes and stars on top. Perfect for potlucks or kid’s parties, and way less slicing involved!
Different ovens and altitudes may require slight adjustments in baking time, so keep an eye on your cake as it bakes. Also, if you want to speed up assembly, prepare the frosting a day ahead—just bring it to room temperature and re-whip before using.
Serving & Storage Suggestions
This red velvet flag cake is best served chilled or at room temperature, about 30 minutes after coming out of the fridge. That way, the cream cheese frosting softens just enough to melt in your mouth without being too loose. Slice carefully with a sharp knife to showcase the flag pattern clearly.
Pair it with a light, bubbly drink like sparkling lemonade or a classic iced tea to balance the rich flavors. For a savory counterpoint, dishes like honey garlic glazed salmon work beautifully alongside this festive dessert at gatherings.
Store leftovers in an airtight container in the refrigerator for up to 4 days. The flavors actually deepen overnight, so it’s a nice make-ahead option. To reheat, let the slices come to room temperature naturally or microwave briefly for 10-15 seconds—just avoid overheating or the frosting might separate.
If you want to freeze the cake, slice it first, then wrap individual pieces tightly in plastic wrap and foil. Frozen cake keeps well for up to 2 months. Thaw overnight in the fridge before serving.
Nutritional Information & Benefits
Each generous slice of this red velvet flag cake with cream cheese frosting contains approximately 350-400 calories, with about 15 grams of fat and 45 grams of carbohydrates. While this treat is indulgent, it also provides small amounts of calcium and protein from the cream cheese and eggs.
The cocoa powder adds antioxidants, and the buttermilk contributes beneficial probiotics, making it a slightly more wholesome dessert option than typical butter-heavy cakes. For those watching sugar intake, you can reduce powdered sugar in the frosting by a quarter or swap for powdered erythritol, though the texture might change slightly.
Keep in mind this recipe contains common allergens such as dairy, gluten, and eggs. If you need allergy-friendly options, see the variations above for substitutions.
Personally, I think it’s worth enjoying this cake as a joyful celebration food, balanced by wholesome meals like the zucchini noodle chicken stir fry on other days.
Conclusion
This show-stopping red velvet flag cake with cream cheese frosting has become one of those recipes I reach for when I want something both impressive and comforting. It’s the perfect way to make an occasion feel special—without needing a bakery’s skill set. The moist, tender cake paired with that rich, tangy frosting always earns compliments and keeps everyone coming back for seconds.
Feel free to make it your own, whether that’s trying the gluten-free version, adding a fruity twist, or turning it into cupcakes. The layering technique is surprisingly approachable, and that flag design is a real crowd-pleaser. I love that this cake brings a bit of fun and festivity to the table—and I hope it becomes a favorite in your kitchen too.
If you try it, I’d love to hear how it turned out or what variations you came up with. Sharing your experiences really makes this recipe feel like a community tradition in the making.
FAQs About Red Velvet Flag Cake
What makes red velvet cake different from chocolate cake?
Red velvet uses a small amount of cocoa powder and buttermilk, giving it a mild chocolate flavor with a tender, moist texture and a slight tang from the buttermilk and vinegar. It’s less intense than traditional chocolate cake.
Can I make this cake ahead of time?
Yes! You can bake the cake layers a day ahead and refrigerate them wrapped tightly. Assemble and frost the cake the day you plan to serve for best freshness.
How do I prevent the cream cheese frosting from melting?
Make sure your cream cheese and butter are softened but not too warm. Chill the frosting if it becomes too soft during assembly, and keep the cake refrigerated until serving.
Can I use a different frosting?
You can, but cream cheese frosting is traditional for red velvet and balances the cake’s flavor best. A simple whipped vanilla buttercream could work but won’t have the same tangy contrast.
How do I get the flag design perfect?
Use a ruler or straight edge to cut neat cake squares and rectangles. Pipe the frosting stripes carefully with an offset spatula or piping bag for clean lines. Chill the cake between steps to keep everything firm.
Pin This Recipe!
Red Velvet Flag Cake
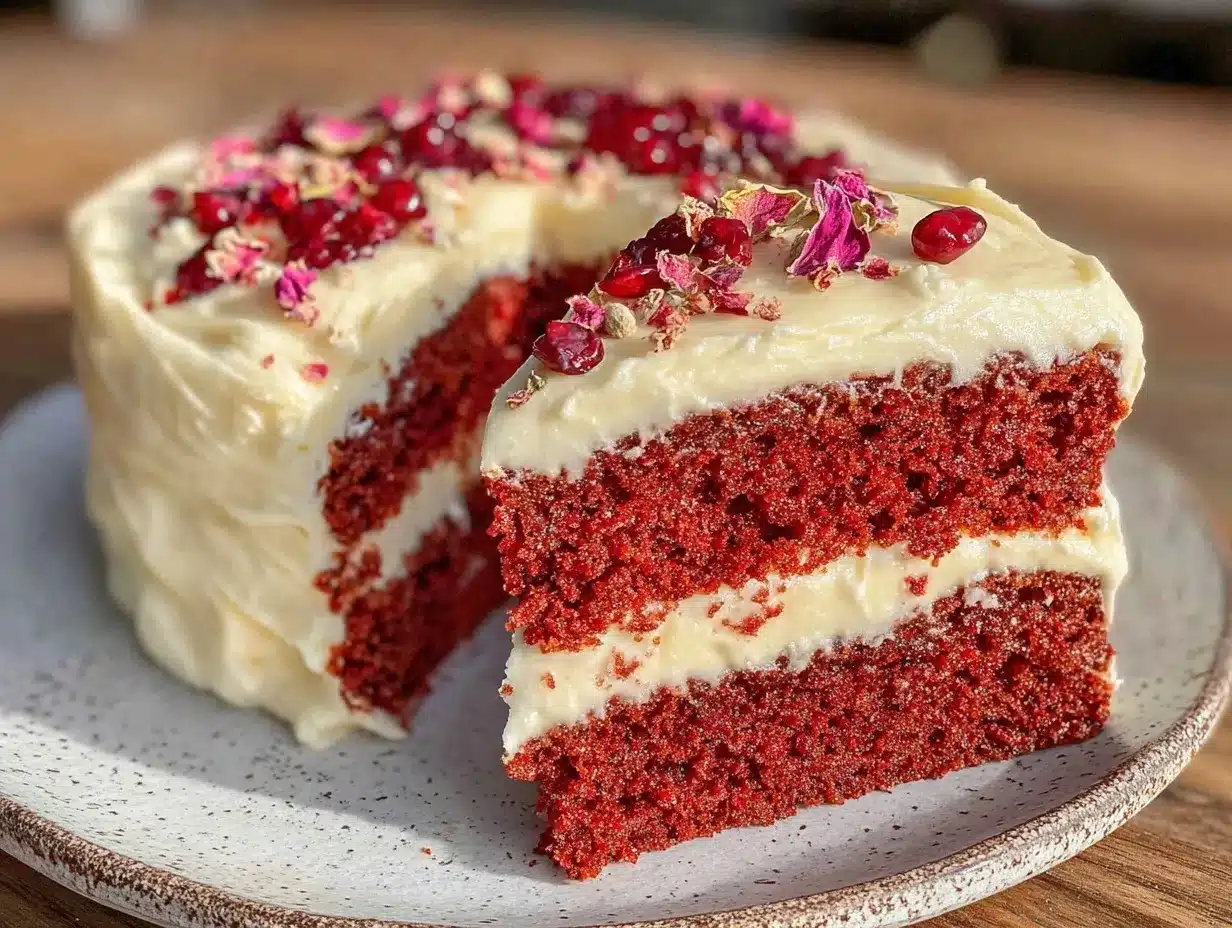
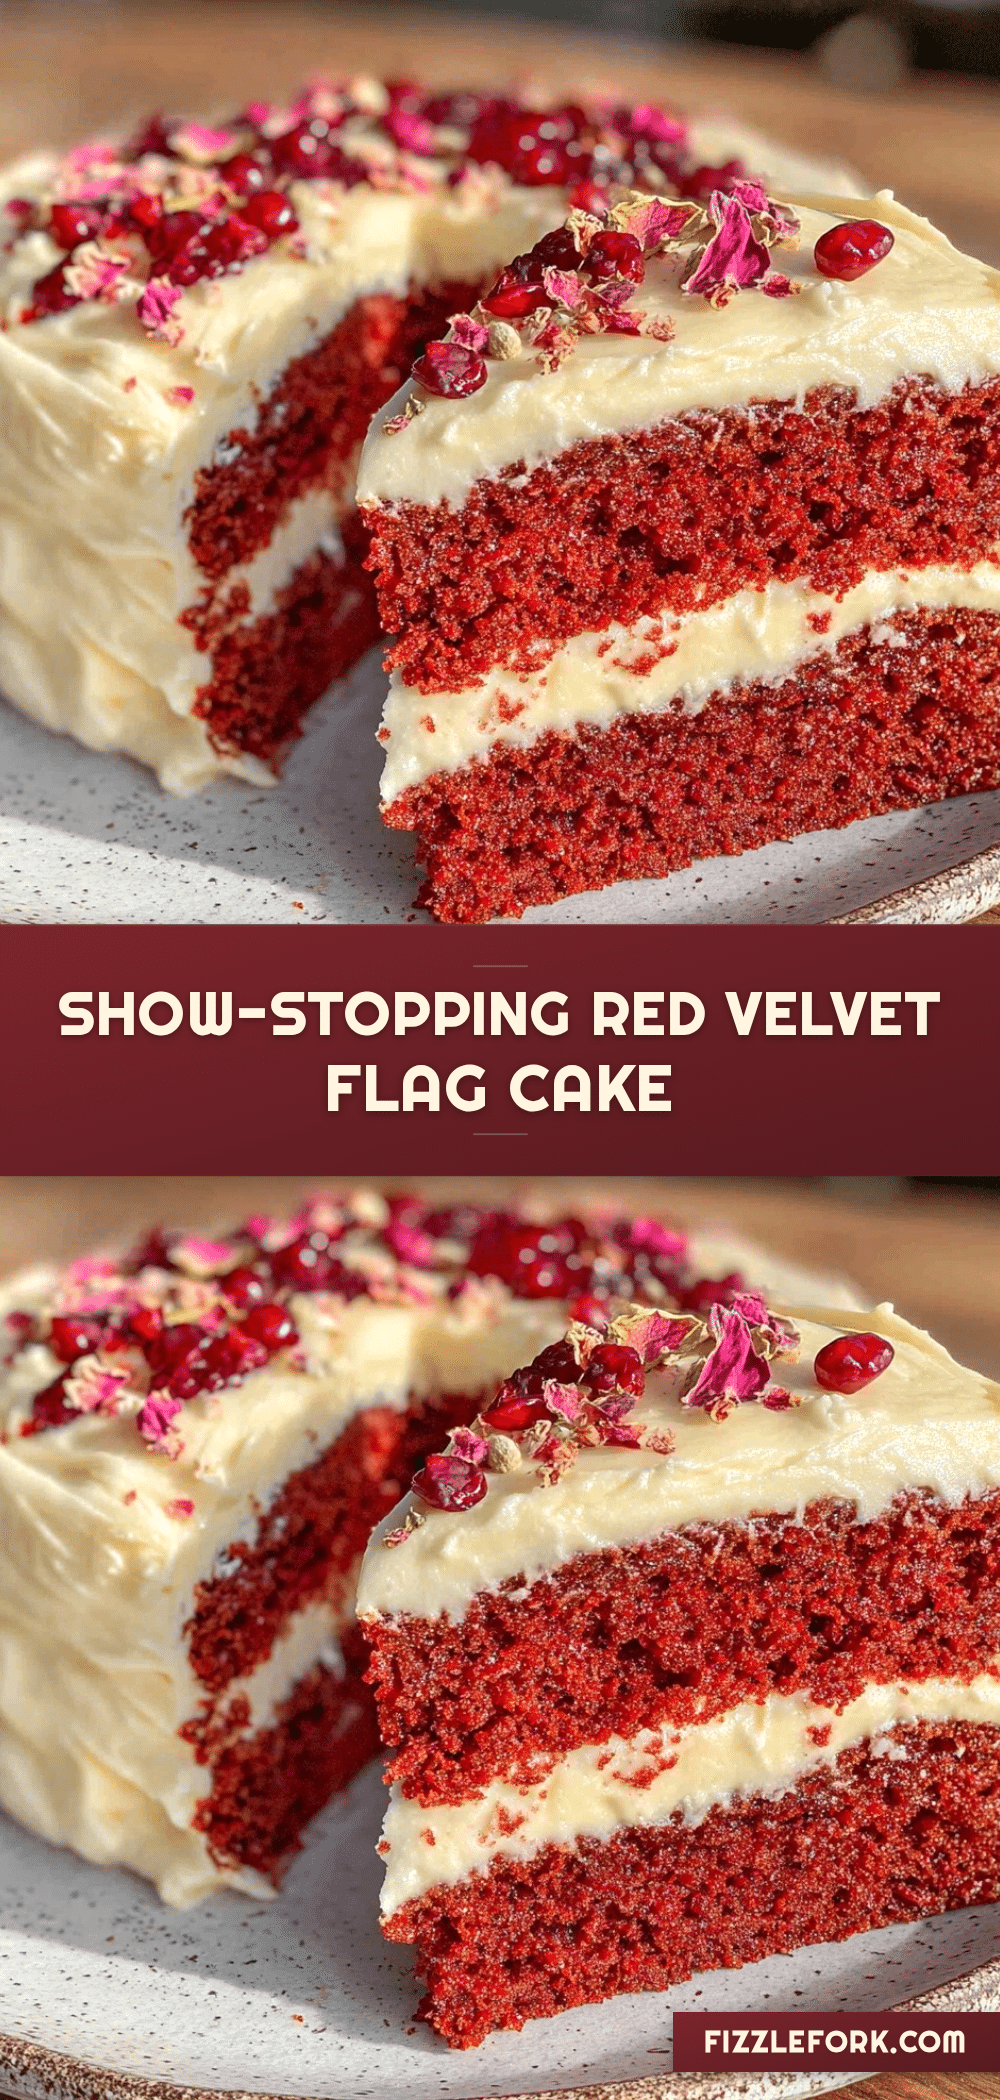
A show-stopping red velvet cake with cream cheese frosting arranged in a flag design, perfect for celebrations and crowd-pleasing events. Moist, tender cake layers paired with silky, tangy frosting create a festive centerpiece.
- Prep Time: 20 minutes
- Cook Time: 25-28 minutes per layer
- Total Time: 1 hour 45 minutes
- Yield: 12 servings 1x
- Category: Dessert
- Cuisine: American
Ingredients
- 2 ½ cups all-purpose flour (315 g)
- 2 tablespoons unsweetened cocoa powder (15 g)
- 1 teaspoon baking soda
- ½ teaspoon salt
- 1 cup unsalted butter, softened (227 g)
- 1 ¾ cups granulated sugar (350 g)
- 2 large eggs, room temperature
- 1 cup buttermilk, room temperature (240 ml)
- 1 teaspoon vanilla extract
- 2 tablespoons red gel food coloring
- 1 teaspoon white vinegar
- 16 oz cream cheese, softened (450 g)
- ½ cup unsalted butter, softened (113 g)
- 4 cups powdered sugar, sifted (480 g)
- 1 teaspoon vanilla extract
- Pinch of salt
- Optional: a few drops of lemon juice
Instructions
- Preheat your oven to 350°F (175°C). Line two 9×13 inch pans with parchment paper and lightly grease.
- In a medium bowl, sift together the flour, cocoa powder, baking soda, and salt. Set aside.
- In a large bowl, beat the softened butter and granulated sugar with an electric mixer for 3-4 minutes until light and fluffy.
- Beat in the eggs one at a time, mixing well after each addition.
- In a separate bowl, whisk together the buttermilk, vanilla extract, red gel food coloring, and white vinegar.
- Gradually add the dry ingredients to the butter mixture in three parts, alternating with the wet ingredients, starting and ending with the dry. Mix just until combined.
- Divide the batter evenly into the two prepared pans and smooth the tops.
- Bake for 25-28 minutes, or until a toothpick inserted in the center comes out clean or with a few moist crumbs.
- Let cakes cool in the pans for 15 minutes, then transfer to wire racks to cool completely.
- While cakes cool, beat together the cream cheese and softened butter until smooth and creamy.
- Gradually add powdered sugar and vanilla extract, beating until fluffy. Add a pinch of salt and optional lemon juice.
- Trim edges of cooled cakes for clean squares if needed. Cut cake into rectangles and squares to create the flag pattern.
- Spread a thin layer of frosting between layers and on top, using frosting to create white stripes between red cake squares.
- Refrigerate the assembled cake for at least 1 hour before serving to let the frosting set.
- Slice carefully to reveal the flag pattern inside.
Notes
Use gel or paste red food coloring for vibrant color without thinning the batter. Let buttermilk rest 5 minutes after adding vinegar or lemon juice. Room temperature ingredients mix better. Avoid overmixing to keep cake tender. Chill cake slightly before cutting to prevent crumbling. Keep frosting chilled but spreadable; refrigerate if too soft. Use an offset spatula for clean frosting lines. Prepare frosting a day ahead for easier assembly.
Nutrition
- Serving Size: 1 slice (approximate
- Calories: 375
- Sugar: 35
- Sodium: 300
- Fat: 15
- Saturated Fat: 9
- Carbohydrates: 45
- Fiber: 1
- Protein: 5
Keywords: red velvet cake, cream cheese frosting, flag cake, celebration cake, easy red velvet, homemade frosting, patriotic cake


