The sticky, sweet scent of simmering elderberries — the kind that curls up your nostrils and lingers long after the pot’s off the stove — always takes me back to quiet Sunday afternoons in my kitchen. It’s not just the smell; it’s the soft, gentle bubbling sound that fills the room, mixing with the distant hum of the neighborhood waking up. That’s when I first started making homemade elderberry gummies for immune support, without any fancy gadgets or complicated steps. Honestly, I wasn’t chasing perfection. I was chasing something comforting, something that felt like a warm, quiet hug in the middle of cold seasons when sniffles and coughs seem to be everywhere.
There’s a kind of magic in turning simple elderberries into little chewy bites that the whole family loves, especially when they come with the promise of a natural immune boost. That first batch was a bit sticky, a little uneven, but it felt special—like passing down a secret recipe made with care and a little bit of trial and error. Over time, I found the balance of flavors and textures that worked just right, and now these gummies aren’t just a remedy; they’re part of our ritual, a small daily joy that feels honest and hopeful.
Making these healthy homemade elderberry gummies for immune support isn’t about quick fixes or flashy health trends. It’s about simple ingredients, the comfort of creating something by hand, and the quiet assurance that we’re doing a little something good for ourselves. And if you’re anything like me, you might find that this recipe becomes a small but steady part of your kitchen routine, too.
Why You’ll Love This Recipe
After countless experiments with elderberry syrups, teas, and supplements, I landed on this gummy recipe as the perfect blend of taste, convenience, and health benefits. It’s not just another elderberry concoction — this is something you’ll actually look forward to enjoying daily.
- Quick & Easy: You can have these gummies ready in under 30 minutes, making them ideal for busy mornings or a quick afternoon immune pick-me-up.
- Simple Ingredients: No need for obscure herbs or powders. Just elderberry syrup, natural sweeteners, and gelatin or a plant-based alternative, all pantry-friendly.
- Perfect for Families: Kids love the chewy texture and mild sweetness, making it a great way to support immune health without fuss.
- Crowd-Pleaser: Whether you’re sharing at a potluck or gifting to friends, these gummies always bring smiles and questions about how you made them.
- Unbelievably Delicious: The balance between tart elderberry and just-right sweetness gives these gummies a flavor that feels homemade and wholesome, not medicinal.
What sets this recipe apart? It’s the little details — like using a high-quality elderberry syrup that’s rich but not overpowering, and a gentle simmer that preserves the berry’s goodness without bitterness. Plus, swapping out refined sugars for natural sweeteners means these gummies support your immune system without the sugar crash. Honestly, I love how these gummies bring a spoonful of nature’s best into a fun, snackable form that feels way less like medicine and way more like a treat.
What Ingredients You Will Need
This recipe uses simple, wholesome ingredients to deliver bold flavor and satisfying texture without the fuss. Most of these are pantry staples, and the ones that aren’t are usually easy to find or substitute.
- Elderberry Syrup (about ½ cup / 120 ml) – I recommend a homemade version or a trusted brand like Nature’s Way for the best immune-boosting benefits.
- Unflavored Gelatin (3 tablespoons / 30 grams) – This gives the gummies their chewy texture. Use agar-agar powder for a vegan alternative (note: agar sets differently).
- Raw Honey (2 tablespoons / 40 grams) – Adds gentle sweetness and additional health benefits.
- Fresh Lemon Juice (1 tablespoon / 15 ml) – Brightens the flavor and adds a touch of vitamin C.
- Filtered Water (1 cup / 240 ml) – For dissolving the gelatin and blending everything smoothly.
Optional but recommended:
- Vitamin C Powder (½ teaspoon / 1 gram) – For an extra immune kick.
- Vanilla Extract (¼ teaspoon / 1 ml) – Just a hint to round out the flavors.
Substitution tips:
- If you want a vegan gummy, swap gelatin for agar-agar powder but expect a slightly different texture (firmer and less chewy).
- Maple syrup or agave nectar can replace honey if you prefer a plant-based sweetener.
- In summer, fresh elderberries can be cooked down into syrup, but store-bought syrup works perfectly year-round.
Equipment Needed
Making elderberry gummies is surprisingly straightforward and doesn’t require fancy tools.
- Medium Saucepan: For gently heating and dissolving the ingredients. A heavy-bottomed pan helps prevent scorching.
- Whisk or Spoon: To stir the mixture smoothly.
- Silicone Gummy Mold or Small Baking Dish: Silicone molds are perfect for shaped gummies, but a small glass or silicone baking dish works if you want to cut squares later.
- Measuring Cups and Spoons: For accuracy, especially with gelatin and liquid ingredients.
- Dropper or Small Spoon: Handy for filling molds without spills.
Alternative tools:
- If you don’t have a silicone mold, use an ice cube tray or line a small dish with parchment paper.
- For whisking, a fork works in a pinch, though a silicone spatula can help scrape down sides better.
Personally, I swear by a set of sturdy silicone molds — they make gummy removal almost foolproof and come in adorable shapes that kids adore.
Preparation Method
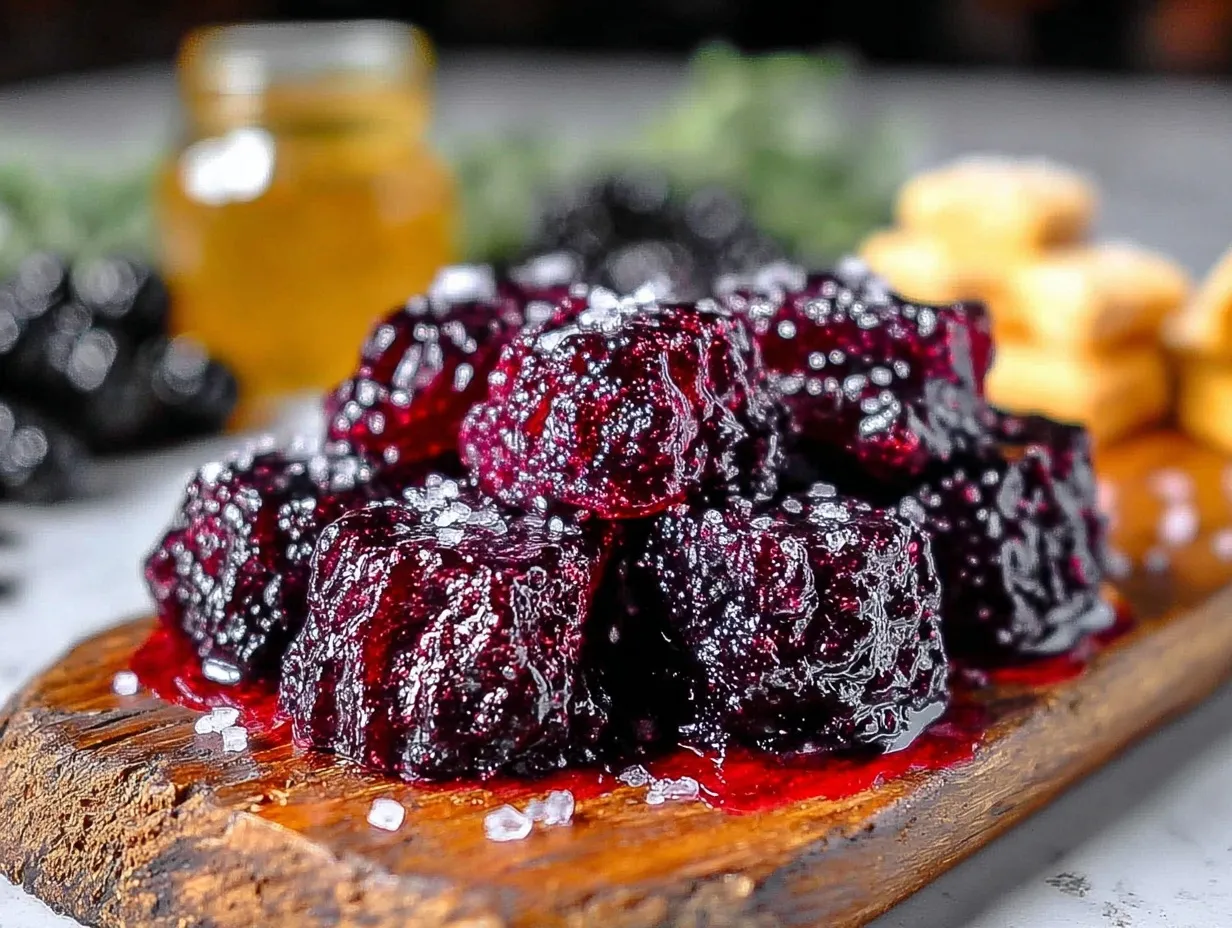
- Bloom the Gelatin: Pour 1 cup (240 ml) of filtered water into the saucepan, sprinkle 3 tablespoons (30 grams) of unflavored gelatin evenly over the surface. Let it sit for about 5 minutes until it absorbs the water and becomes spongy. This step is crucial for smooth, clump-free gummies.
- Warm the Mixture: Place the saucepan over low heat. Stir gently and continuously as the gelatin dissolves into the water. Avoid boiling — just warm until the gelatin is fully melted and the mixture is clear (about 3-5 minutes). You’ll know it’s ready when no granules remain visible.
- Add Elderberry Syrup: Pour in ½ cup (120 ml) of elderberry syrup. Stir to combine. The mixture will take on a rich purple hue, and the sweet-tart aroma will fill your kitchen (a good sign!).
- Sweeten and Flavor: Add 2 tablespoons (40 grams) of raw honey and 1 tablespoon (15 ml) of fresh lemon juice. Whisk gently until fully incorporated. If using, stir in ½ teaspoon (1 gram) of vitamin C powder and ¼ teaspoon (1 ml) of vanilla extract. These extras add brightness and immune support.
- Pour into Molds: Carefully spoon or use a dropper to fill your silicone molds or baking dish. Work quickly — the gelatin begins to set as it cools.
- Chill and Set: Transfer the molds to the refrigerator and chill for at least 2 hours, ideally 3, until firm and springy to the touch.
- Remove and Store: Gently pop the gummies out of the molds or cut into squares if set in a dish. Store them in an airtight container in the fridge for up to 2 weeks or freeze for longer storage.
Preparation notes:
- Keep heat low to avoid destroying the elderberry’s beneficial properties.
- If the mixture thickens too quickly before pouring, briefly warm it again off the heat to loosen.
- The gummies will taste best when chilled; room temperature can feel a bit sticky.
Cooking Tips & Techniques
Getting the perfect texture for elderberry gummies can be a bit of a balancing act, but a few tricks make it easier.
- Gelatin Quality Matters: I’ve tried several brands, and higher-quality gelatin makes a noticeable difference in chewiness. Avoid inexpensive, low-grade powders that can give a rubbery texture.
- Don’t Boil the Mixture: Heat gently to dissolve gelatin and combine ingredients. Boiling can ruin the gelatin’s setting ability and diminish elderberry nutrients.
- Stir Continuously: This prevents clumps and ensures a smooth final gummy without gritty spots.
- Timing is Everything: Pour the mixture into molds right after heating. It sets quickly as it cools, so don’t delay.
- Multitasking Tip: While the gummies chill, it’s a perfect moment to prep a quick healthy dinner, like creamy Tuscan chicken or crispy Mediterranean salmon with veggies.
Common pitfalls I’ve learned to avoid:
- Using cold water for blooming gelatin is key; warm water can cause premature dissolving and clumping.
- Overheating the elderberry syrup dulls its flavor—low and slow wins here.
- Not chilling long enough results in gummy goo rather than chewy bites.
Variations & Adaptations
This recipe is a great base you can tweak depending on your needs or preferences.
- Vegan Version: Replace gelatin with agar-agar powder (use about 1 tablespoon / 10 grams). Agar sets firmer and faster but lacks the chewiness of gelatin. Adjust sweetness slightly since agar can taste neutral.
- Flavor Twists: Add a splash of orange juice or a pinch of cinnamon for a seasonal spin. For a tropical vibe, stir in a bit of pineapple juice along with elderberry syrup.
- Boost with Herbs: Infuse the water with a few fresh mint leaves or a slice of ginger while heating, then strain before adding gelatin for extra soothing qualities.
- Sweetener Swaps: Use maple syrup or agave nectar instead of honey for a different sweetness profile, great if avoiding bee products.
- Texture Play: Mix in finely chopped nuts or seeds after pouring into molds for a little crunch, or roll finished gummies in coconut flakes for a fun coating.
Once, I tried adding turmeric powder for its anti-inflammatory properties — the color was stunning, though the flavor a bit bold. It’s all about finding what suits your taste buds and wellness goals.
Serving & Storage Suggestions
These elderberry gummies are best served chilled, straight from the fridge. They have a pleasantly firm yet chewy bite that melts slightly as they warm on your tongue. Serve them as a daily immune-boosting treat or package them in small jars as thoughtful, homemade gifts for friends.
Try pairing your gummies with a hot cup of herbal tea or alongside a fresh fruit plate for a light afternoon pick-me-up. They also make a nice complement to a cozy, immune-supportive meal, like a nourishing chicken soup or a vibrant salad.
Storage tips:
- Keep gummies in an airtight container in the refrigerator for up to two weeks.
- For longer storage, freeze them in a single layer on parchment paper, then transfer to a sealed bag. Thaw briefly in the fridge before enjoying.
- Flavors tend to deepen after a day or two in the fridge, so if you can wait, you’ll be rewarded with even richer taste.
Nutritional Information & Benefits
Each gummy provides a modest dose of elderberry’s powerful antioxidants and vitamins, particularly vitamin C, which supports immune function. Raw honey adds natural enzymes and antimicrobial properties, while gelatin contributes protein and supports joint and gut health.
This recipe is naturally gluten-free and can be made vegan-friendly with agar-agar. Be mindful of honey if serving to children under one year old.
From a wellness perspective, these gummies offer a gentle, tasty way to incorporate elderberry’s immune support into your daily routine without added sugars or artificial preservatives commonly found in store-bought supplements.
Conclusion
Healthy homemade elderberry gummies for immune support might seem simple, but that’s exactly what makes them so special. They blend tradition, nurturing ingredients, and a bit of kitchen alchemy into little bites that feel both mindful and joyful. You can adjust the sweetness, flavors, and textures to suit your family or personal taste, making this recipe truly your own.
For me, these gummies are more than just a remedy — they’re a small act of care I can make with my own hands, day by day. If you try them, I’d love to hear how you customize your batches or what moments they become part of in your home. Share your experiences and keep nourishing yourself with recipes that feel like a warm, quiet hug.
FAQs
Can I use fresh elderberries instead of elderberry syrup?
Yes! You can cook fresh elderberries with water and a sweetener to make your own syrup, then use it in the gummy recipe. Just strain out the solids for a smooth syrup.
How long do elderberry gummies last?
Stored in an airtight container in the fridge, they last up to two weeks. You can freeze them for up to three months as well.
Can kids eat these gummies safely?
They’re generally safe for children over one year old. Avoid honey for babies under one due to botulism risk. Adjust sweetness if needed to suit little palates.
What if my gummies don’t set properly?
Common causes include not blooming the gelatin fully or overheating the mixture. Try blooming gelatin longer and heating gently. If using agar-agar, follow package instructions carefully as it sets differently.
Are these gummies gluten-free?
Absolutely! All ingredients are naturally gluten-free, making them suitable for gluten-sensitive diets.
Pin This Recipe!
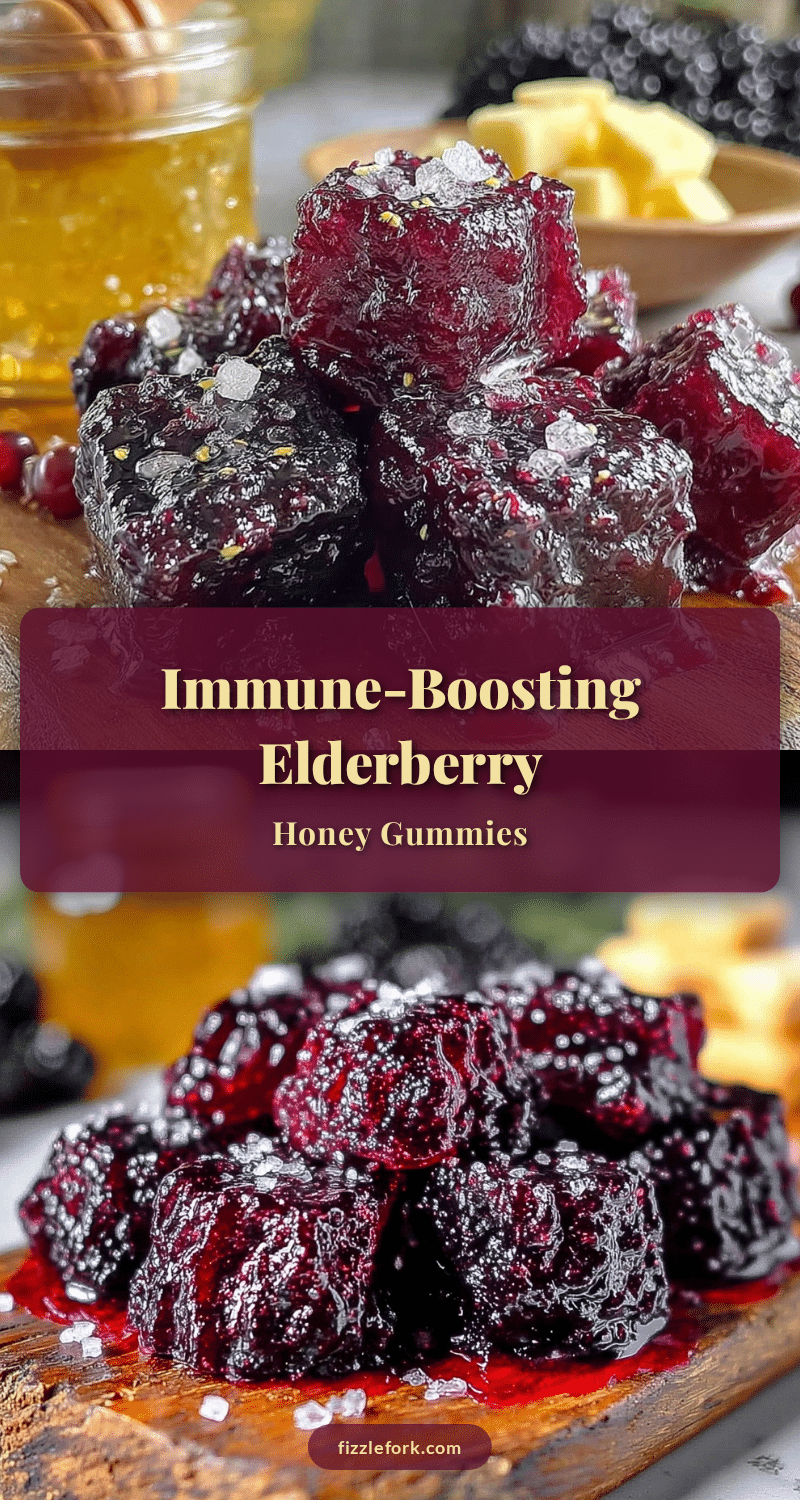
Healthy Homemade Elderberry Gummies Recipe for Immune Boost
These healthy homemade elderberry gummies provide a natural immune boost with simple, wholesome ingredients and a chewy, delicious texture that the whole family will love.
- Prep Time: 10 minutes
- Cook Time: 10 minutes
- Total Time: 2 hours 20 minutes
- Yield: About 30 gummies 1x
- Category: Snack
- Cuisine: American
Ingredients
- ½ cup (120 ml) elderberry syrup
- 3 tablespoons (30 grams) unflavored gelatin (or 1 tablespoon / 10 grams agar-agar powder for vegan alternative)
- 2 tablespoons (40 grams) raw honey (or maple syrup/agave nectar for vegan option)
- 1 tablespoon (15 ml) fresh lemon juice
- 1 cup (240 ml) filtered water
- Optional: ½ teaspoon (1 gram) vitamin C powder
- Optional: ¼ teaspoon (1 ml) vanilla extract
Instructions
- Pour 1 cup (240 ml) of filtered water into a medium saucepan and sprinkle 3 tablespoons (30 grams) of unflavored gelatin evenly over the surface. Let it sit for about 5 minutes until it absorbs the water and becomes spongy.
- Place the saucepan over low heat. Stir gently and continuously as the gelatin dissolves into the water. Avoid boiling; warm until the gelatin is fully melted and the mixture is clear (about 3-5 minutes).
- Pour in ½ cup (120 ml) of elderberry syrup and stir to combine.
- Add 2 tablespoons (40 grams) of raw honey and 1 tablespoon (15 ml) of fresh lemon juice. Whisk gently until fully incorporated. If using, stir in ½ teaspoon (1 gram) of vitamin C powder and ¼ teaspoon (1 ml) of vanilla extract.
- Carefully spoon or use a dropper to fill silicone molds or a small baking dish with the mixture. Work quickly as the gelatin begins to set as it cools.
- Transfer the molds to the refrigerator and chill for at least 2 hours, ideally 3, until firm and springy to the touch.
- Gently pop the gummies out of the molds or cut into squares if set in a dish. Store in an airtight container in the fridge for up to 2 weeks or freeze for longer storage.
Notes
[‘Keep heat low to preserve elderberry nutrients and prevent gelatin from losing setting ability.’, ‘Bloom gelatin in cold water for best texture; avoid warm water to prevent clumping.’, ‘If mixture thickens before pouring, briefly warm off heat to loosen.’, ‘Chill gummies for at least 2 hours for best firmness; longer chilling deepens flavor.’, ‘Use high-quality gelatin for better chewiness; agar-agar sets firmer and less chewy.’, ‘Avoid honey for children under one year old due to botulism risk.’]
Nutrition
- Serving Size: 1 gummy
- Calories: 15
- Sugar: 3
- Sodium: 5
- Carbohydrates: 4
- Protein: 1
Keywords: elderberry gummies, immune boost, homemade gummies, elderberry syrup, healthy snacks, gelatin gummies, vegan gummies, natural sweeteners


