That first whiff of cinnamon and nutmeg hitting the kitchen—the kind that wraps around you before you’ve even fully woken up—still takes me straight to my Aunt Carol’s house on a drizzly October morning. She wasn’t one for fussy pastries or complicated baking projects. But every fall, without fail, she’d pull out her dusty donut pan and whip up a batch of these baked pumpkin donuts. I remember standing on a step stool, watching her whisk the batter together in a single bowl, no mixer required. It felt almost like magic, how simple ingredients could turn into something that smelled like pure autumn.
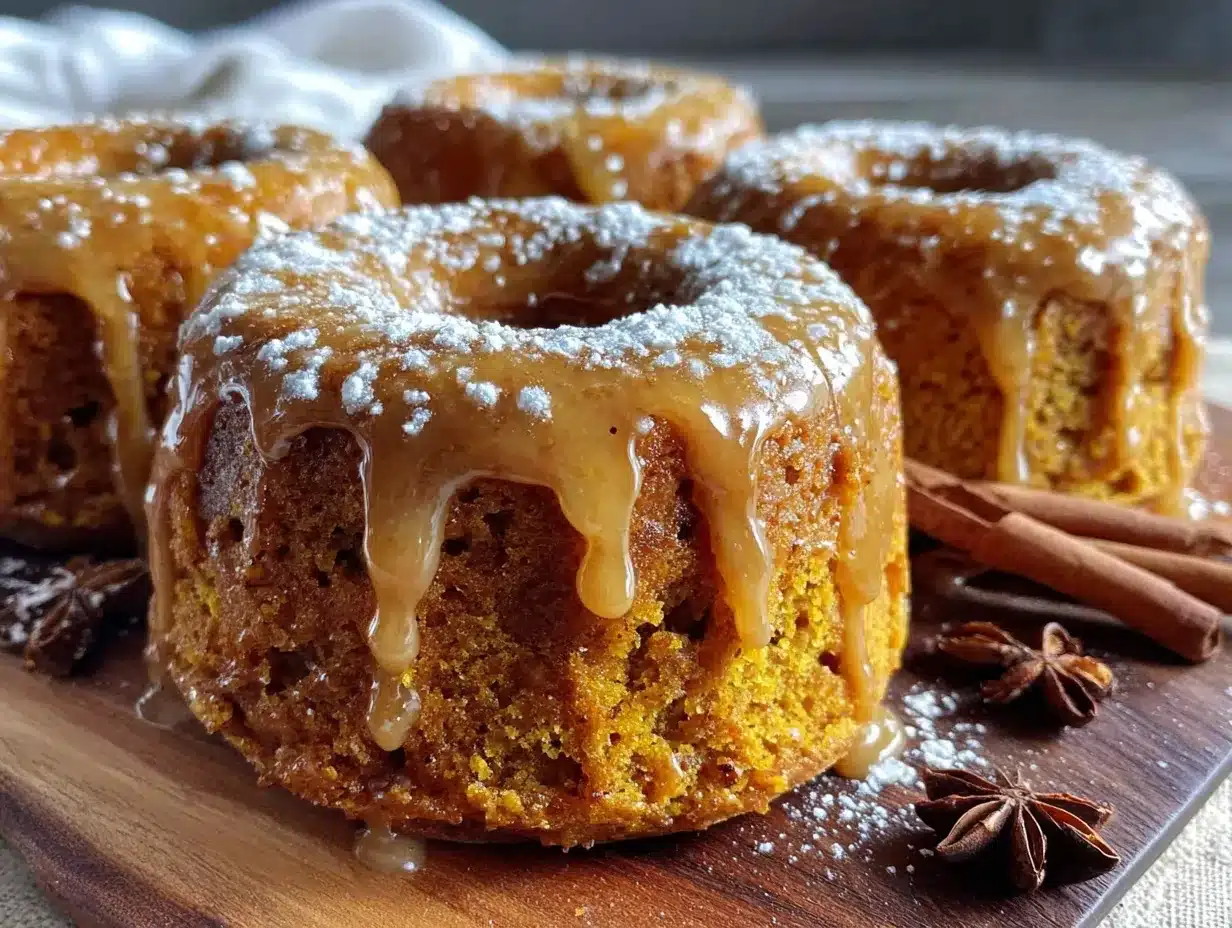
Years later, I started making them myself, tweaking the recipe here and there (honestly, the first few batches were a little dry). I wanted that same cozy feeling, but with a donut that was tender, not dense. And that maple glaze? It had to be just right—not too sweet, not too thin, with that real maple flavor that cuts through the pumpkin spice. That’s the version I’m sharing today. These aren’t your typical fried, greasy donuts. They’re baked, which means they’re ready in under 30 minutes and leave your kitchen smelling like a fall candle factory exploded (in the best way).
I’ve made these for lazy Sunday mornings, for Halloween parties, and even for a quick Thanksgiving breakfast before the big cooking marathon begins. They never last long. Something about that soft, spiced crumb paired with the glossy maple glaze just hits a different note. It’s the kind of treat that makes you slow down for a second, coffee in hand, and just enjoy the moment. And honestly, that’s exactly what a good fall recipe should do.
Why You’ll Love This Recipe
Let me tell you—these baked pumpkin donuts have become my most-requested fall recipe, and for good reason. I’ve tested this batter at least a dozen times to get the texture just right. Not too cakey, not too dense, with that perfect little dome on top that catches every bit of maple glaze.
- Quick & Easy : From start to finish, you’re looking at about 25 minutes. No yeast, no rising time, no deep frying. Just mix, bake, glaze, and devour.
- Simple Ingredients : You probably have most of this in your pantry already. Canned pumpkin, basic spices, flour, sugar, eggs—no weird specialty items required.
- Perfect for Fall Mornings : Whether it’s a cozy weekend breakfast, a treat for a pumpkin-themed brunch, or something to bring to a fall gathering, these donuts fit right in.
- Crowd-Pleaser : I’ve served these to kids, adults, and even picky in-laws. Everyone goes back for seconds. The pumpkin flavor is there, but it’s not overwhelming—it’s more of a warm, spiced backdrop.
- Unbelievably Delicious : The secret is using a bit of oil instead of all butter, which keeps the donuts incredibly moist for days. And that maple glaze? It’s the kind of thing you’ll want to put on everything.
What makes these different from every other pumpkin donut recipe out there? It’s the balance. I’ve found that using a combination of brown sugar and granulated sugar gives the donuts a deeper flavor and a softer crumb. Plus, a touch of nutmeg alongside the cinnamon adds that little something extra that makes people ask, “What’s in these?”
This recipe isn’t just good—it’s the kind that makes you close your eyes after the first bite. It’s comfort food reimagined, baked instead of fried, and ready before you’ve even finished your first cup of coffee. Perfect for impressing guests without any stress, or turning a simple fall morning into something memorable.
What Ingredients You Will Need
This recipe uses simple, wholesome ingredients to deliver that bold pumpkin flavor and soft, tender texture. Most of these are pantry staples, especially if you do any kind of fall baking.
For the Pumpkin Donuts
- All-purpose flour – 1 ¾ cups (210g). Spoon and level it for accuracy. I’ve used King Arthur Flour for years and love the consistent results.
- Pumpkin pie spice – 2 teaspoons. You can use store-bought or make your own with cinnamon, nutmeg, ginger, and cloves.
- Cinnamon – 1 teaspoon. Adds that warm, familiar fall flavor.
- Baking powder – 1 ½ teaspoons. This gives the donuts their lift.
- Baking soda – ½ teaspoon. Helps with browning and tenderness.
- Salt – ½ teaspoon. Balances the sweetness.
- Granulated sugar – ½ cup (100g). For sweetness and structure.
- Light brown sugar, packed – ½ cup (100g). Adds moisture and a hint of molasses flavor.
- Pumpkin puree – 1 cup (245g). Not pumpkin pie filling—make sure it’s 100% pure pumpkin. Libby’s is my go-to.
- Large eggs – 2, at room temperature. They incorporate more evenly into the batter.
- Vegetable oil – ⅓ cup (80ml). Keeps the donuts moist. You can also use melted coconut oil or canola oil.
- Milk – ¼ cup (60ml). Any kind works—dairy or non-dairy. I’ve used oat milk with great results.
- Vanilla extract – 1 teaspoon. Pure vanilla adds a warmth you can’t get from imitation.
For the Maple Glaze
- Powdered sugar – 1 cup (120g). Sifted if it’s lumpy.
- Pure maple syrup – 2 tablespoons. Please use the real stuff here—it makes a huge difference in flavor. I love Grade A Dark Amber for its robust taste.
- Milk – 1 to 2 tablespoons. Start with one and add more for your desired consistency.
- Vanilla extract – ½ teaspoon. Just a touch to round out the maple flavor.
- Pinch of salt – Optional, but it really helps balance the sweetness.
Equipment Needed
You don’t need a fancy bakery setup for these. Here’s what you’ll need:
- Donut pan – This is non-negotiable. A standard 6-cavity donut pan works perfectly. I have a Wilton non-stick pan that I’ve used for years and it’s never let me down.
- Mixing bowls – One large, one medium. Nothing fancy.
- Whisk – For combining dry and wet ingredients.
- Spatula – A rubber spatula is great for scraping down the bowl and folding ingredients.
- Piping bag or zip-top bag – For filling the donut cavities neatly. You can also use a spoon, but a bag is less messy.
- Cooling rack – Essential for letting the donuts cool properly before glazing.
- Small bowl – For whisking the glaze.
No donut pan? You can try using a mini bundt pan or even a muffin tin, but the shape and bake time will be different. Honestly, a donut pan is worth the investment if you plan on making these more than once—and trust me, you will.
Preparation Method
Let’s get baking! This process is straightforward, but I’ve included some notes from my own trial and error to help you nail it on the first try.
- Preheat and prep the pan. Preheat your oven to 350°F (175°C). Lightly grease your donut pan with cooking spray or a little melted butter. Even if it’s non-stick, I always grease it—better safe than sorry.
- Mix the dry ingredients. In a large bowl, whisk together the all-purpose flour, pumpkin pie spice, cinnamon, baking powder, baking soda, and salt. Make sure everything is evenly distributed. I like to do this step first so the spices have a chance to bloom a little.
- Combine the wet ingredients. In a separate medium bowl, whisk together the granulated sugar, brown sugar, pumpkin puree, eggs, vegetable oil, milk, and vanilla extract until smooth. The mixture should be a beautiful deep orange color. Make sure there are no lumps of brown sugar.
- Combine wet and dry. Pour the wet ingredients into the dry ingredients. Gently fold together with a spatula until just combined. A few streaks of flour are okay—overmixing will make the donuts tough. This is the most important tip I can give you. Stop as soon as you don’t see any more dry flour.
- Fill the donut pan. Transfer the batter to a piping bag or a zip-top bag with the corner snipped off. Pipe the batter into each donut cavity, filling them about ⅔ to ¾ full. This leaves room for them to rise without overflowing. If you don’t have a bag, use a small spoon—it’s a bit messier, but it works.
- Bake. Place the pan in the preheated oven and bake for 10 to 12 minutes. The donuts are done when they spring back lightly when touched and a toothpick inserted into the thickest part comes out clean. My oven runs a little hot, so I always check at the 10-minute mark.
- Cool in the pan. Let the donuts cool in the pan for about 5 minutes. This helps them set and makes them easier to remove. Then, transfer them to a wire rack to cool completely. Don’t rush this step—warm donuts will soak up the glaze instead of letting it set on top.
- Make the glaze. While the donuts are cooling, whisk together the powdered sugar, maple syrup, 1 tablespoon of milk, vanilla extract, and a pinch of salt in a small bowl. If the glaze is too thick, add another tablespoon of milk, one teaspoon at a time, until it’s thick but pourable. It should coat the back of a spoon.
- Glaze the donuts. Once the donuts are completely cool, dip the top of each donut into the glaze. Let the excess drip off for a second, then place them back on the wire rack, glazed side up. The glaze will set in about 10 to 15 minutes.
- Serve and enjoy. That’s it! Serve them immediately or let the glaze fully harden for a cleaner look. Either way, they’re absolutely delicious.
Cooking Tips & Techniques
I’ve made a lot of mistakes in the kitchen (underbaked cookies, anyone?), so I’m sharing my hard-earned lessons with you.
Don’t overmix the batter. This is the number one mistake people make with baked donuts. Overmixing develops the gluten in the flour, which leads to tough, rubbery donuts. Mix until the flour just disappears, and then stop. A few lumps are fine.
Use room temperature ingredients. Cold eggs and milk can seize up the batter and make it lumpy. Let them sit on the counter for 15-20 minutes before you start. I usually take them out when I preheat the oven, and by the time I’m ready to mix, they’re perfect.
Let the donuts cool completely. I know it’s tempting to glaze them while they’re still warm, but trust me on this. Warm donuts will absorb the glaze like a sponge, leaving you with a soggy, sticky mess instead of a beautiful, glossy topping. Patience pays off here.
Double the batch. If you only have one donut pan, you’ll need to bake in batches. Let the pan cool down completely between batches, or rinse it with cool water and dry it thoroughly. Placing batter into a hot pan will cause it to spread and cook unevenly.
Test your baking powder. If your baking powder is old, your donuts won’t rise properly. To test it, drop a teaspoon of baking powder into a small bowl of hot water. If it fizzes vigorously, it’s still good. If not, it’s time for a new container.
Variations & Adaptations
One of the best things about this recipe is how flexible it is. Here are some variations I’ve tried and loved:
- Gluten-Free Version : Substitute the all-purpose flour with a 1:1 gluten-free baking flour blend (like Bob’s Red Mill). The texture will be slightly more delicate, but still delicious. Add an extra tablespoon of milk if the batter seems too thick.
- Dairy-Free Version : Use a plant-based milk like oat or almond milk, and swap the butter for coconut oil (if using any). The glaze can be made with dairy-free milk as well. I’ve made these with oat milk and you honestly can’t tell the difference.
- Spice It Up : Add a pinch of ground ginger, cloves, or even a tiny pinch of cayenne pepper to the dry ingredients for a little warmth. I once added a teaspoon of pumpkin spice blend from a local spice shop and it was incredible.
- Chocolate Lover’s Twist : Fold in ½ cup of mini chocolate chips into the batter before baking. The chocolate pairs beautifully with the pumpkin and maple.
- Pumpkin Cream Cheese Glaze : For an extra decadent treat, mix 2 ounces of softened cream cheese with 1 cup of powdered sugar and 2 tablespoons of maple syrup. It’s like a pumpkin chai latte in donut form!
Serving & Storage Suggestions
These donuts are best enjoyed the day they’re made, but they store surprisingly well too.
Serving : Serve them at room temperature with a hot cup of coffee, a creamy pumpkin cold foam, or a glass of cold milk. They’re perfect for breakfast, brunch, or an afternoon snack. For a pretty presentation, arrange them on a cake stand and sprinkle a little extra cinnamon on top.
Storage : Store leftover donuts in an airtight container at room temperature for up to 2 days. If you stack them, place a piece of parchment paper between the layers to prevent the glaze from sticking. After 2 days, the texture starts to soften, but they’re still tasty.
Freezing : You can freeze the unglazed donuts for up to 3 months. Let them cool completely, then place them in a single layer on a baking sheet and freeze until solid. Transfer them to a freezer-safe bag. When you’re ready to enjoy, thaw them at room temperature and glaze them fresh. The glaze doesn’t freeze well, so always add it after thawing.
Reheating : If you want to reheat a glazed donut, pop it in a 300°F (150°C) oven for about 5 minutes. The microwave will make the glaze sticky and the donut rubbery, so I don’t recommend it.
Nutritional Information & Benefits
While these are definitely a treat, they’re a bit lighter than traditional fried donuts. Here’s an approximate breakdown per donut (based on 12 donuts):
- Calories : ~220
- Fat : 9g
- Carbohydrates : 33g
- Protein : 3g
- Fiber : 1g
- Sugar : 20g
Health Benefits : Pumpkin is packed with vitamin A (from beta-carotene), which is great for eye health and your immune system. It’s also a good source of fiber. The pumpkin puree adds moisture without a ton of extra fat, which is why these donuts are so tender. Plus, cinnamon has anti-inflammatory properties. So, you know, it’s practically a health food.
Dietary Considerations : This recipe can easily be made gluten-free and dairy-free (see variations above). It contains eggs and wheat (gluten) in its standard form. If you have nut allergies, this recipe is naturally nut-free as written.
Conclusion
These easy baked pumpkin donuts with maple glaze are everything I love about fall baking. They’re simple enough for a weekday morning, but special enough to share with friends and family. The combination of warm pumpkin spices and that rich, real maple glaze is just unbeatable. It’s the kind of recipe that makes your kitchen feel cozy and your heart feel full.
I’ve made these for so many occasions, and they never fail to bring a smile to people’s faces. I hope they bring the same joy to your kitchen. Please don’t be afraid to make them your own—add some extra cinnamon, swap in a different glaze, or double the batch. Baking should be fun, not stressful.
If you make these, I’d love to hear about it! Leave a comment below and let me know how they turned out. Did you try any variations? Did the glaze set perfectly? Your questions and stories help make this community so special. Happy baking, and here’s to a deliciously cozy fall!
Frequently Asked Questions
Can I use homemade pumpkin puree instead of canned?
Yes, you can! Just make sure to strain your homemade puree through a cheesecloth or fine-mesh strainer to remove excess water. Canned pumpkin is thicker, so homemade puree can make the batter too wet if not drained properly.
Why did my donuts stick to the pan?
This usually happens if the pan wasn’t greased well enough or if the donuts were removed too early. Make sure to grease every nook and cranny of the pan, and let the donuts cool for a full 5 minutes before trying to remove them.
Can I make the batter ahead of time?
I don’t recommend it. The baking powder and baking soda start reacting as soon as they hit the wet ingredients, so the batter needs to be baked immediately for the best rise. You can, however, mix the dry and wet ingredients separately and combine them right before baking.
My glaze is too runny. How do I fix it?
Simply add a little more powdered sugar, one tablespoon at a time, until it reaches the consistency you want. If it’s too thick, add a tiny splash of milk. The perfect glaze should coat the back of a spoon and drip off slowly.
Can I use a different kind of pan?
If you don’t have a donut pan, you can bake this batter in a greased mini muffin tin. Just reduce the baking time to about 8-10 minutes. They won’t be donut-shaped, but they’ll taste just as good! You can also try a pumpkin banana bread variation if you’re in the mood for a loaf instead.
Pin This Recipe!
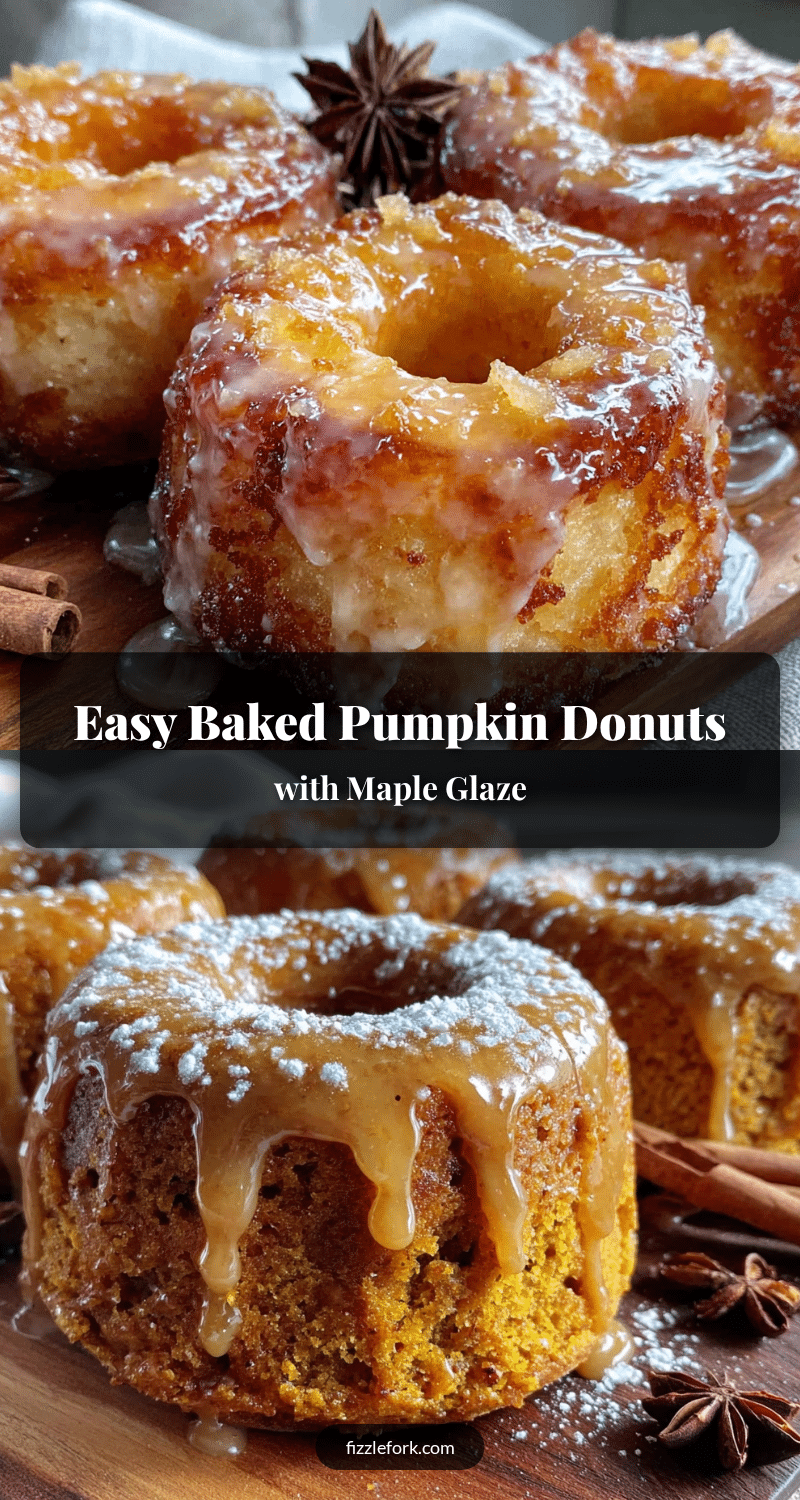
Easy Baked Pumpkin Donuts with Maple Glaze
These baked pumpkin donuts are tender, spiced, and topped with a rich maple glaze. Ready in under 30 minutes, they’re the perfect fall treat for breakfast, brunch, or any cozy occasion.
- Prep Time: 15 minutes
- Cook Time: 12 minutes
- Total Time: 27 minutes
- Yield: 12 servings 1x
- Category: Dessert
- Cuisine: American
Ingredients
- 1 ¾ cups (210g) all-purpose flour
- 2 teaspoons pumpkin pie spice
- 1 teaspoon cinnamon
- 1 ½ teaspoons baking powder
- ½ teaspoon baking soda
- ½ teaspoon salt
- ½ cup (100g) granulated sugar
- ½ cup (100g) packed light brown sugar
- 1 cup (245g) pumpkin puree (not pumpkin pie filling)
- 2 large eggs, at room temperature
- ⅓ cup (80ml) vegetable oil (or melted coconut oil or canola oil)
- ¼ cup (60ml) milk (dairy or non-dairy)
- 1 teaspoon vanilla extract
- 1 cup (120g) powdered sugar, sifted if lumpy
- 2 tablespoons pure maple syrup (Grade A Dark Amber recommended)
- 1 to 2 tablespoons milk (for glaze)
- ½ teaspoon vanilla extract (for glaze)
- Pinch of salt (for glaze, optional)
Instructions
- Preheat oven to 350°F (175°C). Lightly grease a standard 6-cavity donut pan with cooking spray or melted butter.
- In a large bowl, whisk together the all-purpose flour, pumpkin pie spice, cinnamon, baking powder, baking soda, and salt.
- In a separate medium bowl, whisk together the granulated sugar, brown sugar, pumpkin puree, eggs, vegetable oil, milk, and vanilla extract until smooth.
- Pour the wet ingredients into the dry ingredients. Gently fold together with a spatula until just combined (a few streaks of flour are okay; do not overmix).
- Transfer the batter to a piping bag or a zip-top bag with the corner snipped off. Pipe the batter into each donut cavity, filling them about ⅔ to ¾ full.
- Bake for 10 to 12 minutes, until the donuts spring back when lightly touched and a toothpick inserted into the thickest part comes out clean.
- Let the donuts cool in the pan for 5 minutes, then transfer them to a wire rack to cool completely.
- While the donuts cool, make the glaze: In a small bowl, whisk together the powdered sugar, maple syrup, 1 tablespoon of milk, vanilla extract, and a pinch of salt. Add more milk, 1 teaspoon at a time, until the glaze is thick but pourable.
- Once the donuts are completely cool, dip the top of each donut into the glaze. Let excess drip off, then place them back on the wire rack, glazed side up. The glaze will set in about 10 to 15 minutes.
- Serve immediately or let the glaze fully harden. Enjoy!
Notes
Do not overmix the batter; overmixing leads to tough donuts. Use room temperature ingredients for best results. Let donuts cool completely before glazing to prevent the glaze from being absorbed. If you only have one donut pan, let it cool completely between batches. Test your baking powder if it’s old.
Nutrition
- Serving Size: 1 donut
- Calories: 220
- Sugar: 20
- Sodium: 180
- Fat: 9
- Saturated Fat: 1.5
- Carbohydrates: 33
- Fiber: 1
- Protein: 3
Keywords: baked pumpkin donuts, maple glaze, fall donuts, easy pumpkin recipe, baked donuts, pumpkin spice