My friend Jenna did not trust black cocoa powder in a cupcake. She stood in my kitchen, arms crossed, watching me measure out this dark, almost charcoal-colored powder. “It looks like I’m about to bake with dirt,” she said. I couldn’t really argue with her. The stuff looks more like something you’d find at a construction site than a baking supply store.
But here’s the thing about black cocoa powder—it’s not just regular cocoa dyed black. It’s a heavily Dutch-processed cocoa that’s been alkalized to death, which gives it that ultra-dark color and a flavor that’s almost Oreo-like. It’s less chocolatey in the traditional sense and more… mysterious. And honestly, that’s exactly what you want for a Halloween cupcake.
I first tried making black velvet cupcakes about four years ago for a Halloween party I was nervous about hosting. The theme was “creepy chic” (whatever that meant), and I wanted something that looked dramatic but tasted like actual dessert, not a gimmick. The first batch came out looking like charcoal briquettes—dry, crumbly, and honestly kind of sad. But I tweaked the recipe, added more buttermilk, adjusted the leavening, and eventually landed on something that made even Jenna take back her dirt comment after one bite.
These Perfect Black Velvet Halloween Cupcakes with Cream Cheese Frosting are the result of those experiments. They’re dark as midnight, tender as a cloud, and topped with a tangy cream cheese frosting that cuts through the richness perfectly. The color comes from nature (well, processed nature), not artificial dye, which I think makes them feel a little more grown-up than your typical Halloween treat.
Why You’ll Love This Recipe
I’ve tested this recipe more times than I care to admit, and here’s what makes it worth your time:
- No Artificial Food Coloring: The deep black color comes entirely from black cocoa powder. No neon gels, no staining your fingers purple, no worrying about weird aftertastes.
- Perfect for Halloween Parties: These cupcakes look incredible on a dessert table. They’re dramatic without being cheesy, and they fit any spooky theme from kid-friendly to adult-only gatherings.
- Actually Moist and Tender: Black cocoa can dry out baked goods if you’re not careful. This recipe uses buttermilk and oil to keep things soft for days.
- Simple Ingredients: You probably already have most of these in your pantry. The only special item is black cocoa powder, and you can find it online or at specialty baking stores.
- Cream Cheese Frosting That Balances: The tangy frosting is essential here. It cuts through the deep, almost smoky flavor of the cake and adds that classic red velvet (or, you know, black velvet) experience.
I’ve brought these to Halloween parties, work potlucks, and even a friend’s spooky-themed wedding shower. They disappear every single time. People take one look at the dark color and raise an eyebrow, but after one bite, they’re asking for the recipe. That’s the kind of reaction that makes all the testing worth it.
What Ingredients You Will Need
This recipe uses straightforward ingredients, but a few key players make all the difference. Here’s what you’ll need and why each one matters:
For the Cupcakes
- Black cocoa powder (1/2 cup): This is the star of the show. I recommend King Arthur Flour’s Black Cocoa or Rodelle’s Black Cocoa Powder. Regular Dutch-process cocoa won’t give you that dramatic color, but you can use it in a pinch if you add a bit of black food gel.
- All-purpose flour (1 1/2 cups): Standard AP flour works perfectly here. No need for cake flour—the buttermilk keeps things tender enough.
- Granulated sugar (1 cup): Regular white sugar adds sweetness and helps with browning (though you won’t see much browning with black cocoa).
- Light brown sugar (1/2 cup, packed): Adds moisture and a hint of molasses depth that complements the dark cocoa.
- Baking soda (1 teaspoon): This reacts with the buttermilk to help the cupcakes rise. Don’t skip it.
- Salt (1/2 teaspoon): Balances the sweetness and enhances the chocolate flavor.
- Buttermilk (1 cup, room temperature): The acidity tenderizes the gluten and activates the baking soda. If you don’t have buttermilk, add 1 tablespoon of lemon juice or vinegar to regular milk and let it sit for 5 minutes.
- Vegetable oil (1/2 cup): Oil keeps these cupcakes moist longer than butter would. I use a neutral oil like canola or avocado.
- Large eggs (2, room temperature): Room temperature eggs incorporate more evenly into the batter.
- Vanilla extract (2 teaspoons): Adds warmth and rounds out the cocoa flavor.
- Hot coffee or hot water (1/2 cup): This is my secret ingredient. Hot liquid helps bloom the cocoa powder, deepening the flavor. Coffee enhances the chocolate notes without making the cupcakes taste like coffee.
For the Cream Cheese Frosting
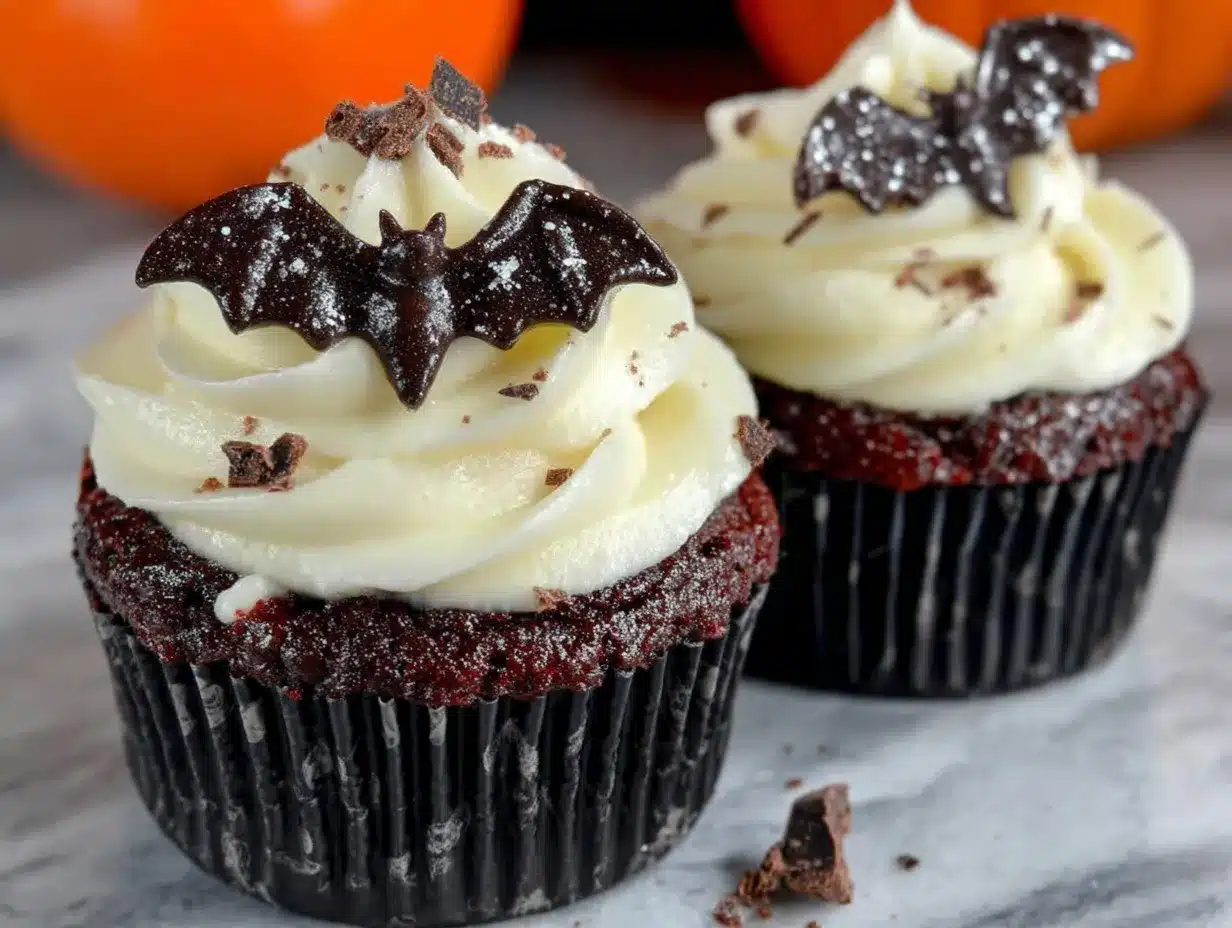
- Cream cheese (8 ounces, softened): Full-fat cream cheese gives the best texture and tang. Low-fat versions can make the frosting runny.
- Unsalted butter (1/2 cup, 1 stick, softened): Adds stability and richness to the frosting.
- Powdered sugar (3 to 4 cups): Sift this to avoid lumps. Start with 3 cups and add more if you want a stiffer frosting.
- Vanilla extract (1 teaspoon): Pure vanilla, not imitation, for the best flavor.
- Pinch of salt: Balances the sweetness.
I’ve tried making these cupcakes with different cocoa powders, and the black cocoa really is non-negotiable for that true black color. Regular dark cocoa gives you more of a dark brown, which is fine for everyday, but for Halloween? Go black or go home. If you can’t find black cocoa, you can mix regular Dutch-process cocoa with a bit of black food coloring gel, but the flavor won’t be quite the same.
Equipment Needed
You don’t need a professional bakery setup for these cupcakes, but a few tools make the process smoother:
- Standard 12-cup muffin tin: This recipe makes about 14-16 cupcakes, so have a second tin or bake in batches.
- Paper cupcake liners: I like using black or Halloween-themed liners for extra flair. White liners will show the dark cake color through them, which looks kind of cool actually.
- Electric hand mixer or stand mixer: You can whisk the frosting by hand, but your arm will thank you for using a mixer. I’ve done both, and the mixer gives a smoother result.
- Large mixing bowls: One for dry ingredients, one for wet ingredients.
- Whisk and rubber spatula: For mixing and scraping down the bowl.
- Cooling rack: Essential for letting cupcakes cool completely before frosting. Frosting warm cupcakes is a recipe for a melty mess.
- Piping bag with a star tip: Optional but recommended for that professional bakery look. A 1M or 2D tip works great. You can also just spread the frosting with a knife.
If you don’t have a piping bag, a zip-top bag with the corner snipped off works in a pinch. I’ve done that more times than I’d like to admit, and honestly, no one ever notices the difference after the first bite.
Preparation Method
Let’s get to the fun part. Here’s how to make these black velvet beauties from start to finish:
- Preheat your oven to 350°F (175°C). Line your muffin tins with paper liners. This recipe makes about 14-16 cupcakes, so prep two tins if you have them, or plan to bake in batches.
- In a medium bowl, whisk together the dry ingredients: 1 1/2 cups all-purpose flour, 1/2 cup black cocoa powder, 1 teaspoon baking soda, and 1/2 teaspoon salt. Make sure there are no lumps in the cocoa powder—black cocoa tends to clump. If you see clumps, sift the mixture through a fine-mesh strainer. Trust me, biting into a pocket of dry cocoa powder is not pleasant.
- In a large bowl, whisk together the wet ingredients: 1 cup room temperature buttermilk, 1/2 cup vegetable oil, 2 room temperature eggs, 2 teaspoons vanilla extract, 1 cup granulated sugar, and 1/2 cup packed light brown sugar. Whisk until smooth and the sugars have mostly dissolved, about 1 minute.
- Add the dry ingredients to the wet ingredients, stirring gently with a rubber spatula until just combined. Do not overmix! Overmixing develops gluten and makes tough cupcakes. A few streaks of flour are fine at this point.
- Pour in the 1/2 cup hot coffee or hot water and fold it in gently. The batter will be very thin and liquidy—that’s normal. Don’t panic. The hot liquid helps bloom the cocoa and creates a tender crumb. The batter should look like thin chocolate milk, but black. Stir until smooth, about 10-15 seconds.
- Fill each cupcake liner about 2/3 full. I use a 1/4 cup measuring cup or a cookie scoop for even portions. The batter is thin, so it will spread easily. Don’t overfill, or you’ll get muffin tops that spill over the liner.
- Bake for 16-20 minutes, or until a toothpick inserted into the center of a cupcake comes out clean or with a few moist crumbs. The tops should spring back when lightly touched. Because the batter is so dark, you can’t rely on color to tell doneness—use the toothpick test every time.
- Let the cupcakes cool in the pan for 5 minutes, then transfer them to a wire rack to cool completely. This is crucial. If you try to frost them while they’re still warm, the frosting will slide right off and turn into a puddle. I speak from experience.
- While the cupcakes cool, make the frosting. In a large bowl, beat the 8 ounces of softened cream cheese and 1/2 cup softened butter together until smooth and creamy, about 2 minutes. Scrape down the bowl halfway through.
- Add 1 teaspoon vanilla extract and a pinch of salt, then beat again to combine.
- Gradually add the powdered sugar, 1 cup at a time, beating on low speed until incorporated. Start with 3 cups. If the frosting seems too soft, add the 4th cup. Beat on medium-high for 2-3 minutes until light and fluffy. The frosting should be thick enough to hold its shape but still spreadable.
- Frost the completely cooled cupcakes. I like to use a piping bag fitted with a star tip for a classic swirl. Start from the outside edge and work your way inward, then pull up for a peak. If you’re spreading with a knife, an offset spatula gives the smoothest finish.
- Optional: Add decorations. I love topping these with black sprinkles, edible glitter, or a small candy spider for Halloween. Orange sprinkles or candy pumpkins also look great against the black frosting.
Cooking Tips & Techniques
I’ve made these cupcakes more times than I can count, and I’ve learned a few things the hard way. Here are my best tips:
Room temperature ingredients matter. I know, I know, everyone says this. But with black cocoa, it’s especially important. Cold buttermilk or eggs can cause the batter to seize up, and since the batter is already thin, you want everything to emulsify properly. Take your ingredients out of the fridge about 30 minutes before you start baking.
Don’t overmix the batter. Once you add the dry ingredients to the wet, mix just until you don’t see flour anymore. Then add the hot liquid and mix gently. Overmixing develops gluten, and you’ll end up with dense, tough cupcakes instead of light, tender ones. I learned this the hard way when I brought a batch to a party and someone asked if they were brownies. Not the compliment I was going for.
Use a cookie scoop for even portions. I’ve used a 1/4 cup measuring cup, a ladle, and even a soup spoon over the years. Nothing beats a cookie scoop for consistent sizing. It also keeps the batter from dripping everywhere as you move from the bowl to the tin.
Test with a toothpick, not your eyes. Because the batter is so dark, you can’t tell when the cupcakes are done by looking at them. The tops might look dry when the centers are still raw. Always use the toothpick test. Insert it into the center of a cupcake—if it comes out clean or with a few moist crumbs, they’re done. If it’s wet batter, give them another 2 minutes.
Let the frosting come to room temperature. If your cream cheese and butter are properly softened, the frosting will come together smoothly. Cold cream cheese creates lumps that are hard to beat out. If you do end up with lumps, let the frosting sit at room temperature for 10 minutes, then beat again.
Variations & Adaptations
One of the best things about this recipe is how adaptable it is. Here are some variations I’ve tried and loved:
Gluten-Free Version: Substitute the all-purpose flour with a 1:1 gluten-free baking flour blend. I’ve used King Arthur’s Measure for Measure with great results. Add 1/4 teaspoon of xanthan gum if your blend doesn’t already include it. The texture will be slightly more delicate, but the flavor is still spot-on.
Vegan Version: Replace the eggs with flax eggs (2 tablespoons ground flaxseed mixed with 6 tablespoons water, let sit for 5 minutes). Use a plant-based buttermilk (1 cup plant milk + 1 tablespoon lemon juice). Substitute the butter and cream cheese in the frosting with vegan alternatives. I’ve used Violife’s cream cheese and Miyoko’s butter with good results. The frosting will be a bit softer, so chill the cupcakes after frosting.
Spooky Drip Effect: Instead of piping the frosting, make a simple chocolate ganache with black cocoa and heavy cream. Drip it over the cupcakes for a creepy, blood-like effect. It’s dramatic and surprisingly easy. Just heat 1/2 cup heavy cream until simmering, pour it over 1/2 cup black cocoa and 1/2 cup chocolate chips, stir until smooth, and let it cool slightly before drizzling.
Mini Cupcakes: Use a mini muffin tin and bake for 10-12 minutes instead of 16-20. These are perfect for parties where people want to try multiple desserts. You’ll get about 36-40 mini cupcakes from this recipe.
Spice It Up: Add 1/2 teaspoon of cinnamon and a pinch of cayenne pepper to the dry ingredients for a subtle warmth that pairs beautifully with the dark cocoa. It’s not spicy—just a background note that makes people wonder what’s different.
I once made a batch with orange zest in the frosting for a Halloween party, and it was a huge hit. The citrus brightens up the dark, rich cake and adds a festive touch. If you try it, use the zest of one orange and mix it into the frosting at the end.
Serving & Storage Suggestions
These cupcakes are best served at room temperature, which allows the cake to be tender and the frosting to be creamy. If you’ve refrigerated them, take them out about 30 minutes before serving.
Presentation Ideas: Arrange the cupcakes on a black or dark gray cake stand for a dramatic look. Add some fake spiderwebs, plastic spiders, or candy eyeballs around the base for a Halloween vibe. I’ve also dusted them with edible black glitter for a more elegant, “midnight sky” aesthetic.
What to Serve With Them: These cupcakes pair beautifully with a creamy pumpkin chai spice latte for a cozy fall treat. For a spooky movie night, serve them alongside crispy baked buffalo cauliflower bites for a sweet and savory balance. If you’re hosting a Halloween party, consider adding a batch of gooey peanut butter stuffed brownie cookies to the dessert table for variety.
Storage Instructions: Store unfrosted cupcakes in an airtight container at room temperature for up to 3 days. Frosted cupcakes should be refrigerated in an airtight container for up to 5 days. The cream cheese frosting needs refrigeration, but the cake stays moist thanks to the oil.
Freezing Instructions: You can freeze unfrosted cupcakes for up to 3 months. Wrap each one tightly in plastic wrap, then place them in a freezer bag. Thaw at room temperature before frosting. Frosted cupcakes can also be frozen, but the frosting might lose some of its texture. I usually freeze them unfrosted and make fresh frosting when I’m ready to serve.
Reheating: If you want that just-baked warmth, microwave an unfrosted cupcake for 10-15 seconds. Don’t microwave frosted cupcakes—the frosting will melt and get greasy.
One thing I love about these cupcakes is that the flavor actually improves after a day. The black cocoa settles and deepens, and the cake becomes even more moist. So don’t be afraid to make them a day ahead.
Nutritional Information & Benefits
Let’s be real—these are cupcakes, not health food. But here’s the approximate nutritional breakdown for one cupcake with frosting (based on 16 servings):
- Calories: Approximately 320-350
- Fat: 18-20g
- Carbohydrates: 40-45g
- Protein: 4-5g
- Sugar: 30-35g
Potential Allergens: This recipe contains wheat (gluten), dairy, and eggs. For allergen-friendly versions, see the variations section above.
Health Benefits (Such as They Are): Black cocoa powder is rich in antioxidants called flavonoids, which can help reduce inflammation and support heart health. The cream cheese frosting provides a small amount of calcium and protein. And honestly? Sometimes the mental health benefit of eating a delicious homemade treat is worth more than any nutrient count. Baking can be therapeutic, and sharing these cupcakes with friends and family brings a different kind of nourishment.
If you’re looking for a healthier option, you could reduce the sugar in the frosting by using less powdered sugar, or try a Greek yogurt-based frosting for more protein. But honestly, Halloween comes once a year. I say go all out.
Conclusion
These Perfect Black Velvet Halloween Cupcakes with Cream Cheese Frosting have become my go-to for every spooky celebration, and I think they’ll become yours too. They look incredible on a dessert table, taste like a dream, and come together with ingredients that are mostly pantry staples. The black cocoa gives them that dramatic color without artificial dyes, and the cream cheese frosting adds just the right amount of tangy sweetness.
What I love most about this recipe is how versatile it is. You can dress them up with fancy piping and edible glitter, or keep them simple with a swirl of frosting and a sprinkle of black sugar. They work for kid-friendly Halloween parties, adult gatherings, or just a fun weekend baking project. And honestly, they’re so good that I’ve made them in October and in April, just because I was craving that dark, rich chocolate flavor.
I’d love to hear how yours turn out. Did you add any fun decorations? Try a different frosting? Make them gluten-free? Drop a comment below and let me know—I read every single one, and I love seeing your creations. If you share them on social media, tag me so I can see your spooky masterpieces.
Happy Halloween, and happy baking. May your cupcakes be dark, your frosting be tangy, and your kitchen be full of laughter.
Frequently Asked Questions
Can I use regular cocoa powder instead of black cocoa?
You can, but the color won’t be black—it will be a dark brown. If you want that dramatic black color, you’ll need to add black food coloring gel. Start with 1/2 teaspoon and add more until you reach your desired shade. The flavor will also be different; black cocoa has a milder, more Oreo-like taste, while regular cocoa is more intensely chocolatey.
Why is my batter so thin?
Don’t worry, that’s normal! The hot coffee or water thins out the batter significantly. It should be about the consistency of thin pancake batter or even a little runnier. This thin batter creates a tender, moist crumb. If your batter seems thicker than usual, you might have overmixed it or used too much flour.
Can I make these cupcakes ahead of time?
Absolutely. You can bake the cupcakes up to 3 days in advance and store them unfrosted in an airtight container at room temperature. You can also freeze them for up to 3 months. Make the frosting fresh on the day you plan to serve them for the best texture and flavor. If you make the frosting ahead, it will need to be re-whipped before using.
My cream cheese frosting turned out runny. What went wrong?
This usually happens for one of three reasons: your cream cheese or butter was too soft (almost melted), you added too much liquid (like extra vanilla), or you didn’t beat it long enough. To fix runny frosting, add more powdered sugar, 1/4 cup at a time, until it thickens up. You can also chill the frosting for 15-20 minutes to help it firm up before piping.
Can I make this recipe as a cake instead of cupcakes?
Yes! Pour the batter into two greased and floured 8-inch round cake pans. Bake at 350°F for 25-30 minutes, or until a toothpick comes out clean. You’ll need to double the cream cheese frosting recipe to have enough for a layer cake. The cake layers will be very dark, so use the toothpick test—don’t rely on visual cues for doneness.
Pin This Recipe!
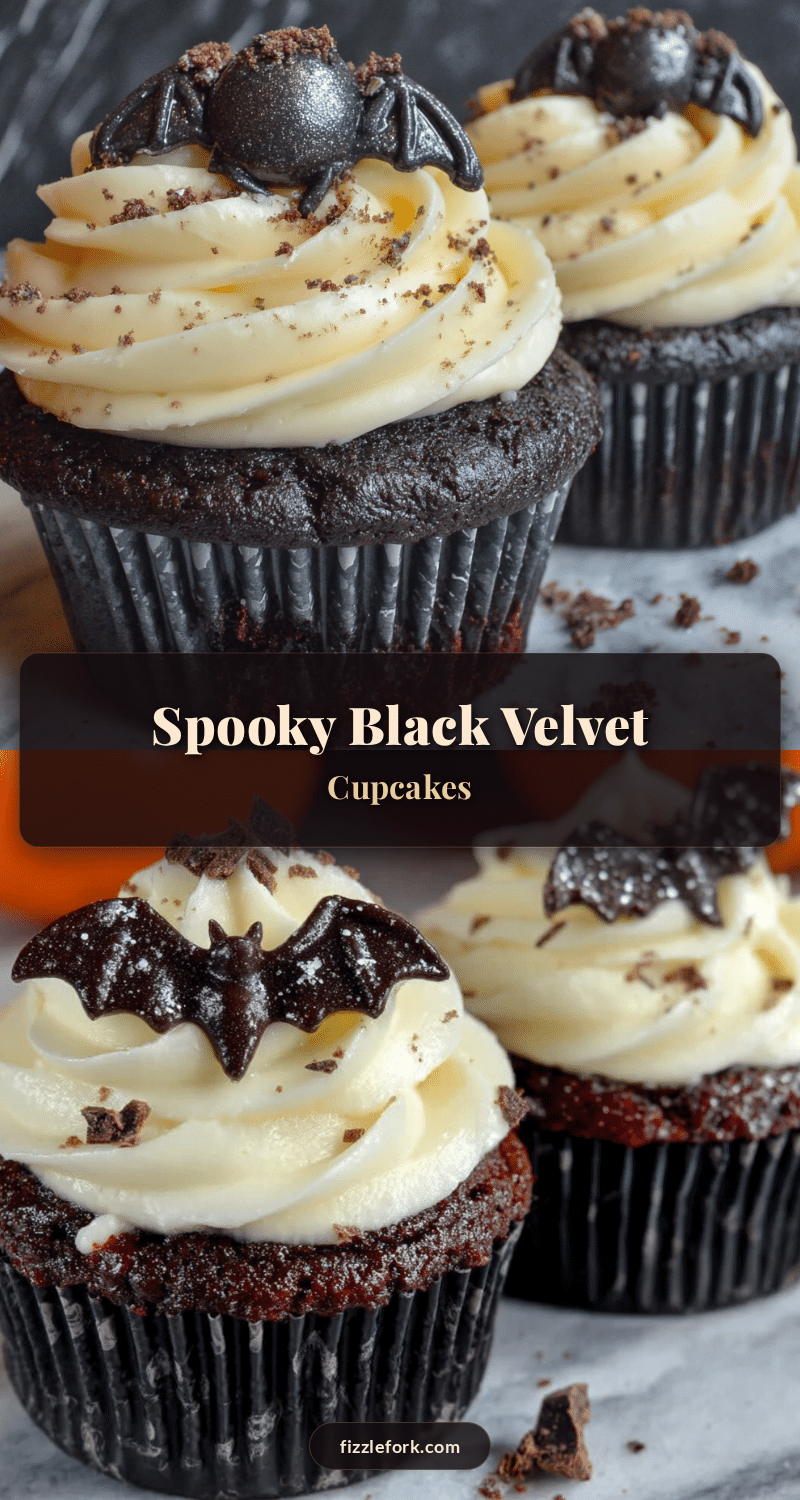
Perfect Black Velvet Halloween Cupcakes with Easy Cream Cheese Frosting
These dark, tender black velvet cupcakes get their dramatic color from black cocoa powder, not artificial dye. Topped with a tangy cream cheese frosting, they’re the perfect spooky treat for Halloween parties.
- Prep Time: 20 minutes
- Cook Time: 18 minutes
- Total Time: 38 minutes
- Yield: 16 servings 1x
- Category: Dessert
- Cuisine: American
Ingredients
- 1/2 cup black cocoa powder
- 1 1/2 cups all-purpose flour
- 1 cup granulated sugar
- 1/2 cup light brown sugar, packed
- 1 teaspoon baking soda
- 1/2 teaspoon salt
- 1 cup buttermilk, room temperature
- 1/2 cup vegetable oil
- 2 large eggs, room temperature
- 2 teaspoons vanilla extract
- 1/2 cup hot coffee or hot water
- 8 ounces cream cheese, softened
- 1/2 cup unsalted butter, softened
- 3 to 4 cups powdered sugar
- 1 teaspoon vanilla extract
- Pinch of salt
Instructions
- Preheat oven to 350°F (175°C). Line muffin tins with paper liners.
- In a medium bowl, whisk together flour, black cocoa powder, baking soda, and salt. Sift if cocoa is clumpy.
- In a large bowl, whisk together buttermilk, vegetable oil, eggs, vanilla extract, granulated sugar, and brown sugar until smooth.
- Add dry ingredients to wet ingredients and stir gently with a rubber spatula until just combined. Do not overmix.
- Pour in hot coffee or hot water and fold gently until smooth. Batter will be thin.
- Fill each cupcake liner about 2/3 full.
- Bake for 16-20 minutes, until a toothpick inserted into the center comes out clean or with a few moist crumbs.
- Cool in pan for 5 minutes, then transfer to a wire rack to cool completely.
- For frosting: Beat cream cheese and butter together until smooth and creamy, about 2 minutes.
- Add vanilla extract and salt, beat to combine.
- Gradually add powdered sugar, 1 cup at a time, beating on low speed. Start with 3 cups; add 4th if needed. Beat on medium-high for 2-3 minutes until light and fluffy.
- Frost completely cooled cupcakes using a piping bag or offset spatula. Decorate as desired.
Notes
Room temperature ingredients are crucial for proper emulsification. Do not overmix the batter. Use the toothpick test to check doneness since the batter is dark. Frosting can be refrigerated for up to 5 days; bring to room temperature before serving. Unfrosted cupcakes can be frozen for up to 3 months.
Nutrition
- Serving Size: 1 cupcake
- Calories: 335
- Sugar: 33
- Sodium: 220
- Fat: 19
- Saturated Fat: 8
- Carbohydrates: 43
- Fiber: 2
- Protein: 5
Keywords: black velvet cupcakes, Halloween cupcakes, black cocoa cupcakes, cream cheese frosting, no artificial dye, spooky dessert


