Tuesday night, 8:47 PM. My phone buzzed with a text from my sister-in-law: “Please tell me you have extra.” She had stopped by earlier to grab a tupperware container I’d left on the porch for her, and I’d tossed in a teriyaki chicken bowl on a whim. She ate it cold, standing over her kitchen sink, and texted me anyway. That was the moment I knew this recipe was a keeper.
Honestly, I wasn’t trying to invent anything special. I was just tired of sad, dry meal prep chicken by Wednesday afternoon. You know the kind—the stuff that tastes like regret and needs a gallon of hot sauce to be edible. I wanted something that actually got better as the week went on, something that made opening the fridge at work feel like a small victory instead of a chore.
So I started messing around with a homemade teriyaki sauce that wouldn’t turn the rice into a soggy mess by day three. I tested ratios of soy sauce to mirin, played with garlic and ginger amounts, and figured out exactly how to cook the chicken so it stayed juicy after reheating. The first batch was decent. The second was good. By the fifth attempt, I had something I genuinely looked forward to eating—and apparently, so did everyone who tried it.
These easy teriyaki chicken and rice bowls for meal prep aren’t fancy. They’re just reliable. And honestly, that’s way better than fancy when you’re staring down a busy week.
Why You’ll Love This Recipe
I’ve tested this recipe more times than I care to admit. My friends have taste-tested it. My husband has eaten it for lunch four days in a row without complaint. That’s the kind of approval that matters.
- Quick & Easy: From start to finish, these bowls come together in about 35 minutes. That’s fast enough for a Sunday afternoon prep session or even a weeknight dinner with leftovers built in.
- Simple Ingredients: You probably already have soy sauce, honey, garlic, and rice in your pantry. No trips to specialty stores, no hunting down obscure Asian ingredients.
- Perfect for Busy Weeks: These bowls are designed to be made ahead and enjoyed throughout the week. They’re great for work lunches, post-workout dinners, or nights when cooking feels impossible.
- Crowd-Pleaser: My picky nephew ate an entire bowl. My mom asked for the recipe. Even people who claim they don’t like “meal prep food” end up asking for seconds.
- Unbelievably Delicious: The sauce is the real star here. It’s sticky, savory, slightly sweet, and coats every grain of rice and piece of chicken perfectly. It’s the kind of meal that makes you close your eyes after the first bite.
What makes these bowls different from the rest is the sauce-to-rice ratio and the way I cook the chicken. Most teriyaki recipes turn the chicken into tough, dry strips by day two. But I’ve figured out a method—using thigh meat and a specific cooking technique—that keeps everything tender and juicy even after reheating. It’s not just another version of teriyaki chicken. It’s the version you’ll actually want to eat all week.
What Ingredients You Will Need
This recipe uses simple, everyday ingredients to create something that tastes way more complex than it actually is. The magic is all in the balance of flavors and the cooking technique.
For the Teriyaki Sauce
- Soy sauce – ½ cup (120ml). Use low-sodium if you prefer less salt. I like Kikkoman for its consistent flavor.
- Honey – ¼ cup (85g). Adds sweetness and helps create that glossy, sticky texture. Maple syrup works in a pinch.
- Mirin – 2 tablespoons (30ml). This Japanese sweet rice wine adds depth and a subtle sweetness. You can substitute with 1 tablespoon rice vinegar + 1 teaspoon sugar if needed.
- Rice vinegar – 1 tablespoon (15ml). Adds a gentle acidity that balances the sweetness.
- Fresh garlic – 4 cloves, minced. Don’t use the jarred stuff here—fresh garlic makes a noticeable difference.
- Fresh ginger – 1 tablespoon, grated. Again, fresh is key. The jarred ginger paste works in a pinch but fresh gives you that bright, zingy flavor.
- Cornstarch – 1 tablespoon (8g). Mixed with 2 tablespoons (30ml) cold water to make a slurry. This thickens the sauce to that perfect clingy consistency.
- Sesame oil – 1 teaspoon (5ml). Adds a nutty aroma that ties everything together.
For the Chicken
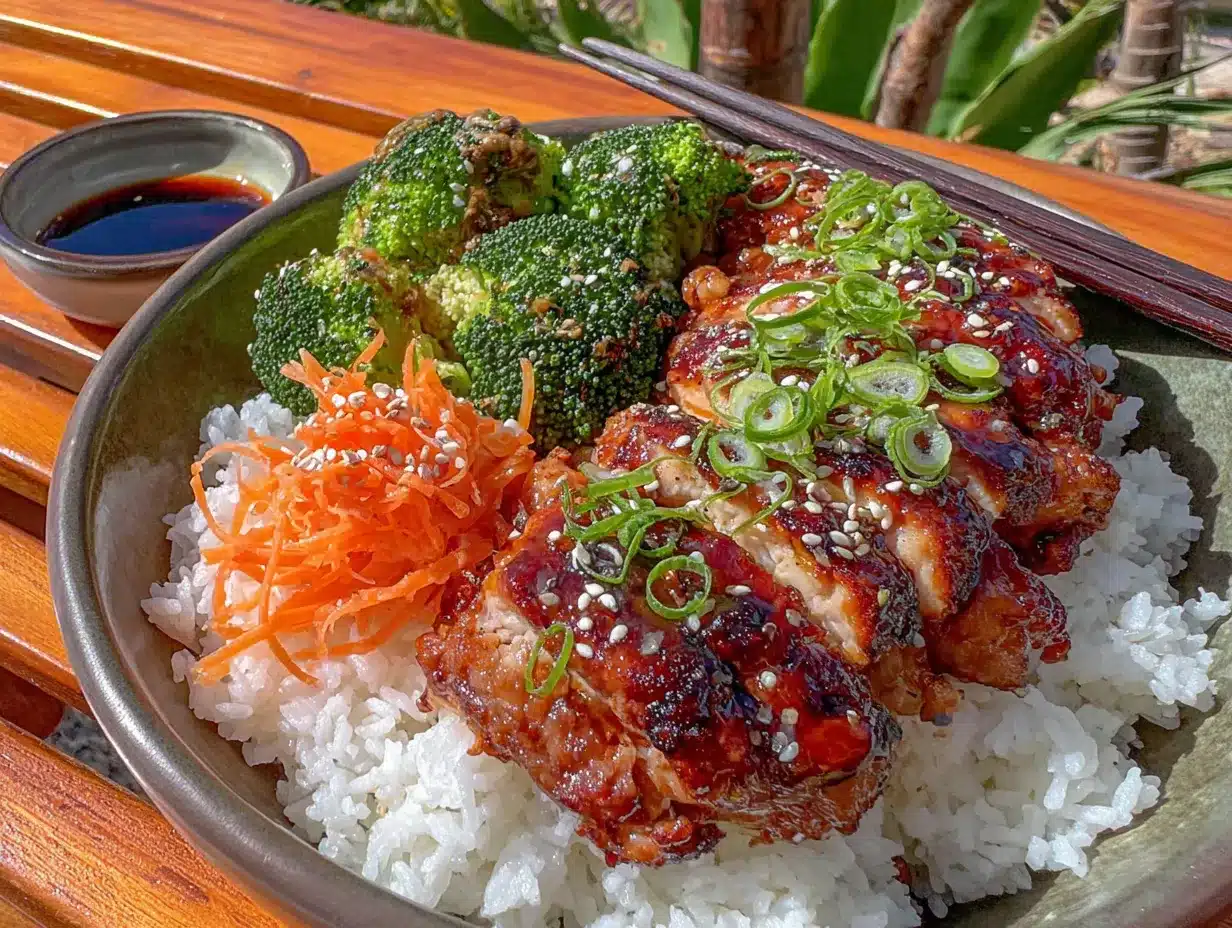
- Boneless, skinless chicken thighs – 1.5 lbs (680g). Thighs are non-negotiable here. They stay juicy and tender, unlike chicken breast which dries out quickly. Trust me on this one.
- Neutral oil – 1 tablespoon (15ml). Avocado or grapeseed oil works well. Avoid olive oil—its flavor is too strong.
- Salt and white pepper – A pinch each. White pepper is milder and doesn’t leave dark specks, but black pepper works fine too.
For the Bowls
- Cooked jasmine rice – 4 cups (about 600g cooked). Sushi rice or short-grain rice also work great. Avoid brown rice—it gets too chewy after a few days.
- Broccoli florets – 2 cups (about 200g). Fresh or frozen, both work. If using frozen, don’t thaw them first.
- Carrots – 2 medium, julienned or sliced into thin ribbons.
- Edamame – 1 cup (150g), shelled. Adds protein and a pop of color.
- Sesame seeds – 1 tablespoon, for garnish.
- Green onions – 3, sliced, for garnish.
Equipment Needed
The beauty of this recipe is that you don’t need any fancy equipment. Here’s what you’ll need:
- Large skillet or wok – A 12-inch non-stick skillet works best. Cast iron is great too, but you’ll need to be careful with the sticky sauce.
- Small saucepan – For making the teriyaki sauce. Any small pot works.
- Sharp knife and cutting board – A good chef’s knife makes slicing chicken and vegetables much easier.
- Measuring cups and spoons – For accurate measurements.
- Microplane or grater – For grating ginger and garlic. A regular grater works, but a microplane gives you that fine, almost paste-like texture.
- Mixing bowls – A couple of small bowls for prepping ingredients.
- Meal prep containers – 4 to 6 airtight containers. Glass ones are best because they don’t absorb odors and reheat well.
- Rice cooker (optional but helpful) – Makes perfect rice every time with zero effort.
If you don’t have a wok, don’t worry. I’ve made this in a regular non-stick skillet more times than I can count. The key is having enough surface area to cook the chicken without overcrowding it. If your pan is too small, cook the chicken in batches.
Preparation Method
Let me walk you through this step by step. I’ve made this recipe dozens of times, and I’ve learned a few tricks along the way that make everything come together smoothly.
- Make the teriyaki sauce first – In a small saucepan, combine ½ cup soy sauce, ¼ cup honey, 2 tablespoons mirin, and 1 tablespoon rice vinegar. Whisk everything together over medium heat. Let it come to a gentle simmer—you’ll see small bubbles forming around the edges. In a small bowl, mix 1 tablespoon cornstarch with 2 tablespoons cold water until smooth. Slowly pour the cornstarch slurry into the simmering sauce while whisking constantly. The sauce will thicken almost immediately, going from watery to glossy in about 30 seconds. Remove from heat and stir in 1 teaspoon sesame oil. Set aside. The sauce will continue to thicken as it cools.
- Prep your chicken – Pat the chicken thighs dry with paper towels. This is important—dry chicken browns better. Trim off any excess fat, but leave a little bit for flavor. Cut the thighs into bite-sized pieces, about 1-inch chunks. Season lightly with salt and white pepper. Don’t overseason because the teriyaki sauce has plenty of salt.
- Cook the chicken – Heat 1 tablespoon neutral oil in your large skillet over medium-high heat. You want the oil shimmering but not smoking. Add the chicken pieces in a single layer—don’t overcrowd the pan. If your pan is small, cook in two batches. Let the chicken cook undisturbed for 3-4 minutes until the bottom is golden brown and crispy. Flip each piece and cook another 2-3 minutes. The chicken should be cooked through and have nice caramelized edges. Pour about ⅓ cup of the teriyaki sauce over the chicken and toss to coat. Let it cook for another minute until the sauce is sticky and clinging to each piece. Transfer the chicken to a clean bowl.
- Blanch the broccoli – While the chicken is cooking, bring a small pot of water to a boil. Add the broccoli florets and cook for exactly 2 minutes. You want them bright green and still crisp-tender. Immediately drain and run under cold water to stop the cooking. This keeps them from turning into sad, mushy broccoli by day three.
- Assemble the bowls – Divide the cooked rice evenly among your meal prep containers. I usually get about 4-6 bowls depending on portion size. Top each with the teriyaki chicken, blanched broccoli, julienned carrots, and edamame. Drizzle the remaining teriyaki sauce over everything—don’t be shy with it. The sauce is what keeps the rice from drying out.
- Garnish and store – Sprinkle sesame seeds and sliced green onions over each bowl. Let the bowls cool completely before putting the lids on. This prevents condensation from making everything soggy. I usually let them sit on the counter for about 20-30 minutes before refrigerating.
A few things I’ve learned the hard way: Don’t skip the blanching step for the broccoli. I tried just throwing raw broccoli in once and it was tough and weird after reheating. Also, let the chicken rest for a few minutes after cooking before assembling the bowls. This helps the juices redistribute so the meat stays tender.
Cooking Tips & Techniques
I’ve made every mistake you can imagine with this recipe. Here’s what I’ve learned so you don’t have to repeat my errors.
Don’t overcook the chicken. Chicken thighs are forgiving, but they can still get tough if you cook them too long. Cook them just until they’re done—about 5-7 minutes total. The internal temperature should reach 165°F (74°C). If you’re not using a thermometer, cut into a piece to check. It should be white all the way through with no pink.
Make extra sauce. I always double the sauce recipe. The extra keeps in the fridge for up to two weeks, and you can use it for stir-fries, drizzle over roasted vegetables, or mix into rice for an instant flavor boost. It’s honestly one of those things that makes weeknight cooking so much easier.
Toast your sesame seeds. This is a tiny step that makes a huge difference. Throw the sesame seeds in a dry pan over medium heat for about 2 minutes, shaking frequently, until they’re fragrant and lightly golden. Toasted sesame seeds have a nutty, rich flavor that raw seeds just don’t have.
Let the sauce cool slightly before adding to the chicken. If you add piping hot sauce to hot chicken, it can get a little too sticky and clumpy. Let the sauce cool for 2-3 minutes after cooking, then toss with the chicken.
Use day-old rice if possible. Freshly cooked rice can be a bit too moist and sticky for meal prep bowls. If you have time, cook the rice the day before and let it cool completely in the fridge. Day-old rice holds up better and doesn’t get mushy when you add the sauce.
One of my biggest failures was the time I tried to rush the sauce. I added the cornstarch slurry too quickly and ended up with lumpy, gloopy sauce that looked like something from a science experiment. The trick is to pour slowly while whisking constantly. Patience pays off here.
Variations & Adaptations
This recipe is super flexible. Here are some ways I’ve adapted it depending on what I have in the fridge or who I’m feeding.
Spicy Teriyaki Bowls
Add 1-2 teaspoons of sriracha or chili garlic sauce to the teriyaki sauce. I like adding it at the end so the heat stays bright and punchy. You can also sprinkle red pepper flakes over the finished bowls for extra kick.
Vegetarian Version
Swap the chicken for extra-firm tofu or tempeh. Press the tofu for at least 30 minutes to remove excess water, then cube and pan-fry until golden before adding the sauce. The same teriyaki sauce works beautifully with tofu—it soaks up all that flavor. I’ve also used this sauce on roasted chickpeas for a quick, protein-packed option.
Low-Carb Bowls
Replace the rice with cauliflower rice or a bed of mixed greens. The teriyaki chicken and vegetables are so flavorful that you honestly won’t miss the rice. I’ve made this for friends on keto diets and they loved it.
Different Vegetables
Use whatever vegetables you have on hand. Snap peas, bell peppers, zucchini, and bok choy all work great. In the summer, I love adding fresh corn kernels. In the fall, roasted butternut squash cubes are amazing. The key is to cut everything to a similar size so they cook evenly.
I once made a version with pineapple chunks added to the chicken during the last minute of cooking. The pineapple caramelized slightly and added this sweet-tart pop that was honestly incredible. It felt like a tropical vacation in a meal prep container.
Serving & Storage Suggestions
These bowls are designed to be eaten all week, but there are a few tricks to keep them tasting fresh.
Serving temperature: These bowls are delicious both warm and cold. I actually prefer them at room temperature straight from the fridge on busy days. If you want to heat them up, microwave for 2-3 minutes, stirring halfway through. The rice might be a little steamy, but the chicken stays tender.
Storage: Keep the bowls in airtight containers in the refrigerator for up to 5 days. I don’t recommend freezing these because the rice gets mushy when thawed. If you want to freeze, freeze just the chicken and sauce separately, then make fresh rice when you’re ready to eat.
Reheating tips: Add a splash of water or extra teriyaki sauce before microwaving to help rehydrate the rice. Cover the bowl with a damp paper towel to create steam. For the best texture, reheat in a skillet over medium heat with a tablespoon of water—the chicken gets slightly crispy edges again.
Flavor development: Here’s a secret—these bowls actually taste better on day two or three. The flavors meld together and the sauce soaks into the rice and chicken. By day three, every bite is perfectly seasoned. It’s one of those rare meal prep recipes that improves with time.
For a complete meal, I sometimes add a side of pickled ginger or a simple cucumber salad. The acidity cuts through the richness of the teriyaki sauce and adds a refreshing crunch. If you’re looking for other easy meal prep ideas, these Mediterranean chicken meal prep bowls are another favorite in my rotation.
Nutritional Information & Benefits
These bowls are balanced and satisfying without being heavy. Here’s the estimated nutrition per serving (based on 4 servings):
- Calories: 520-580
- Protein: 38-42g
- Carbohydrates: 55-60g
- Fat: 14-18g
- Fiber: 6-8g
- Sugar: 18-22g (mostly from honey and natural sugars)
Health benefits: Chicken thighs provide high-quality protein and essential B vitamins. Broccoli is packed with vitamin C, fiber, and antioxidants. Edamame adds plant-based protein and fiber. Ginger and garlic have anti-inflammatory properties. The honey provides natural sweetness without refined sugar.
Dietary considerations: This recipe is dairy-free and nut-free. To make it gluten-free, use tamari or coconut aminos instead of soy sauce. For a lower-sodium version, use low-sodium soy sauce and reduce the added salt.
Potential allergens: Soy (from soy sauce), sesame (from sesame oil and seeds). Check your edamame packaging—some brands process soy in facilities that also handle other allergens.
I love that these bowls feel indulgent but are actually pretty balanced. You get protein, vegetables, and carbs all in one container. It’s the kind of meal that keeps you full and energized without that heavy, sluggish feeling.
Conclusion
These easy teriyaki chicken and rice bowls are the kind of recipe that makes meal prep feel like a treat instead of a chore. They’re quick to put together, use simple ingredients, and actually taste better as the week goes on. That’s rare in the meal prep world, honestly.
What I love most about this recipe is how adaptable it is. You can swap in whatever vegetables you have, adjust the spice level, or make it vegetarian with tofu. It’s forgiving and flexible, which is exactly what you want in a recipe you’re going to eat multiple times a week.
If you make these bowls, I’d love to hear how they turn out. Leave a comment below and let me know what variations you tried. Did you add pineapple? Swap the broccoli for snap peas? Make it spicy? I’m always looking for new ideas. And if you’re looking for another easy dinner idea, try these slow cooker honey garlic chicken thighs for a set-it-and-forget-it option.
Thanks for stopping by. Happy cooking, and here’s to a week of delicious lunches that don’t taste like leftovers.
Frequently Asked Questions
Can I use chicken breast instead of thighs?
You can, but I don’t recommend it. Chicken breast tends to dry out after a few days in the fridge, especially when reheated. Thighs stay juicy and tender because they have more fat. If you must use breast, cook it just until done and don’t overcook it.
How long does the teriyaki sauce last in the fridge?
The homemade teriyaki sauce keeps in an airtight container in the refrigerator for up to 2 weeks. I like to make a double batch and keep it on hand for quick stir-fries or drizzling over roasted vegetables. Just give it a good stir before using because it thickens as it sits.
Can I freeze these bowls?
I don’t recommend freezing the assembled bowls because the rice gets mushy when thawed. However, you can freeze the cooked chicken and sauce separately for up to 3 months. Thaw overnight in the fridge, then make fresh rice and vegetables when you’re ready to eat.
What’s the best rice to use for meal prep?
Jasmine rice or sushi rice are my top choices. They hold up well in the fridge and don’t get too hard or dry. Avoid brown rice—it tends to get chewy and tough after a couple of days. If you want a healthier option, try cauliflower rice, but add it fresh when you’re ready to eat.
How do I keep the broccoli from getting soggy?
The key is blanching the broccoli for just 2 minutes, then immediately shocking it in cold water. This stops the cooking process and keeps the broccoli bright green and crisp-tender. Also, make sure the bowls are completely cool before putting the lids on to prevent condensation.
Pin This Recipe!
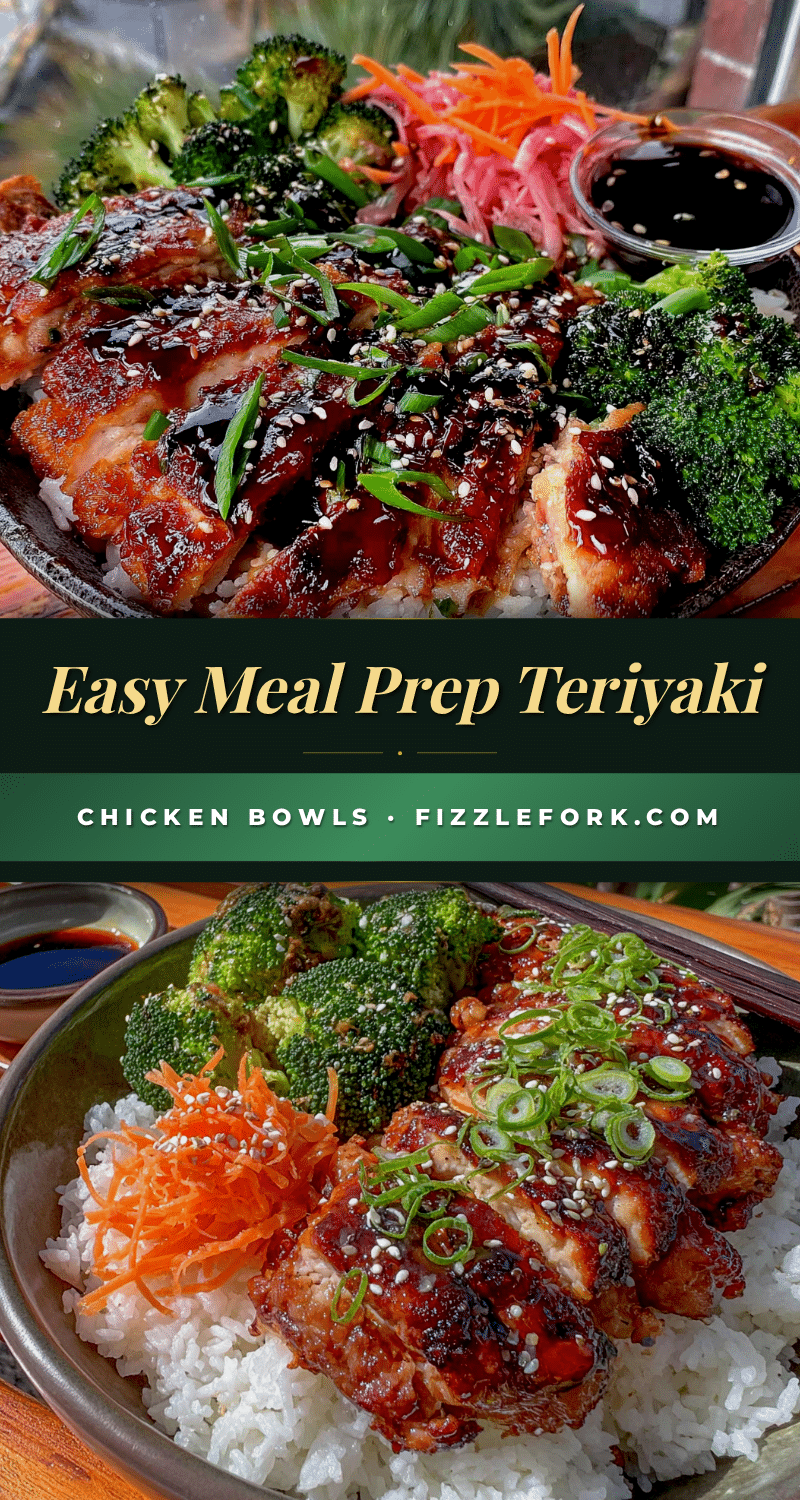
Easy Teriyaki Chicken and Rice Bowls: Best Meal Prep
These easy teriyaki chicken and rice bowls are perfect for meal prep, featuring juicy chicken thighs, a homemade sticky-sweet teriyaki sauce, and crisp vegetables. They come together in about 35 minutes and taste even better as the week goes on.
- Prep Time: 15 minutes
- Cook Time: 20 minutes
- Total Time: 35 minutes
- Yield: 4-6 servings 1x
- Category: Main Course
- Cuisine: Japanese
Ingredients
- ½ cup (120ml) soy sauce (low-sodium if preferred)
- ¼ cup (85g) honey
- 2 tablespoons (30ml) mirin
- 1 tablespoon (15ml) rice vinegar
- 4 cloves fresh garlic, minced
- 1 tablespoon fresh ginger, grated
- 1 tablespoon (8g) cornstarch
- 2 tablespoons (30ml) cold water
- 1 teaspoon (5ml) sesame oil
- 1.5 lbs (680g) boneless, skinless chicken thighs
- 1 tablespoon (15ml) neutral oil (avocado or grapeseed)
- Salt and white pepper to taste
- 4 cups (about 600g) cooked jasmine rice
- 2 cups (about 200g) broccoli florets
- 2 medium carrots, julienned or sliced into thin ribbons
- 1 cup (150g) shelled edamame
- 1 tablespoon sesame seeds, for garnish
- 3 green onions, sliced, for garnish
Instructions
- Make the teriyaki sauce: In a small saucepan, combine ½ cup soy sauce, ¼ cup honey, 2 tablespoons mirin, and 1 tablespoon rice vinegar. Whisk over medium heat until simmering. In a small bowl, mix 1 tablespoon cornstarch with 2 tablespoons cold water until smooth. Slowly pour the slurry into the simmering sauce while whisking constantly. Cook until thickened, about 30 seconds. Remove from heat and stir in 1 teaspoon sesame oil. Set aside.
- Prep the chicken: Pat chicken thighs dry with paper towels. Trim excess fat and cut into bite-sized pieces (about 1-inch chunks). Season lightly with salt and white pepper.
- Cook the chicken: Heat 1 tablespoon neutral oil in a large skillet over medium-high heat. Add chicken in a single layer (cook in batches if needed). Cook undisturbed for 3-4 minutes until golden brown. Flip and cook another 2-3 minutes until cooked through. Pour about ⅓ cup of teriyaki sauce over the chicken and toss to coat. Cook for 1 minute until sticky. Transfer to a bowl.
- Blanch the broccoli: Bring a small pot of water to a boil. Add broccoli florets and cook for exactly 2 minutes. Drain and run under cold water to stop cooking.
- Assemble the bowls: Divide cooked rice among 4-6 meal prep containers. Top each with teriyaki chicken, blanched broccoli, julienned carrots, and edamame. Drizzle remaining teriyaki sauce over everything.
- Garnish and store: Sprinkle sesame seeds and sliced green onions over each bowl. Let bowls cool completely (about 20-30 minutes) before sealing and refrigerating.
Notes
For best results, use chicken thighs instead of breast to keep the meat juicy. Make extra sauce to keep on hand for up to 2 weeks. Toast sesame seeds in a dry pan for 2 minutes for enhanced flavor. Use day-old rice to prevent mushiness. Bowls taste even better on day 2 or 3 as flavors meld.
Nutrition
- Serving Size: 1 bowl
- Calories: 520580
- Sugar: 1822
- Sodium: 8001000
- Fat: 1418
- Saturated Fat: 35
- Carbohydrates: 5560
- Fiber: 68
- Protein: 3842
Keywords: teriyaki chicken, meal prep, chicken bowls, easy dinner, healthy lunch, teriyaki sauce, rice bowls


