My husband ate four of these ham and cheese pinwheels standing at the kitchen counter before I could even get them on a plate for lunch. I remember just leaning against the counter watching him, not saying anything, because honestly, what was there to say? He was in his zone, and these little spirals of dough, ham, and melty cheese had clearly hit a nerve. He finally looked up, mouth half full, and just pointed at the baking sheet with this look like, more of these, please. And that was it. That moment, right there, is exactly why these easy ham and cheese pinwheels became a permanent fixture in my freezer rotation.
I’d been messing around with different fillings for days, trying to nail something that felt satisfying but not fussy. You know those recipes that sound good on paper but then you make them and it’s just… fine? I wanted the opposite of fine. I wanted the kind of snack you grab from the freezer, bake off without thinking, and suddenly your whole afternoon feels a little better. These pinwheels are that. They are buttery, flaky, packed with salty ham and gooey cheese, and they come together so fast it almost feels like cheating. I mean, we are talking about a recipe that uses just a handful of ingredients and maybe fifteen minutes of active work. The freezer does the rest of the heavy lifting.
There is something deeply satisfying about having a bag of these ready to go. Late nights, surprise guests, hungry kids after school, or just a Tuesday when you need a little comfort food without the effort. These pinwheels deliver every single time. And honestly, that first bite—warm, cheesy, with that little bit of golden-brown crust on the outside—it just works. It’s the kind of recipe that feels like a secret weapon in your kitchen, and I am so glad I finally got it right.
Why You’ll Love This Recipe
Let’s be real for a second. There are a million recipes out there for ham and cheese rolls. But these? These are different. I have tested this specific method more times than I care to admit, tweaking everything from the dough temperature to the cheese-to-ham ratio until it was just right. Here is why these easy ham and cheese pinwheels earn a permanent spot in your kitchen:
- Quick & Easy: From start to oven, these take about 15 minutes of hands-on time. Seriously. You don’t need any special skills or fancy equipment. If you can roll out dough and sprinkle cheese, you’ve got this.
- Simple Ingredients: Nothing weird here. Just refrigerated crescent dough, deli ham, shredded cheese, and a few pantry staples. No hunting down obscure ingredients at three different stores.
- Perfect for Busy Days: Whether it’s a chaotic weekday lunch, a last-minute party appetizer, or a snack attack after school, these pinwheels are your answer. They bake in under 15 minutes straight from frozen.
- Crowd-Pleaser: I have yet to meet someone who doesn’t love these. Kids devour them. Adults hover around the baking sheet. They disappear faster than almost anything else I make.
- Freezer-Friendly: This is the real game-changer. Make a big batch, freeze them unbaked, and bake off exactly what you need whenever you need them. No waste, no fuss, no last-minute stress.
What makes this version different from all the others? It’s the technique. I learned the hard way that if you don’t chill the rolled log before slicing, you end up with a squished, messy situation. And the cheese blend? I use a mix of sharp cheddar and mozzarella. The cheddar brings the flavor punch, and the mozzarella gives you that perfect, stretchy pull. It is not just another recipe—it is the one I turn to again and again because it actually works every single time.
These pinwheels are the kind of food that makes you close your eyes after the first bite. They are comfort food at its most practical—fast, freezer-friendly, and absolutely delicious. Perfect for impressing a crowd without breaking a sweat, or just making a regular day feel a little more special.
What Ingredients You Will Need
This recipe uses simple, everyday ingredients to create something genuinely special. No complicated shopping lists, no gourmet items—just honest food that works beautifully together. Here is everything you need:
For the Pinwheels
- 2 cans (8 oz each) refrigerated crescent roll dough – I prefer Pillsbury original, but any brand works. The key is to keep it cold until you’re ready to use it. Warm dough is sticky and hard to work with.
- 8 oz thinly sliced deli ham – Go for good quality ham here. I like honey ham or black forest ham for the flavor. Avoid super thick slices—they make the pinwheels bulky and harder to roll.
- 1 ½ cups shredded sharp cheddar cheese – Shred it yourself if you have the time. Pre-shredded cheese has anti-caking agents that prevent it from melting as smoothly. But honestly, in a pinch, the bagged stuff works fine.
- 1 ½ cups shredded mozzarella cheese – This gives you that beautiful stretch when you pull the pinwheels apart. Low-moisture mozzarella is best—it melts without making everything watery.
- ¼ cup melted unsalted butter – For brushing on top. It adds richness and helps the tops get golden and gorgeous. Salted butter works too, just skip the extra salt.
- 1 teaspoon garlic powder – A little goes a long way. It adds savory depth without being overpowering.
- 1 teaspoon onion powder – Complements the ham and cheese beautifully. Don’t skip it—it makes a difference.
- ½ teaspoon black pepper – Freshly ground is best, but pre-ground works.
- Optional: 1 tablespoon Dijon mustard – Spread a thin layer on the dough before adding ham for a subtle tangy kick. I do this about half the time, depending on my mood.
- Optional: 2 tablespoons chopped fresh chives or parsley – For garnish after baking. Makes them look pretty and adds a fresh note.
Ingredient Selection Tips
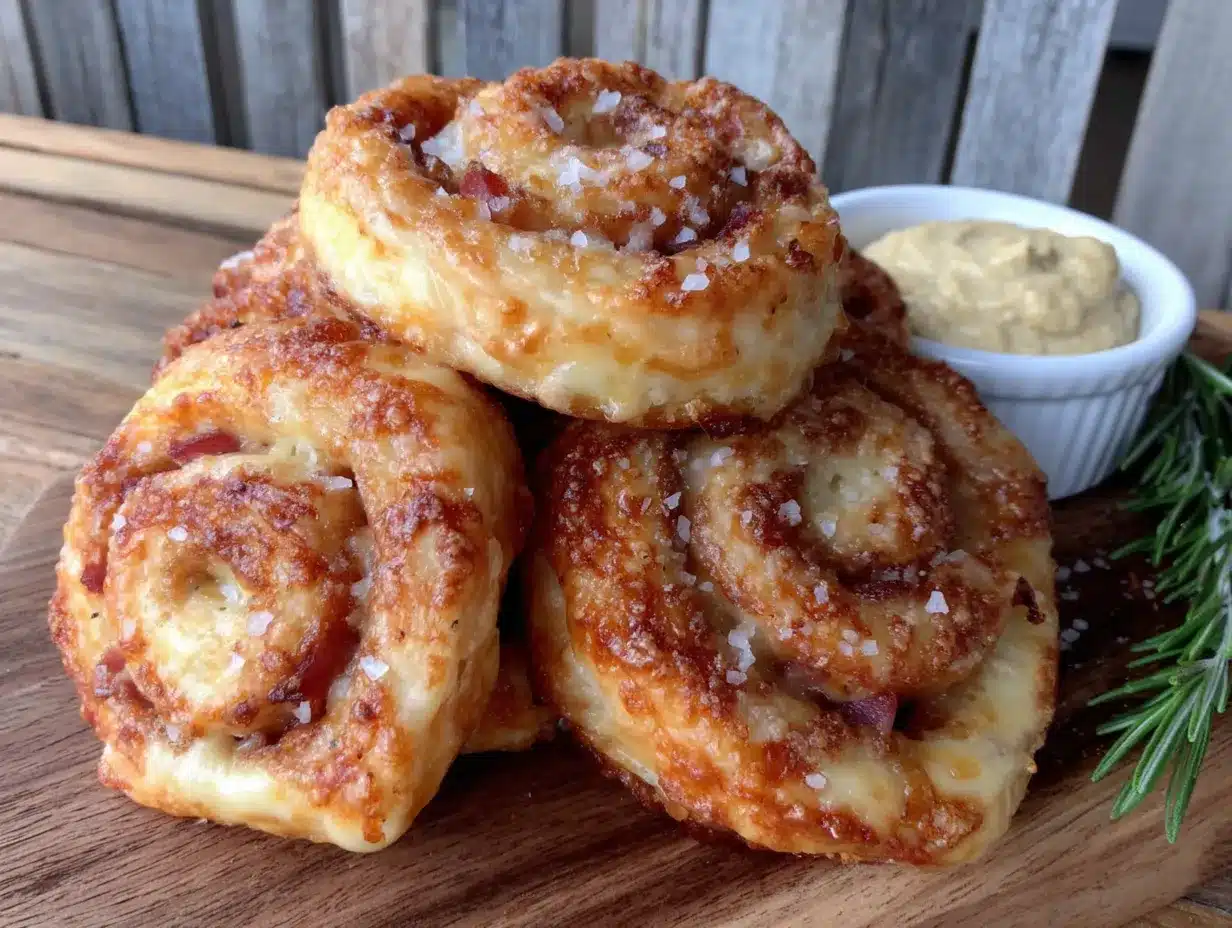
For the best texture, look for crescent dough that is cold and firm. If it has been sitting on your counter for a while, pop it in the fridge for 15 minutes before you start. As for the ham, I recommend Boar’s Head or Applegate if you want something with clean ingredients and great flavor. But honestly, whatever deli ham is on sale works perfectly fine.
If you are dairy-free, you can use vegan shredded cheese, but the melt factor will be different. The pinwheels will still taste good, just less gooey. For a gluten-free option, look for gluten-free crescent dough—it exists, though it can be a little more delicate to work with.
Equipment Needed
You don’t need a fully stocked kitchen to make these easy ham and cheese pinwheels. Here is what you will need:
- Baking sheet (half-sheet pan or similar) – I use a standard 13×18 inch baking sheet. Line it with parchment paper for easy cleanup.
- Parchment paper – Non-negotiable for me. It prevents sticking and makes cleanup a breeze. You can use a silicone baking mat instead.
- Sharp knife or pizza cutter – A sharp knife gives you clean slices without squishing the dough. A pizza cutter works great too.
- Pastry brush – For brushing the melted butter on top. A silicone one is easy to clean.
- Cutting board or clean work surface – You need a flat surface to roll out the dough.
- Small bowl – For mixing the melted butter with garlic and onion powder.
- Freezer-safe bag or container – If you are making a batch to freeze. I like gallon-sized zip-top bags.
If you don’t have a pastry brush, just use a spoon to drizzle the butter over the tops. It won’t be as even, but it still works. And if you don’t have parchment paper, lightly grease your baking sheet with cooking spray.
Preparation Method
Alright, let’s get rolling—literally. This is the fun part. Follow these steps carefully, and you will have perfect pinwheels every single time.
- Preheat your oven to 375°F (190°C). Line a baking sheet with parchment paper and set it aside. Getting the oven hot before you start assembling ensures even baking.
- Unroll the crescent dough. Open one can of crescent dough and carefully unroll it onto a clean work surface. Press the perforated seams together firmly with your fingers to create one solid rectangle. If the dough tears a little, just patch it up—it is forgiving stuff. Repeat with the second can on a separate surface.
- Spread the mustard (if using). Using a small spatula or the back of a spoon, spread a thin, even layer of Dijon mustard over each dough rectangle. Go all the way to the edges. This step is optional, but I really love the little tang it adds.
- Layer the ham. Arrange half of the sliced ham evenly over each dough rectangle, covering the entire surface. Don’t pile it too thick—you want a single layer with a few overlapping pieces. Too much ham makes the pinwheels hard to roll and slice.
- Add the cheese. Sprinkle half of the shredded cheddar and mozzarella mixture evenly over the ham on each rectangle. Again, don’t go overboard—you want a generous but even layer. Press the cheese down gently with your hands so it sticks to the ham.
- Roll it up tight. Starting from one of the long edges, carefully roll the dough into a tight log. Roll slowly and evenly, using your fingers to keep the filling tucked in. You should end up with a nice, firm spiral. Repeat with the second rectangle.
- Chill the logs. This step is crucial. Wrap each log tightly in plastic wrap or parchment paper and place them in the refrigerator for at least 30 minutes. This firms up the dough and makes slicing clean and easy. If you skip this, your pinwheels will squish and look messy. Trust me—I learned this the hard way.
- Slice the pinwheels. After chilling, unwrap the logs and place them on a cutting board. Using a sharp knife, slice each log into ½-inch thick rounds. You should get about 10-12 pinwheels per log. If the edges look a little ragged, just press them back into shape with your fingers.
- Arrange on the baking sheet. Place the pinwheels on the prepared baking sheet, spacing them about 1 inch apart. They will expand a little as they bake, so give them some room.
- Brush with butter mixture. In a small bowl, mix the melted butter with garlic powder, onion powder, and black pepper. Brush this mixture generously over the tops of each pinwheel. This is what gives them that beautiful golden-brown crust.
- Bake. Place the baking sheet in the preheated oven and bake for 12-15 minutes, or until the pinwheels are puffed up and golden brown on top. The cheese should be bubbly and the edges crisp. For extra color, switch to broil for the last 1-2 minutes—but watch closely so they don’t burn.
- Cool slightly and serve. Let the pinwheels cool on the baking sheet for 2-3 minutes before transferring them to a plate. They are extremely hot inside, so give them a minute. Garnish with chopped chives or parsley if you like.
For Freezing: After slicing the chilled logs, arrange the pinwheels on a baking sheet lined with parchment paper and place them in the freezer for 1-2 hours, or until solid. Once frozen, transfer them to a freezer-safe bag or container. To bake from frozen, simply place the frozen pinwheels on a parchment-lined baking sheet and bake at 375°F for 15-18 minutes, brushing with the butter mixture halfway through. No need to thaw—just add a few extra minutes to the baking time.
Cooking Tips & Techniques
I have made these easy ham and cheese pinwheels more times than I can count, and I have definitely made my share of mistakes. Here are the things I wish someone had told me from the start:
Chill the log before slicing. This is the number one tip I can give you. If you try to slice the dough when it’s warm and soft, the filling will squish out, the spiral will collapse, and you will end up with a sad, flat mess. Thirty minutes in the fridge makes all the difference. I have even chilled mine for an hour when I got distracted, and it actually made slicing even easier.
Use a sharp knife. A dull knife will drag through the dough and smoosh the layers together. A sharp chef’s knife or serrated knife gives you clean, beautiful slices. Wipe the blade clean between cuts if it gets sticky.
Don’t overfill. I know it is tempting to pile on the ham and cheese, but less really is more here. Too much filling makes the pinwheels bulky, hard to roll, and they tend to unravel during baking. A thin, even layer is the sweet spot.
Watch the baking time. Ovens vary, so start checking at the 12-minute mark. You want the tops golden brown and the edges crisp. If the bottoms are browning too fast, slide another baking sheet underneath to insulate them.
Let them rest before serving. I know they smell amazing straight out of the oven, but the cheese inside is molten lava hot. Give them a few minutes to cool, and you will avoid burning your mouth. Plus, they hold their shape better after a short rest.
One time I forgot to chill the log and tried to slice it anyway. The dough stuck to the knife, the filling oozed out everywhere, and I ended up with these weird, flattened blobs that still tasted good but looked terrible. Learn from my mistake—chill the log!
Variations & Adaptations
One of the best things about this recipe is how easy it is to customize. Here are some of my favorite variations:
Turkey and Swiss Pinwheels: Swap the ham for thinly sliced turkey breast and use shredded Swiss cheese instead of cheddar. Add a thin layer of cranberry sauce for a festive twist. This is my go-to version around the holidays.
Spicy Pepperoni and Cheese Pinwheels: Replace the ham with pepperoni slices and use a mix of mozzarella and provolone. Add a sprinkle of red pepper flakes to the butter mixture for heat. These are perfect for game day or movie night.
Veggie Lover’s Pinwheels: Skip the meat entirely and layer the dough with sautéed spinach, roasted red peppers, and a mix of mozzarella and feta cheese. You can also add a thin layer of pesto for extra flavor. Even my meat-eating husband likes these.
Breakfast Pinwheels: Use thinly sliced ham or bacon crumbles, scrambled eggs, and shredded cheddar. These are perfect for a quick breakfast or brunch. Bake them fresh or freeze them for busy mornings.
Gluten-Free Option: Look for gluten-free crescent dough at your grocery store. It is a bit more delicate, so handle it gently and chill the log for a full hour before slicing. The results are still delicious.
Dairy-Free Option: Use vegan shredded cheese and dairy-free butter. The texture will be slightly different, but the flavor is still great. I have also used nutritional yeast mixed with a little flour for a cheesy flavor without the dairy.
My personal favorite variation is the turkey and Swiss with cranberry sauce. I first tried it on a whim during Thanksgiving week, and it was so good I made it again the next day. The sweet and savory combo is just perfect.
Serving & Storage Suggestions
These easy ham and cheese pinwheels are incredibly versatile when it comes to serving. Here is how I like to enjoy them:
Serving Temperature: Serve them warm, straight from the oven. The cheese is at its most gooey and delicious state when hot. They are also good at room temperature, but honestly, warm is where they shine.
Presentation: Arrange the pinwheels on a platter in a single layer, slightly overlapping. Sprinkle with fresh chopped chives or parsley for a pop of color. If you are serving them as an appetizer, put a small bowl of honey mustard or ranch dressing in the center for dipping.
Complementary Dishes: These pinwheels pair beautifully with a simple green salad dressed with vinaigrette. The acidity of the dressing cuts through the richness of the cheese and ham. They are also great alongside a bowl of tomato soup or creamy loaded baked potato soup for a cozy lunch. For a heartier meal, serve them with easy sheet pan sausage, apple, and butternut squash roast for a fall-inspired dinner.
Storage Instructions: Store baked pinwheels in an airtight container in the refrigerator for up to 4 days. To reheat, place them on a baking sheet and warm in a 350°F oven for 5-7 minutes, or until heated through. The microwave works in a pinch, but the oven keeps them crispy.
Freezer Storage: As mentioned earlier, freeze the unbaked, sliced pinwheels on a baking sheet until solid, then transfer to a freezer-safe bag. They will keep for up to 3 months. Bake directly from frozen, adding a few extra minutes to the baking time. I always keep a bag in my freezer for emergencies.
Flavor Development: Interestingly, the flavors actually meld together even more after a day in the fridge. If you have leftover baked pinwheels, they taste even better the next day—the ham and cheese flavors deepen and the dough absorbs all that buttery goodness.
Nutritional Information & Benefits
While these ham and cheese pinwheels are definitely a treat, they do have some redeeming qualities. Here is a rough nutritional breakdown per pinwheel (based on 24 pinwheels per batch):
- Calories: Approximately 150-180 calories per pinwheel
- Protein: 8-10 grams
- Fat: 10-12 grams
- Carbohydrates: 10-12 grams
- Fiber: Less than 1 gram
- Sugar: 2-3 grams
- Sodium: 400-500 mg
Health Benefits of Key Ingredients: Ham is a good source of high-quality protein, which helps keep you full and satisfied. Cheese provides calcium for strong bones and teeth. The crescent dough offers quick energy from carbohydrates, making these a great option for active kids or a pre-workout snack.
Dietary Considerations: This recipe is not gluten-free or dairy-free in its standard form, but as mentioned, substitutions are possible. For a lower-sodium version, use low-sodium ham and reduced-sodium cheese. You can also use whole wheat crescent dough for added fiber.
Potential Allergens: This recipe contains wheat (gluten), dairy (cheese, butter), and may contain soy (depending on the crescent dough brand). Always check labels if you are cooking for someone with allergies.
From a wellness perspective, I believe in balance. These pinwheels are not health food, but they are real food made with simple ingredients. Pair them with a veggie-heavy meal or a big salad, and you have a satisfying, balanced plate.
Conclusion
These easy ham and cheese pinwheels are the kind of recipe that makes you look like a kitchen hero with almost zero effort. They are quick to assemble, incredibly versatile, and the freezer-friendly factor means you always have a delicious snack or appetizer ready to go. Whether you are feeding a hungry family, hosting a party, or just need something comforting on a busy day, these pinwheels deliver every single time.
I love that this recipe is a blank canvas for your creativity. Swap the fillings, experiment with different cheeses, or add your favorite spreads. The base technique is so forgiving that you can make it your own without any stress. And honestly, that is what cooking should be—fun, flexible, and rewarding.
I would love to hear how these turn out for you! Did you try a fun variation? Did your family devour them as fast as mine did? Drop a comment below and let me know. And if you have a favorite freezer-friendly recipe, share that too—I am always looking for new ideas to stock my freezer. Happy cooking, friends!
Frequently Asked Questions
Can I use puff pastry instead of crescent dough?
Absolutely! Puff pastry will give you a flakier, more buttery result. Just thaw it according to package directions, roll it out slightly, and proceed with the recipe. The baking time may be a few minutes longer, so keep an eye on them.
How do I prevent the pinwheels from unraveling during baking?
Make sure you roll the dough tightly and chill the log for at least 30 minutes before slicing. Placing the pinwheels seam-side down on the baking sheet also helps keep them closed. If you are still having trouble, you can secure each pinwheel with a toothpick before baking.
Can I make these ahead of time for a party?
Yes! You have two options: bake them a day ahead and reheat in the oven before serving, or prepare them up to the slicing step and refrigerate the sliced pinwheels on the baking sheet for up to 24 hours before baking. The second option gives you fresher results.
What other fillings work well?
The possibilities are endless! Try roast beef with horseradish cream sauce, Italian meats with provolone, or even a sweet version with Nutella and banana slices. Just keep the fillings thin and even for the best results.
Can I air fry these instead of baking?
Yes, you can! Place the pinwheels in a single layer in the air fryer basket and cook at 350°F for 8-10 minutes, or until golden brown. No need to preheat. The air fryer gives them an extra crispy exterior. Just work in batches to avoid overcrowding.
Pin This Recipe!
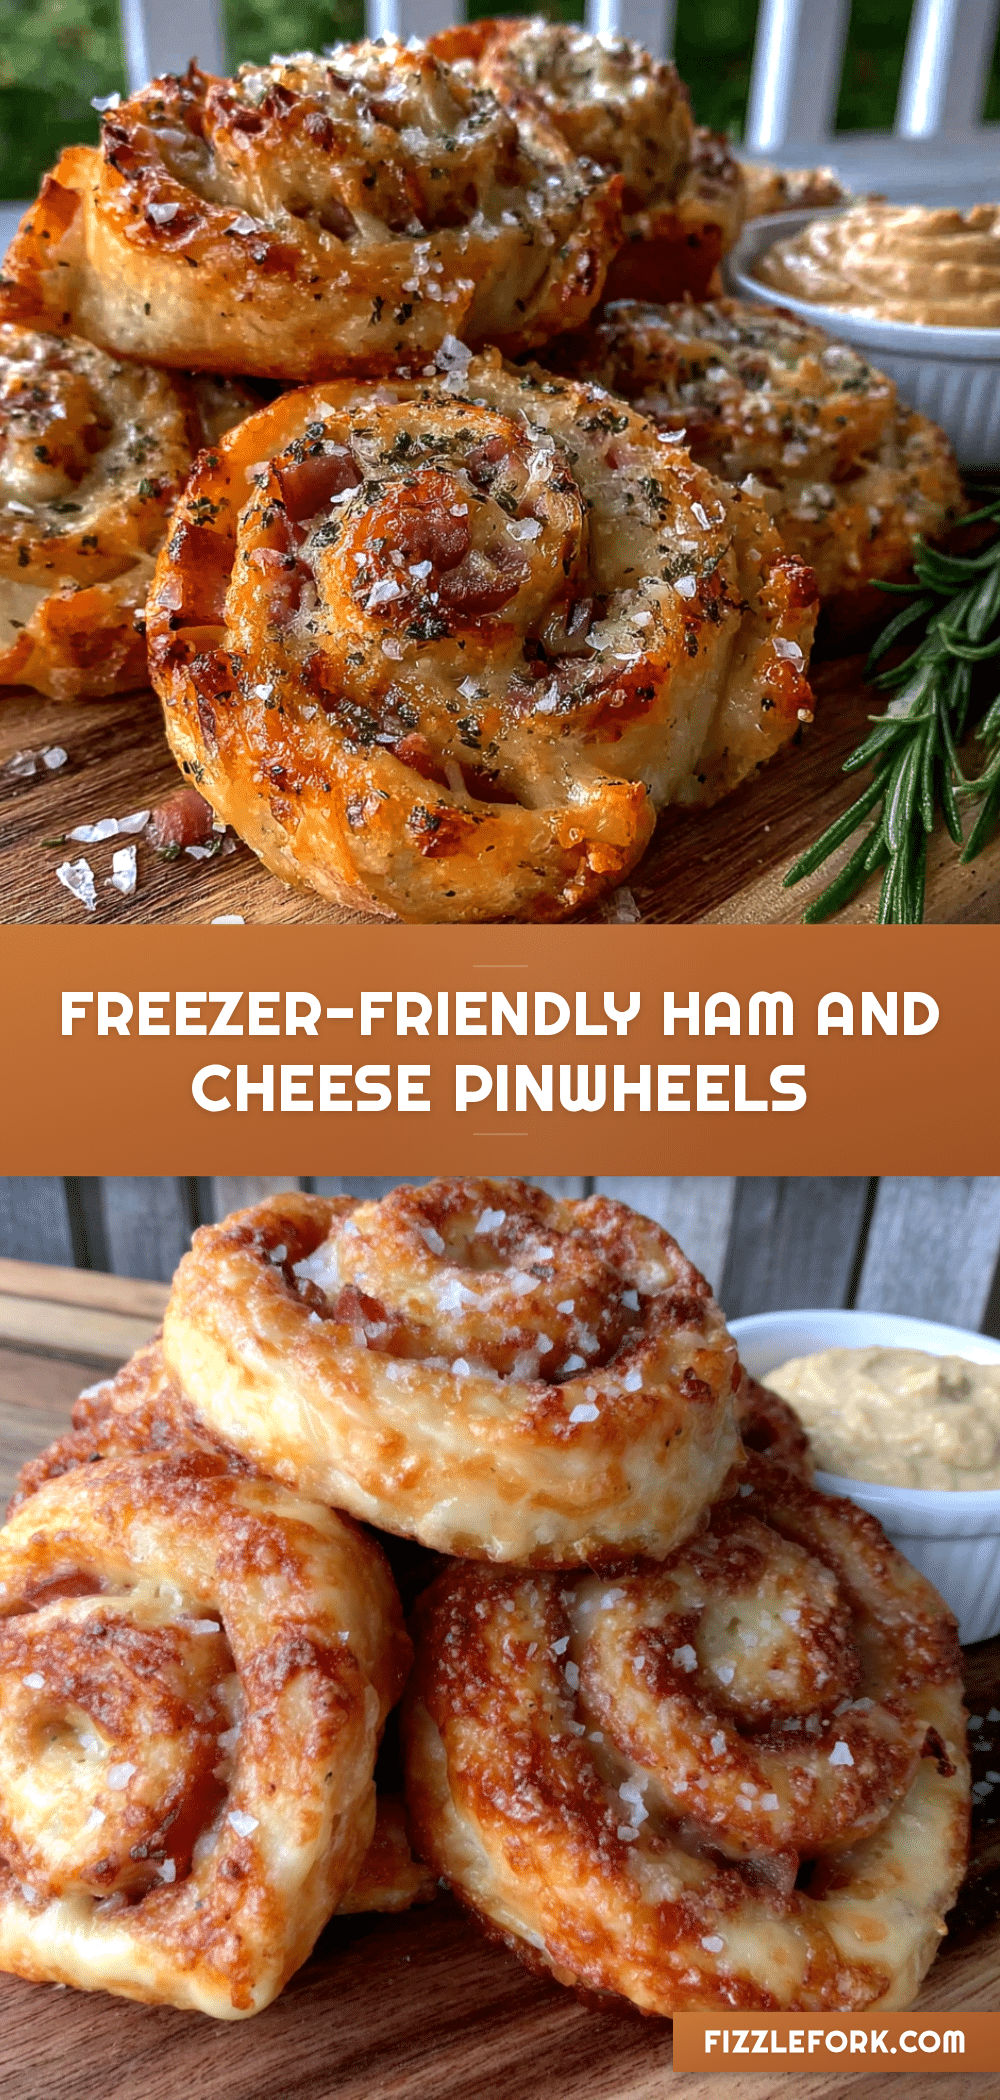
Easy Ham and Cheese Pinwheels: Best Freezer-Friendly Snack

These easy ham and cheese pinwheels are buttery, flaky, packed with salty ham and gooey cheese, and come together so fast it almost feels like cheating. Perfect for busy days, they are freezer-friendly and bake in under 15 minutes straight from frozen.
- Prep Time: 15 minutes
- Cook Time: 15 minutes
- Total Time: 30 minutes
- Yield: 24 servings 1x
- Category: Appetizer
- Cuisine: American
Ingredients
- 2 cans (8 oz each) refrigerated crescent roll dough
- 8 oz thinly sliced deli ham
- 1 ½ cups shredded sharp cheddar cheese
- 1 ½ cups shredded mozzarella cheese
- ¼ cup melted unsalted butter
- 1 teaspoon garlic powder
- 1 teaspoon onion powder
- ½ teaspoon black pepper
- Optional: 1 tablespoon Dijon mustard
- Optional: 2 tablespoons chopped fresh chives or parsley
Instructions
- Preheat your oven to 375°F (190°C). Line a baking sheet with parchment paper and set it aside.
- Unroll the crescent dough. Open one can of crescent dough and carefully unroll it onto a clean work surface. Press the perforated seams together firmly with your fingers to create one solid rectangle. Repeat with the second can on a separate surface.
- Spread the mustard (if using). Using a small spatula or the back of a spoon, spread a thin, even layer of Dijon mustard over each dough rectangle.
- Layer the ham. Arrange half of the sliced ham evenly over each dough rectangle, covering the entire surface.
- Add the cheese. Sprinkle half of the shredded cheddar and mozzarella mixture evenly over the ham on each rectangle. Press the cheese down gently with your hands.
- Roll it up tight. Starting from one of the long edges, carefully roll the dough into a tight log. Repeat with the second rectangle.
- Chill the logs. Wrap each log tightly in plastic wrap or parchment paper and place them in the refrigerator for at least 30 minutes.
- Slice the pinwheels. After chilling, unwrap the logs and place them on a cutting board. Using a sharp knife, slice each log into ½-inch thick rounds.
- Arrange on the baking sheet. Place the pinwheels on the prepared baking sheet, spacing them about 1 inch apart.
- Brush with butter mixture. In a small bowl, mix the melted butter with garlic powder, onion powder, and black pepper. Brush this mixture generously over the tops of each pinwheel.
- Bake. Place the baking sheet in the preheated oven and bake for 12-15 minutes, or until the pinwheels are puffed up and golden brown on top.
- Cool slightly and serve. Let the pinwheels cool on the baking sheet for 2-3 minutes before transferring them to a plate. Garnish with chopped chives or parsley if you like.
Notes
Chill the log before slicing to prevent squishing. Use a sharp knife for clean slices. Don’t overfill. Watch the baking time. Let them rest before serving.
Nutrition
- Serving Size: 1 pinwheel
- Calories: 165
- Sugar: 2.5
- Sodium: 450
- Fat: 11
- Saturated Fat: 5
- Carbohydrates: 11
- Protein: 9
Keywords: ham and cheese pinwheels, freezer-friendly snack, easy appetizer, crescent roll recipe, ham and cheese rolls


