The way that sauce coats the edge of the rice, leaving a slightly sticky, almost lacquered trail—that’s the whole point. I didn’t set out to make the perfect meal prep recipe. Honestly, I was just tired of sad, dry chicken and flavorless rice by Wednesday afternoon. You know that feeling? You spend a perfectly good Sunday afternoon cooking, and by day three, you’re staring at a container of beige sadness, contemplating a vending machine run instead.
This whole thing started on a particularly chaotic Tuesday. I had a container of leftover chicken, a bottle of soy sauce that was dangerously low, and a craving for something that didn’t taste like a punishment. I just started throwing things in a bowl, and something clicked. The sauce was clingy and sweet, the chicken was actually juicy, and the whole thing felt… intentional. Not like leftovers, but like a real meal. It was that glossy, sticky-sweet coating on the chicken that got me—it made everything look like it was meant to be there.
This recipe for Easy Chicken Teriyaki Meal Prep Bowls is the result of that chaotic Tuesday and a lot of fine-tuning. It’s not trying to be fancy. It’s trying to be the lunch you actually look forward to eating, even on a Thursday. It’s the one that makes your coworkers peer over your cubicle wall and ask, “What’s that? It smells amazing.” And honestly, that’s the kind of cooking I want to share—the kind that works for real life, not just for a photo shoot.
Why You’ll Love This Recipe
I’ve tested this recipe about a dozen times to get the balance just right. Not too sweet, not too salty, and with a consistency that holds up beautifully over a few days in the fridge. Here’s why I think it’ll become a staple in your kitchen too.
- 30-Minute Meal Prep: From start to finish, you can have a week’s worth of lunches ready in the time it takes to watch a single episode of your favorite show. No all-day cooking marathons.
- Simple Pantry Ingredients: You probably already have soy sauce, honey, and garlic in your kitchen. No trips to a specialty store for mirin or sake—this is a weeknight-friendly version that still tastes authentic.
- Perfect for Busy Weeks: These bowls are the ultimate solution for those days when you know you’ll be too tired to cook. Just grab, microwave, and eat.
- Crowd-Pleaser: My kids actually fight over the leftovers, which is basically a culinary miracle. The sweet, savory sauce is universally loved.
- Stays Delicious All Week: This is the biggest win. The chicken stays tender, the veggies keep a bit of crunch, and the sauce doesn’t get weird or watery. It’s a meal prep unicorn.
What really sets this apart from other teriyaki recipes is the double-glaze technique. Instead of just marinating the chicken, we cook it, then toss it back in a reduced sauce that clings to every piece like a second skin. It’s the difference between a good bowl and one that makes you close your eyes after the first bite. It’s comfort food reimagined—faster, healthier, but with the same soul-soothing satisfaction. Perfect for impressing yourself on a busy Wednesday.
What Ingredients You Will Need
This recipe relies on a handful of ingredients that work together to create that signature glossy, sweet-savory sauce. No fuss, just flavor.
- Chicken Thighs (1.5 lbs / 680g): Boneless, skinless chicken thighs are my go-to for meal prep. They stay juicier than breasts and have more flavor. If you’re watching fat, you can use chicken breasts, but keep an eye on the cooking time so they don’t dry out. I recommend getting thighs from a brand like Bell & Evans or just your local butcher for the best texture.
- Soy Sauce (1/2 cup / 120ml): Use low-sodium soy sauce so you can control the saltiness. If you need a gluten-free option, tamari works perfectly here. It’s the backbone of the entire sauce.
- Honey (1/3 cup / 110g): This gives the sauce its sweetness and that gorgeous sticky consistency. You can substitute with brown sugar or maple syrup, but honey gives the best gloss. I use a local wildflower honey, but any kind works.
- Rice Vinegar (2 tablespoons / 30ml): Adds a gentle acidity that balances the sweetness and prevents the sauce from being cloying. Apple cider vinegar can work in a pinch.
- Garlic (4 cloves, minced): Fresh garlic is non-negotiable here. The pre-minced stuff in a jar just doesn’t have the same punch. It adds a savory depth that makes the sauce feel complex.
- Fresh Ginger (1 tablespoon, grated): This is the secret to that authentic teriyaki flavor. It adds a warm, slightly spicy kick. Use a microplane to grate it—it makes a huge difference.
- Cornstarch (1 tablespoon): This is our thickening agent. It creates that luscious, clingy sauce that coats every grain of rice. Mix it with 2 tablespoons of cold water to make a slurry before adding it to the pan.
- Toasted Sesame Oil (1 teaspoon): A little goes a long way. Drizzle this in at the very end for a nutty, aromatic finish that elevates the whole bowl.
- Cooked Rice (4 cups / 600g): Sushi rice or jasmine rice is ideal for meal prep because it stays fluffy even after being refrigerated. Brown rice works too, but it will be a bit chewier.
- Broccoli Florets (2 cups / 200g): I steam these just until bright green and tender-crisp. They add a nice crunch and a dose of green to the bowl. Frozen broccoli works perfectly—just thaw and pat dry.
- Edamame (1 cup / 150g): Shelled edamame adds protein and a pop of color. I buy them frozen and just run them under warm water to thaw.
- Sesame Seeds (for garnish): A sprinkle of toasted sesame seeds adds a nice visual touch and a little extra nuttiness.
Equipment Needed
You don’t need a professional kitchen to pull this off. Just a few basic tools.
- Large Skillet or Wok: A 12-inch skillet or wok is ideal for searing the chicken and making the sauce without overcrowding. A non-stick pan makes cleanup easier, but a stainless steel one will give you better browning.
- Sharp Knife: A good chef’s knife makes slicing the chicken into uniform pieces a breeze. A dull knife is a recipe for frustration (and uneven cooking).
- Cutting Board: Use a separate board for raw chicken to avoid cross-contamination.
- Microplane: This is my favorite tool for grating ginger and garlic. It turns them into a paste that melts right into the sauce.
- Mixing Bowls: You’ll need a small bowl for the cornstarch slurry and a larger one for mixing the sauce.
- Meal Prep Containers: Get yourself some glass containers with tight-fitting lids. They’re reusable, microwave-safe, and don’t hold onto odors like plastic ones do.
Preparation Method
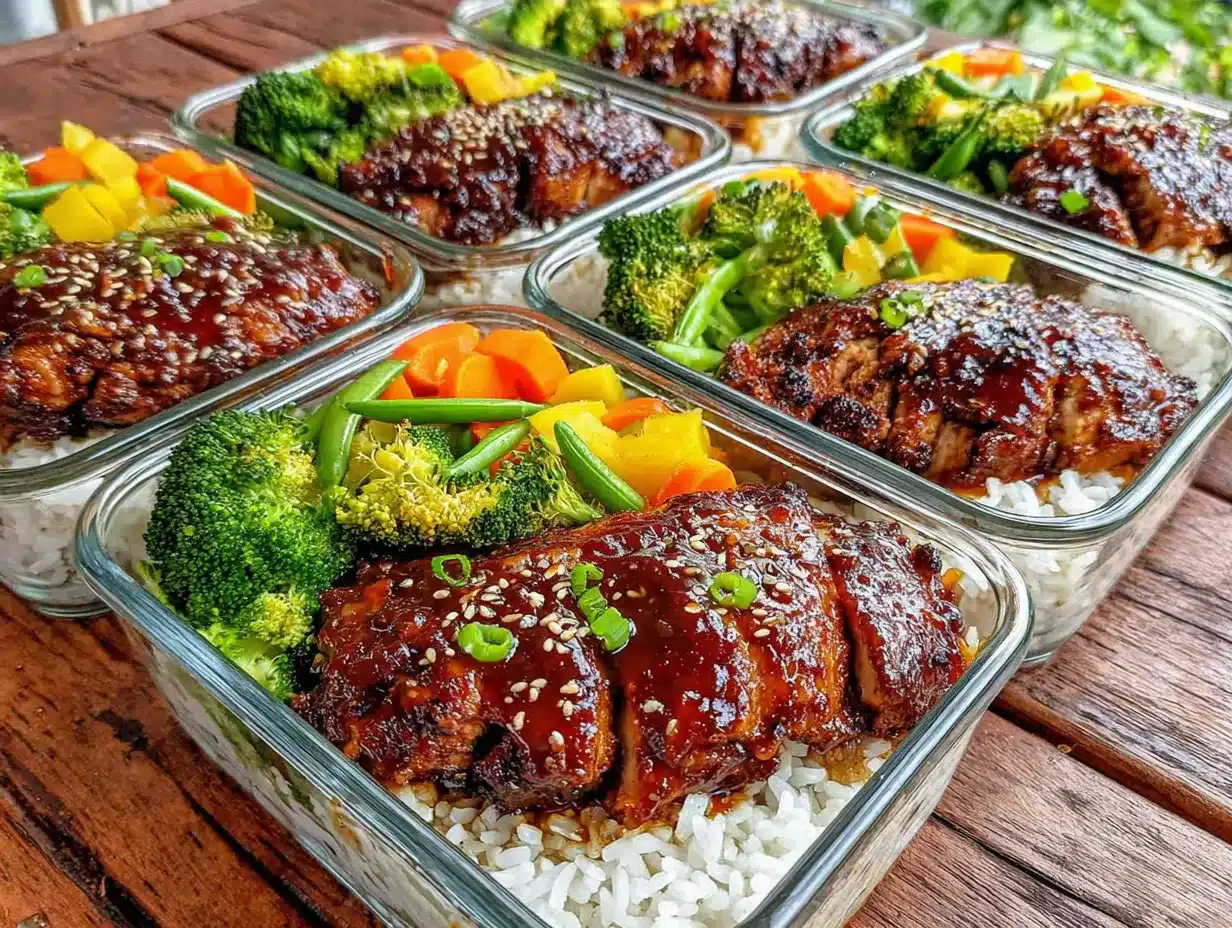
- Make the Teriyaki Sauce (5 minutes): In a small bowl, whisk together the soy sauce, honey, rice vinegar, minced garlic, and grated ginger. Set it aside. In another tiny bowl, mix the cornstarch with 2 tablespoons of cold water until smooth. This is your slurry—don’t skip this step, or you’ll end up with clumps.
- Prep the Chicken (5 minutes): Pat the chicken thighs dry with paper towels. This is crucial for getting a good sear. Cut them into bite-sized pieces, about 1-inch cubes. Season lightly with a pinch of salt and pepper. If you’re using chicken breasts, pound them to an even thickness before cutting.
- Sear the Chicken (8-10 minutes): Heat 1 tablespoon of vegetable oil in your large skillet over medium-high heat. Once the oil is shimmering, add the chicken pieces in a single layer. Don’t crowd the pan—work in batches if needed. Let them cook undisturbed for 3-4 minutes until golden brown on the bottom. Flip and cook for another 3-4 minutes until cooked through. The internal temperature should reach 165°F (74°C). Remove the chicken from the pan and set it aside on a plate.
- Build the Sauce (5 minutes): Reduce the heat to medium. Pour the soy sauce mixture into the same skillet. Let it come to a gentle simmer, scraping up any browned bits from the bottom of the pan—that’s pure flavor. Let it simmer for about 2 minutes to meld the flavors.
- Thicken the Sauce (2 minutes): Give the cornstarch slurry a quick stir (it settles fast), then pour it into the simmering sauce while whisking constantly. You’ll see it start to thicken almost immediately. Let it bubble for about 30 seconds until it’s glossy and coats the back of a spoon. If it gets too thick, add a splash of water to loosen it up.
- Glaze the Chicken (2 minutes): Return the cooked chicken to the skillet. Toss it in the thickened sauce until every piece is well-coated. Let it cook for another minute so the sauce really clings to the chicken. Drizzle in the toasted sesame oil and give it one final toss.
- Steam the Broccoli (3 minutes): While the chicken is glazing, steam the broccoli. You can do this in a microwave-safe bowl with a splash of water, covered, for 2-3 minutes. Or steam it on the stovetop. You want it bright green and tender-crisp, not mushy. Drain well.
- Assemble the Bowls (5 minutes): Divide the cooked rice evenly among your meal prep containers. Top with the glazed chicken, steamed broccoli, and a generous handful of edamame. Sprinkle with sesame seeds. Let the bowls cool completely to room temperature before putting the lids on. This prevents condensation from making the rice soggy.
- Store and Enjoy: Seal the containers and store them in the refrigerator for up to 4 days. To reheat, remove the lid and microwave for 2-3 minutes, stirring halfway through. The sauce will loosen up and become glossy again.
Cooking Tips & Techniques
I’ve made this recipe enough times to learn a few lessons the hard way. Here’s what I wish I’d known from the start.
Don’t Overcrowd the Pan. This is the most common mistake. If you dump all the chicken in at once, it will steam instead of sear. You’ll lose that beautiful golden-brown crust that adds so much flavor. Cook in batches if you have to. It takes an extra 5 minutes, and it’s absolutely worth it.
Use a Meat Thermometer. I used to just guess when my chicken was done, and I ended up with dry, overcooked meat more times than I’d like to admit. Chicken thighs are forgiving, but chicken breasts are not. A simple instant-read thermometer takes the guesswork out of it. 165°F (74°C) is the magic number.
Make Extra Sauce. The recipe as written makes a generous amount of sauce, but if you’re a sauce person (I am), consider doubling it. You can always keep a little extra in the fridge to drizzle over the bowls when you reheat them, especially if the rice has soaked up some of the original sauce.
Let the Bowls Cool Completely. This is a meal prep rule that I break sometimes, and I always regret it. Putting warm food into a sealed container creates a sauna effect. The steam turns into water, and your crispy rice gets soggy. Patience is a virtue here. Spread the bowls out on the counter and let them cool for a full 30 minutes before refrigerating.
Timing is Everything. I like to start the rice first, then prep the chicken while it’s cooking. By the time the rice is done, the chicken is ready to hit the pan. It’s a seamless workflow that saves about 10 minutes. If you’re using leftover rice, even better—it actually works better for meal prep because it’s a bit drier and won’t get mushy.
Variations & Adaptations
This recipe is a fantastic base, but it’s also a canvas for creativity. Here are a few ways I’ve adapted it over the months.
Spicy Teriyaki Bowls: Add 1-2 teaspoons of sriracha or a pinch of red pepper flakes to the sauce while it simmers. The heat balances beautifully with the sweetness of the honey. I’ve also added a dollop of gochujang (Korean chili paste) for a deeper, more complex heat. It’s incredible.
Low-Carb / Keto Version: Swap the rice for cauliflower rice or zucchini noodles. The teriyaki chicken and veggies are already low-carb, so this is an easy adaptation. Just be aware that cauliflower rice releases water when reheated, so it’s best to store it separately and combine them when you’re ready to eat.
Vegetarian Teriyaki Bowls: Replace the chicken with extra-firm tofu or tempeh. Press the tofu for 30 minutes to remove excess moisture, then cube it and pan-fry it until golden brown before tossing it in the sauce. You can also add more veggies like bell peppers, snap peas, or carrots.
Baked Teriyaki Chicken: If you want to avoid standing over the stove, you can bake the chicken. Toss the raw chicken pieces in half the sauce, spread them on a baking sheet, and bake at 400°F (200°C) for 15-18 minutes. Then toss them in the remaining thickened sauce. It’s a bit less hands-on, but you’ll miss out on that nice pan sear.
Serving & Storage Suggestions
These bowls are designed to be eaten cold or reheated, but a few small tweaks can make a big difference in your experience.
Serving Temperature: I actually prefer these bowls at room temperature. The flavors seem brighter, and the sauce is still glossy without being piping hot. If you’re reheating, I recommend microwaving for 1 minute, stirring, then another 30 seconds. Overheating can make the chicken tough and the broccoli mushy.
What to Serve With It: These bowls are a complete meal on their own, but if you want to round it out, a simple cucumber salad with a sesame-ginger dressing is a fantastic side. You could also add a side of maple dijon baked salmon for a surf-and-turf twist, or a fresh harvest apple walnut kale salad for extra greens. For a heartier meal, pair it with a bowl of cozy chicken and mushroom wild rice soup on a cold day.
Storage Instructions: Store the bowls in airtight containers in the refrigerator for up to 4 days. I do not recommend freezing these bowls. The sauce can separate upon thawing, and the texture of the rice and broccoli will suffer. If you must freeze, freeze the chicken and sauce separately from the rice and veggies.
How Flavors Develop: Here’s a little secret—these bowls actually taste better on day two. The flavors meld together overnight, and the sauce seeps into the rice, making every bite more flavorful. So don’t be disappointed if the first bowl doesn’t blow your mind. The magic happens later.
Nutritional Information & Benefits
This bowl is a balanced meal that delivers protein, complex carbs, and healthy fats. Here’s a rough breakdown per serving (based on 4 servings).
| Nutrient | Amount per Serving |
|---|---|
| Calories | 485 |
| Protein | 38g |
| Carbohydrates | 52g |
| Fat | 14g |
| Saturated Fat | 3g |
| Fiber | 5g |
| Sugar | 18g |
| Sodium | 820mg |
The chicken provides a solid dose of lean protein, which is great for muscle repair and keeping you full. The ginger and garlic in the sauce have anti-inflammatory properties, and the broccoli adds a healthy dose of vitamin C and fiber. If you use brown rice, you’ll get more fiber and B vitamins. It’s a meal that supports your body without feeling like a sacrifice. Honestly, it’s the kind of food that makes you feel good about eating well.
Conclusion
This recipe is the one that finally made meal prep click for me. It’s not about spending hours in the kitchen on a Sunday. It’s about making something genuinely delicious that you’ll look forward to eating all week. The glossy sauce, the tender chicken, the satisfying crunch of the broccoli—it all comes together in a bowl that feels like a hug, even on a chaotic Tuesday.
I’d love to hear how these turn out for you. Did you try a variation? Did you add something unexpected? Drop a comment below and let me know. And if you share a photo on Pinterest, tag me—I love seeing your creations. Remember, this is your recipe now. Make it your own, tweak it, and enjoy every single bite. You’ve got this.
Frequently Asked Questions
Can I use chicken breasts instead of thighs?
Absolutely. Just be mindful of the cooking time. Chicken breasts cook faster and can dry out easily. Use a meat thermometer to pull them at 165°F (74°C), and consider slicing them into thinner pieces for even cooking. The sauce will still make them taste amazing.
How do I prevent the rice from getting hard in the fridge?
Make sure your rice is fully cooked and slightly moist before you assemble the bowls. When reheating, add a teaspoon of water per bowl before microwaving. This creates steam that rehydrates the rice. Also, letting the bowls cool completely before sealing helps prevent the rice from drying out.
Can I make this gluten-free?
Yes. Simply swap the regular soy sauce for tamari or coconut aminos. Make sure your rice vinegar is also gluten-free (most brands are). Everything else in the recipe is naturally gluten-free. It’s an easy swap that doesn’t change the flavor much.
How long will these bowls last in the fridge?
They’ll stay fresh for up to 4 days in an airtight container. After that, the texture of the chicken and veggies starts to decline. I usually make these on Sunday and eat them through Thursday. If you’re worried about freshness, you can prep the components separately and assemble them the night before.
Can I freeze the teriyaki chicken separately?
Yes, you can freeze the cooked chicken and sauce together in a freezer-safe bag or container for up to 2 months. Thaw it overnight in the fridge and reheat it in a skillet. Just know that the texture of the chicken might be slightly softer after freezing. I’d recommend making fresh rice and veggies when you serve it.
Pin This Recipe!
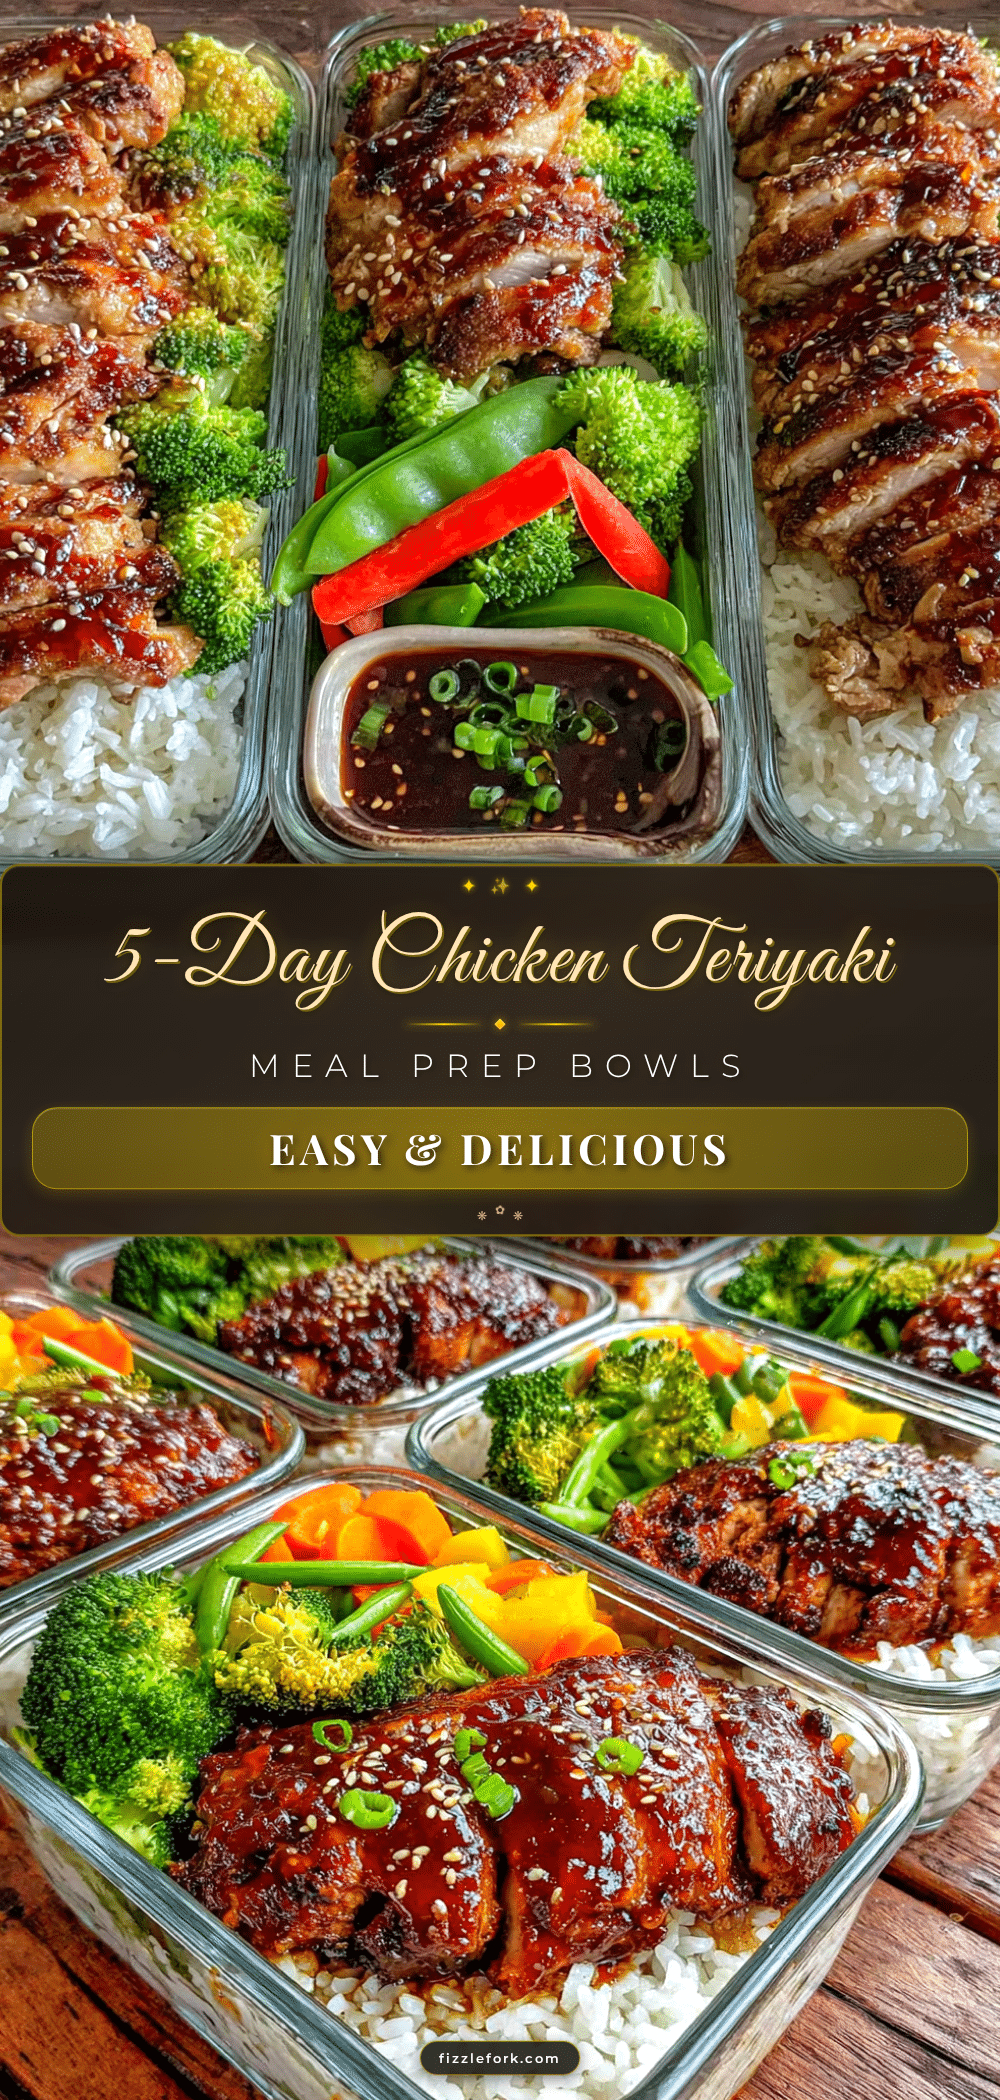
Easy Chicken Teriyaki Meal Prep Bowls
These 30-minute meal prep bowls feature juicy chicken thighs coated in a glossy, sweet-savory teriyaki sauce, served over rice with broccoli and edamame. Perfect for busy weeks, they stay delicious all week long.
- Prep Time: 15 minutes
- Cook Time: 15 minutes
- Total Time: 30 minutes
- Yield: 4 servings 1x
- Category: Main Course
- Cuisine: Japanese
Ingredients
- 1.5 lbs (680g) boneless, skinless chicken thighs
- 1/2 cup (120ml) low-sodium soy sauce
- 1/3 cup (110g) honey
- 2 tablespoons (30ml) rice vinegar
- 4 cloves garlic, minced
- 1 tablespoon fresh ginger, grated
- 1 tablespoon cornstarch
- 2 tablespoons cold water
- 1 teaspoon toasted sesame oil
- 4 cups (600g) cooked sushi or jasmine rice
- 2 cups (200g) broccoli florets
- 1 cup (150g) shelled edamame
- 1 tablespoon vegetable oil
- Salt and pepper to taste
- Sesame seeds for garnish
Instructions
- Make the Teriyaki Sauce: In a small bowl, whisk together soy sauce, honey, rice vinegar, minced garlic, and grated ginger. In another tiny bowl, mix cornstarch with 2 tablespoons cold water until smooth to make a slurry.
- Prep the Chicken: Pat chicken thighs dry with paper towels and cut into bite-sized pieces (about 1-inch cubes). Season lightly with salt and pepper.
- Sear the Chicken: Heat 1 tablespoon vegetable oil in a large skillet over medium-high heat. Add chicken pieces in a single layer (work in batches if needed). Cook undisturbed for 3-4 minutes until golden brown, then flip and cook another 3-4 minutes until cooked through (internal temperature 165°F/74°C). Remove chicken and set aside.
- Build the Sauce: Reduce heat to medium. Pour soy sauce mixture into the same skillet, scraping up browned bits. Let simmer for about 2 minutes.
- Thicken the Sauce: Stir cornstarch slurry, then pour into simmering sauce while whisking constantly. Let bubble for about 30 seconds until glossy and thickened. Add a splash of water if too thick.
- Glaze the Chicken: Return cooked chicken to skillet and toss in thickened sauce until well-coated. Cook for 1 minute. Drizzle with toasted sesame oil and toss again.
- Steam the Broccoli: While chicken glazes, steam broccoli in microwave-safe bowl with a splash of water, covered, for 2-3 minutes until bright green and tender-crisp. Drain well.
- Assemble the Bowls: Divide cooked rice among meal prep containers. Top with glazed chicken, steamed broccoli, and edamame. Sprinkle with sesame seeds. Let cool completely to room temperature before sealing.
- Store and Enjoy: Seal containers and refrigerate for up to 4 days. To reheat, remove lid and microwave for 2-3 minutes, stirring halfway through.
Notes
Don’t overcrowd the pan when searing chicken to ensure a good crust. Use a meat thermometer for perfectly cooked chicken. Make extra sauce if you like more. Let bowls cool completely before refrigerating to prevent soggy rice. These bowls taste even better on day two as flavors meld.
Nutrition
- Serving Size: 1 bowl
- Calories: 485
- Sugar: 18
- Sodium: 820
- Fat: 14
- Saturated Fat: 3
- Carbohydrates: 52
- Fiber: 5
- Protein: 38
Keywords: chicken teriyaki, meal prep bowls, easy teriyaki recipe, 30-minute meal, healthy lunch, chicken and rice bowls


