Why You’ll Love This Recipe
Look, I’ve tested a lot of apple cider recipes over the years. Some are fussy, some are flavorless, and some just don’t deliver that donut-shop magic. This one hits different. Here’s why you’ll keep coming back to it:
- Quick & Easy: From mixing bowl to oven in under 15 minutes. No stand mixer required. No complicated techniques. Just whisk, pour, and bake.
- Simple Ingredients: You probably have most of this in your pantry right now. No weird extracts, no specialty flours. Just real, honest baking staples.
- Perfect for Fall Gatherings: This cake is made for apple picking trips, Thanksgiving brunch, cozy Sunday mornings, or any time you want your house to smell like autumn heaven.
- Crowd-Pleaser: I brought this to a Friendsgiving potluck last year, and three people asked for the recipe before I even set the plate down. Kids love it. Adults love it. It is universally adored.
- Unbelievably Delicious: The secret is reducing the apple cider before adding it to the batter. That little extra step concentrates the flavor into something almost caramel-like. Trust me on this one.
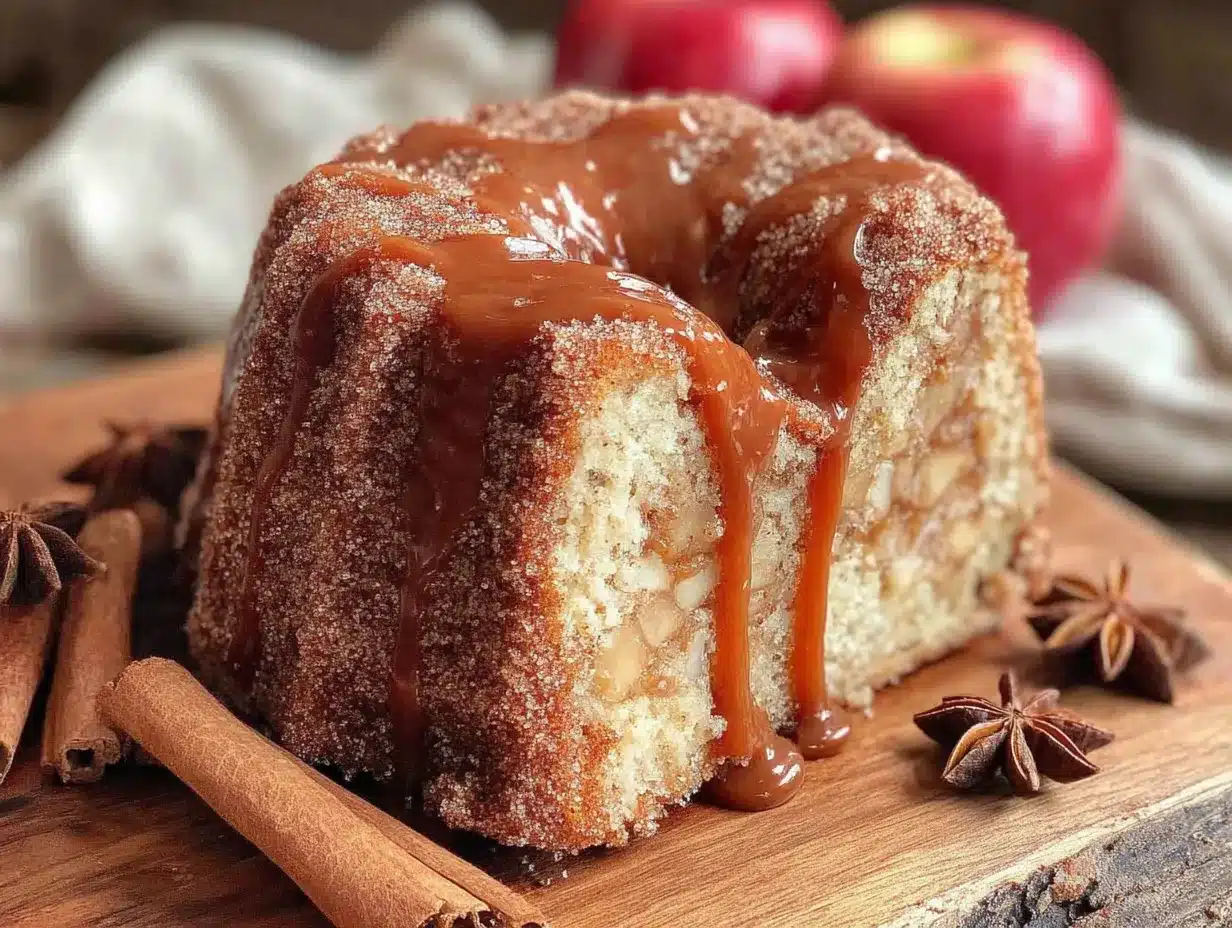
This isn’t just another apple cake. It is the cake that tastes like a whole fall festival in every single bite. The texture is so tender it practically melts, with a crumb that reminds you of a fresh donut but with the satisfaction of a proper slice. And that caramel glaze? It seeps into the warm cake and creates little pockets of gooey sweetness. It is comfort food at its finest—no stress, no fuss, just pure cozy happiness.
What Ingredients You Will Need
This recipe relies on simple, wholesome ingredients that work together to create that signature donut flavor without any of the deep-frying drama. Most of these are pantry staples, which makes this an easy last-minute bake when fall cravings hit.
- Apple Cider (2 cups): Not apple juice. You want the real, unfiltered stuff for the deepest flavor. We’re going to reduce it down to about 1/2 cup, which concentrates all that apple goodness.
- All-Purpose Flour (2 cups): Gives the cake structure without making it tough. Spoon and level your flour—don’t scoop straight from the bag or you’ll end up with a dry cake.
- Granulated Sugar (1 cup): Adds sweetness and helps create that tender crumb. I’ve tried reducing this, and the cake just isn’t the same.
- Light Brown Sugar (1/2 cup, packed): This is where the deep, molasses-y warmth comes from. Don’t skip it or substitute white sugar—you’ll lose that cozy flavor.
- Unsalted Butter (1/2 cup, melted and slightly cooled): Adds richness and moisture. I use salted butter in a pinch and just reduce the added salt by 1/4 teaspoon.
- Large Eggs (2): Room temperature is best. If you forget to take them out, place them in a bowl of warm water for 5 minutes.
- Buttermilk (1/2 cup): Makes the cake incredibly tender. No buttermilk? Add 1/2 tablespoon of lemon juice or vinegar to regular milk and let it sit for 5 minutes.
- Vanilla Extract (2 teaspoons): Pure vanilla, not imitation. It rounds out all the warm spices beautifully.
- Ground Cinnamon (2 teaspoons): The backbone of that donut shop flavor. I use Vietnamese cinnamon for extra punch.
- Ground Nutmeg (1/2 teaspoon): Freshly grated if you have it—the difference is noticeable.
- Ground Cloves (1/4 teaspoon): A little goes a long way. Adds that nostalgic, spiced depth.
- Baking Powder (1 1/2 teaspoons): For lift and a light texture.
- Baking Soda (1/2 teaspoon): Helps the cake brown and rise properly.
- Salt (1/2 teaspoon): Balances the sweetness and enhances the spices.
For the Caramel Glaze:
- Unsalted Butter (3 tablespoons): For richness and that glossy finish.
- Light Brown Sugar (1/2 cup, packed): The base of the caramel flavor.
- Heavy Cream (3 tablespoons): Makes the glaze silky. Half-and-half works in a pinch but won’t be as luscious.
- Powdered Sugar (1/2 cup, sifted): Thickens the glaze and adds sweetness without graininess.
- Vanilla Extract (1 teaspoon): Optional but recommended for depth.
- Flaky Sea Salt (a pinch): For that sweet-salty finish that makes everything better.
I recommend using a good-quality apple cider like Martinelli’s or a local orchard brand. The better your cider, the better your cake. And if you’re feeling adventurous, try using a blend of Honeycrisp and Granny Smith apples for your own fresh-pressed cider—it takes this cake to another level.
Equipment Needed
You don’t need a bakery-level setup for this cake. Here’s what you’ll need:
- 10-cup Bundt Pan: This is non-negotiable. A standard 12-cup bundt pan works too, but your cake will be slightly shorter. I love my Nordic Ware Anniversary Bundt Pan—it releases cakes perfectly every time.
- Small Saucepan: For reducing the apple cider. Use a heavy-bottomed one to prevent scorching.
- Large Mixing Bowl: For the dry ingredients.
- Medium Mixing Bowl: For the wet ingredients.
- Whisk: A good balloon whisk is all you need—no electric mixer required.
- Rubber Spatula: For scraping down the bowl and folding ingredients together.
- Cooling Rack: Essential for letting the cake cool evenly before glazing.
- Small Saucepan (for glaze): Or you can make the glaze in the microwave in a heatproof bowl.
- Cooking Spray with Flour: Baker’s Joy is my go-to. Regular non-stick spray can leave a residue that makes the cake stick.
No bundt pan? You can use a 9×5-inch loaf pan, but you’ll need to adjust the baking time (about 55-65 minutes). The texture will be slightly different, but it’ll still be delicious. If you’re new to bundt cakes, invest in a good pan—it makes all the difference in release and presentation.
Preparation Method
Alright, let’s get baking. This method is straightforward, but I’ve included all the little details that make the difference between a good cake and a great one.
- Reduce the Apple Cider: Pour 2 cups of apple cider into a small saucepan. Bring it to a boil over medium-high heat, then reduce the heat to medium and let it simmer. You want it to reduce down to about 1/2 cup. This takes about 15-20 minutes. Swirl the pan occasionally, but don’t walk away—it can go from perfect to burnt quickly. You’ll know it’s done when it’s syrupy and smells intensely of apples. Set it aside to cool while you prep everything else. (Pro tip: If you accidentally reduce it too much and it gets thick like caramel, just whisk in a tablespoon of water to loosen it.)
- Preheat and Prep: Preheat your oven to 350°F (175°C). Generously grease your bundt pan with cooking spray that contains flour. Get into every nook and cranny—I mean it. A poorly greased bundt pan is the number one reason cakes stick. I run my finger along the edges to make sure no spot is missed.
- Mix Dry Ingredients: In a large bowl, whisk together the flour, cinnamon, nutmeg, cloves, baking powder, baking soda, and salt. Whisk for about 20 seconds to aerate and distribute the spices evenly. Set aside.
- Mix Wet Ingredients: In a medium bowl, whisk together the granulated sugar, brown sugar, melted butter, eggs, buttermilk, vanilla extract, and the cooled reduced apple cider. Whisk until smooth—about 30 seconds. The mixture should look glossy and smell amazing already.
- Combine Wet and Dry: Pour the wet ingredients into the dry ingredients. Use a rubber spatula to fold everything together gently. Stop as soon as you no longer see streaks of flour. Overmixing will make the cake tough. A few small lumps are totally fine—they’ll bake out.
- Fill the Pan: Pour the batter into the prepared bundt pan. Use the spatula to spread it evenly. Lift the pan about 2 inches off the counter and drop it gently a couple times to release any air bubbles.
- Bake: Place the pan on the middle rack of your preheated oven. Bake for 40-50 minutes, or until a wooden skewer inserted near the center comes out clean or with just a few moist crumbs. The top should be golden brown and spring back when lightly touched. Start checking at 38 minutes—every oven runs differently.
- Cool in Pan: Let the cake cool in the pan on a wire rack for exactly 15 minutes. This is crucial. Too short and the cake will fall apart when you invert it. Too long and it will stick to the pan as it cools and contracts.
- Invert the Cake: Place your cooling rack upside down on top of the cake pan. Hold both together firmly and flip them over. Lift the pan off slowly. If the cake doesn’t release immediately, gently tap the bottom of the pan. Let the cake cool completely on the rack before glazing—about 1 hour.
- Make the Caramel Glaze: While the cake cools, make the glaze. In a small saucepan over medium heat, melt the butter. Add the brown sugar and heavy cream, stirring constantly. Bring it to a gentle simmer and cook for 1-2 minutes until the sugar is dissolved and the mixture is smooth. Remove from heat and whisk in the powdered sugar and vanilla until smooth. Let it cool for 2-3 minutes—it should be thick but pourable. If it gets too thick, add a teaspoon of cream to thin it.
- Glaze the Cake: Place the cooled cake on a serving plate. Slowly pour the caramel glaze over the top, letting it drip down the sides. Use a spoon to help it along if needed. Sprinkle with flaky sea salt immediately while the glaze is still wet.
- Let the Glaze Set: Allow the glaze to set for at least 15 minutes before slicing. I know it’s tempting to dig in right away, but the wait is worth it for clean slices.
Cooking Tips & Techniques
I’ve made this cake more times than I can count, and I’ve learned a few things the hard way. Let me save you the trouble.
Don’t skip reducing the cider. I know it’s an extra step, but it is the secret weapon here. Raw apple cider is too watery and won’t give you that concentrated, almost caramel-like apple flavor. Reducing it also removes excess liquid that would make your cake gummy. I once tried skipping this step in a hurry, and the result was a bland, wet cake that nobody finished. Never again.
Room temperature ingredients matter. Cold eggs and cold buttermilk will seize the melted butter and give you a lumpy batter. Take them out 30 minutes before you start. If you forget, place the eggs in warm water for 5 minutes and microwave the buttermilk for 10 seconds.
Use the spoon-and-level method for flour. Scooping directly from the bag compacts the flour and can add up to 25% more than the recipe calls for. Instead, fluff the flour with a spoon, spoon it into your measuring cup, and level it off with a knife. Your cake will thank you.
Watch the glaze temperature. If you pour the glaze over a warm cake, it will soak in completely and disappear. If the cake is too cold, the glaze will harden instantly and look streaky. Room temperature cake with slightly warm glaze is the sweet spot.
Test for doneness properly. A toothpick test is fine, but I prefer a thin wooden skewer—it reaches deeper into the cake and gives you a better read. Also, look for the cake pulling away slightly from the edges of the pan. That’s a reliable visual cue.
Variations & Adaptations
This recipe is wonderfully flexible. Here are some ways to make it your own:
- Dairy-Free Version: Substitute the butter with a plant-based butter (I like Miyoko’s), use full-fat oat milk mixed with 1 teaspoon of apple cider vinegar for the buttermilk, and swap the heavy cream in the glaze with coconut cream. The texture is slightly less tender but still delicious.
- Gluten-Free Option: Use a 1:1 gluten-free baking flour blend like King Arthur Measure for Measure. Add 1/2 teaspoon of xanthan gum if your blend doesn’t already include it. The cake will be a bit more delicate, so handle it gently when inverting.
- Spice It Up: Add 1/4 teaspoon of ground cardamom or ginger for a more complex spice profile. I made this version for Christmas last year, and it was a huge hit with mulled wine.
- Add Texture: Fold in 1/2 cup of toasted pecans or walnuts along with the dry ingredients. The crunch is a lovely contrast to the tender crumb.
- Maple Glaze Variation: Swap the caramel glaze for a simple maple glaze—whisk together 1 cup of powdered sugar, 3 tablespoons of maple syrup, and 1 tablespoon of milk. It’s less rich but has that pure, woodsy maple flavor that pairs beautifully with apple.
- Bake as Muffins: Divide the batter into a greased muffin tin and bake at 350°F for 18-22 minutes. You’ll get about 16 muffins. Drizzle with glaze while still warm for a portable breakfast treat.
Serving & Storage Suggestions
This cake is at its absolute best served slightly warm, about 30 minutes after glazing. The glaze is still soft, the cake is tender, and the whole thing tastes like a hug in food form.
How to Serve: Slice generously and serve with a hot cup of coffee or a mug of spiced tea. For an extra-indulgent treat, warm individual slices in the microwave for 10 seconds and add a scoop of vanilla bean ice cream. The contrast between warm spiced cake and cold, creamy ice cream is next-level comfort food. If you’re feeling fancy, a dollop of lightly sweetened whipped cream and a dusting of cinnamon makes a beautiful presentation.
Storage: Store the cake in an airtight container at room temperature for up to 3 days. Do not refrigerate—it will dry out the cake. If your kitchen is warm, the glaze might get a bit sticky, but that’s part of the charm.
Freezing: This cake freezes beautifully. Wrap the completely cooled (unglazed) cake tightly in plastic wrap, then in aluminum foil. Freeze for up to 3 months. When ready to serve, thaw overnight in the refrigerator, bring to room temperature, then make the glaze fresh. The glaze does not freeze well, so always make it fresh.
Reheating: For that just-baked experience, microwave individual slices for 10-15 seconds. Or place slices on a baking sheet in a 300°F oven for 5-7 minutes. The cake will smell like autumn all over again.
Flavor Development: Here’s a little secret—this cake actually tastes better on day two. The spices have time to meld and deepen, and the texture becomes even more tender. So if you can resist, make it a day ahead and let it rest overnight. You won’t regret it.
Nutritional Information & Benefits
Let’s be real—this is a treat, not a health food. But that doesn’t mean it can’t have some redeeming qualities! Here’s the estimated nutritional breakdown per slice (based on 12 servings):
- Calories: Approximately 380
- Fat: 16g
- Carbohydrates: 58g
- Protein: 4g
- Fiber: 1g
- Sugar: 40g
Health Highlights: Apple cider contains antioxidants called polyphenols, which support heart health and reduce inflammation. Cinnamon is known for its anti-inflammatory properties and can help regulate blood sugar. Cloves and nutmeg are packed with antioxidants too. So while this cake isn’t a health food, it does use ingredients that offer some benefits when consumed as part of a balanced diet.
Dietary Considerations: This recipe contains gluten, dairy, and eggs. For gluten-free or dairy-free adaptations, see the variations section above. It is not suitable for vegan diets unless all substitutions are made. Always check your ingredient labels if cooking for someone with allergies.
My philosophy? Life is too short to skip dessert. This cake is meant to be enjoyed in moderation, shared with loved ones, and savored without guilt. A slice of this with a cup of tea on a crisp autumn afternoon is a form of self-care, honestly.
Conclusion
This Cozy Spiced Apple Cider Donut Cake with Caramel Glaze is more than just a recipe—it is a moment. It is the smell of cinnamon filling your kitchen on a rainy Sunday. It is the first bite that makes you close your eyes and forget about your to-do list. It is the cake you bring to the cider mill, even if your sister thinks it’s weird, because you know it will make people smile.
I love this recipe because it takes the flavor of a classic fall donut and turns it into something you can linger over. Something that feeds a crowd without frying a single thing. Something that feels special but comes together with simple ingredients and a single bowl.
Now I want to hear from you. Have you tried this cake? Did you add your own twist? Drop a comment below and let me know how it turned out. Tag me in your photos—I love seeing your bakes. And if you’re looking for more cozy fall recipes, you might enjoy this cozy one-pot chicken and wild rice soup or these easy baked pumpkin donuts with maple glaze. Happy baking, friends. Go make something that smells like autumn.
Frequently Asked Questions
Can I use apple juice instead of apple cider?
Technically yes, but the flavor won’t be as rich or complex. Apple juice is sweeter and more filtered, so it lacks the tangy, tannic notes that make cider special. If you’re in a pinch, add 1/2 teaspoon of apple cider vinegar to the juice to mimic some of that acidity.
Why did my cake stick to the bundt pan?
This happens to the best of us. The most common culprit is insufficient greasing. Use a baking spray that contains flour—it makes a huge difference. Also, make sure you let the cake cool for exactly 15 minutes before inverting. Too short and it’s fragile; too long and it’s glued to the pan.
Can I make this cake ahead of time?
Absolutely. In fact, I prefer it on day two. Bake the cake a day ahead, cool it completely, wrap it tightly, and store at room temperature. Make the glaze fresh on the day you plan to serve it. The cake stays moist and the flavors deepen overnight.
How do I prevent the glaze from being too runny?
If your glaze is too thin, let it cool for a few more minutes before pouring. The glaze thickens as it cools. If it’s still too runny, whisk in an extra tablespoon of powdered sugar. If it’s too thick, add a teaspoon of cream or milk.
Can I skip the caramel glaze?
You can, but I wouldn’t recommend it. The glaze adds moisture and a rich, buttery sweetness that complements the spiced cake perfectly. If you want a lighter option, try dusting the cake with powdered sugar and cinnamon instead. Or go with the maple glaze variation mentioned above.
Pin This Recipe!
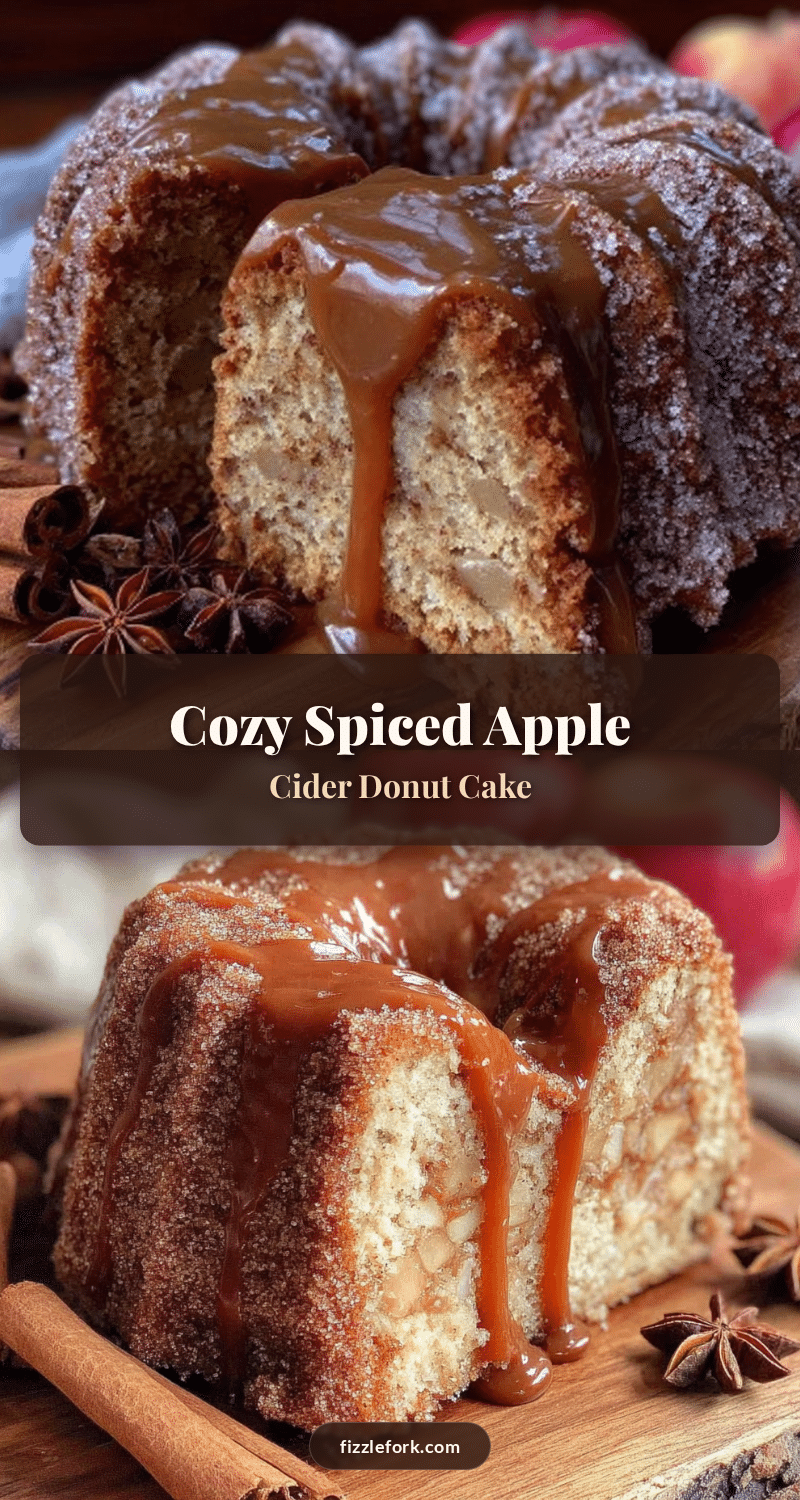
Cozy Spiced Apple Cider Donut Cake with Easy Caramel Glaze
This tender, spiced cake tastes like a fall festival in every bite, with a concentrated apple cider flavor and a rich caramel glaze that seeps into the warm cake for pockets of gooey sweetness.
- Prep Time: 15 minutes
- Cook Time: 40-50 minutes
- Total Time: 1 hour 15 minutes
- Yield: 12 servings 1x
- Category: Dessert
- Cuisine: American
Ingredients
- 2 cups apple cider
- 2 cups all-purpose flour
- 1 cup granulated sugar
- 1/2 cup light brown sugar, packed
- 1/2 cup unsalted butter, melted and slightly cooled
- 2 large eggs, room temperature
- 1/2 cup buttermilk
- 2 teaspoons vanilla extract
- 2 teaspoons ground cinnamon
- 1/2 teaspoon ground nutmeg
- 1/4 teaspoon ground cloves
- 1 1/2 teaspoons baking powder
- 1/2 teaspoon baking soda
- 1/2 teaspoon salt
- For the Caramel Glaze:
- 3 tablespoons unsalted butter
- 1/2 cup light brown sugar, packed
- 3 tablespoons heavy cream
- 1/2 cup powdered sugar, sifted
- 1 teaspoon vanilla extract
- 1 pinch flaky sea salt
Instructions
- Reduce the Apple Cider: Pour 2 cups of apple cider into a small saucepan. Bring to a boil over medium-high heat, then reduce heat to medium and simmer until reduced to about 1/2 cup, about 15-20 minutes. Swirl occasionally. Set aside to cool.
- Preheat and Prep: Preheat oven to 350°F (175°C). Generously grease a 10-cup Bundt pan with cooking spray that contains flour.
- Mix Dry Ingredients: In a large bowl, whisk together flour, cinnamon, nutmeg, cloves, baking powder, baking soda, and salt for about 20 seconds. Set aside.
- Mix Wet Ingredients: In a medium bowl, whisk together granulated sugar, brown sugar, melted butter, eggs, buttermilk, vanilla extract, and cooled reduced apple cider until smooth, about 30 seconds.
- Combine Wet and Dry: Pour wet ingredients into dry ingredients. Fold gently with a rubber spatula until just combined. Do not overmix; a few lumps are fine.
- Fill the Pan: Pour batter into prepared Bundt pan. Spread evenly. Tap pan gently on counter to release air bubbles.
- Bake: Bake on middle rack for 40-50 minutes, until a wooden skewer inserted near center comes out clean or with a few moist crumbs. Start checking at 38 minutes.
- Cool in Pan: Let cake cool in pan on a wire rack for exactly 15 minutes.
- Invert the Cake: Place cooling rack upside down on pan, flip together, and lift pan off. Let cake cool completely on rack, about 1 hour.
- Make the Caramel Glaze: In a small saucepan over medium heat, melt butter. Add brown sugar and heavy cream, stirring constantly. Bring to a gentle simmer and cook 1-2 minutes until smooth. Remove from heat and whisk in powdered sugar and vanilla until smooth. Let cool 2-3 minutes until thick but pourable.
- Glaze the Cake: Place cooled cake on serving plate. Slowly pour caramel glaze over top, letting it drip down sides. Sprinkle with flaky sea salt immediately.
- Let the Glaze Set: Allow glaze to set for at least 15 minutes before slicing.
Notes
Don’t skip reducing the cider—it concentrates the apple flavor. Room temperature ingredients are important for a smooth batter. Use the spoon-and-level method for flour. For best results, let the cake rest overnight for deeper flavor. The glaze is best made fresh.
Nutrition
- Serving Size: 1 slice
- Calories: 380
- Sugar: 40
- Fat: 16
- Carbohydrates: 58
- Fiber: 1
- Protein: 4
Keywords: apple cider donut cake, spiced apple cake, caramel glaze, fall dessert, bundt cake, easy apple cake