This was supposed to be a batch of savory pumpkin dinner rolls. I had the flour measured, the yeast proofing, and a whole plan for a cozy autumn side dish. But somewhere between answering the door for a package and trying to find my favorite rolling pin—which, honestly, I think my sister borrowed months ago—I grabbed the wrong container from the spice rack. Instead of sage, I dumped a generous amount of cinnamon into the dough. My heart sank. I stared at the bowl, the fragrant cinnamon swirling into the pumpkin puree, and I was already picturing a wasted afternoon and a trip to the bakery.
But I was stubborn. And hungry. So I kept going, muttering to myself about what a mess this was turning into. I swapped the yeast for baking powder, tossed in some nutmeg and ginger because why not, and poured the whole thing into a donut pan I’d impulse-bought months ago and never used. The batter looked good—thick, spiced, a deep orange-gold—but I had zero expectations. I mean, a pumpkin donut that came from a dinner roll disaster? It sounded like a joke.
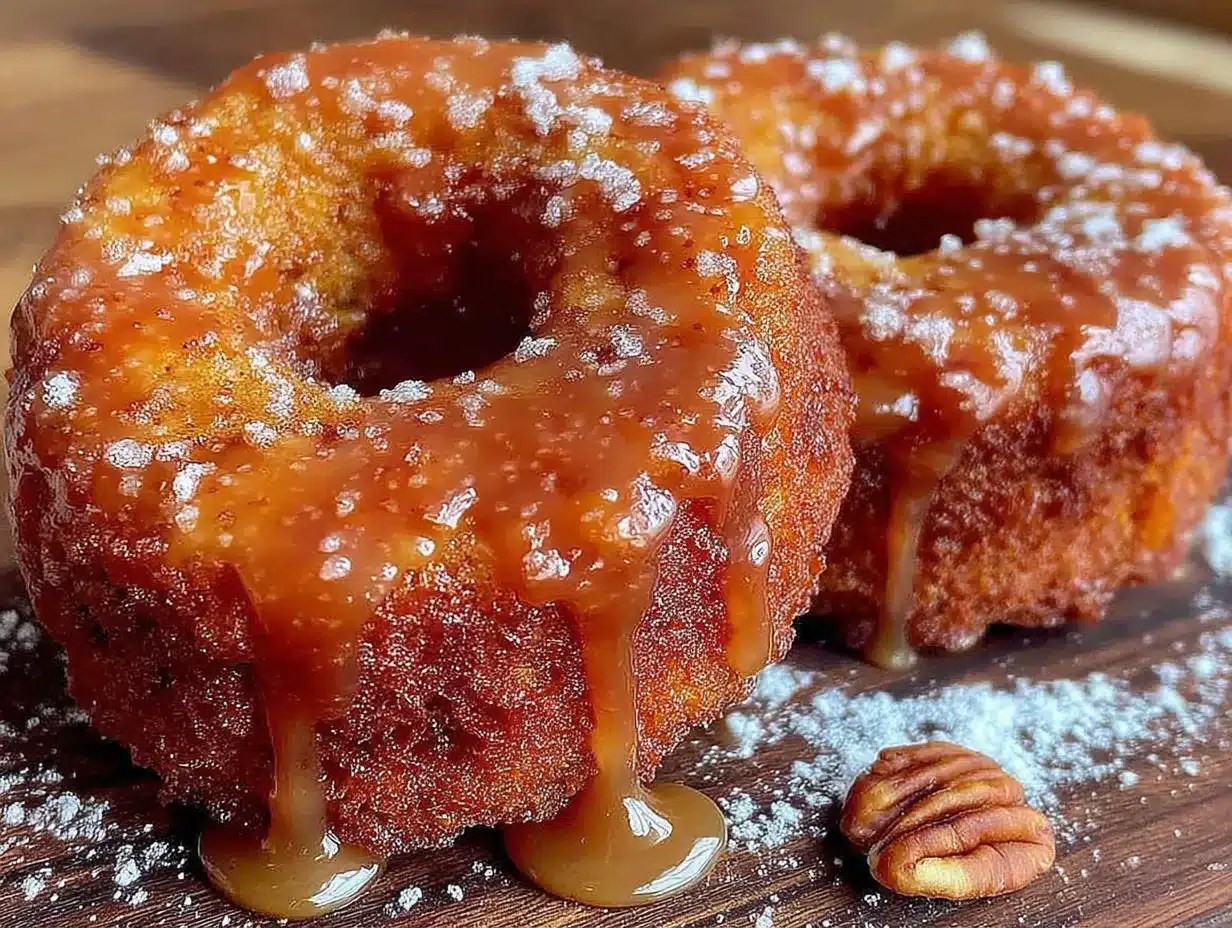
When the timer went off, the kitchen smelled like a bakery had exploded. I pulled the pan out, let them cool for maybe two minutes (I’m impatient, let’s be real), and took a bite. The texture was perfect—soft, cakey, not too dense. The maple glaze I whisked up on a whim was the final touch. I stood there at the counter, eating a donut that was never supposed to exist, and I knew I’d stumbled onto something special. Maybe you’ve been there—a mistake in the kitchen that turns out better than the plan. These baked pumpkin donuts with maple glaze are that happy accident I keep coming back to, and now I make them on purpose every single time I want to impress a crowd without breaking a sweat.
Why You’ll Love This Recipe
Let me tell you why these donuts have become my secret weapon for fall gatherings. I’ve tested this recipe at least a dozen times—for brunches, for potlucks, for that one time I promised to bring dessert to a friend’s dinner party and showed up with a dozen of these glazed beauties. They disappeared in minutes. People asked for the recipe before I even sat down.
- Quick & Easy: These come together in under 30 minutes from start to finish. No yeast, no rising time, no deep-frying mess. Perfect for when you remember at 4 PM that you’re hosting dinner at 6.
- Simple Ingredients: You likely have everything in your pantry right now—flour, sugar, pumpkin puree, eggs, butter, and a handful of spices. No specialty store trips required.
- Perfect for Hosting: These are made for sharing. They look impressive on a platter, they’re easy to grab, and they pair beautifully with coffee, cider, or even a glass of wine. Great for brunch, Thanksgiving morning, or a casual fall get-together.
- Crowd-Pleaser: I’ve served these to kids, picky eaters, and serious foodies. Everyone loves them. The maple glaze is the real star—it’s not too sweet, just rich and cozy.
- Unbelievably Delicious: The texture is what gets me every time. Baked, not fried, so they’re light and tender. The pumpkin flavor is warm and present, and the maple glaze adds that sticky-sweet finish that makes you reach for a second one.
What sets this recipe apart is the balance. I’ve tried baked donuts before that were dry or bland. These aren’t. The secret is using melted butter and a touch of buttermilk, which keeps them moist without being greasy. And the spice blend—cinnamon, nutmeg, ginger, and a pinch of cloves—makes the kitchen smell like autumn itself. This isn’t just another pumpkin recipe. It’s the one I turn to when I want to feel like a rockstar host without spending all day in the kitchen.
What Ingredients You Will Need
This recipe uses simple, wholesome ingredients to deliver bold flavor and a satisfying texture without the fuss. Most of these are pantry staples, especially if you bake during the fall season. Here’s what you’ll need and why each one matters.
For the Donuts
- 1 ¾ cups all-purpose flour (spooned and leveled—don’t scoop directly from the bag or you’ll pack in too much)
- 1 ½ teaspoons baking powder (for lift; make sure it’s fresh)
- ½ teaspoon baking soda (helps with browning and texture)
- 1 teaspoon ground cinnamon (I prefer Saigon cinnamon for its bold, warm flavor)
- ½ teaspoon ground nutmeg (freshly grated if you have it—it makes a difference)
- ½ teaspoon ground ginger (adds a subtle warmth without being overpowering)
- ¼ teaspoon ground cloves (a little goes a long way; skip if you’re not a fan)
- ½ teaspoon salt (balances the sweetness and enhances the spices)
- 1 cup pumpkin puree (not pumpkin pie filling—look for 100% pure pumpkin. I like Libby’s for consistent results)
- ½ cup granulated sugar (adds sweetness and structure)
- ¼ cup packed light brown sugar (adds moisture and a hint of molasses flavor)
- 2 large eggs (room temperature, so they incorporate smoothly)
- ½ cup buttermilk (adds tenderness and helps activate the baking soda. No buttermilk? Use ½ cup milk plus ½ tablespoon lemon juice or vinegar, let sit 5 minutes)
- ¼ cup unsalted butter, melted and slightly cooled (adds richness and keeps the donuts moist)
- 1 teaspoon vanilla extract (enhances the overall flavor)
For the Maple Glaze
- 1 ½ cups powdered sugar, sifted (to avoid lumps)
- 3 tablespoons pure maple syrup (not pancake syrup—use the real stuff for the best flavor. I recommend Grade A Dark Amber for a stronger maple taste)
- 2 tablespoons milk (or heavy cream for a richer glaze)
- ½ teaspoon vanilla extract (optional, but I like the extra depth)
- Pinch of salt (to cut the sweetness)
Ingredient Selection Tips: For the pumpkin puree, avoid cans that say “pumpkin pie mix” because they already have sugar and spices added. You want pure, unadulterated pumpkin. For the maple syrup, I’ve tried this with cheaper syrups, and the glaze ends up tasting thin and artificial. Splurge on the good stuff—it’s worth it for that rich, woodsy sweetness. If you’re dairy-free, you can substitute the buttermilk with a dairy-free milk plus lemon juice, and use a plant-based butter. The texture will be slightly different but still delicious.
Equipment Needed
You don’t need a fancy bakery setup for these donuts. Here’s what I use and some alternatives if you’re working with a minimalist kitchen.
- Donut pan: This is the one specialized tool you’ll need. I have a standard 6-cavity non-stick pan from Wilton that’s held up for years. If you don’t have one, you can use a mini donut pan (adjust baking time to 8-10 minutes) or even a muffin tin—just fill the cups halfway and bake for 12-15 minutes. They won’t have the classic donut shape, but they’ll taste the same.
- Mixing bowls: Two medium bowls—one for dry ingredients, one for wet. Nothing fancy. I use glass bowls because they’re easy to clean and don’t hold onto odors.
- Whisk: For combining ingredients. A fork works in a pinch, but a whisk gives you a smoother batter.
- Rubber spatula: For scraping down the sides of the bowl and folding the batter together. I’ve ruined a batch by overmixing with a wooden spoon—use a spatula for gentle folding.
- Piping bag or zip-top bag: For filling the donut cavities cleanly. I usually snip the corner off a gallon-size zip-top bag. It’s less messy than spooning the batter in.
- Cooling rack: Essential for letting the glaze set. If you don’t have one, use a wire rack from a baking sheet or even a clean kitchen towel placed over a cutting board.
- Small saucepan: For warming the glaze ingredients if needed. I’ve also made the glaze in a microwave-safe bowl in 15-second bursts.
Budget-Friendly Options: Don’t rush out to buy a donut pan if you’re not sure you’ll use it often. Borrow one from a friend or check thrift stores—I found my backup pan for $2. The zip-top bag trick works perfectly, so you don’t need a piping bag set. And honestly, a fork and a bowl are all you really need for mixing.
Preparation Method
Let’s get baking. I’ve broken this down into clear steps with time estimates and sensory cues so you know exactly what to look for. Trust me, these donuts are forgiving, but a few small details make all the difference.
- Preheat your oven to 350°F (175°C). Spray your donut pan generously with non-stick cooking spray. I use a spray with flour in it for extra insurance. Place the pan on a baking sheet for easier handling—this also catches any drips if you overfill.
- In a medium bowl, whisk together the dry ingredients: 1 ¾ cups all-purpose flour, 1 ½ teaspoons baking powder, ½ teaspoon baking soda, 1 teaspoon cinnamon, ½ teaspoon nutmeg, ½ teaspoon ginger, ¼ teaspoon cloves, and ½ teaspoon salt. Whisk until everything is evenly distributed—about 20 seconds. You want the spices to be fully incorporated so you don’t get a pocket of cinnamon in one bite. Set this aside.
- In a larger bowl, combine the wet ingredients: 1 cup pumpkin puree, ½ cup granulated sugar, ¼ cup packed light brown sugar, 2 large eggs, ½ cup buttermilk, ¼ cup melted butter (cooled slightly), and 1 teaspoon vanilla extract. Whisk until smooth and glossy. The mixture should be a vibrant orange color and smell like pumpkin pie. If the butter seizes up from cold ingredients, don’t panic—just whisk vigorously or let the bowl sit for a minute to warm up.
- Pour the dry ingredients into the wet ingredients. Use a rubber spatula to fold them together gently. Stir just until no streaks of flour remain—about 10 to 12 folds. A few small lumps are fine. Overmixing will make the donuts tough, so stop as soon as it comes together. The batter will be thick but scoopable, like a muffin batter.
- Transfer the batter to a piping bag or zip-top bag. If using a zip-top bag, snip about ½ inch off one corner. Pipe the batter into the prepared donut cavities, filling each one about ¾ full. Don’t overfill—they’ll puff up as they bake, and you want that classic donut ring shape, not a puffy dome. If you have extra batter, you can bake a second batch after the pan cools.
- Bake for 10 to 12 minutes. The donuts are done when they’re golden brown around the edges and a toothpick inserted into the thickest part comes out clean or with a few moist crumbs. The tops should spring back when lightly touched. Every oven runs a little different—mine is done at 11 minutes exactly. Start checking at 10 minutes.
- Let the donuts cool in the pan for 5 minutes. This is crucial—if you try to remove them too soon, they’ll stick and tear. After 5 minutes, gently run a small offset spatula or butter knife around the edges to loosen them, then turn the pan over onto a cooling rack. Tap the bottom of the pan if needed. Let them cool completely before glazing. Warm donuts will melt the glaze into a puddle, and you’ll lose that beautiful glossy finish.
- While the donuts cool, make the maple glaze. In a small bowl, whisk together 1 ½ cups sifted powdered sugar, 3 tablespoons pure maple syrup, 2 tablespoons milk, ½ teaspoon vanilla extract, and a pinch of salt. Whisk until smooth. The consistency should be thick but pourable—like honey. If it’s too thick, add milk 1 teaspoon at a time. If it’s too thin, add a little more powdered sugar. Taste it—you should get a clear maple flavor, not just sweetness.
- Dip the cooled donuts into the glaze. Hold each donut by the edges and dip the top into the glaze, twisting slightly to coat evenly. Lift it out and let the excess drip back into the bowl for a few seconds. Place the donut glazed-side up on the cooling rack. The glaze will set in about 10 to 15 minutes at room temperature. For a thicker glaze layer, let the first coat set for 5 minutes, then dip again.
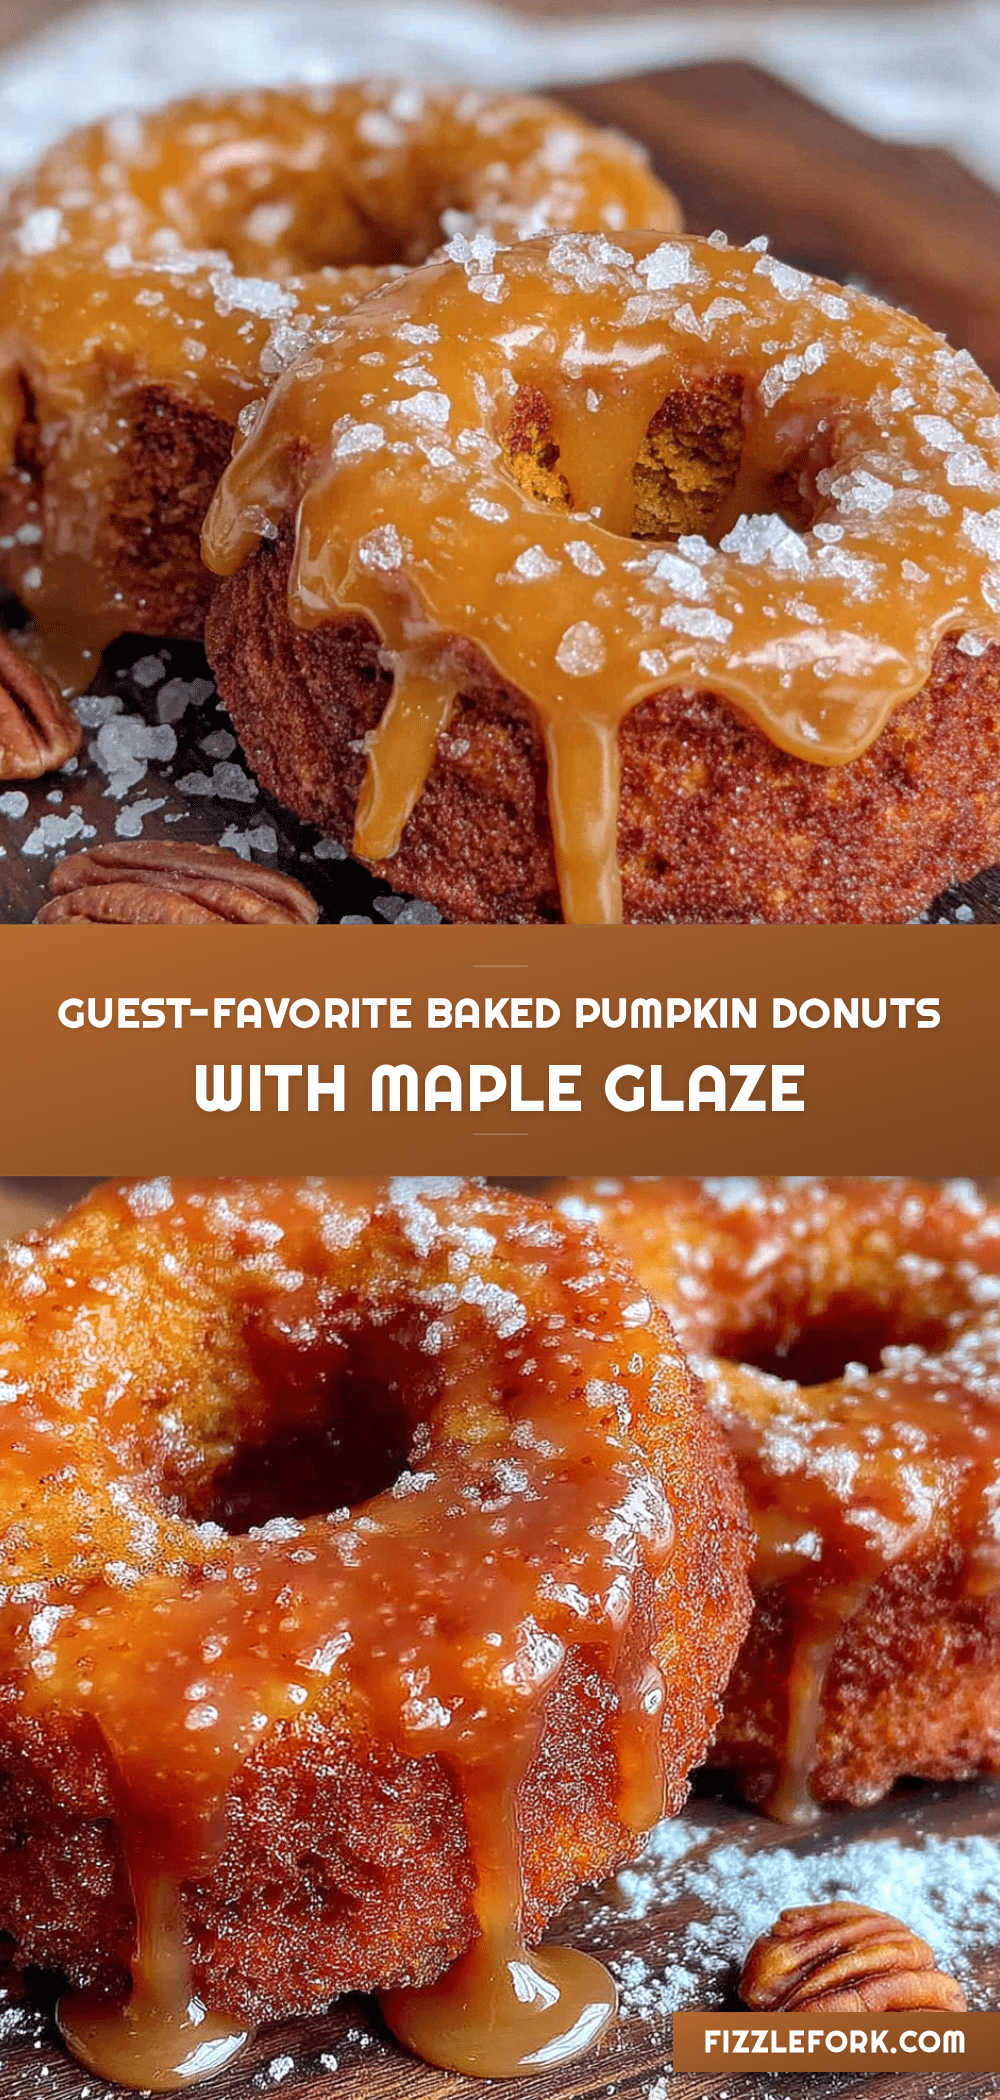
- Optional: Add a sprinkle of cinnamon or a pinch of flaky sea salt on top right after glazing, before the glaze sets. The salt is a game-changer—it cuts through the sweetness and makes the maple flavor pop.
Personal Efficiency Tip: I make the glaze while the donuts are baking, so everything is ready to go when they come out. And I always double the glaze recipe because people love extra—I’ve had guests ask for a little bowl of it on the side for dipping.
Cooking Tips & Techniques
I’ve made these donuts enough times to know exactly where things can go wrong. Here are the lessons I learned the hard way, so you don’t have to.
The Biggest Mistake: Overmixing the Batter. I did this on my second test batch. I was too aggressive with the whisk, and the donuts came out dense and rubbery. The gluten develops quickly when you mix wet and dry ingredients, so use a light hand. Fold until just combined—lumps are your friends here. The batter should look like a thick muffin batter, not a smooth cake batter.
Don’t Skip the Buttermilk. I tried making these with regular milk once because I was out of buttermilk. The texture was noticeably less tender. The acid in the buttermilk reacts with the baking soda to create a softer crumb. If you don’t have buttermilk, the milk-and-lemon-juice hack works perfectly. Let it sit for 5 minutes before using—you’ll see it thicken slightly.
Temperature Matters for the Glaze. The first time I made the maple glaze, I used cold milk straight from the fridge. The powdered sugar clumped up, and I ended up with a grainy mess. Make sure your milk (or cream) is at room temperature, or gently warm the maple syrup before whisking. A smooth glaze makes all the difference in presentation.
Timing Your Glaze. Don’t glaze the donuts while they’re warm, but don’t wait until they’re stone cold either. I aim for about 15 minutes after they come out of the pan—still slightly warm to the touch but not hot. The glaze will set nicely without sliding off. If you glaze them too cold, the glaze tends to thicken and sit on top in a thick layer instead of forming that thin, glossy coat.
Multitasking Strategy. While the donuts are baking, I clean up the mixing bowls and make the glaze. That way, when the donuts come out, all I have to do is dip and serve. If I’m hosting, I’ll even bake the donuts a few hours ahead and glaze them just before guests arrive. The glaze stays shiny for about 2 hours, so you’ve got a good window.
Variations & Adaptations
One of the best things about this recipe is how flexible it is. I’ve tried several variations depending on the occasion or what I have on hand, and they’ve all been hits.
Gluten-Free Version: Substitute the all-purpose flour with a 1:1 gluten-free baking flour blend (I like Bob’s Red Mill). The texture will be slightly more delicate, so handle them gently when removing from the pan. No other adjustments needed—the pumpkin puree helps keep them moist.
Dairy-Free Adaptation: Use a plant-based buttermilk substitute (unsweetened almond milk or oat milk plus ½ tablespoon lemon juice) and melted coconut oil or vegan butter instead of regular butter. The flavor is slightly different—coconut oil adds a subtle tropical note that pairs surprisingly well with pumpkin—but the texture is still soft and tender.
Spice Variations: For a chai-spiced version, add ½ teaspoon cardamom and ¼ teaspoon black pepper to the dry ingredients. The pepper sounds weird, I know, but it adds a gentle warmth that complements the pumpkin. I made this for a fall brunch once, and a friend asked if she could take the rest home.
Chocolate Lover’s Twist: Add ¼ cup mini chocolate chips to the batter before piping. The chocolate melts into little pockets of richness. I’ve also drizzled melted dark chocolate over the maple glaze for a double-coated donut that’s dangerously good.
Baking Method Alternative: If you don’t have a donut pan, use a mini muffin tin. Fill the cups about ⅔ full and bake for 8-10 minutes. They won’t have the hole in the middle, but they’ll taste exactly the same. I’ve also made this as a small loaf cake—bake in a greased 8×4 inch loaf pan at 350°F for 35-40 minutes. Slice and serve with extra glaze on the side.
Serving & Storage Suggestions
These donuts are best served slightly warm or at room temperature, with the glaze fully set. I like to arrange them on a large wooden board or a white platter for maximum visual impact—the golden glaze against the dark wood is stunning for fall tablescapes. If you’re hosting, place them near the coffee station or set them out as guests arrive. They’re the perfect bite to hold while mingling.
What to Serve Alongside: A hot cup of coffee or spiced apple cider is the obvious pairing, but don’t overlook a glass of cold milk or a chai latte. For brunch, I serve them with a simple frittata or a bowl of fresh fruit to balance the sweetness. They also work beautifully as part of a dessert spread with vanilla ice cream or a scoop of pumpkin gelato.
Storage Instructions: Store leftover donuts in an airtight container at room temperature for up to 2 days. Do not refrigerate them—the fridge dries out baked goods and makes the glaze lose its shine. If you need to store them longer, freeze them unglazed. Wrap each cooled donut individually in plastic wrap, then place them in a freezer-safe bag. They’ll keep for up to 2 months. When you’re ready to serve, thaw them at room temperature for about 30 minutes, then make fresh glaze and dip them. The glaze doesn’t freeze well, so always add it fresh.
Reheating Tips: To refresh day-old donuts, pop them in a 300°F oven for 3-5 minutes. The glaze will soften slightly but won’t melt off. Avoid the microwave—it makes the donuts rubbery and the glaze sticky. I’ve learned this the hard way more than once.
Flavor Development: Honestly, these donuts are even better the next day. The spices meld together overnight, and the texture stays moist. If you can resist eating them all on day one, you’re in for a treat on day two.
Nutritional Information & Benefits
Here’s a rough estimate per donut (based on 12 donuts with glaze): approximately 220 calories, 6g fat, 38g carbohydrates, 3g protein, 1g fiber, and 22g sugar. These numbers will vary based on exact ingredients and glaze thickness.
While these are definitely a treat, there are some nutritional bright spots. Pumpkin puree is packed with vitamin A (over 200% of your daily needs per cup) and antioxidants like beta-carotene, which supports eye health and immune function. The cinnamon and ginger add anti-inflammatory properties, and the buttermilk provides a little calcium and protein. The maple syrup, while still sugar, contains trace minerals like zinc and manganese that refined sugar lacks.
Dietary Considerations: This recipe can be made gluten-free and dairy-free with the substitutions listed above. It contains eggs, wheat, and dairy in its standard form. If you’re watching your sugar intake, you can reduce the granulated sugar to ⅓ cup and use a sugar-free maple syrup alternative, though the texture and flavor will change slightly.
My personal perspective? I don’t believe in labeling these as “healthy” or “guilt-free.” They’re a celebration food—something you make for a special occasion or a cozy weekend morning. And that’s okay. A donut made with real ingredients, shared with people you love, is a beautiful thing. Balance is everything.
Conclusion
These baked pumpkin donuts with maple glaze started as a kitchen mistake, but now they’re the recipe I’m most proud of. They’re proof that sometimes the best things come from unexpected places—a wrong spice, a distracted moment, a willingness to keep going even when things don’t go as planned. Every time I make them, I’m reminded that cooking isn’t about perfection. It’s about showing up, trusting your instincts, and sharing something delicious with the people around you.
I hope you give these a try. Customize them however you like—add more spice, swap the glaze, make them gluten-free. The recipe is a starting point, not a rulebook. And when you bite into that first warm, glazed donut, I think you’ll understand why I keep coming back to this one.
If you make them, I’d love to hear how they turned out. Drop a comment below or tag me in your photos—I’m always amazed by the creative twists you all come up with. Until next time, happy baking, and remember: the best recipes are the ones you never planned to make.
Frequently Asked Questions
Can I use pumpkin pie filling instead of pumpkin puree?
No, I don’t recommend it. Pumpkin pie filling already has sugar and spices added, which will throw off the balance of this recipe. Stick with 100% pure pumpkin puree for the best texture and flavor control.
Why did my donuts stick to the pan?
This usually happens if the pan isn’t greased well enough or if you try to remove them too soon. Make sure to spray the pan generously with non-stick spray, and let the donuts cool in the pan for a full 5 minutes before turning them out. I also recommend using a silicone donut pan if sticking is a recurring issue.
Can I make the batter ahead of time?
I wouldn’t. The baking powder and baking soda start reacting as soon as they hit the wet ingredients, so the batter loses its lift over time. For best results, bake the donuts immediately after mixing. If you need to prep ahead, bake the donuts and store them unglazed, then glaze them fresh the day you serve them.
How do I get a thicker glaze?
To thicken the glaze, add more sifted powdered sugar one tablespoon at a time until you reach your desired consistency. You can also let the first coat set for 5 minutes, then dip the donuts a second time for a thicker, more opaque layer. Just make sure the glaze isn’t too thin to begin with—it should coat the back of a spoon.
Can I freeze these donuts with the glaze on?
I don’t recommend it. The glaze tends to become sticky and lose its shine after freezing and thawing. It’s much better to freeze the donuts unglazed, then make a fresh batch of glaze when you’re ready to serve. The donuts themselves freeze beautifully for up to 2 months.
Pin This Recipe!
Easy Baked Pumpkin Donuts with Maple Glaze Recipe
These baked pumpkin donuts with maple glaze started as a happy kitchen accident and have become a fall favorite. They’re quick, easy, and made with simple ingredients for a tender, spiced treat that’s perfect for sharing.
- Prep Time: 15 minutes
- Cook Time: 12 minutes
- Total Time: 27 minutes
- Yield: 12 servings 1x
- Category: Dessert
- Cuisine: American
Ingredients
- 1 ¾ cups all-purpose flour
- 1 ½ teaspoons baking powder
- ½ teaspoon baking soda
- 1 teaspoon ground cinnamon
- ½ teaspoon ground nutmeg
- ½ teaspoon ground ginger
- ¼ teaspoon ground cloves
- ½ teaspoon salt
- 1 cup pumpkin puree
- ½ cup granulated sugar
- ¼ cup packed light brown sugar
- 2 large eggs
- ½ cup buttermilk
- ¼ cup unsalted butter, melted and slightly cooled
- 1 teaspoon vanilla extract
- 1 ½ cups powdered sugar, sifted
- 3 tablespoons pure maple syrup
- 2 tablespoons milk
- ½ teaspoon vanilla extract
- Pinch of salt
Instructions
- Preheat your oven to 350°F (175°C). Spray your donut pan generously with non-stick cooking spray. Place the pan on a baking sheet for easier handling.
- In a medium bowl, whisk together the dry ingredients: 1 ¾ cups all-purpose flour, 1 ½ teaspoons baking powder, ½ teaspoon baking soda, 1 teaspoon cinnamon, ½ teaspoon nutmeg, ½ teaspoon ginger, ¼ teaspoon cloves, and ½ teaspoon salt. Whisk until evenly distributed.
- In a larger bowl, combine the wet ingredients: 1 cup pumpkin puree, ½ cup granulated sugar, ¼ cup packed light brown sugar, 2 large eggs, ½ cup buttermilk, ¼ cup melted butter (cooled slightly), and 1 teaspoon vanilla extract. Whisk until smooth and glossy.
- Pour the dry ingredients into the wet ingredients. Use a rubber spatula to fold them together gently until just combined. A few small lumps are fine. Do not overmix.
- Transfer the batter to a piping bag or zip-top bag. Snip about ½ inch off one corner. Pipe the batter into the prepared donut cavities, filling each one about ¾ full.
- Bake for 10 to 12 minutes, until golden brown around the edges and a toothpick inserted into the thickest part comes out clean or with a few moist crumbs.
- Let the donuts cool in the pan for 5 minutes. Then gently loosen them with a small offset spatula or butter knife and turn the pan over onto a cooling rack. Let them cool completely before glazing.
- While the donuts cool, make the maple glaze: In a small bowl, whisk together 1 ½ cups sifted powdered sugar, 3 tablespoons pure maple syrup, 2 tablespoons milk, ½ teaspoon vanilla extract, and a pinch of salt until smooth. Adjust consistency as needed.
- Dip the cooled donuts into the glaze, holding each by the edges and twisting slightly to coat evenly. Let excess drip off, then place glazed-side up on the cooling rack. The glaze will set in 10 to 15 minutes.
- Optional: Sprinkle cinnamon or flaky sea salt on top right after glazing.
Notes
For best results, use 100% pure pumpkin puree, not pumpkin pie filling. The buttermilk is key for tenderness; if you don’t have it, use ½ cup milk plus ½ tablespoon lemon juice or vinegar, let sit 5 minutes. Don’t overmix the batter. Glaze the donuts when they are slightly warm but not hot. Store unglazed donuts in an airtight container at room temperature for up to 2 days, or freeze unglazed for up to 2 months.
Nutrition
- Serving Size: 1 donut
- Calories: 220
- Sugar: 22
- Sodium: 180
- Fat: 6
- Saturated Fat: 3.5
- Carbohydrates: 38
- Fiber: 1
- Protein: 3
Keywords: baked pumpkin donuts, maple glaze, fall recipe, pumpkin spice, easy donuts