I used to swear I wasn’t a holiday-baking person. Not the Halloween-theme kind, anyway. For years, I watched other moms post photos of perfectly iced sugar cookies shaped like ghosts and pumpkins, and I felt that familiar mix of admiration and exhaustion. You know the feeling—like you’re supposed to be doing something cute and seasonal, but the thought of rolling out dough and piping royal icing makes you want to hide in the pantry with a bag of pretzels. That was me. Every October.
Then last week, my six-year-old came home from school clutching a crumpled flyer for the annual Halloween bake sale. “We have to make something spooky, Mom,” she said, her eyes huge and hopeful. “Not too spooky. But spooky enough.” I nodded, already planning my escape route via store-bought cupcakes. But that night, scrolling through my phone while she slept, I stumbled onto a photo of a chocolate cookie with a spiderweb pattern piped across the top. It wasn’t fussy. It wasn’t precious. It looked like something a kid could actually help with—and something I wouldn’t hate making.
Honestly, I almost scrolled past. But something about the cracked, glossy surface and the way the white icing webbed across the dark chocolate caught me. I thought, I could do that. And more importantly, my daughter could do that without me hovering, biting my tongue, and fighting the urge to “fix” her work. So the next afternoon, I pulled out a mixing bowl and a bag of powdered sugar, and I told her we were making spider cookies. She squealed. I braced for disaster.
What happened next surprised me. She measured, she stirred, she got chocolate on her cheek and powdered sugar on the counter. And when we piped those webs together—her lines wobbly, mine only slightly steadier—I realized I was actually having fun. The cookies came out looking like something between a science experiment and a work of art. They were imperfect. They were delicious. And they were ours.
Why You’ll Love This Recipe
Let me tell you why these spiderweb cookies have earned a permanent spot in our October rotation. First off, they are genuinely kid-friendly—not in that “well, a child could theoretically help” way, but in the “my six-year-old did most of the work and only ate two spoonfuls of dough” way. The dough comes together in one bowl with no electric mixer required, which means less cleanup and more patience for the fun part: decorating.
- Quick & Easy: From start to finish, you are looking at about 45 minutes. That includes chilling time. For a decorated cookie, that is basically a miracle.
- Simple Ingredients: Butter, sugar, cocoa powder, flour, eggs—things you probably already have. No specialty extracts, no neon food coloring, no trips to three different stores.
- Perfect for Halloween: Whether you need something for a school party, a bake sale, or just a cozy night in with a spooky movie, these cookies deliver the theme without the stress.
- Crowd-Pleaser: I brought a batch to our neighborhood potluck, and they disappeared before the chili. Kids grabbed them. Adults grabbed them. One dad asked for the recipe twice.
- Unbelievably Delicious: These are not just pretty faces. The cookie itself is rich, fudgy, and slightly crackly on top—think brownie meets chocolate crinkle. The powdered sugar web adds just enough sweetness to balance the deep cocoa flavor.
What makes this recipe different from the dozens of other Halloween cookies out there? It is the technique. Instead of trying to pipe perfect concentric circles freehand (which, let’s be honest, looks great on Instagram but is a nightmare with a squirmy toddler nearby), we use a simple toothpick drag method. You pipe a spiral of thick powdered sugar glaze onto each cookie, then drag a toothpick from the center outward. That is it. The web appears like magic. It is forgiving, it is fast, and it looks impressive without requiring steady hands.
This recipe is the kind that makes you close your eyes after the first bite. It is comfort food reimagined for the holiday season—rich, chocolatey, and just a little bit spooky. Perfect for impressing other parents without breaking a sweat, or turning a regular Tuesday afternoon into something your kids will remember.
What Ingredients You Will Need
This recipe uses simple, everyday ingredients to create something that feels special. Most of these are pantry staples, which means you can decide at 3 PM that you want Halloween cookies and actually make it happen.
- Unsalted butter, softened (1/2 cup or 1 stick) — I prefer using unsalted so I can control the salt level. Let it sit out for about 30 minutes before starting. If you forget, you can microwave it in 5-second bursts, but be careful—you want it soft, not melted.
- Granulated sugar (1 cup) — Regular white sugar works perfectly here. It gives the cookies that slight crackle on top.
- Large egg (1) — Room temperature is ideal. If your egg is cold, just place it in a bowl of warm water for 5 minutes.
- Vanilla extract (1 teaspoon) — Pure vanilla is nice, but imitation works fine for baking. I use whatever I have in the cabinet.
- All-purpose flour (1 1/4 cups) — Spoon and level your flour for the best results. Scooping directly from the bag can pack in too much.
- Unsweetened cocoa powder (1/2 cup) — I recommend a Dutch-process cocoa for a deeper, richer flavor, but natural cocoa works too. My go-to is Hershey’s Special Dark—it is affordable and gives a lovely dark color.
- Baking powder (1/2 teaspoon) — Make sure it is not expired. Old baking powder leads to flat cookies.
- Salt (1/4 teaspoon) — Just enough to balance the sweetness and bring out the chocolate.
- Powdered sugar (1 cup, for the glaze) — Also called confectioners’ sugar. Do not substitute granulated sugar here; the glaze needs the fine texture to pipe smoothly.
- Milk (2-3 tablespoons, for the glaze) — Whole milk gives the richest glaze, but 2% or even almond milk works. Add it slowly—you want a thick but pipeable consistency.
- Vanilla extract (1/2 teaspoon, for the glaze) — A little extra vanilla in the glaze makes the web taste as good as it looks.
For the spider decoration, you will also need a few black licorice strings or pretzel sticks for the legs, and some candy eyes (the little white-and-black ones you find in the baking aisle). If you cannot find candy eyes, you can pipe tiny eyes with melted chocolate—but the candy ones are easier and way more fun for kids.
Equipment Needed
You do not need fancy equipment for these cookies. That is part of the charm. Here is what you will need:
- Large mixing bowl — Any bowl works, but a wide one makes mixing easier.
- Wooden spoon or rubber spatula — No electric mixer required. I actually prefer a spatula for this dough because it is thick and fudgy.
- Baking sheet (2, if you have them) — Lining with parchment paper or a silicone baking mat is strongly recommended. The cookies spread slightly, and parchment makes cleanup a breeze.
- Piping bag or zip-top bag — For the glaze. A small zip-top bag with the corner snipped off works perfectly. No need to buy fancy piping tips.
- Toothpick — The hero of this recipe. You will use it to drag the glaze into web patterns.
- Cooling rack — The cookies need to cool completely before decorating. A wire rack speeds this up.
- Measuring cups and spoons — Accuracy matters, especially with the cocoa powder and flour.
If you do not have a cooling rack, you can use a clean dish towel on the counter—just flip the cookies occasionally so they cool evenly. And if you do not have parchment paper, lightly greased foil works in a pinch.
Preparation Method
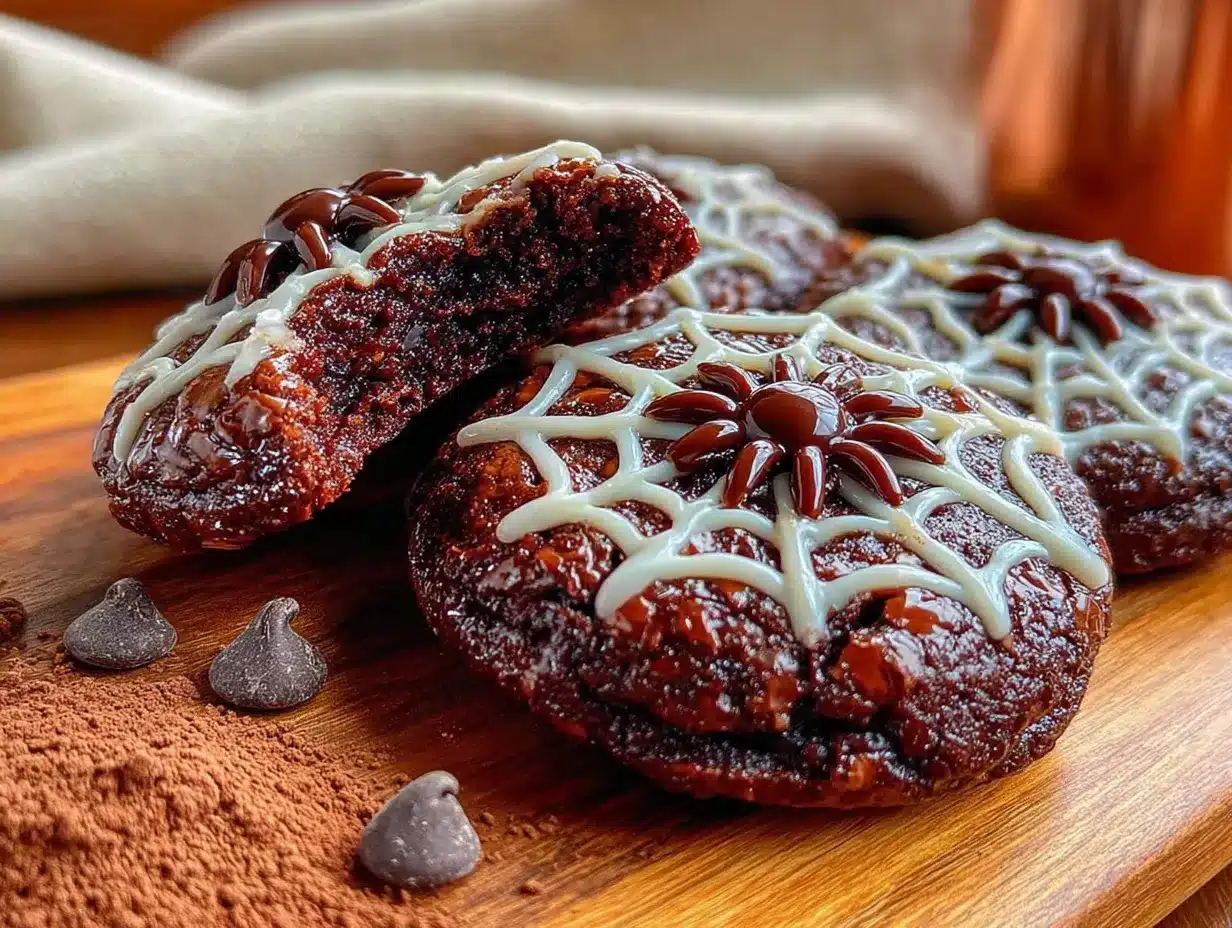
Alright, let us make some spider cookies. This method is broken into two parts: the cookies themselves and the spiderweb decoration. Take your time with the first part—the dough is forgiving, but proper chilling makes a big difference.
Part 1: Make the Cookie Dough
- Cream the butter and sugar. In a large bowl, beat the softened butter and granulated sugar together until light and fluffy. This takes about 2 minutes with a wooden spoon. You want it to look pale and a little airy. If you are using a stand mixer, use the paddle attachment on medium speed.
- Add the egg and vanilla. Crack the egg into the bowl and add the vanilla. Stir until fully combined. The mixture might look slightly separated at this point—that is normal. Do not panic.
- Mix the dry ingredients. In a separate small bowl, whisk together the flour, cocoa powder, baking powder, and salt. This ensures the baking powder is evenly distributed. If you skip this step, you might end up with a cookie that puffs unevenly.
- Combine wet and dry. Gradually add the dry ingredients to the wet mixture, stirring until just combined. The dough will be thick and fudgy—almost like a brownie batter. Do not overmix, or the cookies will be tough. Stop as soon as you no longer see streaks of flour.
- Chill the dough. Cover the bowl with plastic wrap and refrigerate for at least 30 minutes. This step is non-negotiable. Chilled dough spreads less and gives you that nice crackly top. If you are in a hurry, you can pop it in the freezer for 15 minutes, but keep an eye on it.
Part 2: Shape and Bake
- Preheat your oven to 350°F (175°C). Line your baking sheets with parchment paper.
- Scoop and roll. Using a tablespoon or a small cookie scoop, portion out the dough. Roll each portion into a ball about 1 inch in diameter. Place them on the prepared baking sheet about 2 inches apart—they will spread a little.
- Optional: Roll in powdered sugar. For extra crackle, you can roll each dough ball in a small bowl of powdered sugar before placing it on the sheet. This gives the cookies a snowy, crinkled look. My daughter loves this step because it makes a mess.
- Bake. Bake for 10 to 12 minutes. The cookies should look puffed and set around the edges but still soft in the center. They will continue to set as they cool. Do not overbake—you want them fudgy, not dry.
- Cool completely. Let the cookies sit on the baking sheet for 5 minutes, then transfer them to a cooling rack. They must be completely cool before you add the spiderweb glaze. Warm cookies will cause the glaze to melt and slide right off.
Part 3: Make the Spiderweb Glaze
- Mix the glaze. In a small bowl, whisk together the powdered sugar, 2 tablespoons of milk, and 1/2 teaspoon of vanilla. Start with 2 tablespoons of milk and add more, one teaspoon at a time, until the glaze is thick but flows slowly off the spoon. You want it to hold its shape when piped but still be fluid enough to drag with a toothpick.
- Fill a piping bag. Spoon the glaze into a small piping bag or a zip-top bag. If using a zip-top bag, snip off a tiny corner—about 1/8 inch wide. You can always make the hole bigger, but you cannot undo a cut that is too large.
Part 4: Decorate
- Pipe a spiral. On each cooled cookie, pipe a spiral of glaze starting from the center and working outward. Do not worry about perfection. The spiral should have about 4 to 5 rings.
- Drag the web. Immediately after piping, take a toothpick and gently drag it from the center of the spiral outward to the edge of the cookie. Repeat this 6 to 8 times around the cookie, spacing the drags evenly. You will see the web pattern appear instantly. Wipe the toothpick clean between drags for the cleanest lines.
- Add the spider. While the glaze is still wet, press two small candy eyes onto the center of the web. Then break the black licorice strings or pretzel sticks into 4 pieces each and press them into the glaze to form spider legs—4 on each side. The glaze acts as glue, so work quickly before it sets.
- Let the glaze set. Allow the cookies to sit at room temperature for about 20 minutes, or until the glaze is firm to the touch. If you are in a humid environment, you can pop them in the refrigerator for 10 minutes.
Cooking Tips & Techniques
I have made these cookies four times in the past two weeks (not a brag, just a confession), and I have learned a few things the hard way. Here are my best tips for spiderweb success.
Chill the dough thoroughly. The first batch I made, I was impatient and only chilled the dough for 10 minutes. The cookies spread into flat, sad discs that looked more like chocolate pancakes than spider cookies. Trust me on the 30-minute chill. It makes the dough easier to handle and gives you that nice, puffed shape.
Do not overbake. This is the most common mistake with chocolate cookies. They look underdone when you pull them out of the oven, but they continue to cook on the hot baking sheet. If you wait until they look fully set, you will end up with dry, crumbly cookies. Take them out when the edges are firm and the centers are still soft.
Test your glaze consistency. Before you pipe onto a cookie, test the glaze on a piece of parchment paper. It should hold a ribbon shape for a second before slowly melting into a puddle. If it is too thick, add milk one drop at a time. If it is too thin, add a little more powdered sugar. A runny glaze will not hold the web pattern.
Work in small batches. Pipe the glaze and drag the web on 3 to 4 cookies at a time, then move on to the next group. If you pipe all the cookies at once and then try to drag them, the glaze will start to set, and the web lines will not form cleanly. This is a great task for a kid helper—you pipe, they drag.
Use a light hand with the toothpick. You do not need to press hard. A gentle drag from the center outward is all it takes. If you press too hard, you will scrape through the glaze and into the cookie, which looks messy. Think of it as drawing a line in sand, not carving a groove.
I ruined an entire batch of cookies because I tried to multitask. I was piping glaze while talking on the phone, and by the time I got to the dragging step, the first cookies had already set. Learn from my mistake: focus on one small group at a time, and let everything else wait.
Variations & Adaptations
One of the best things about this recipe is how easy it is to adapt. Here are a few ways to make it your own.
Gluten-Free Version: Substitute the all-purpose flour with a 1:1 gluten-free baking flour blend. I have used King Arthur Measure for Measure with great results. The cookies will be slightly more tender, but the flavor and appearance are nearly identical. Just make sure your baking powder is also gluten-free.
Dairy-Free Version: Use vegan butter or coconut oil (solid, not melted) in place of the butter. For the glaze, substitute the milk with oat milk or almond milk. I have tried it with oat milk, and honestly, I could not tell the difference. The cookies are still rich and fudgy.
Peanut Butter Spiderweb Twist: For a flavor variation, replace 2 tablespoons of the butter with creamy peanut butter. The peanut butter adds a savory note that pairs beautifully with the chocolate. Just be aware that the dough will be slightly stickier, so chill it for an extra 10 minutes.
Different Web Colors: Instead of a white glaze, try tinting it with a drop of orange or green food coloring for a festive twist. My daughter insisted on making a batch with neon green webs, and they looked delightfully creepy. The kids at the bake sale went crazy for them.
No-Candy-Eye Option: If you cannot find candy eyes or prefer not to use them, pipe small dots of melted dark chocolate onto the center of the web. They will harden into shiny black eyes that look surprisingly realistic. I actually prefer this method now because it feels more homemade.
Serving & Storage Suggestions
These cookies are best served at room temperature, and they look stunning on a Halloween-themed platter or cake stand. I like to arrange them on a black or orange plate with a few plastic spiders scattered around for effect. If you are taking them to a party, arrange them in a single layer in a wide container—stacking them can smudge the webs.
For storage, place the cookies in an airtight container at room temperature. They will stay fresh for up to 5 days, though the glaze may soften slightly after day 3. If you live in a humid climate, I recommend storing them with a piece of bread in the container—the bread absorbs excess moisture and keeps the cookies from getting sticky.
Freezer instructions: You can freeze the undecorated cookies for up to 3 months. Bake and cool them completely, then place them in a single layer in a freezer-safe bag or container. When you are ready to serve, thaw them at room temperature for about 30 minutes, then decorate with the glaze and spider legs. I have done this for two different school events, and no one could tell they were frozen.
The flavors actually deepen after a day or two. The chocolate becomes more pronounced, and the cookies get slightly softer and more fudgy. If you can resist eating them all on day one, you will be rewarded on day two.
Nutritional Information & Benefits
Let us be honest—these are cookies, not health food. But here is the nutritional breakdown for one cookie (based on a batch of 24):
| Nutrient | Amount Per Cookie |
|---|---|
| Calories | 145 |
| Total Fat | 6g |
| Saturated Fat | 3.5g |
| Carbohydrates | 22g |
| Sugar | 14g |
| Protein | 2g |
| Fiber | 1g |
The cocoa powder in these cookies is a surprising source of antioxidants, specifically flavonoids, which can support heart health. Cocoa also contains magnesium and iron, so you are getting a tiny nutritional boost with every bite. The butter provides fat-soluble vitamins A, D, E, and K, though in small amounts.
These cookies are not suitable for anyone with a dairy allergy (unless you use the dairy-free substitutions mentioned above) and contain gluten, eggs, and potentially soy (depending on your chocolate brand). If you are serving them at a school event, it is always a good idea to label them with the ingredients.
From a wellness perspective, I believe in balance. These cookies are a treat, and treats are part of a happy life. They are not an everyday snack, but for a Halloween party or a cozy October afternoon, they are exactly right. Make them, enjoy them, and do not feel guilty about it.
Conclusion
These spiderweb chocolate spider cookies have become our family’s official Halloween tradition, and I did not see it coming. I walked into this recipe as a reluctant convert, skeptical that a holiday-themed cookie could be both fun and genuinely delicious. But here I am, three batches later, with chocolate-stained fingers and a very proud six-year-old who can now pipe a web pattern faster than I can.
What I love most about this recipe is that it meets you where you are. If you are a perfectionist, you can obsess over the symmetry of your webs. If you are a chaos goblin (like my daughter), you can make every cookie look wildly different and call it artistic. The cookies turn out great either way. They are forgiving, they are delicious, and they make people smile.
I hope you give these a try, whether you are making them for a classroom party, a neighborhood gathering, or just a quiet night in with your own little goblins. Customize them however you like—add sprinkles, use different colors, skip the spider legs and just do the webs. The recipe is a starting point, not a rulebook.
If you make these, I would love to hear how they turned out. Drop a comment below and tell me about your decorating adventures. Did your kids take over the piping bag? Did you discover a new favorite variation? Share your photos, your disasters, and your triumphs. And if you are looking for more easy Halloween treats, check out our spooky mummy pizza bites or these no-bake pumpkin cheesecake jars for more kid-friendly fun.
Happy Halloween, and happy baking!
Frequently Asked Questions
Can I make the dough ahead of time?
Absolutely. You can prepare the dough up to 3 days in advance and keep it covered in the refrigerator. When you are ready to bake, let it sit at room temperature for about 10 minutes to soften slightly before scooping. You can also freeze the dough balls for up to 3 months—just bake them directly from frozen, adding 2 minutes to the baking time.
Why did my cookies spread too much?
This usually happens for one of two reasons: the dough was not chilled long enough, or the butter was too soft when you mixed it. Make sure your butter is softened but not melted, and never skip the 30-minute chill. If your kitchen is warm, you can chill the shaped dough balls on the baking sheet for 10 minutes before baking.
Can I use a different type of glaze?
Yes! A simple royal icing works beautifully for the webs, though it sets harder than the powdered sugar glaze. You can also use melted white chocolate thinned with a teaspoon of coconut oil. The white chocolate gives a glossier finish and a sweeter flavor. Just be aware that it sets faster, so you will need to work quickly.
How do I get the spider legs to stay on?
The key is to press the legs into the glaze while it is still wet. If the glaze has started to set, the legs will slide off. Work on one cookie at a time—pipe, drag, add eyes, add legs—before moving to the next. If a leg falls off after the glaze has dried, you can dab a tiny bit of honey or corn syrup underneath it to glue it back on.
Can I make these cookies vegan?
Yes, with a few substitutions. Use vegan butter or coconut oil in place of the butter. Replace the egg with a flax egg (1 tablespoon ground flaxseed mixed with 3 tablespoons water, let sit for 5 minutes). For the glaze, use plant-based milk. The texture will be slightly different—the cookies will be a bit more tender—but the flavor and appearance are still fantastic. I have tested this with a vegan friend’s kids, and they gave it two thumbs up.
Pin This Recipe!
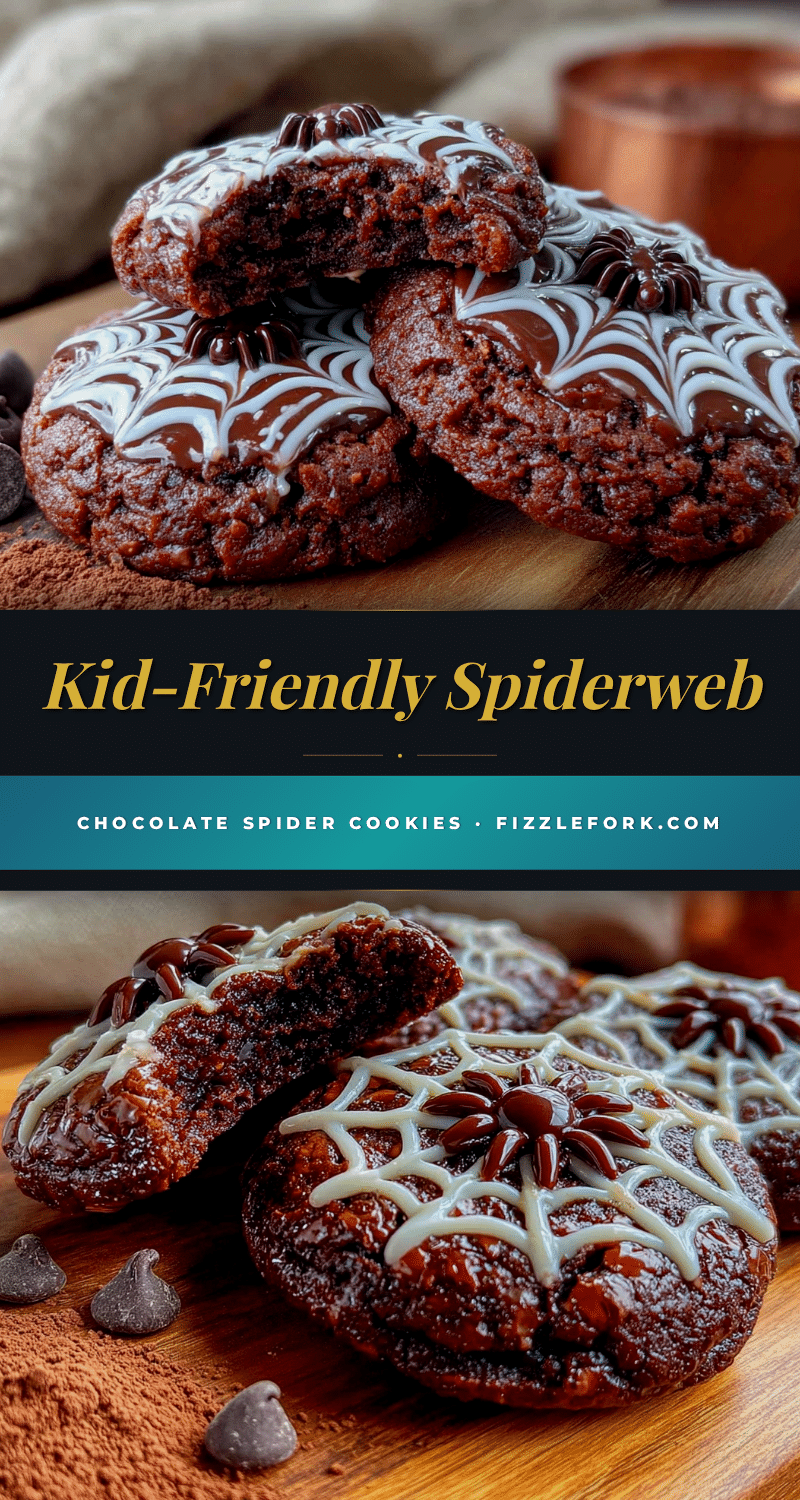
Kid-Friendly Spiderweb Chocolate Spider Cookies Easy Halloween Treat

These spiderweb chocolate spider cookies are a fun, kid-friendly Halloween treat that combines a rich, fudgy chocolate cookie with a simple powdered sugar glaze web and candy spider decorations. Perfect for bake sales, school parties, or a cozy night in.
- Prep Time: 15 minutes
- Cook Time: 12 minutes
- Total Time: 45 minutes (includes chilling)
- Yield: 24 cookies 1x
- Category: Dessert
- Cuisine: American
Ingredients
- 1/2 cup (1 stick) unsalted butter, softened
- 1 cup granulated sugar
- 1 large egg, room temperature
- 1 teaspoon vanilla extract
- 1 1/4 cups all-purpose flour
- 1/2 cup unsweetened cocoa powder (Dutch-process recommended)
- 1/2 teaspoon baking powder
- 1/4 teaspoon salt
- 1 cup powdered sugar (for glaze)
- 2–3 tablespoons milk (for glaze)
- 1/2 teaspoon vanilla extract (for glaze)
- Black licorice strings or pretzel sticks (for spider legs)
- Candy eyes (for decoration)
Instructions
- Cream the butter and sugar: In a large bowl, beat the softened butter and granulated sugar together until light and fluffy, about 2 minutes.
- Add the egg and vanilla: Crack the egg into the bowl and add the vanilla. Stir until fully combined.
- Mix the dry ingredients: In a separate small bowl, whisk together the flour, cocoa powder, baking powder, and salt.
- Combine wet and dry: Gradually add the dry ingredients to the wet mixture, stirring until just combined. The dough will be thick and fudgy.
- Chill the dough: Cover the bowl with plastic wrap and refrigerate for at least 30 minutes.
- Preheat oven to 350°F (175°C). Line baking sheets with parchment paper.
- Scoop and roll: Using a tablespoon or small cookie scoop, portion out the dough into balls about 1 inch in diameter. Place them on the prepared baking sheet about 2 inches apart.
- Optional: Roll in powdered sugar for extra crackle.
- Bake: Bake for 10 to 12 minutes. Cookies should look puffed and set around the edges but still soft in the center.
- Cool completely: Let cookies sit on the baking sheet for 5 minutes, then transfer to a cooling rack. Cool completely before decorating.
- Make the glaze: In a small bowl, whisk together the powdered sugar, 2 tablespoons of milk, and 1/2 teaspoon of vanilla. Add more milk, one teaspoon at a time, until the glaze is thick but flows slowly off the spoon.
- Fill a piping bag: Spoon the glaze into a small piping bag or zip-top bag. Snip off a tiny corner (about 1/8 inch wide).
- Pipe a spiral: On each cooled cookie, pipe a spiral of glaze starting from the center and working outward (4 to 5 rings).
- Drag the web: Immediately after piping, use a toothpick to gently drag from the center of the spiral outward to the edge of the cookie. Repeat 6 to 8 times around the cookie, spacing evenly. Wipe the toothpick clean between drags.
- Add the spider: While the glaze is still wet, press two candy eyes onto the center. Break licorice strings or pretzel sticks into 4 pieces each and press them into the glaze to form spider legs (4 on each side).
- Let the glaze set: Allow cookies to sit at room temperature for about 20 minutes, or until the glaze is firm.
Notes
Chill the dough thoroughly for at least 30 minutes to prevent spreading. Do not overbake; cookies continue to set as they cool. Test glaze consistency on parchment before piping. Work in small batches (3-4 cookies at a time) to ensure the glaze doesn’t set before dragging. Use a light hand with the toothpick. For best results, let cookies cool completely before decorating.
Nutrition
- Serving Size: 1 cookie
- Calories: 145
- Sugar: 14
- Fat: 6
- Saturated Fat: 3.5
- Carbohydrates: 22
- Fiber: 1
- Protein: 2
Keywords: Halloween cookies, spider cookies, chocolate cookies, kid-friendly, easy Halloween treat, spiderweb cookies


